Servlet开发技术,创建,以及Servlet的配置,web.xml的配置
2016-10-13 20:12
561 查看
[b]直接上图,不废话!!![/b]
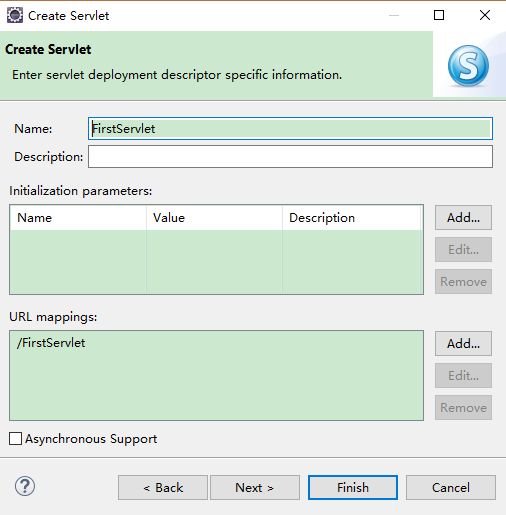
[b]第一:首先在Eclipse的包资源管理器中,单机鼠标右键,在弹出的快捷键菜单中选择“新建”/Servlet命令,在弹出的对话框中输入新建的Servlet所在的包和类名,然后单击下一步,[/b]
[b]

[/b]
我选择默认,Next
依旧默认,Next

注意事项,在创建web的工程的时候需要注意的是如下图,选择上web.xml这个按钮,因为Servlet需要配置一下web.xml这个文件,web.xml在web-inf这个文件下面


[b]上图第二个箭头前面有个方括号,勾选上就可以自动创建好web.xml这个文件了。[/b]
运行效果如下图所示

[b]第一:首先在Eclipse的包资源管理器中,单机鼠标右键,在弹出的快捷键菜单中选择“新建”/Servlet命令,在弹出的对话框中输入新建的Servlet所在的包和类名,然后单击下一步,[/b]
[b]
[/b]
我选择默认,Next
依旧默认,Next
注意事项,在创建web的工程的时候需要注意的是如下图,选择上web.xml这个按钮,因为Servlet需要配置一下web.xml这个文件,web.xml在web-inf这个文件下面
[b]上图第二个箭头前面有个方括号,勾选上就可以自动创建好web.xml这个文件了。[/b]
package com.ningmeng;

import java.io.IOException;
import java.io.PrintWriter;

import javax.servlet.ServletException;
import javax.servlet.annotation.WebServlet;
import javax.servlet.http.HttpServlet;
import javax.servlet.http.HttpServletRequest;
import javax.servlet.http.HttpServletResponse;

/**
* Servlet implementation class FirstServlet
*/
@WebServlet("/FirstServlet")
public class FirstServlet extends HttpServlet {
private static final long serialVersionUID = 1L;

/**
* @see HttpServlet#HttpServlet()
*/
public FirstServlet() {
super();
// TODO Auto-generated constructor stub
}

/**
* @see HttpServlet#doGet(HttpServletRequest request, HttpServletResponse response)
*/
protected void doGet(HttpServletRequest request, HttpServletResponse response) throws ServletException, IOException {
// TODO Auto-generated method stub
response.setContentType("text/html");
response.setCharacterEncoding("GBK");
PrintWriter out=response.getWriter();
out.print("<HTML>");
out.println("<HEAD><TITLE>Servlet实例</TITLE></HEAD>");
out.println("<BODY>");
out.println("servlet实例");
out.println(this.getClass());
out.println("</BODY>");
out.println("</HTML>");
out.flush();
out.close();
response.getWriter().append("Served at: ").append(request.getContextPath());
}

/**
* @see HttpServlet#doPost(HttpServletRequest request, HttpServletResponse response)
*/
protected void doPost(HttpServletRequest request, HttpServletResponse response) throws ServletException, IOException {
// TODO Auto-generated method stub
doGet(request, response);
}

}
<?xml version="1.0" encoding="UTF-8"?> <web-app xmlns:xsi="http://www.w3.org/2001/XMLSchema-instance" xmlns="http://java.sun.com/xml/ns/javaee" xsi:schemaLocation="http://java.sun.com/xml/ns/javaee http://java.sun.com/xml/ns/javaee/web-app_3_0.xsd" id="WebApp_ID" version="3.0"> <display-name>web02</display-name> <welcome-file-list> <welcome-file>index.html</welcome-file> <welcome-file>index.htm</welcome-file> <welcome-file>index.jsp</welcome-file> <welcome-file>default.html</welcome-file> <welcome-file>default.htm</welcome-file> <welcome-file>default.jsp</welcome-file> </welcome-file-list> <servlet> <!-- 声明Servlet对象 --> <servlet-name>FirstServlet</servlet-name> <!-- 上面一句指定Servlet对象的名称 --> <servlet-class>com.ningmeng.FirstServlet</servlet-class> <!-- 上面一句指定Servlet对象的完整位置,包含包名和类名 --> </servlet> <servlet-mapping> <!-- 映射Servlet --> <servlet-name>FirstServlet</servlet-name> <!--<servlet-name>与上面<Servlet>标签的<servlet-name>元素相对应,不可以随便起名 --> <url-pattern>/FirsetServlet</url-pattern> <!-- 上面一句话用于映射访问URL --> </servlet-mapping> </web-app>
运行效果如下图所示

相关文章推荐
- Servlet开发技术,创建,以及Servlet的配置,web.xml的配置
- Servlet开发技术,创建,以及Servlet的配置,web.xml的配置
- 创建servlet配置web.xml
- 配置servlet用注解和web.xml都没作用,报404错误以及500错误的解决
- 手动创建Servlet配置web.xml的过程
- spring mvc 配置web.xml servlet.xml文件配置以及出现异常的解决方案
- java web开发中web.xml配置(仅基于servlet的)
- JSP开发:eclipse搭建servlet以及xml配置(图解)
- IntelliJ IDEA 创建Servlet,通过urlPatterns配置路径(当然也可以在web.xml中设置)
- MyBatis笔记---开发环境搭建、xml配置以及MybatisUtil工具类创建
- intellij 创建servlet后如何快速配置web.xml
- 快速创建一个servlet并且在web.xml配置和使用它
- 关于servlet开发时,web.xml的配置问题。
- Servlet的生命周期及其常用覆盖方法的说明 以及在web.xml中配置servlet的属性说明
- 如何自己创建Servlet并配置web.xml
- Servlet读取web.xml配置文件
- servlet中web.xml配置详解
- Servlet中Web.xml配置详解(二)
- 怎样在tomcat5.0中怎样配置web.xml运行servlet
- web.xml文件中配置(servlet, spring, filter, listenr)的加载顺序