基于beaglebone的rtems4.12源码编译生成image镜像并烧入sd卡
2016-09-22 10:52
369 查看
在上一篇博文中,讲述了如何通过编译好的toolchain编译rtems源码,接下来讲讲如何讲编译好的源码制作成image镜像文件,然后烧写到sd卡中。
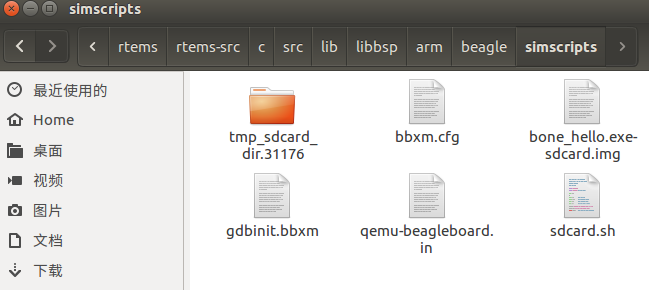
编译好的源码是放在/image文件夹下,制作image文件在这里用到的是之前git到的rtems源码中的脚本工具sdcard.sh。是国外某个大神的杰作,文件放在
路径下
sdcard.sh脚本文件内容如下:
# we store all generated files here.
TMPDIR=tmp_sdcard_dir.$$
FATIMG=$TMPDIR/bbxm_boot_fat.img
SIZE=65536
OFFSET=2048
FATSIZE=`expr $SIZE - $OFFSET`
UENV=uEnv.txt
rm -rf $TMPDIR
mkdir -p $TMPDIR
if [ $# -ne 2 ]
then echo "Usage: $0 <RTEMS prefix> <RTEMS executable>"
exit 1
fi
PREFIX=$1
if [ ! -d "$PREFIX" ]
then echo "This script needs the RTEMS tools bindir as the first argument."
exit 1
fi
executable=$2
case "$2" in
*beagleboard*)
ubootcfg=omap3_beagle
imgtype=bb
;;
*beaglebone*)
ubootcfg=am335x_evm
imgtype=bone
;;
*)
echo "Can't guess which uboot to use - please specify full path to executable."
exit 1
;;
esac
app=rtems-app.img
if [ ! -f "$executable" ]
then echo "Expecting RTEMS executable as arg; $executable not found."
exit 1
fi
set -e
IMG=${imgtype}_`basename $2`-sdcard.img
# Make an empty image
dd if=/dev/zero of=$IMG bs=512 seek=`expr $SIZE - 1` count=1
dd if=/dev/zero of=$FATIMG bs=512 seek=`expr $FATSIZE - 1` count=1
# Make an ms-dos FS on it
$PREFIX/bin/newfs_msdos -r 1 -m 0xf8 -c 4 -F16 -h 64 -u 32 -S 512 -s $FATSIZE -o 0 ./$FATIMG
# Prepare the executable.
base=`basename $executable`
$PREFIX/bin/arm-rtems4.12-objcopy $executable -O binary $TMPDIR/$base.bin
gzip -9 $TMPDIR/$base.bin
$PREFIX/bin/mkimage -A arm -O rtems -T kernel -a 0x80000000 -e 0x80000000 -n RTEMS -d $TMPDIR/$base.bin.gz $TMPDIR/$app
echo "setenv bootdelay 5
uenvcmd=run boot
boot=fatload mmc 0 0x80800000 $app ; bootm 0x80800000" >$TMPDIR/$UENV
# Copy the uboot and app image onto the FAT image
$PREFIX/bin/mcopy -bsp -i $FATIMG $PREFIX/uboot/$ubootcfg/MLO ::MLO
$PREFIX/bin/mcopy -bsp -i $FATIMG $PREFIX/uboot/$ubootcfg/u-boot.img ::u-boot.img
$PREFIX/bin/mcopy -bsp -i $FATIMG $TMPDIR/$app ::$app
$PREFIX/bin/mcopy -bsp -i $FATIMG $TMPDIR/$UENV ::$UENV
# Just a single FAT partition (type C) that uses all of the image
$PREFIX/bin/partition -m $IMG $OFFSET c:${FATSIZE}\*
# Put the FAT image into the SD image
dd if=$FATIMG of=$IMG seek=$OFFSET
# cleanup
rm -rf $TMPDIR
echo "Result is in $IMG."
接下来就开始制作镜像,首先制作一个hello world例子镜像。
进入脚本所在的目录
键入如下命令
第一个路径是uboot等一些文件的存放处,第二个路径是hello.exe例子程序所在。
回车后会提示:
表示镜像文件已经生成,这样生成的image文件就存放在当前目录下,也就是脚本所在的目录。
接下来就是将镜像文件写入sd卡中,在这里本人准备的是一张8G的sd卡。
利用读卡器插上电脑后,查看sd卡的设备号,一般是/dev/sdb
然后利用linux自带的烧写命令:
if=×.img 表示input file,是要烧入的文件,of表示output file 是写入的文件,bs=4096 表示烧写的速度
执行该命令后提示:

表示写入完成,然后bbb板通过sd卡启动,可发现板上的4个led有规律的闪烁。通过minicom监控串口信息:
表明启动成功。
查看sd卡中的文件,有以下四个文件:
其中MLO,uboot,uenv文件是必须的,rtems-app就是hello.exe生成的镜像。
接下来将编译好的rtems文件系统制作成img镜像:
在这里要用到一个软件:rki(rtems kernel image)可以将rtems制作成.elf文件
在github上git到,https://github.com/alanc98/rki
阅读其readme文件:
./build/sparc-rtems4.12-sis/rki.elf
根据上述,打开makefile文件,找到以下几行:
RTEMS_TOOL_BASE ?= /home/c/development/rtems/4.12/bin/
RTEMS_BSP_BASE ?= /home/c/development/rtems/image
BSP ?= beagleboneblack
ARCH ?= arm-rtems4.12
将路径改成自己的。
然后echo $PATH确认export后,make报错
/home/lenovo/development/rtems/4.11/lib/gcc/arm-rtems4.11/4.9.2/../../../../arm-rtems4.11/bin/ld: error: legacy-build/arm-rtems4.11-beagleboneblack/rki.elf uses VFP register arguments, /home/lenovo/development/rtems/image/arm-rtems4.11/beagleboneblack/lib/librtemscpu.a(libposix_a-pthreadself.o)
does not
/home/lenovo/development/rtems/4.11/lib/gcc/arm-rtems4.11/4.9.2/../../../../arm-rtems4.11/bin/ld: failed to merge target specific data of file /home/lenovo/development/rtems/image/arm-rtems4.11/beagleboneblack/lib/librtemscpu.a(libposix_a-pthreadself.o)
collect2: error: ld returned 1 exit status
make: *** [rki.elf] 错误 1
然后通过sdcard脚本将rki.elf文件制成img文件:
制成后img如下:
然后通过dd命令将该img烧写进sd卡中:
烧写完成即可启动bbb板,串口信息如下:
表示系统移植成功。
编译好的源码是放在/image文件夹下,制作image文件在这里用到的是之前git到的rtems源码中的脚本工具sdcard.sh。是国外某个大神的杰作,文件放在
rtems-src/c/src/lib/libbsp/arm/beagle/simscripts
路径下
sdcard.sh脚本文件内容如下:
# we store all generated files here.
TMPDIR=tmp_sdcard_dir.$$
FATIMG=$TMPDIR/bbxm_boot_fat.img
SIZE=65536
OFFSET=2048
FATSIZE=`expr $SIZE - $OFFSET`
UENV=uEnv.txt
rm -rf $TMPDIR
mkdir -p $TMPDIR
if [ $# -ne 2 ]
then echo "Usage: $0 <RTEMS prefix> <RTEMS executable>"
exit 1
fi
PREFIX=$1
if [ ! -d "$PREFIX" ]
then echo "This script needs the RTEMS tools bindir as the first argument."
exit 1
fi
executable=$2
case "$2" in
*beagleboard*)
ubootcfg=omap3_beagle
imgtype=bb
;;
*beaglebone*)
ubootcfg=am335x_evm
imgtype=bone
;;
*)
echo "Can't guess which uboot to use - please specify full path to executable."
exit 1
;;
esac
app=rtems-app.img
if [ ! -f "$executable" ]
then echo "Expecting RTEMS executable as arg; $executable not found."
exit 1
fi
set -e
IMG=${imgtype}_`basename $2`-sdcard.img
# Make an empty image
dd if=/dev/zero of=$IMG bs=512 seek=`expr $SIZE - 1` count=1
dd if=/dev/zero of=$FATIMG bs=512 seek=`expr $FATSIZE - 1` count=1
# Make an ms-dos FS on it
$PREFIX/bin/newfs_msdos -r 1 -m 0xf8 -c 4 -F16 -h 64 -u 32 -S 512 -s $FATSIZE -o 0 ./$FATIMG
# Prepare the executable.
base=`basename $executable`
$PREFIX/bin/arm-rtems4.12-objcopy $executable -O binary $TMPDIR/$base.bin
gzip -9 $TMPDIR/$base.bin
$PREFIX/bin/mkimage -A arm -O rtems -T kernel -a 0x80000000 -e 0x80000000 -n RTEMS -d $TMPDIR/$base.bin.gz $TMPDIR/$app
echo "setenv bootdelay 5
uenvcmd=run boot
boot=fatload mmc 0 0x80800000 $app ; bootm 0x80800000" >$TMPDIR/$UENV
# Copy the uboot and app image onto the FAT image
$PREFIX/bin/mcopy -bsp -i $FATIMG $PREFIX/uboot/$ubootcfg/MLO ::MLO
$PREFIX/bin/mcopy -bsp -i $FATIMG $PREFIX/uboot/$ubootcfg/u-boot.img ::u-boot.img
$PREFIX/bin/mcopy -bsp -i $FATIMG $TMPDIR/$app ::$app
$PREFIX/bin/mcopy -bsp -i $FATIMG $TMPDIR/$UENV ::$UENV
# Just a single FAT partition (type C) that uses all of the image
$PREFIX/bin/partition -m $IMG $OFFSET c:${FATSIZE}\*
# Put the FAT image into the SD image
dd if=$FATIMG of=$IMG seek=$OFFSET
# cleanup
rm -rf $TMPDIR
echo "Result is in $IMG."
接下来就开始制作镜像,首先制作一个hello world例子镜像。
cd $HOME/development/rtems/rtems-src/c/src/lib/libbsp/arm/beagle/simscripts
进入脚本所在的目录
键入如下命令
sh sdcard.sh $HOME/development/rtems/4.12 $HOME/development/rtems/b-beagle/arm-rtems4.12/c/beagleboneblack/testsuites/samples/hello/hello.exe
第一个路径是uboot等一些文件的存放处,第二个路径是hello.exe例子程序所在。
回车后会提示:
Result is in bone_hello.exe-sdcard.img.
表示镜像文件已经生成,这样生成的image文件就存放在当前目录下,也就是脚本所在的目录。
接下来就是将镜像文件写入sd卡中,在这里本人准备的是一张8G的sd卡。
利用读卡器插上电脑后,查看sd卡的设备号,一般是/dev/sdb
然后利用linux自带的烧写命令:
dd if=bone_hello.exe-sdcard.img of=/dev/sdb bs=4096
if=×.img 表示input file,是要烧入的文件,of表示output file 是写入的文件,bs=4096 表示烧写的速度
执行该命令后提示:
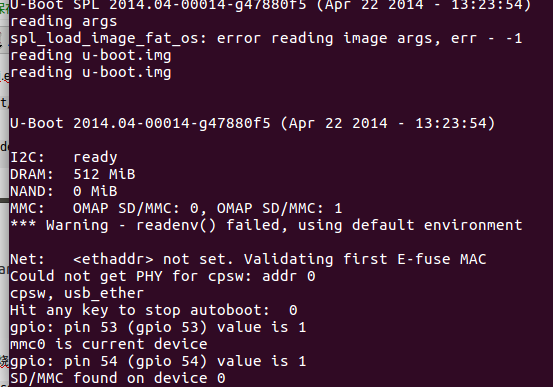
表示写入完成,然后bbb板通过sd卡启动,可发现板上的4个led有规律的闪烁。通过minicom监控串口信息:
# picocom -b 115200 /dev/ttyUSB0
U-Boot SPL 2014.04-00015-gb4422bd (Apr 22 2014 - 13:24:29)
reading args
spl_load_image_fat_os: error reading image args, err - -1
reading u-boot.img
reading u-boot.img

U-Boot 2014.04-00015-gb4422bd (Apr 22 2014 - 13:24:29)

I2C:   ready
DRAM:  512 MiB
NAND:  0 MiB
MMC:   OMAP SD/MMC: 0, OMAP SD/MMC: 1
*** Warning - readenv() failed, using default environment

Net:   <ethaddr> not set. Validating first E-fuse MAC
cpsw, usb_ether
Hit any key to stop autoboot:  0
gpio: pin 53 (gpio 53) value is 1
mmc0 is current device
gpio: pin 54 (gpio 54) value is 1
SD/MMC found on device 0
reading uEnv.txt
99 bytes read in 5 ms (18.6 KiB/s)
gpio: pin 55 (gpio 55) value is 1
Loaded environment from uEnv.txt
Importing environment from mmc ...
Checking if uenvcmd is set ...
gpio: pin 56 (gpio 56) value is 1
Running uenvcmd ...
reading rtems-app.img
58629 bytes read in 11 ms (5.1 MiB/s)
## Booting kernel from Legacy Image at 80800000 ...
Image Name:   RTEMS
Image Type:   ARM RTEMS Kernel Image (gzip compressed)
Data Size:    58565 Bytes = 57.2 KiB
Load Address: 80000000
Entry Point:  80000000
Verifying Checksum ... OK
Uncompressing Kernel Image ... OK
## Transferring control to RTEMS (at address 80000000) ...

RTEMS Beagleboard: am335x-based

*** BEGIN OF TEST HELLO WORLD ***
Hello World
*** END OF TEST HELLO WORLD ***
表明启动成功。
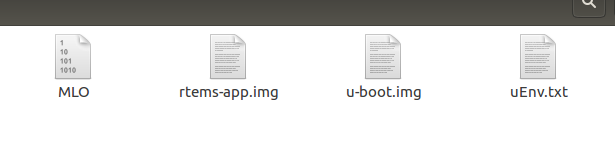
查看sd卡中的文件,有以下四个文件:
其中MLO,uboot,uenv文件是必须的,rtems-app就是hello.exe生成的镜像。
接下来将编译好的rtems文件系统制作成img镜像:
在这里要用到一个软件:rki(rtems kernel image)可以将rtems制作成.elf文件
在github上git到,https://github.com/alanc98/rki
阅读其readme文件:
| You can find the Waf project here: |
| http://code.google.com/p/waf/ |
| Simple instructions on How to set up Waf is here: |
| http://www.rtems.org/ftp/pub/rtems/people/chrisj/rtl/rtems-linker/waf.html |
| Steps |
| ----- |
| 1. Build or install the tools. In this example the path is |
| $HOME/Development/rtems/4.12. |
| 2. Build and install the RTEMS Board Support Packages you want to use. In this |
| example the path is $HOME/Development/rtems/build/4.12. |
| 3. Unpack this package somewhere, anywhere on your disk and change into the top |
| level directory. |
| 4. Populate the git submodule: |
| $ git submodule init |
| $ git submodule update |
| 5. Configure with your specific settings. In this case the path to the tools |
| and RTEMS and provided on the command line and so do not need to be in your |
| path or environment [1] and we limit the build to 'sparc/sis' BSP: |
| $ waf configure --rtems=$HOME/Development/rtems/build/4.12 \ |
| --rtems-tools=$HOME/Development/rtems/4.12 \ |
| --rtems-version=4.12 \ |
| --rtems-bsps=sparc/sis |
| You can use '--rtems-archs=sparc,sis' or |
| '--rtems-bsps=sparc/sis,arm/raspberrypi' to build for more than BSP at a time. |
| 6. Build: |
| $ waf |
| 7. Run the executable using the simulator: |
| $ $HOME/Development/rtems/4.12/bin/sparc-rtems4.12-run \ |
根据上述,打开makefile文件,找到以下几行:
RTEMS_TOOL_BASE ?= /home/c/development/rtems/4.12/bin/
RTEMS_BSP_BASE ?= /home/c/development/rtems/image
BSP ?= beagleboneblack
ARCH ?= arm-rtems4.12
将路径改成自己的。
然后echo $PATH确认export后,make报错
/home/lenovo/development/rtems/4.11/lib/gcc/arm-rtems4.11/4.9.2/../../../../arm-rtems4.11/bin/ld: error: legacy-build/arm-rtems4.11-beagleboneblack/rki.elf uses VFP register arguments, /home/lenovo/development/rtems/image/arm-rtems4.11/beagleboneblack/lib/librtemscpu.a(libposix_a-pthreadself.o)
does not
/home/lenovo/development/rtems/4.11/lib/gcc/arm-rtems4.11/4.9.2/../../../../arm-rtems4.11/bin/ld: failed to merge target specific data of file /home/lenovo/development/rtems/image/arm-rtems4.11/beagleboneblack/lib/librtemscpu.a(libposix_a-pthreadself.o)
collect2: error: ld returned 1 exit status
make: *** [rki.elf] 错误 1
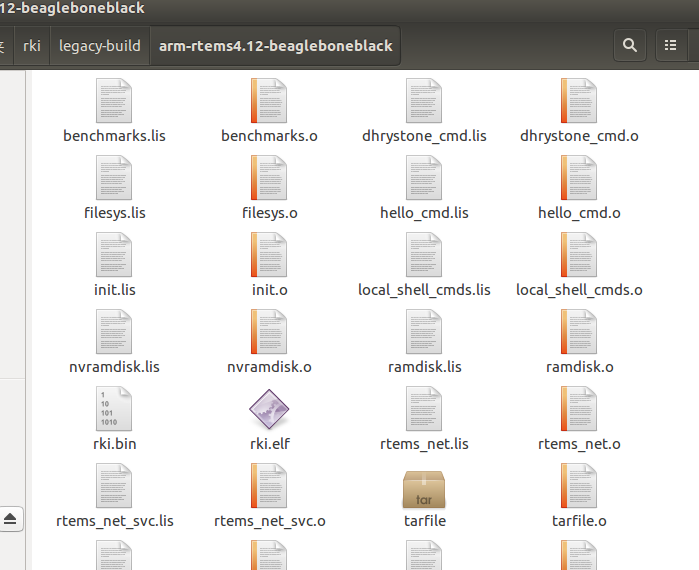
rki编译的错误提示是这样:
rki.elf uses VFP register arguments,  BUT librtemscpu.a(libposix_a-pthreadself.o) does not (use VFP)
修改的方法之一是把 rki 目录下面的 Makefile 里 LDFLAGS(可能还包括 ARCH_OPTS)选项中  -mfloat-abi=hard 去掉
然后生成rki.elf和rki.bin
然后通过sdcard脚本将rki.elf文件制成img文件:
cd $HOME/development/rtems/rtems-src/c/src/lib/libbsp/arm/beagle/simscripts
sh sdcard.sh $HOME/development/rtems/4.12 $HOME/rki/legacy-build/arm-rtems4.12-beagleboneblack/rki.elf
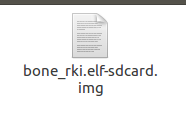
制成后img如下:
然后通过dd命令将该img烧写进sd卡中:
dd if=bone_rki.elf-sdcard.img of=/dev/sdb bs=4096
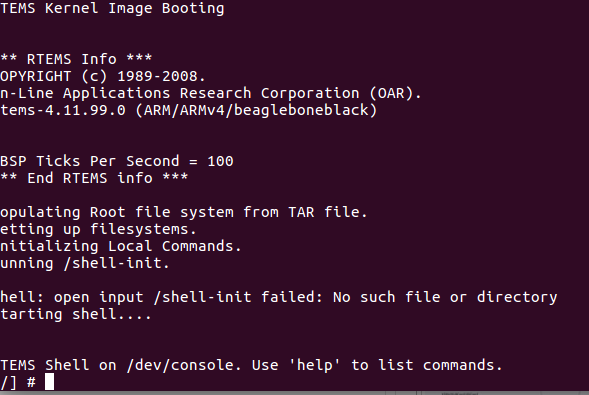
烧写完成即可启动bbb板,串口信息如下:
表示系统移植成功。

相关文章推荐
- 利用国内镜像下载Android源码,并编译生成image镜像文件
- android源码编译生成ramdisk.img和system.img解压和使用(基于海天雄A9+android2.3.3)
- 基于 Beaglebone Black嵌入式linux系统u-boot编译 启动
- 基于ubuntu的rtems-libbsd编译运行beagleboneblack bsp
- 用ADS编译ARM程序后生成镜像Image的信息分析
- RTEMS 最新基于ubuntu和RSB编译环境的安装配置
- 解决:Android编译源码根目录下/system/vold后,通过push命令将编译生成的vold文件push至system/bin下无法正常开机
- 基于源码编译openssl
- 通过清华大学镜像下载Android源码并编译源码
- centos7实现基于源码编译安装LAMP的wordpress应用
- kernel编译生成Image zImage uImage的区别
- Android:源码环境编译自定义的APP到ROM(System Image)中
- Spark1.0.0 源码编译和部署包生成
- 源码推荐(0710B):基于Block的系统PickerImageController的封装,简单的搜索标签
- SNMP阶段总结,基于SNMP++提取进程内存使用,CPU占用率,进程名称,PID,路径等信息的功能函数,生成了DLL,源码送上
- 用javac编译生成不同版本的源码和目标class
- NanoPi—M1(H3)———安卓源码编译完成后各镜像存放路径记录
- Freescale I.mx 6 Android 4.2.2源码编译环境搭建(基于ubuntu12.04 LTS)