Win10+intellij搭建grpc-java环境
2016-09-18 00:00
176 查看
这几天一直在研究grpc,刚好做成了一个demo,于是把研究过程中碰到的坑都记录下来,也为后来查看做好准备。
环境:Windows10 + Intellij
本次教程将从最开始的环境搭建到最后的demo输出,一步一步做详细介绍!
1、下载安装Intellij,点这里下载(也可自行度娘,以下链接同理)
2、配置maven,网络教程
3、安装配置gradle,网络安装教程,Intellij配置教程
4、下载grpc-java源码,github地址,如果不知道怎么使用github下载代码,可以看这里
5、grpc依赖protobuf,所以需要安装protobuf,下载地址
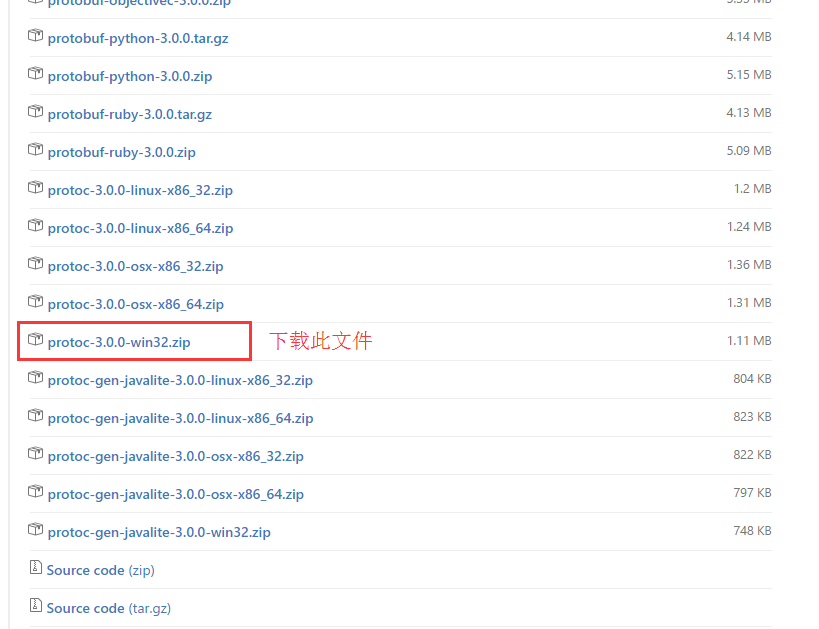
解压protoc-3.0.0-win32.zip,然后把解压后的文件protoc-3.0.0-win32下bin子目录添加到系统的环境变量,比如我的目录地址是:D:\Program Files\protoc-3.0.0-win32\bin,查看是否成功,同时按win+R,在对话框输入cmd,然后在命令行里面输入protoc --version,出现版本信息则表示成功:

6、安装C++编译环境(GCC、clang和visual studio),不然在编译grpc-java源码时会报错,因为grpc-java的编译包(grpc-java源码下的compiler子目录下的代码)是用C++写的,clang exe文件下载地址,下载完后直接双击安装,安装过程中有一项选择:Add LLVM to the system PATH for all users(第2个,安装时默认为Do not add LLVM to the system PATH),选择此项即可。GCC编译器下载,安装教程。visual studio下载
7、编译grpc-java源码,用intellij打开grpc-java项目,在终端(Terminal)输入官网上的编译命令:gradlew java_pluginExecutable或者gradlew install(不需要加../,不然不错),都会出现如下图所示错误,
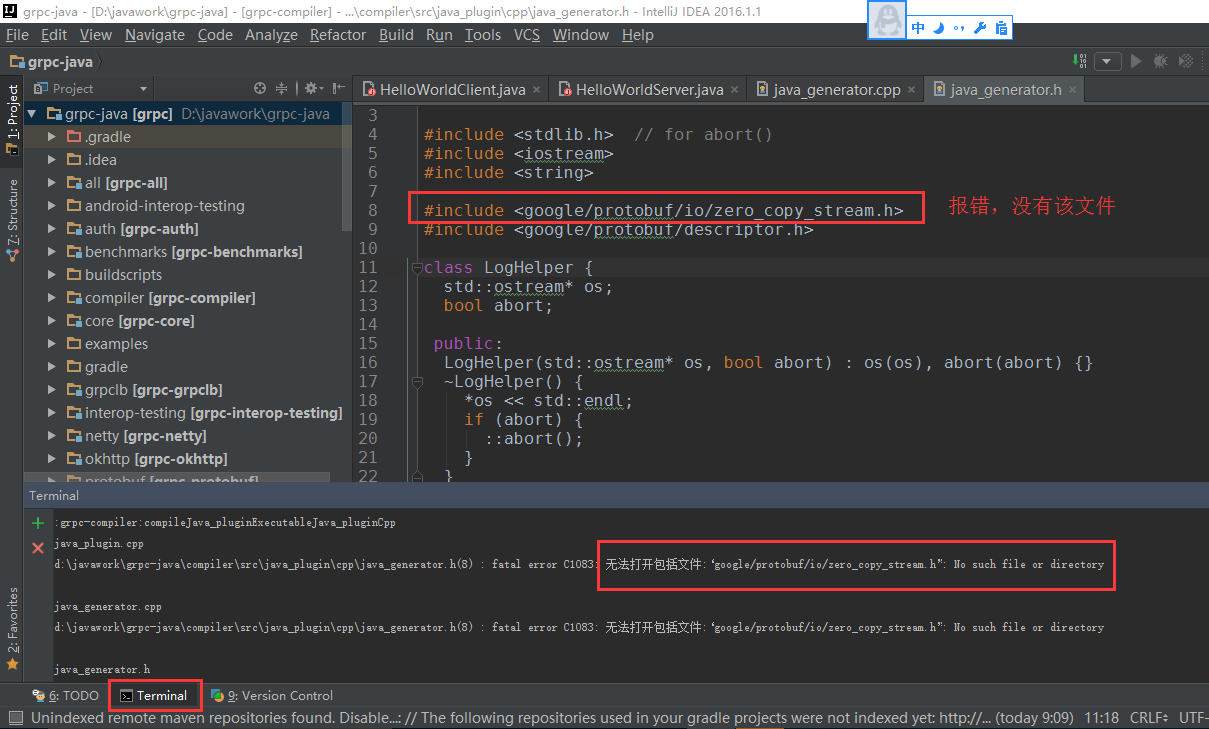
解决办法是进入grpc-java目录,在该目录下新建gradle.properties文件,文件内容为:skipCodegen=true(或者直接把报错的那一行源码删掉,即删掉java_generator.h文件里面的:
),
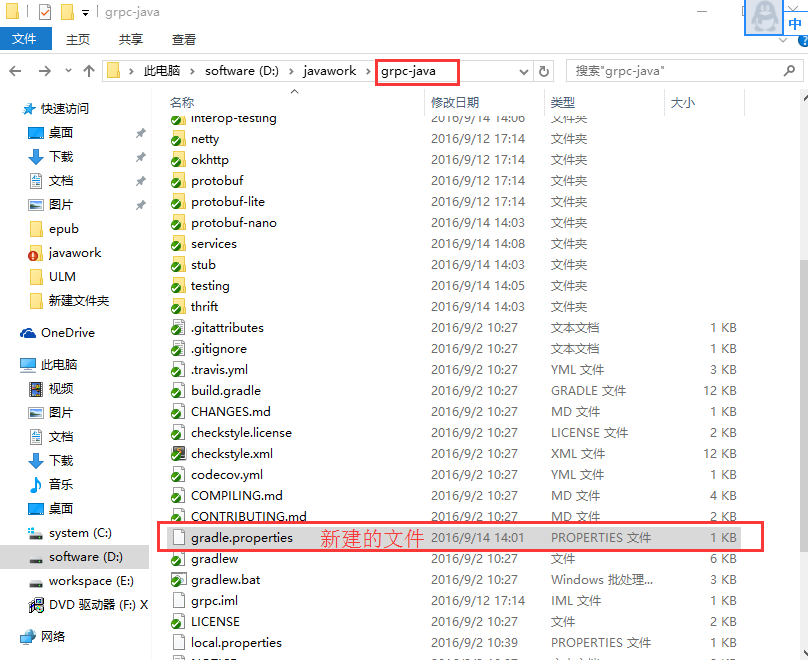
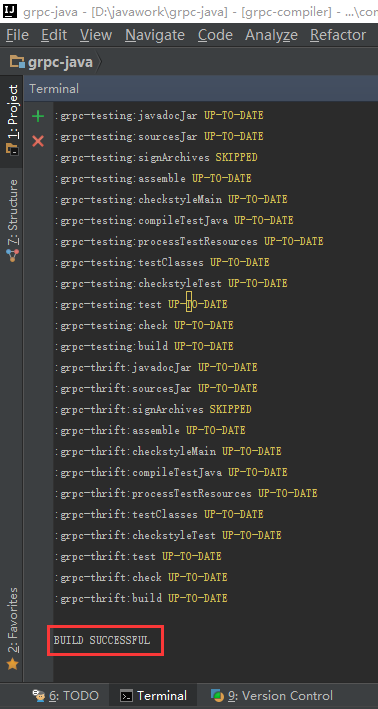
然后继续在intellij命令行里输入编译命令gradlew install,即可成功
8、搭建demo,创建maven项目(创建过程见步骤2),本人的项目名是grpc-demo,在src/main下创建新的Directory,取名为proto(必须在src/main目录下,否则打包不了,用来创建protobuf文件),详细目录结构如下:
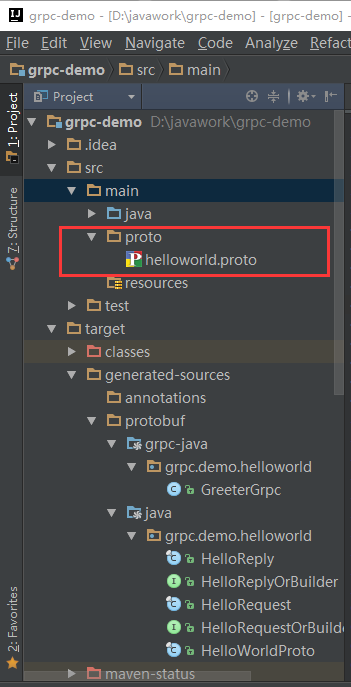
然后在proto下创建.proto文件(我的是helloworld.proto),内容是:
pom.xml文件:
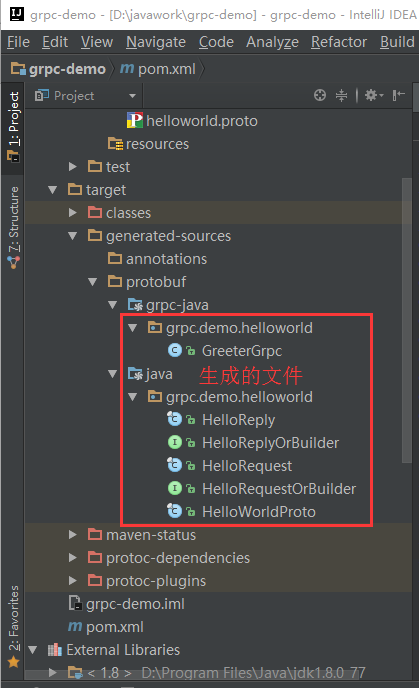
然后用maven进行编译,在终端输入:mvn compile命令,待成功后生成如下文件:
添加客户端和服务端代码:在src/main/java下新建包(本人用的名称是com.helloworld):
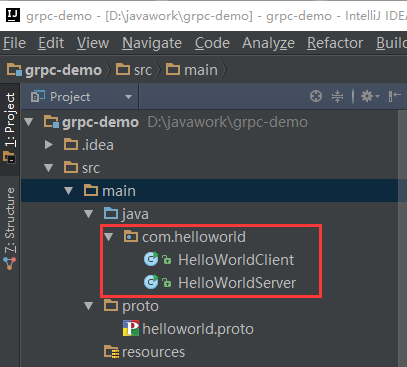
在com.helloworld包下创建java类文件,客户端HelloWorldClient.java:
服务端HelloWorldServer.java:
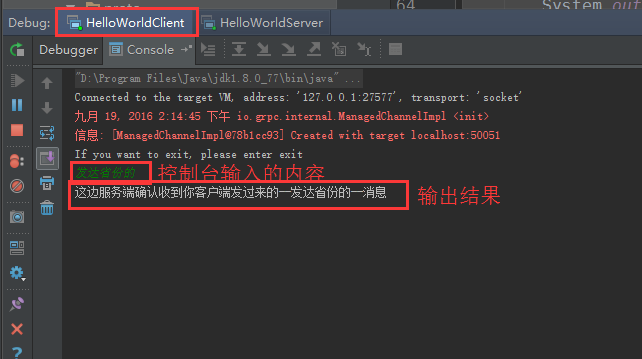
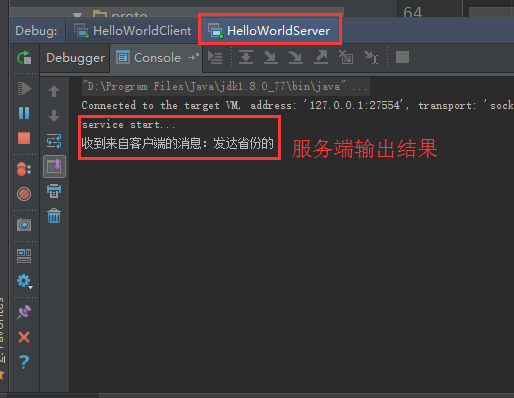
编码完成,分别运行HelloWorldClient和HelloWorldServer,在客户端控制台输入,即可看到输出:
环境:Windows10 + Intellij
本次教程将从最开始的环境搭建到最后的demo输出,一步一步做详细介绍!
1、下载安装Intellij,点这里下载(也可自行度娘,以下链接同理)
2、配置maven,网络教程
3、安装配置gradle,网络安装教程,Intellij配置教程
4、下载grpc-java源码,github地址,如果不知道怎么使用github下载代码,可以看这里
5、grpc依赖protobuf,所以需要安装protobuf,下载地址
解压protoc-3.0.0-win32.zip,然后把解压后的文件protoc-3.0.0-win32下bin子目录添加到系统的环境变量,比如我的目录地址是:D:\Program Files\protoc-3.0.0-win32\bin,查看是否成功,同时按win+R,在对话框输入cmd,然后在命令行里面输入protoc --version,出现版本信息则表示成功:
6、安装C++编译环境(GCC、clang和visual studio),不然在编译grpc-java源码时会报错,因为grpc-java的编译包(grpc-java源码下的compiler子目录下的代码)是用C++写的,clang exe文件下载地址,下载完后直接双击安装,安装过程中有一项选择:Add LLVM to the system PATH for all users(第2个,安装时默认为Do not add LLVM to the system PATH),选择此项即可。GCC编译器下载,安装教程。visual studio下载
7、编译grpc-java源码,用intellij打开grpc-java项目,在终端(Terminal)输入官网上的编译命令:gradlew java_pluginExecutable或者gradlew install(不需要加../,不然不错),都会出现如下图所示错误,
解决办法是进入grpc-java目录,在该目录下新建gradle.properties文件,文件内容为:skipCodegen=true(或者直接把报错的那一行源码删掉,即删掉java_generator.h文件里面的:
#include <google/protobuf/io/zero_copy_stream.h>
),
然后继续在intellij命令行里输入编译命令gradlew install,即可成功
8、搭建demo,创建maven项目(创建过程见步骤2),本人的项目名是grpc-demo,在src/main下创建新的Directory,取名为proto(必须在src/main目录下,否则打包不了,用来创建protobuf文件),详细目录结构如下:
然后在proto下创建.proto文件(我的是helloworld.proto),内容是:
syntax = "proto3";

option java_multiple_files = true;
option java_package = "grpc.demo.helloworld";
option java_outer_classname = "HelloWorldProto";
option objc_class_prefix = "HLW";

package helloworld;

// The greeting service definition.
service Greeter {
// Sends a greeting
rpc SayHello (HelloRequest) returns (HelloReply) {}
}

// The request message containing the user's name.
message HelloRequest {
string name = 1;
}

// The response message containing the greetings
message HelloReply {
string message = 1;
}
pom.xml文件:
<?xml version="1.0" encoding="UTF-8"?>
<project xmlns="http://maven.apache.org/POM/4.0.0"
xmlns:xsi="http://www.w3.org/2001/XMLSchema-instance"
xsi:schemaLocation="http://maven.apache.org/POM/4.0.0 http://maven.apache.org/xsd/maven-4.0.0.xsd"> <modelVersion>4.0.0</modelVersion>

<groupId>grpc.demo</groupId>
<artifactId>grpc-demo</artifactId>
<version>20160902.1.0.0</version>

<dependencies>
<!--<dependency>
<groupId>io.grpc</groupId>
<artifactId>grpc-all</artifactId>
<version>0.13.2</version>
</dependency>-->
<dependency>
<groupId>io.grpc</groupId>
<artifactId>grpc-netty</artifactId>
<version>1.0.0</version>
</dependency>
<dependency>
<groupId>io.grpc</groupId>
<artifactId>grpc-protobuf</artifactId>
<version>1.0.0</version>
</dependency>
<dependency>
<groupId>io.grpc</groupId>
<artifactId>grpc-stub</artifactId>
<version>1.0.0</version>
</dependency>

</dependencies>

<build>
<extensions>
<extension>
<groupId>kr.motd.maven</groupId>
<artifactId>os-maven-plugin</artifactId>
<version>1.4.1.Final</version>
</extension>
</extensions>
<plugins>
<plugin>
<groupId>org.xolstice.maven.plugins</groupId>
<artifactId>protobuf-maven-plugin</artifactId>
<version>0.5.0</version>
<configuration>
<!--
The version of protoc must match protobuf-java. If you don't depend on
protobuf-java directly, you will be transitively depending on the
protobuf-java version that grpc depends on.
-->
<protocArtifact>com.google.protobuf:protoc:3.0.0-beta-2:exe:${os.detected.classifier}</protocArtifact>
<pluginId>grpc-java</pluginId>
<pluginArtifact>io.grpc:protoc-gen-grpc-java:0.13.2:exe:${os.detected.classifier}</pluginArtifact>
<protocExecutable>D:\Program Files\protoc-3.0.0-win32\bin\protoc</protocExecutable>
</configuration>
<executions>
<execution>
<goals>
<goal>compile</goal>
<goal>compile-custom</goal>
</goals>
</execution>
</executions>
</plugin>
<plugin>
<groupId>org.apache.maven.plugins</groupId>
<artifactId>maven-compiler-plugin</artifactId>
<configuration>
<source>1.6</source>
<target>1.6</target>
</configuration>
</plugin>
</plugins>
</build>
</project>
然后用maven进行编译,在终端输入:mvn compile命令,待成功后生成如下文件:
添加客户端和服务端代码:在src/main/java下新建包(本人用的名称是com.helloworld):
在com.helloworld包下创建java类文件,客户端HelloWorldClient.java:
package com.helloworld;

import grpc.demo.helloworld.GreeterGrpc;
import grpc.demo.helloworld.HelloReply;
import grpc.demo.helloworld.HelloRequest;
import io.grpc.ManagedChannel;
import io.grpc.ManagedChannelBuilder;
import io.grpc.StatusRuntimeException;

import java.io.BufferedReader;
import java.io.InputStreamReader;
import java.util.concurrent.TimeUnit;

public class HelloWorldClient {

private final ManagedChannel channel;
private final GreeterGrpc.GreeterBlockingStub blockingStub;

/** Construct client connecting to HelloWorld server at {@code host:port}. */
public HelloWorldClient(String host, int port) {
channel = ManagedChannelBuilder.forAddress(host, port)
.usePlaintext(true)
.build();
blockingStub = GreeterGrpc.newBlockingStub(channel);
}

public void shutdown() throws InterruptedException {
channel.shutdown().awaitTermination(5, TimeUnit.SECONDS);
}

/** Say hello to server. */
public void greet(String name) {
HelloRequest request = HelloRequest.newBuilder().setName(name).build();
HelloReply response;
try {
response = blockingStub.sayHello(request);
} catch (StatusRuntimeException e) {
return;
}
System.out.println(response.getMessage());
}

/**
* Greet server. If provided, the first element of {@code args} is the name to use in the
* greeting.
*/
public static void main(String[] args) throws Exception {
HelloWorldClient client = new HelloWorldClient("localhost", 50051);
BufferedReader br = new BufferedReader(new InputStreamReader(System.in));
boolean flag = true;
System.out.println("If you want to exit, please enter exit");
while(flag){
String st = br.readLine();
if(st.trim().equals("exit")){
flag = false;
}else{
client.greet(st);
}
}
System.out.println("exit success!");
client.shutdown();
}
}
服务端HelloWorldServer.java:
package com.helloworld;

import grpc.demo.helloworld.GreeterGrpc;
import grpc.demo.helloworld.HelloReply;
import grpc.demo.helloworld.HelloRequest;
import io.grpc.Server;
import io.grpc.ServerBuilder;
import io.grpc.stub.StreamObserver;

import java.io.IOException;

public class HelloWorldServer {

private int port = 50051;
private Server server;

private void start() throws IOException {
server = ServerBuilder.forPort(port)
.addService(GreeterGrpc.bindService(new GreeterImpl()))
.build()
.start();

System.out.println("service start...");

Runtime.getRuntime().addShutdownHook(new Thread() {

@Override
public void run() {

System.err.println("*** shutting down gRPC server since JVM is shutting down");
HelloWorldServer.this.stop();
System.err.println("*** server shut down");
}
});
}

private void stop() {
if (server != null) {
server.shutdown();
}
}

// block 一直到退出程序
private void blockUntilShutdown() throws InterruptedException {
if (server != null) {
server.awaitTermination();
}
}

public static void main(String[] args) throws IOException, InterruptedException {

final HelloWorldServer server = new HelloWorldServer();
server.start();
server.blockUntilShutdown();
}

// 实现 定义一个实现服务接口的类
private class GreeterImpl implements GreeterGrpc.Greeter {

@Override
public void sayHello(HelloRequest req, StreamObserver<HelloReply> responseObserver) {
System.out.println("收到来自客户端的消息:"+req.getName());
HelloReply reply = HelloReply.newBuilder().setMessage("这边服务端确认收到你客户端发过来的--" + req.getName() + "--消息").build();
responseObserver.onNext(reply);
responseObserver.onCompleted();
}
}

}
编码完成,分别运行HelloWorldClient和HelloWorldServer,在客户端控制台输入,即可看到输出:

相关文章推荐
- 使用Intellij Idea+Gradle 搭建Java 本地开发环境
- Java环境搭建,以win10为例
- Win10不需要Cygwin搭建大数据测试环境(3)-Java操作HBase
- win10_java+selenium环境搭建
- Win10搭建Java开发环境
- Java环境搭建,以win10为例
- win10_java+selenium环境搭建
- 1.在win10中搭建Java环境
- 记一个简单的小问题 win10 java环境搭建问题
- 使用Intellij Idea+Gradle 搭建Java 本地开发环境
- (win10系统下)java初学者最快搭建java开发环境的方法
- Java开发环境搭建与Intellij的安装和初始配置
- WIN10下 python+eclipse+jdk+PyDev(离线) 搭建java,python,C/C++开发环境
- Java开发环境搭建全过程(下)
- Eclipse中Java Web 开发环境的搭建--Eclipse+Tomcat+Lomboz
- 在Ubuntu搭建java开发环境
- Eclipse+JDK+API中文帮助文档的java开发环境搭建
- Java和J2EE运行环境的搭建
- Eclipse3.2中 Java Web 开发环境的搭建之LOMBOZ+TOMCAT 安装及验证
- Editplus搭建java开发环境