原型模式——浅复制与深复制
2016-09-17 22:06
141 查看
原型模式涉及一个浅复制和深复制的概念。原型模式可以简单理解为“复制”,但这个复制不是代码的复制。对同一个类,我们可以实例化new三次来“复制”,但如果在初始化的时候构造函数的执行很长,多次实例化就显得效率很低效了。那我们能否只实例化一次,然后“复制”呢?
这样写吗?注意这是引用的复制,这实际上还是只有test1一个实例,test2、test3只是复制了其引用而已,如果修改了一个对象则会影响到其他的对象。这样是不符合我们要求的。这就会引出我们Java的clone方法浅复制和深复制了。
我们先来看浅复制是什么。对于要实现克隆(我们后面将浅复制和深复制统称为克隆),必须实现Cloneable接口,尽管clone方法在Object类里,但我们还是得实现Cloneable接口不然会抛出CloneNotSupportedException错误。
定义一个Resume类实现Cloneable接口,并实现Object类中的clone方法。
客户端测试代码:
我们可以看看输出结果,resume2是否只是复制了resume1的引用。
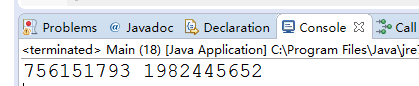
看来并不是。并且我们也成功地克隆了一个对象,并不是简单地复制了引用。我们的Resume类里只有两个String基本类型,我们来看看如果有其他引用会是什么样子的。
此时我们增加了一个Test类的引用,其他代码不变,Test类里什么都没有。看看客户端代码:
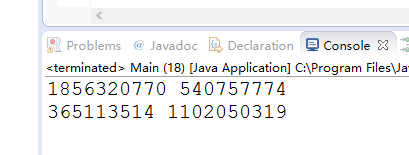
这个时候对第18行的输出结果会是什么样的呢?

我们看到虽然我们对resume1进行了克隆,resume2确实也是新的引用,但由于Resume类中有了对另外一个类的引用,所以resume1和resume2对Test对象的引用还是同一个,这就是浅复制。那么如何做到连同Test对象一起克隆,而不是只复制一个引用呢?这就是深复制的概念。
我们首先对在Resume中被引用的类Test做一点改变,让它实现Cloneable接口,实现clone方法:
同样在Resume类中做一点微小的改变:
客户端测试代码不变:
输出结果:
这样我们就实现了对象的深复制。
说完浅复制与深复制,其实我们也就讲完了原型模式:用原型实例指定创建对象的种类,并且通过拷贝这些原型创建新的对象。为什么要通过克隆的方式来创建新的对象,也即是我们在上面提到的,每new一次都需要执行一次构造函数,如果构造函数的执行时间很长,那么多次执行这个初始化操作就实在是太低效了。
Test test1 = new Test();
Test test2 = test1;
Test test3 = test1;
这样写吗?注意这是引用的复制,这实际上还是只有test1一个实例,test2、test3只是复制了其引用而已,如果修改了一个对象则会影响到其他的对象。这样是不符合我们要求的。这就会引出我们Java的clone方法浅复制和深复制了。
我们先来看浅复制是什么。对于要实现克隆(我们后面将浅复制和深复制统称为克隆),必须实现Cloneable接口,尽管clone方法在Object类里,但我们还是得实现Cloneable接口不然会抛出CloneNotSupportedException错误。
定义一个Resume类实现Cloneable接口,并实现Object类中的clone方法。
package day_12_prototype;

/**
* @author turbo
*
* 2016年9月17日
*/
public class Resume implements Cloneable {
private String name;
private String sex;

public String getName() {
return name;
}

public void setName(String name) {
this.name = name;
}

public String getSex() {
return sex;
}

public void setSex(String sex) {
this.sex = sex;
}

@Override
protected Object clone() throws CloneNotSupportedException {
Resume resume = (Resume)super.clone();
return resume;
}

}
客户端测试代码:
package day_12_prototype;

/**
* @author turbo
*
* 2016年9月17日
*/
public class Main {

/**
* @param args
* @throws CloneNotSupportedException
*/
public static void main(String[] args) throws CloneNotSupportedException {
Resume resume1 = new Resume();
Resume resume2 = (Resume)resume1.clone();
System.out.println(resume1.hashCode() + " " + resume2.hashCode());
}

}
我们可以看看输出结果,resume2是否只是复制了resume1的引用。
看来并不是。并且我们也成功地克隆了一个对象,并不是简单地复制了引用。我们的Resume类里只有两个String基本类型,我们来看看如果有其他引用会是什么样子的。
package day_12_prototype;

/**
* @author turbo
*
* 2016年9月17日
*/
public class Resume implements Cloneable {
private String name;
private String sex;
private Test test = new Test();

public String getName() {
return name;
}

public void setName(String name) {
this.name = name;
}

public String getSex() {
return sex;
}

public void setSex(String sex) {
this.sex = sex;
}

public Test getTest() {
return test;
}

public void setTest(Test test) {
this.test = test;
}

@Override
protected Object clone() throws CloneNotSupportedException {
Resume resume = (Resume)super.clone();
return resume;
}

}
此时我们增加了一个Test类的引用,其他代码不变,Test类里什么都没有。看看客户端代码:
package day_12_prototype;

/**
* @author turbo
*
* 2016年9月17日
*/
public class Main {

/**
* @param args
* @throws CloneNotSupportedException
*/
public static void main(String[] args) throws CloneNotSupportedException {
Resume resume1 = new Resume();
Resume resume2 = (Resume)resume1.clone();
System.out.println(resume1.hashCode() + " " + resume2.hashCode());
System.out.println(resume1.getTest().hashCode() + " " + resume2.getTest().hashCode());
}

}
这个时候对第18行的输出结果会是什么样的呢?
我们看到虽然我们对resume1进行了克隆,resume2确实也是新的引用,但由于Resume类中有了对另外一个类的引用,所以resume1和resume2对Test对象的引用还是同一个,这就是浅复制。那么如何做到连同Test对象一起克隆,而不是只复制一个引用呢?这就是深复制的概念。
我们首先对在Resume中被引用的类Test做一点改变,让它实现Cloneable接口,实现clone方法:
package day_12_prototype;

/**
* @author turbo
*
* 2016年9月17日
*/
public class Test implements Cloneable{
private String test;

public String getTest() {
return test;
}

public void setTest(String test) {
this.test = test;
}

@Override
protected Object clone() throws CloneNotSupportedException {
return super.clone();
}

}
同样在Resume类中做一点微小的改变:
package day_12_prototype;

/**
* @author turbo
*
* 2016年9月17日
*/
public class Resume implements Cloneable {
private String name;
private String sex;
private Test test = new Test();

public String getName() {
return name;
}

public void setName(String name) {
this.name = name;
}

public String getSex() {
return sex;
}

public void setSex(String sex) {
this.sex = sex;
}

public Test getTest() {
return test;
}

public void setTest(Test test) {
this.test = test;
}

@Override
protected Object clone() throws CloneNotSupportedException {
Resume resume = (Resume)super.clone();
resume.test = (Test)test.clone();
return resume;
}

}
客户端测试代码不变:
package day_12_prototype;

/**
* @author turbo
*
* 2016年9月17日
*/
public class Main {

/**
* @param args
* @throws CloneNotSupportedException
*/
public static void main(String[] args) throws CloneNotSupportedException {
Resume resume1 = new Resume();
Resume resume2 = (Resume)resume1.clone();
System.out.println(resume1.hashCode() + " " + resume2.hashCode());
System.out.println(resume1.getTest().hashCode() + " " + resume2.getTest().hashCode());
}

}
输出结果:
这样我们就实现了对象的深复制。
说完浅复制与深复制,其实我们也就讲完了原型模式:用原型实例指定创建对象的种类,并且通过拷贝这些原型创建新的对象。为什么要通过克隆的方式来创建新的对象,也即是我们在上面提到的,每new一次都需要执行一次构造函数,如果构造函数的执行时间很长,那么多次执行这个初始化操作就实在是太低效了。

相关文章推荐
- 深入详解原型模式之深复制和浅复制
- JohnConnor设计模式笔记(二) 程序世界里的复印机-原型模式与浅复制/深复制
- 原型模式中的深浅复制
- 设计模式学习笔记九:原型模式(和深浅复制)
- java 原型模式之深复制与浅复制
- 原型模式 对象深浅复制
- 再会原型模式——深复制VS浅复制
- 克隆复制可使用原型( Prototype)设计模式
- 设计模式之原型学习 java中的浅复制和深复制
- (C#)原型模式—深复制与浅复制
- 原型模式(简历的复制)
- 2.6 《硬啃设计模式》第8章 复制不是很难 - 原型模式(Prototype Pattern)
- 原型模式深浅复制
- 原型模式(ProtoType) - Java里的对象复制
- 设计模式(六):原型模式——浅复制
- java设计模式---Prototype Pattern---原型模式(复制建立对象)
- C#原型模式之深复制实现
- 原型模式——浅复制VS深复制
- 原型模式——浅复制和深复制
- GOF 23 设计模式之 原型模式(prototype) 深复制与浅复制举例