iOS - Bundle 资源文件包
2016-09-05 19:33
453 查看
1、Bundle 文件
Bundle 文件,简单理解,就是资源文件包。我们将许多图片、XIB、文本文件组织在一起,打包成一个 Bundle 文件。方便在其他项目中引用包内的资源。Bundle 文件是静态的,也就是说,我们包含到包中的资源文件作为一个资源包是不参加项目编译的。也就意味着,bundle 包中不能包含可执行的文件。它仅仅是作为资源,被解析成为特定的 2 进制数据。
2、制作 Bundle 文件
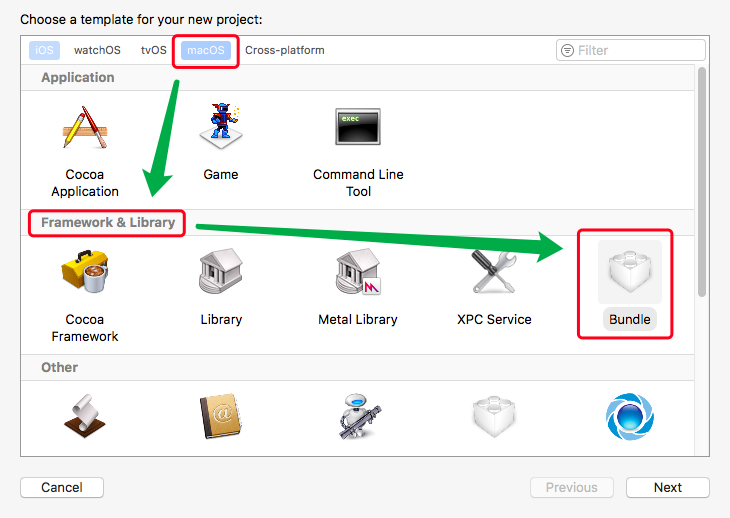
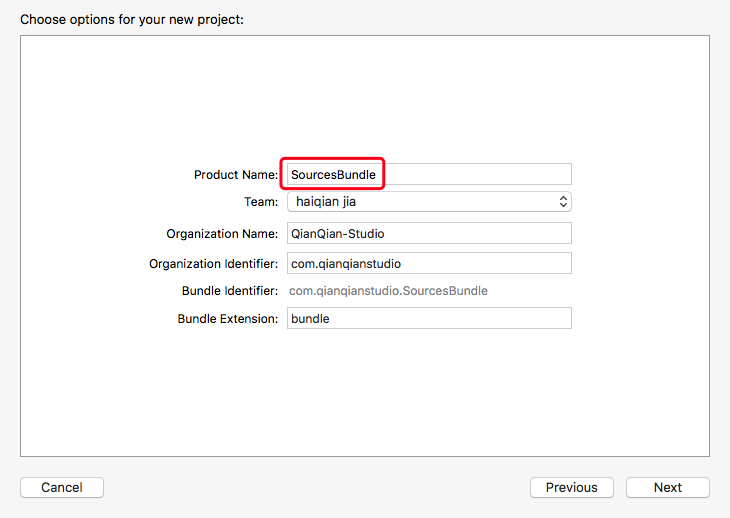
1、新建 Bundle 项目创建名为 SourcesBundle(最后要生成的 Bundle 文件名称)的工程,注意 Bundle 默认是 macOS 系统的,Xcode 高版本中需要在 macOS => Framework & Library 选项下找到。

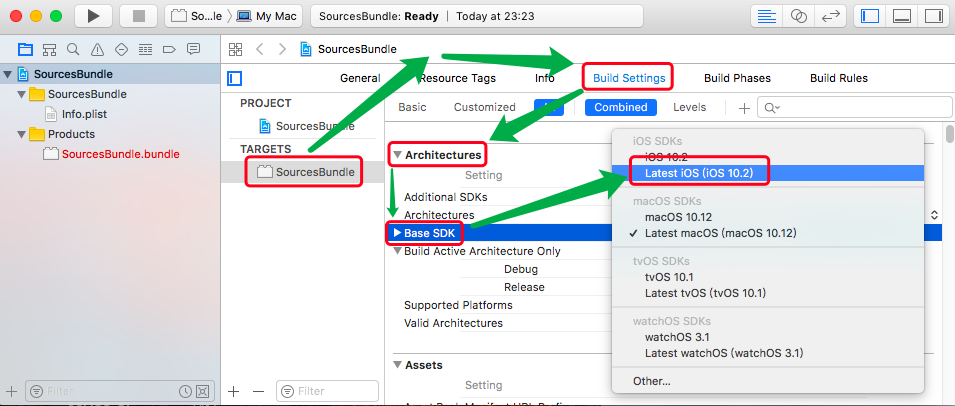
2、修改 Bundle 配置信息
因为 Bundle 默认是 macOS 系统的,所有需要修改他的信息,修改成 iOS 系统。
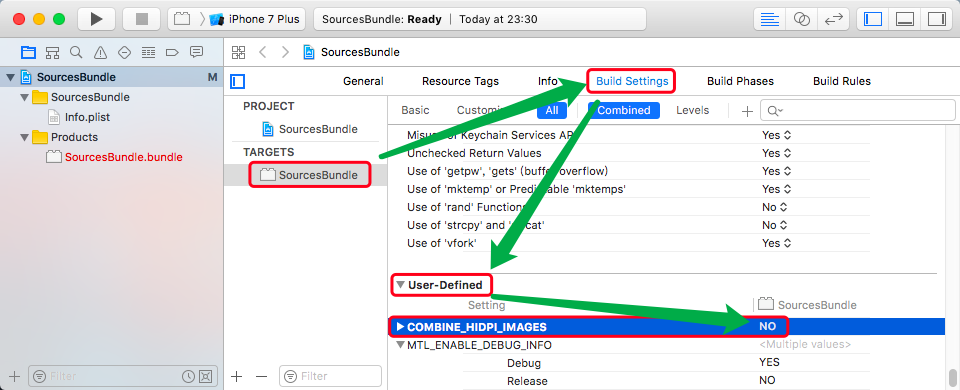
设置 Build Setting 中的
COMBINE_HIDPI_IMAGES为 NO,否则 Bundle 中的图片就是 tiff 格式了。
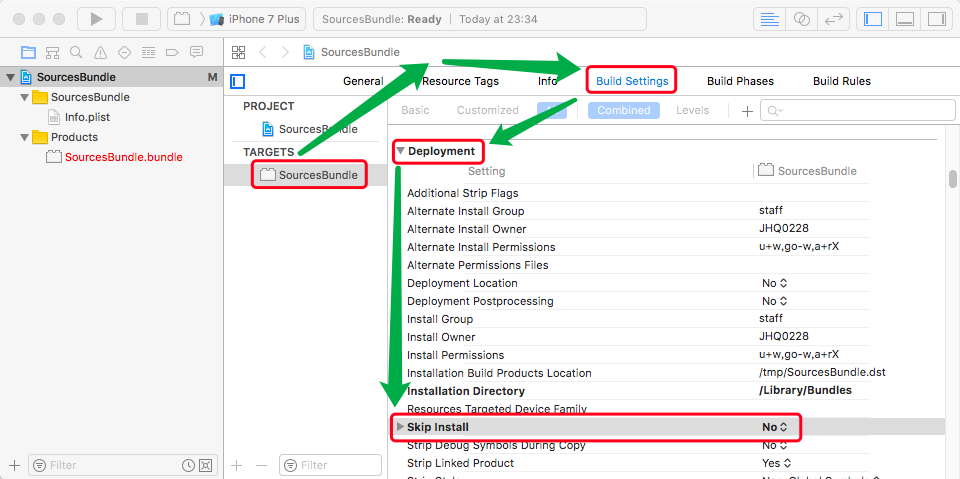
3、可选配置
作为资源包,仅仅需要编译就好,无需安装相关的配置,设置 Skip Install 为 YES。同样要删除安装路径 Installation Directory 的值。

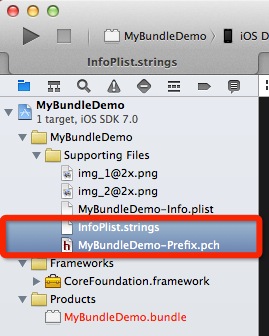
该资源包的 pch 文件和 strings 文件是可以删除的。
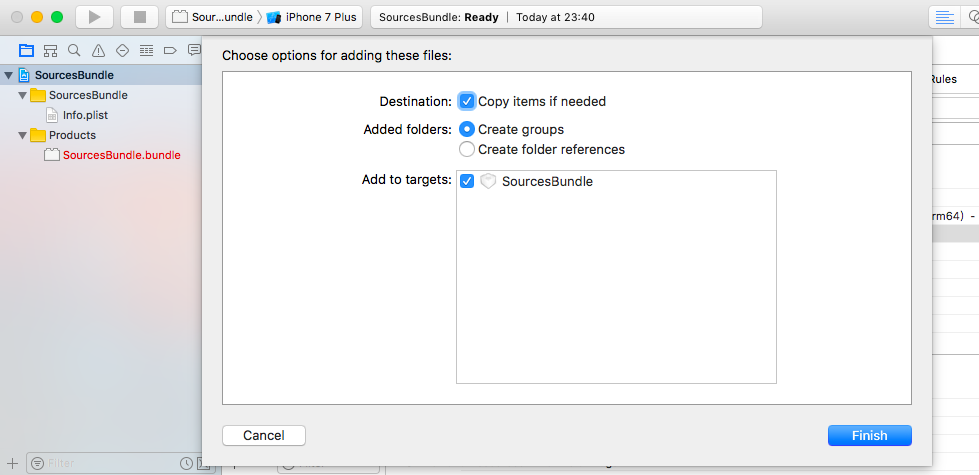
4、添加文件
将资源文件或文件夹拖动到工程中的 SourcesBundle 文件夹下面。
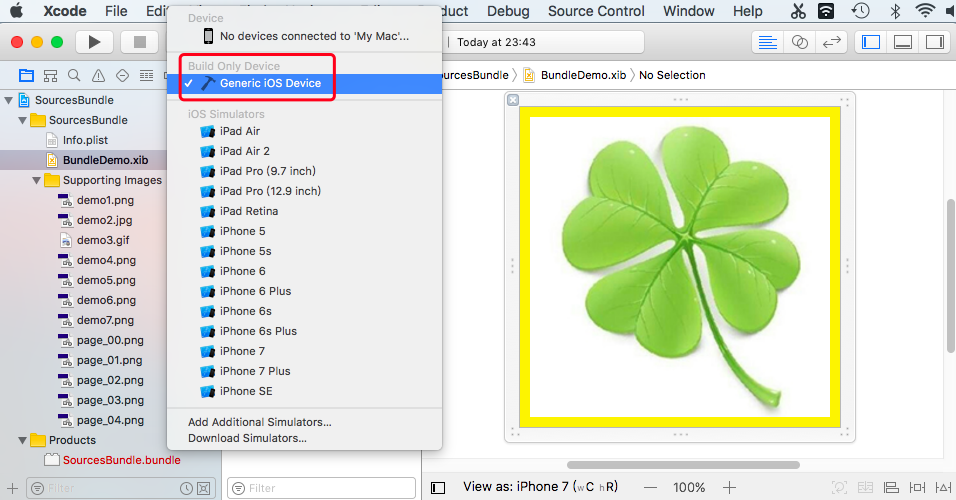
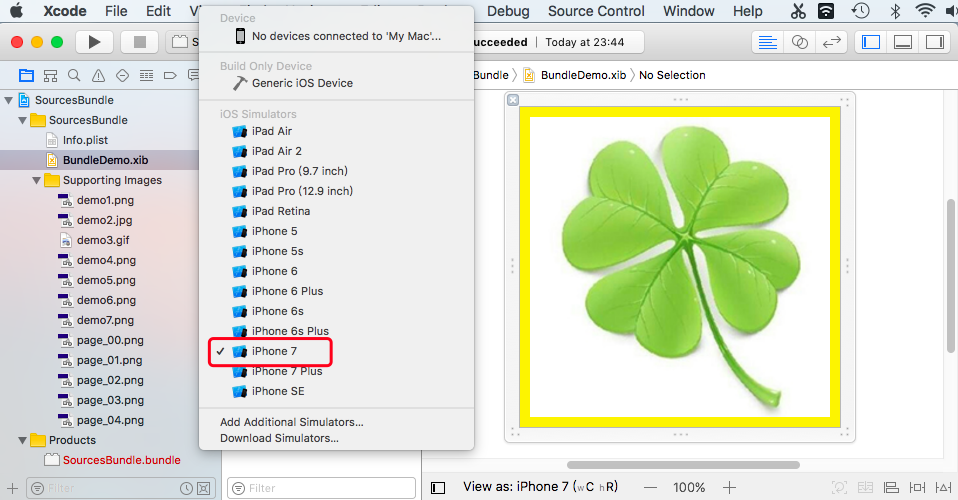
5、编译生成 Bundle 文件
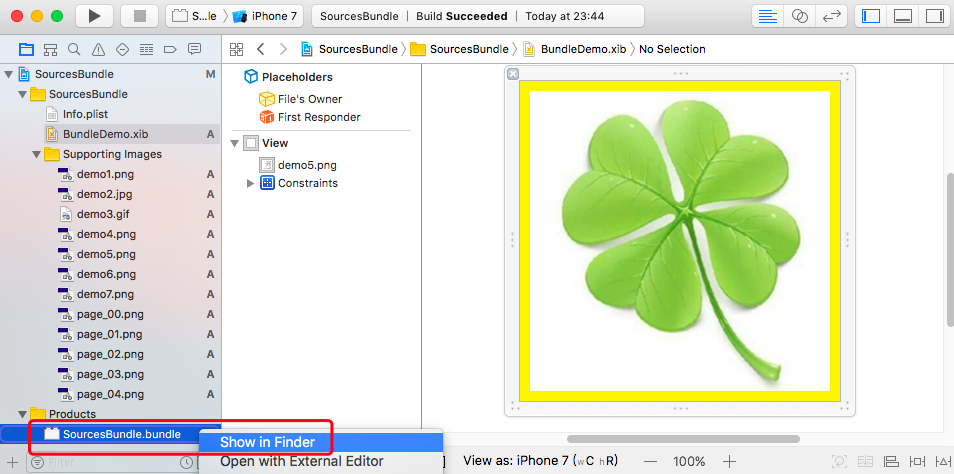
我们分别选择 Generic iOS Device 和任意一个模拟器各编译一次,编译完后,我们会看到工程中 Products 文件夹下的 SourcesBundle.bundle 由红色变成了黑色。
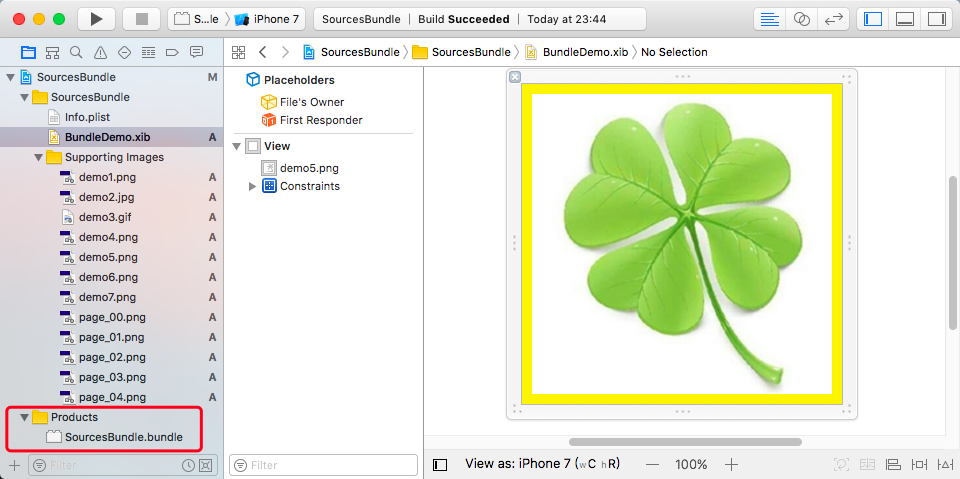
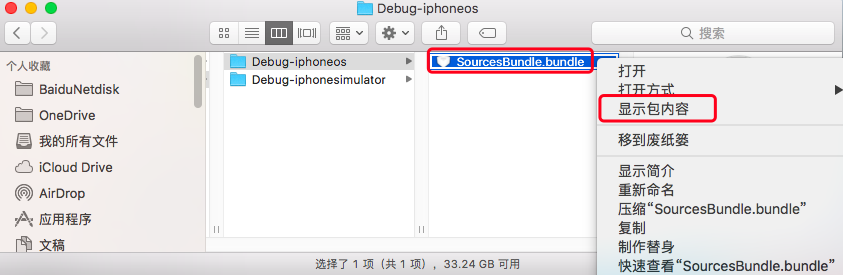
然后 show in finder,看看生成的文件。我们看到它为真机和模拟器都生成了 .bundle 资源文件。
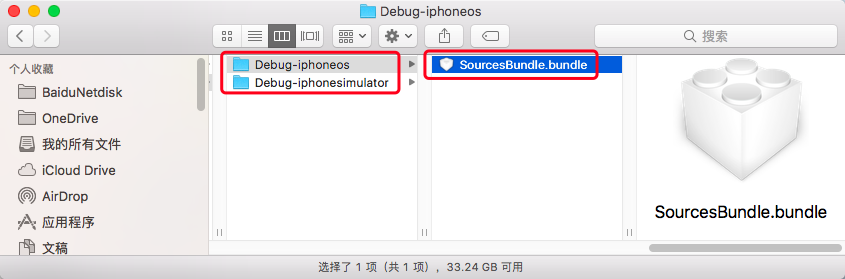
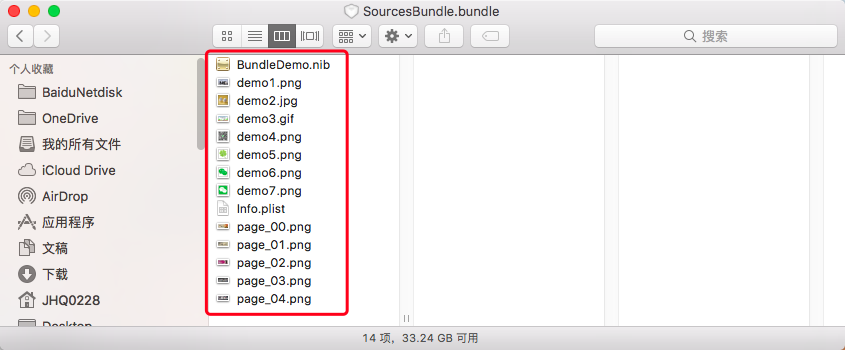
选中 .bundle 文件右键 显示包内容,我们可以看到之前拖拽到工程中的资源文件都在其中。
3、使用 Bundle 文件
将生成的真机(Debug-iphoneos)Bundle 资源文件拖拽到需要使用的工程中。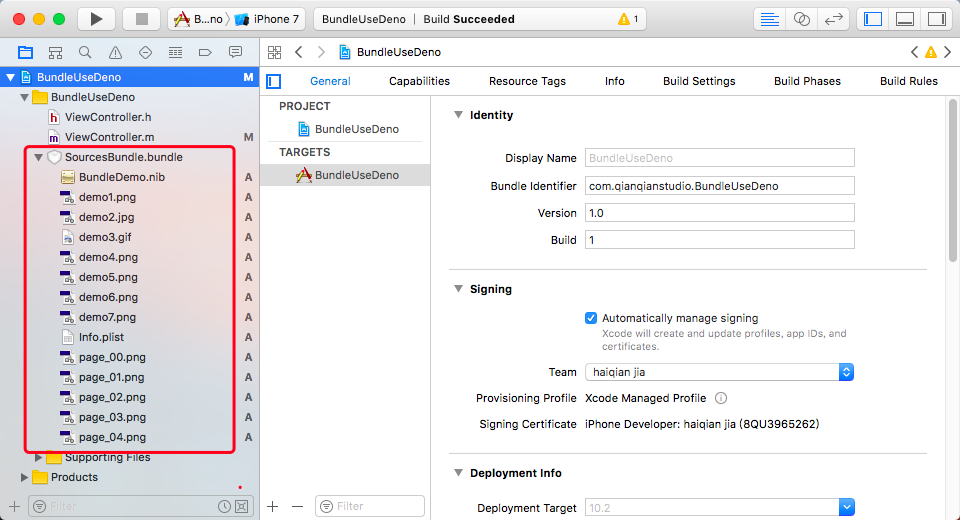
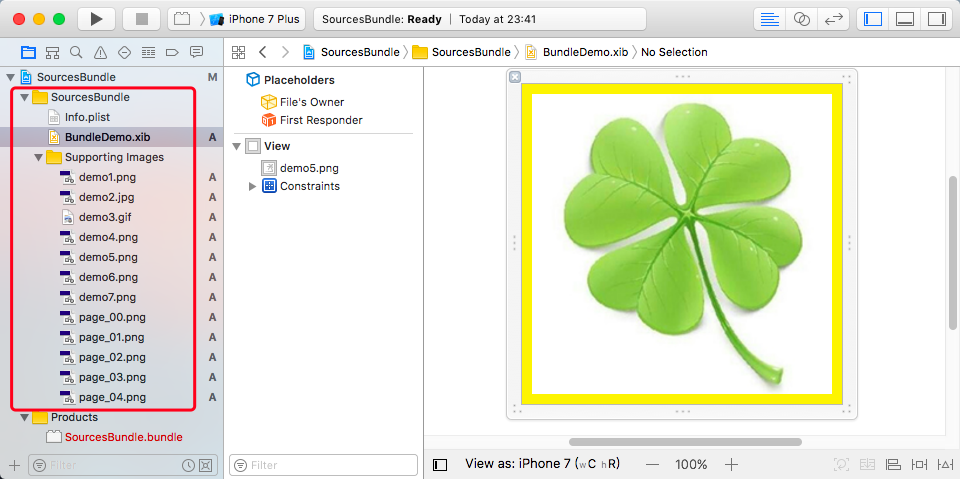
1、加载 Bundle 中的 xib 资源文件
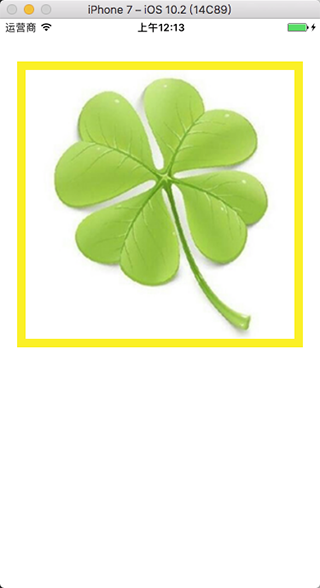
// 设置文件路径
NSString *bundlePath = [[NSBundle mainBundle] pathForResource:@"SourcesBundle" ofType:@"bundle"];
NSBundle *resourceBundle = [NSBundle bundleWithPath:bundlePath];

// 加载 nib 文件
UINib *nib = [UINib nibWithNibName:@"BundleDemo" bundle:resourceBundle];
NSArray *viewObjs = [nib instantiateWithOwner:nil options:nil];

// 获取 xib 文件
UIView *view = viewObjs.lastObject;

view.frame = CGRectMake(20, 50, self.view.bounds.size.width - 40, self.view.bounds.size.width - 40);
[self.view addSubview:view];
效果
2、加载 Bundle 中的图片资源文件
指定绝对路径的形式
UIImage *image = [UIImage imageNamed:@"SourcesBundle.bundle/demo2.jpg"];
拼接路径的形式
NSString *bundlePath = [[NSBundle mainBundle] pathForResource:@"SourcesBundle" ofType:@"bundle"];
NSString *imgPath= [bundlePath stringByAppendingPathComponent:@"demo4"];

UIImage *image = [UIImage imageWithContentsOfFile:imgPath];
宏定义的形式
#define MYBUNDLE_NAME   @"SourcesBundle.bundle"
#define MYBUNDLE_PATH   [[[NSBundle mainBundle] resourcePath] stringByAppendingPathComponent:MYBUNDLE_NAME]
#define MYBUNDLE        [NSBundle bundleWithPath:MYBUNDLE_PATH]

NSString *imgPath= [MYBUNDLE_PATH stringByAppendingPathComponent:@"demo4"];
UIImage *image = [UIImage imageWithContentsOfFile:imgPath];
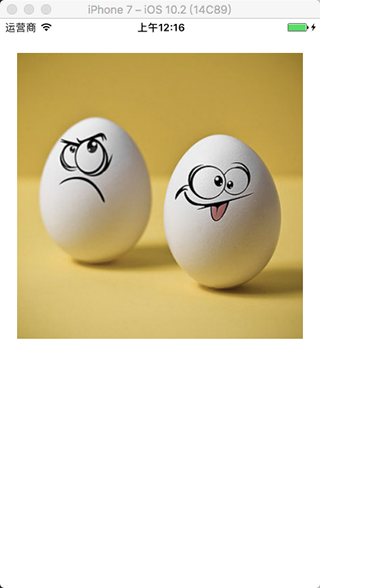
效果


相关文章推荐
- 本地推送
- iOS - Library 库
- iOS-GCD学习之同步异步线程去执行串行操作
- iOS-GCD学习之Group
- iOS NSTimer释放不掉的问题 以及如何开始暂停定时器
- iOS KVO新姿势
- iOS--多线程GCD--05
- iOS基础呀
- iOS--线程间通讯NSThread--04
- iOS 单例计时器(页面切换仍然计时)
- iOS-多线程-GCD
- 【iOS自动约束】使用Masonry导致内存持续增长问题分析
- 全球的iOS开发大V门的博客
- iOS tableview的一些小技巧(分割线顶格显示等……)
- RunTime知识整理
- iOS--线程安全03
- TestFlight Tutorial: iOS Beta Testing
- IOS原声与JS交互
- iOS<null>处理
- 【iOS自动约束】四个重要的系统方法