自定义一个"花瓣"菜单-b
2016-08-20 23:39
176 查看
先来看一下效果
XLCircleMenu.gif
是不是觉得挺好玩的呀.
通过这篇文章你可以学到:
1.系统UITableView的部分设计思想
2.自定义控件常用设计思路
3.动画的具体使用
4.手势的具体使用
4.装逼一点,良好的代码风格
5......
为了快速区分视图,这里用了随机颜色来区分,生成随机颜色的方式比较多.
常见的获取方法为宏如下:
通过类方法实现:
1.数据:从客户端来看一般就是服务端给的json格式的数据
2.样式:从客户端开发来看就是设置各个控件的各种属性
3.交互:
我暂且把这三样映射到UITableView上
数据对应着DataSource代理,样式对应着我们拿到数据之后自定义的cell不同类型(其实就是设置不同属性为不同值),交互对应着Delegate代理.
接下来我们也仿照则TabelView的代理写
系统TableView的DataSource代理
当然我们也没必要把系统的代理一个一个仿照则写完,只要自己能够理解到如何根据系统API的设计思想来设计自己写的代码就行了.
自己设计的DataSource代理
注释我就没有加了,因为OC最好的就是见名知意.
然后在为类添加属性的时候,需要考虑界面和功能,界面和功能需要在写代码之前就应该清楚的.举个例子:
1.具体有多少个可点的小圆,应该通过代理来传递的,并且小圆的个数应该不止在一个地方用到,所以可以定义为属性,而且中间有一个大圆也是通过代理传递的,也需要定义一个属性来接收.于是可以定义出两个属性.
有哪些属性我们还可以直接从功能和界面上直接去思考.
2.根据上面的分析依次考虑我们界面上的元素和我们需要控制的属性.大致定义出了如下属性(实现的思路很多,不一定非要这样定义)
2.来看一下需要进行哪些操作吧
首先肯定是显示和隐藏了,如果考虑得多一点,我们可以在显示或者隐藏之后做一个回调给使用则
者.
然后就是点击的各种处理,在定义代理的时候,我们已经仿照系统的TableView的Delegate写了一个代理了.所以点击操作可以直接通过代理去处理
简单一点来说初始化的话,我们就让使用者把需要的参数都传入进来吧.最终设计出的方法如下:
到目前为止整个类的架子基本就打好了.
第一步定义属于的私有属性
第二步开始写方法吧
初始化方法
子视图的创建
手势添加
实现动画
接下来把用到的主要技术和方式
iOS手势识别:http://www.cnblogs.com/kenshincui/p/3950646.html
添加手势到指定视图,设置手势代理,根据需要特殊处理
这里判断如果点击的是button,则不用接收了
>
下面是就是拖拽部分的代码,用到的是transform(放射变换)
一旦移动,就改变视图的frame

移动.gif
这里就通过是否有代理来确定属性的值,当然如果代理是必须的就没必要去判断了(respondsToSelector),相当于通过代理来给属性赋值.
当我们想传递事件给代理的时候,可以通过添加事件给子视图,然后代理出去,如下:
在处理事件的时候调用代理
先来看看如果不把布局和手势关联是怎样的效果.

僵硬的感觉.gif
看起来是不是特别的僵硬,下面就详细讲一讲使用到的布局和动画
先看图:

逆正弦函数
逆余弦函数.png
当时搞这个的时候,反正我是基本把这些东西还给了初中老师.
为了实现能够当菜单靠边的时候,小圆能够适应自动旋转角度,我们需要考虑当前边缘是哪个方向.类似于:

具体思路:
根据当前菜单的x,y的正,负决定是在哪个方向上的边缘.
根据x,y负数的绝对值能够知道当前偏移了屏幕多少
根据x,y偏移的程度改变整个可见的弧度,得到可变的弧度范围
遍历小圆,改变各个小圆的中心点
上代码吧:
底部和右边的实现方法同顶部和左边的思路是一样的
最后开始布局各个小圆
原文地址:http://mp.weixin.qq.com/s?__biz=MzIwOTQ3NzU0Mw==&mid=2247483823&idx=1&sn=5080a6061968f9d65eb7201048bd7987&scene=0#wechat_redirect[/code]
XLCircleMenu.gif
是不是觉得挺好玩的呀.
通过这篇文章你可以学到:
1.系统UITableView的部分设计思想
2.自定义控件常用设计思路
3.动画的具体使用
4.手势的具体使用
4.装逼一点,良好的代码风格
5......
开始码
随机颜色为了快速区分视图,这里用了随机颜色来区分,生成随机颜色的方式比较多.
常见的获取方法为宏如下:
#define RandomColor [UIColor colorWithRed:arc4random_uniform(255)/255.0 green:arc4random_uniform(255)/255.0 blue:arc4random_uniform(255)/255.0 alpha:1]
通过类方法实现:
+ (UIColor *)randomColor{
static BOOL seed = NO;
if (!seed) {
seed = YES;
srandom((uint)time(NULL));
}
CGFloat red = (CGFloat)random()/(CGFloat)RAND_MAX;
CGFloat green = (CGFloat)random()/(CGFloat)RAND_MAX;
CGFloat blue = (CGFloat)random()/(CGFloat)RAND_MAX;
return [UIColor colorWithRed:red green:green blue:blue alpha:1.0f];
//alpha为1.0,颜色完全不透明
}
基本设计
我们在做公共控件的时候,可以把要做的部分捋一捋.其实我们在做客户端开发可以类比网页的开发.做的事情无非就是拿到服务端给的数据,通过不同的方式展示出来.其中就涉及到:1.数据:从客户端来看一般就是服务端给的json格式的数据
2.样式:从客户端开发来看就是设置各个控件的各种属性
3.交互:
我暂且把这三样映射到UITableView上
数据对应着DataSource代理,样式对应着我们拿到数据之后自定义的cell不同类型(其实就是设置不同属性为不同值),交互对应着Delegate代理.
接下来我们也仿照则TabelView的代理写
系统TableView的DataSource代理
@protocol UITableViewDataSource<NSObject>@required- (NSInteger)tableView:(UITableView *)tableView numberOfRowsInSection:(NSInteger)section;// Row display. Implementers should *always* try to reuse cells by setting each cell's reuseIdentifier and querying for available reusable cells with dequeueReusableCellWithIdentifier:// Cell gets various attributes set automatically based on table (separators) and data source (accessory views, editing controls)- (UITableViewCell *)tableView:(UITableView *)tableView cellForRowAtIndexPath:(NSIndexPath *)indexPath;@optional- (NSInteger)numberOfSectionsInTableView:(UITableView *)tableView; // Default is 1 if not implemented- (nullable NSString *)tableView:(UITableView *)tableView titleForHeaderInSection:(NSInteger)section; // fixed font style. use custom view (UILabel) if you want something different- (nullable NSString *)tableView:(UITableView *)tableView titleForFooterInSection:(NSInteger)section;// Editing// Individual rows can opt out of having the -editing property set for them. If not implemented, all rows are assumed to be editable.- (BOOL)tableView:(UITableView *)tableView canEditRowAtIndexPath:(NSIndexPath *)indexPath;// Moving/reordering// Allows the reorder accessory view to optionally be shown for a particular row. By default, the reorder control will be shown only if the datasource implements -tableView:moveRowAtIndexPath:toIndexPath:- (BOOL)tableView:(UITableView *)tableView canMoveRowAtIndexPath:(NSIndexPath *)indexPath;// Index- (nullable NSArray<NSString *> *)sectionIndexTitlesForTableView:(UITableView *)tableView __TVOS_PROHIBITED; // return list of section titles to display in section index view (e.g. "ABCD...Z#")- (NSInteger)tableView:(UITableView *)tableView sectionForSectionIndexTitle:(NSString *)title atIndex:(NSInteger)index __TVOS_PROHIBITED; // tell table which section corresponds to section title/index (e.g. "B",1))// Data manipulation - insert and delete support// After a row has the minus or plus button invoked (based on the UITableViewCellEditingStyle for the cell), the dataSource must commit the change// Not called for edit actions using UITableViewRowAction - the action's handler will be invoked instead- (void)tableView:(UITableView *)tableView commitEditingStyle:(UITableViewCellEditingStyle)editingStyle forRowAtIndexPath:(NSIndexPath *)indexPath;// Data manipulation - reorder / moving support- (void)tableView:(UITableView *)tableView moveRowAtIndexPath:(NSIndexPath *)sourceIndexPath toIndexPath:(NSIndexPath *)destinationIndexPath;@end
当然我们也没必要把系统的代理一个一个仿照则写完,只要自己能够理解到如何根据系统API的设计思想来设计自己写的代码就行了.
自己设计的DataSource代理
@protocol XLCircleMenuDataSource <NSObject>
@required
- (NSInteger)numberOfCircleViewForCircleMenu:(XLCircleMenu *)circleMenu;
- (UIButton *)circleMenu:(XLCircleMenu *)circleMenu circleViewAtIndex:(NSInteger)index;@optional- (CGFloat)lengthForCircleMenu:(XLCircleMenu *)circleMenu;
- (UIView *)centerViewForCircleMenu:(XLCircleMenu *)circleMenu;@end@protocol XLCircleMenuDelegate <NSObject>@optional- (void)circleMenu:(XLCircleMenu *)circleMenu didClickCircleView:(UIButton *)circleView;@end
注释我就没有加了,因为OC最好的就是见名知意.
设计类
我们在设计类的时候,做得比较好的,需要考虑属性的读写情况,一般只把需要暴露给外部知道的才暴露出去.然后在为类添加属性的时候,需要考虑界面和功能,界面和功能需要在写代码之前就应该清楚的.举个例子:
1.具体有多少个可点的小圆,应该通过代理来传递的,并且小圆的个数应该不止在一个地方用到,所以可以定义为属性,而且中间有一个大圆也是通过代理传递的,也需要定义一个属性来接收.于是可以定义出两个属性.
有哪些属性我们还可以直接从功能和界面上直接去思考.
2.根据上面的分析依次考虑我们界面上的元素和我们需要控制的属性.大致定义出了如下属性(实现的思路很多,不一定非要这样定义)
@property (nonatomic, weak) id<XLCircleMenuDataSource> dataSource;
@property (nonatomic, weak) id<XLCircleMenuDelegate> delegate;
@property (nonatomic, assign, readonly) CGPoint centerPoint;
@property (nonatomic, assign, readonly) CGFloat menuLength;
@property (nonatomic, assign, readonly) NSInteger numberOfCircleView;
@property (nonatomic, strong, readonly) UIView *centerCircleView;
@property (nonatomic, strong, readonly) UIView *circleMenuView;
2.来看一下需要进行哪些操作吧
首先肯定是显示和隐藏了,如果考虑得多一点,我们可以在显示或者隐藏之后做一个回调给使用则
者.
然后就是点击的各种处理,在定义代理的时候,我们已经仿照系统的TableView的Delegate写了一个代理了.所以点击操作可以直接通过代理去处理
简单一点来说初始化的话,我们就让使用者把需要的参数都传入进来吧.最终设计出的方法如下:
- (instancetype)initFromPoint:(CGPoint)centerPoint  withDataSource:(id<XLCircleMenuDataSource>)dataSource                   andDelegate:(id<XLCircleMenuDelegate>)delegate;
- (void)showMenu;
- (void)showMenuWithCompletion:(void(^)()) completion;
- (void)closeMenu;
- (void)closeMenuWithCompletion:(void(^)()) completion;
到目前为止整个类的架子基本就打好了.
类的实现
现在该去具体实现我们的设计了第一步定义属于的私有属性
第二步开始写方法吧
初始化方法
子视图的创建
手势添加
实现动画
接下来把用到的主要技术和方式
拖拽的是实现
视图的拖拽是通过UITapGestureRecognizer实现的这一章关于iOS手势相关的介绍可以参考一下这篇文章:iOS手势识别:http://www.cnblogs.com/kenshincui/p/3950646.html
添加手势到指定视图,设置手势代理,根据需要特殊处理
UITapGestureRecognizer *tapGesture = [[UITapGestureRecognizer alloc] initWithTarget:self action:@selector(closeCircelMenu:)];
[self addGestureRecognizer:tapGesture];
tapGesture.delegate = self;
这里判断如果点击的是button,则不用接收了
>
#pragma mark - UIGestureRecognizerDelegate
-(BOOL) gestureRecognizer:(UIGestureRecognizer *)gestureRecognizer    shouldReceiveTouch:(UITouch *)touch{
BOOL should = YES;
if([touch.view isKindOfClass:[UIButton class]]){
should = NO;
}
return should;
}
下面是就是拖拽部分的代码,用到的是transform(放射变换)
一旦移动,就改变视图的frame
if ((panGesture.state == UIGestureRecognizerStateChanged) || (panGesture.state == UIGestureRecognizerStateEnded)) {        CGPoint translation = [panGesture translationInView:self];        CGRect radialMenuRect = self.circleMenuView.frame;
radialMenuRect.origin.x += translation.x;
radialMenuRect.origin.y += translation.y;

self.circleMenuView.frame = radialMenuRect;       [self placeRadialMenuElementsAnimated:NO];
[panGesture setTranslation:CGPointZero inView:self];
}
移动.gif
调用代理的时间
一般在设计代理返回参数的时候都会设计一个属性用来保存代理返回的参数,比如:_menuLength = 50;
if(self.dataSource && [self.dataSource respondsToSelector:@selector(lengthForCircleMenu:)]){
_menuLength = [self.dataSource lengthForCircleMenu:self];
} _numberOfCircleView = [self.dataSource numberOfCircleViewForCircleMenu:self];这里就通过是否有代理来确定属性的值,当然如果代理是必须的就没必要去判断了(respondsToSelector),相当于通过代理来给属性赋值.
当我们想传递事件给代理的时候,可以通过添加事件给子视图,然后代理出去,如下:
UIButton *element = [self.dataSource circleMenu:self circleViewAtIndex:i];        if(self.maxW < element.frame.size.width) {
self.maxW = element.frame.size.width;
}else {
}
element.userInteractionEnabled = YES;
element.alpha = 0;
element.tag = i;
[element addTarget:self action:@selector(didTapButton:)
forControlEvents:UIControlEventTouchUpInside];
[self.elementsArray addObject:element];
在处理事件的时候调用代理
-(void)didTapButton:(UIButton *)sender {
[self.delegate circleMenu:self didClickCircleView:sender];
}
布局和创建视图分开
由于视图的布局和拖动的效果是相关,所以布局和创建应该独立出来.其实我们实际开发中也应该这样做.在用frame布局的时候,我一般习惯把布局的操作放在layoutSubview里面,是的创建要不在初始化的时候创建完成,要不用懒加载额形式创建.先来看看如果不把布局和手势关联是怎样的效果.
僵硬的感觉.gif
看起来是不是特别的僵硬,下面就详细讲一讲使用到的布局和动画
布局和动画
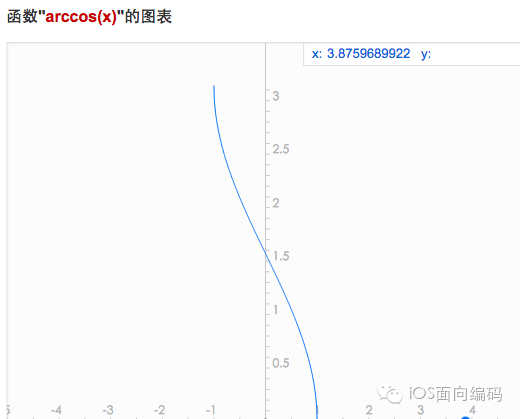
这种花瓣形的布局是当时比较头疼的,牵涉到了角度计算(asinf:逆正弦函数,acosf:逆余弦函数),长度百分比换成角度百分比先看图:
逆正弦函数
逆余弦函数.png
当时搞这个的时候,反正我是基本把这些东西还给了初中老师.
为了实现能够当菜单靠边的时候,小圆能够适应自动旋转角度,我们需要考虑当前边缘是哪个方向.类似于:
具体思路:
根据当前菜单的x,y的正,负决定是在哪个方向上的边缘.
根据x,y负数的绝对值能够知道当前偏移了屏幕多少
根据x,y偏移的程度改变整个可见的弧度,得到可变的弧度范围
遍历小圆,改变各个小圆的中心点
上代码吧:
// 顶部边缘
if(self.circleMenuView.frame.origin.y < 0 &&       self.circleMenuView.frame.origin.x > 0 &&       CGRectGetMaxX(self.circleMenuView.frame) < self.frame.size.width){        // 部分显示
fullCircle = NO;        // 得到顶部偏移多少
CGFloat d = -(self.circleMenuView.frame.origin.y +  self.menuLength);        // 获得起始角度的位置
startingAngle = asinf((d + (self.maxW / 2.0) + 5) / (self.menuLength+radiusToAdd));        // 获取总共显示的晚饭
usableAngle = M_PI - (2 * startingAngle);
}
// 左边
if(self.circleMenuView.frame.origin.x < 0){
fullCircle = NO;        // 开始的角度
if(self.circleMenuView.frame.origin.y > 0){
CGFloat d = -(self.circleMenuView.frame.origin.x + self.menuLength);
startingAngle = -acosf((d + 5) / (self.menuLength + radiusToAdd));
} else {
CGFloat d = -(self.circleMenuView.frame.origin.y + self.menuLength);
startingAngle = asinf((d + self.maxW / 2.0+ 5) / (self.menuLength + radiusToAdd));
}        // 结束角度
if(CGRectGetMaxY(self.circleMenuView.frame) <= self.frame.size.height){            if(self.circleMenuView.frame.origin.y > 0){
usableAngle = -2 * startingAngle;
} else {
CGFloat d = -(self.circleMenuView.frame.origin.x + self.menuLength);                CGFloat virtualAngle = acosf((d + 5) / (self.menuLength + radiusToAdd));
usableAngle = 2 * virtualAngle -(virtualAngle+startingAngle);
}
} else {
CGFloat d = (CGRectGetMaxY(self.circleMenuView.frame) - self.frame.size.height -self.menuLength);            CGFloat virtualAngle = -asinf((d + 5) / (self.menuLength + radiusToAdd));
usableAngle = -startingAngle+virtualAngle;
}
}
底部和右边的实现方法同顶部和左边的思路是一样的
最后开始布局各个小圆
for(int i = 0; i < [self.elementsArray count]; i++){
UIButton *element = [self.elementsArray objectAtIndex:i];
element.center = CGPointMake(self.circleMenuView.frame.size.width / 2.0, self.circleMenuView.frame.size.height / 2.0);        double delayInSeconds = 0.025*i;        void (^elementPositionBlock)(void) = ^{
element.alpha = 1;
[self.circleMenuView bringSubviewToFront:element];            // 这一段比较复杂,参考的了别人写的
CGPoint endPoint = CGPointMake(self.circleMenuView.frame.size.width/2.0+(_menuLength+radiusToAdd)*(cos(startingAngle+usableAngle/(self.numberOfCircleView-(fullCircle ? 0 :1))*(float)i)), self.circleMenuView.frame.size.height/2.0+(_menuLength+radiusToAdd)*(sin(startingAngle+usableAngle/(self.numberOfCircleView-(fullCircle ? 0 :1))*(float)i)));
element.center = endPoint;
};
if(animated) {
dispatch_time_t popTime = dispatch_time(DISPATCH_TIME_NOW, (int64_t)(delayInSeconds * NSEC_PER_SEC));
dispatch_after(popTime, dispatch_get_main_queue(), ^(void){// 延迟一下做动画的时间
[UIView animateWithDuration:0.25 animations:elementPositionBlock];
});
} else {
elementPositionBlock();
};
}
消失动画
消息动画比较简单,就是改变各个子视图的center.和透明度,然后渐变消失.动画做完之后再里面移除视图就可以了for(int i = 0; i < [self.elementsArray count]; i++){
UIButton *element = [self.elementsArray objectAtIndex:i];
double delayInSeconds = 0.025*i;
dispatch_time_t popTime = dispatch_time(DISPATCH_TIME_NOW, (int64_t)(delayInSeconds * NSEC_PER_SEC));
dispatch_after(popTime, dispatch_get_main_queue(), ^(void){
[UIView animateWithDuration:0.25 animations:^{
element.alpha = 0;
element.center = CGPointMake(self.centerCircleView.frame.size.width/2.0, self.centerCircleView.frame.size.height/2.0);
}];
});
}
double delayInSeconds = 0.25+0.025*[self.elementsArray count];
dispatch_time_t popTime = dispatch_time(DISPATCH_TIME_NOW, (int64_t)(delayInSeconds * NSEC_PER_SEC));
dispatch_after(popTime, dispatch_get_main_queue(), ^(void){
[UIView animateWithDuration:0.25 animations:^{
self.centerCircleView.alpha = 0;
self.alpha = 0;
} completion:^(BOOL finished) {
[self.centerCircleView removeFromSuperview];
[self removeFromSuperview];
if(completion) completion();
}];
});原文地址:http://mp.weixin.qq.com/s?__biz=MzIwOTQ3NzU0Mw==&mid=2247483823&idx=1&sn=5080a6061968f9d65eb7201048bd7987&scene=0#wechat_redirect[/code]

相关文章推荐
- 借鉴系统UITableView的设计思想,自定义一个"花瓣"菜单
- drupal6中添加一个自定义菜单列表
- c#+Winform实现自定义的“复制、粘贴”右键快捷菜单,多个控件共享使用一个右键菜单。
- 自定义Veiw的实践(一)---一个简易侧滑菜单的实现
- Feature开发一(制作一个简单的自定义菜单)
- MySQL创建一个固定频率执行且自定义"开始"时间的定时任务event
- 微信自定义菜单,php配置一个多维数组,通过json_encode()生成json字符串,中文会转为\uxxxx,微信报错!
- 实现一个"可变二维数组",这个二维数组的行数要求用户从键盘输入,每行的元素个数仍由用户从键盘输入. //数组元素值用户可以自定义.最后把二维数组打印出来.不要忘记释放数组内存. /*void main
- 如果自定义一个可以点击之后展开/收缩的菜单组件
- 跟我一起学extjs5(41--增加一个自定义模块(源码下载)[2销售合同加入菜单和模块展示])
- 一个自定义卫星菜单控件极其使用,仿arcmenu
- ios一个自定义的下拉多选菜单
- 跟我一起学extjs5(41--增加一个自定义模块(源码下载)[2销售合同加入菜单和模块展示])
- 开发者模式下创建自定义菜单返回{ "errcode": -1, "errmsg": "system error" }
- 实现一个简单的菜单程序,运行时显示"Menu:A(dd) D(elete) S(ort) Q(uit),Select one: "提示用户输入。输入A、D、S时分别提示"数据已经增加、删除、排序"
- IE浏览器右键菜单插件开发(上篇)——自定义一个IE右键菜单项
- 给超链接自定义一个右键菜单
- 安卓:一个简单的综合使用(1-3周),sqlite,listview,自定义适配器,菜单,对话框,通知.....
- menu菜单水平放置时每一项后多出一个<td style="width: 3px;">