Android SQLite详解及示例代码
在Android中使用SQLite数据库的入门指南,打算分下面几部分与大家一起分享,
1、什么是SQLite
2、Android中使用SQLite
一、什么是SQLite
SQLite是一款开源的、轻量级的、嵌入式的、关系型数据库。它在2000年由D. Richard Hipp发布,可以支援Java、Net、PHP、Ruby、Python、Perl、C等几乎所有的现代编程语言,支持Windows、Linux、Unix、Mac OS、Android、IOS等几乎所有的主流操作系统平台。
SQLite被广泛应用的在苹果、Adobe、Google的各项产品。如果非要举一个你身边应用SQLite的例子的话,如果你的机器中装的有迅雷,请打开迅雷安装目录,搜索一下sqlite3.dll,是不是找到了它的身影? 如果你装的有金山词霸,那么打开他的安装目录也会看到sqlite.dll的存在。是的,SQLite早就广泛的应用在我们接触的各种产品中了,当然我们今天学习它,是因为在Android开发中,Android推荐的数据库,也是内置了完整支持的数据库就是SQlite。
SQLite的特性:
1. ACID事务
2. 零配置 – 无需安装和管理配置
3. 储存在单一磁盘文件中的一个完整的数据库
4. 数据库文件可以在不同字节顺序的机器间自由的共享
5. 支持数据库大小至2TB
6. 足够小, 大致3万行C代码, 250K
7. 比一些流行的数据库在大部分普通数据库操作要快
8. 简单, 轻松的API
9. 包含TCL绑定, 同时通过Wrapper支持其他语言的绑定
10. 良好注释的源代码, 并且有着90%以上的测试覆盖率
11. 独立: 没有额外依赖
12. Source完全的Open, 你可以用于任何用途, 包括出售它
13. 支持多种开发语言,C, PHP, Perl, Java, ASP.NET,Python
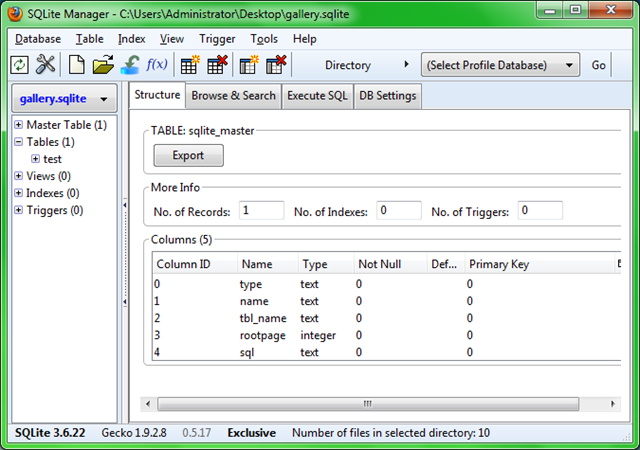
推荐的SQLite客户端管理工具,火狐插件 Sqlite Manger
二、Android中使用SQLite
我们还是通过一个例子来学习,相关讲解都写在代码注释里。
1、新建一个项目Lesson15_HelloSqlite,Activity起名叫MainHelloSqlite.java
2、编写用户界面 res/layout/main.xml,准备增(insert)删(delete)改(update)查(select)四个按钮,准备一个下拉列表spinner,显示表中的数据。
<?xml version="1.0" encoding="utf-8"?>
<linearlayout android:layout_height="fill_parent" android:layout_width="fill_parent" android:orientation="vertical" xmlns:android="http://schemas.android.com/apk/res/android">
<textview android:layout_height="wrap_content" android:layout_width="wrap_content" android:textsize="20sp" android:layout_margintop="5dp" android:id="@+id/TextView01" android:text="SQLite基本操作">
</textview>
<button android:layout_height="wrap_content" android:layout_width="wrap_content" android:textsize="20sp" android:layout_margintop="5dp" android:id="@+id/Button01" android:text="增 | insert" android:minwidth="200dp"></button>
<button android:layout_height="wrap_content" android:layout_width="wrap_content" android:textsize="20sp" android:layout_margintop="5dp" android:id="@+id/Button02" android:text="删 | delete" android:minwidth="200dp"></button>
<button android:layout_height="wrap_content" android:layout_width="wrap_content" android:textsize="20sp" android:layout_margintop="5dp" android:id="@+id/Button03" android:text="改 | update" android:minwidth="200dp"></button>
<button android:layout_height="wrap_content" android:layout_width="wrap_content" android:textsize="20sp" android:layout_margintop="5dp" android:id="@+id/Button04" android:text="查 | select" android:minwidth="200dp"></button>
<spinner android:layout_height="wrap_content" android:layout_width="wrap_content" android:layout_margintop="5dp" android:id="@+id/Spinner01" android:minwidth="200dp">
</spinner>
<textview android:layout_height="wrap_content" android:layout_width="wrap_content" android:textsize="20sp" android:layout_margintop="5dp" android:id="@+id/TextView02"></textview>
</linearlayout>
3、在MainHeloSqlite.java的同目录中新建一个数据库操作辅助类 DbHelper.java,内容如下:
package android.basic.lesson15;
import android.content.Context;
import android.database.sqlite.SQLiteDatabase;
import android.database.sqlite.SQLiteDatabase.CursorFactory;
import android.database.sqlite.SQLiteOpenHelper;
public class DbHelper extends SQLiteOpenHelper {
public DbHelper(Context context, String name, CursorFactory factory,
int version) {
super(context, name, factory, version);
}
//辅助类建立时运行该方法
@Override
public void onCreate(SQLiteDatabase db) {
String sql = "CREATE TABLE pic (_id INTEGER PRIMARY KEY AUTOINCREMENT NOT NULL , fileName VARCHAR, description VARCHAR)";
db.execSQL(sql);
}
@Override
public void onUpgrade(SQLiteDatabase db, int oldVersion, int newVersion) {
}
}
4、MainHelloSqlite.java的内容如下:
package android.basic.lesson15;
import android.app.Activity;
import android.content.ContentValues;
import android.database.Cursor;
import android.database.sqlite.SQLiteDatabase;
import android.os.Bundle;
import android.view.View;
import android.view.View.OnClickListener;
import android.widget.AdapterView;
import android.widget.AdapterView.OnItemSelectedListener;
import android.widget.Button;
import android.widget.SimpleCursorAdapter;
import android.widget.Spinner;
import android.widget.TextView;
import android.widget.Toast;
public class MainHelloSqlite extends Activity {
//SQLiteDatabase对象
SQLiteDatabase db;
//数据库名
public String db_name = "gallery.sqlite";
//表名
public String table_name = "pic";
//辅助类名
final DbHelper helper = new DbHelper(this, db_name, null, 1);
/** Called when the activity is first created. */
@Override
public void onCreate(Bundle savedInstanceState) {
super.onCreate(savedInstanceState);
setContentView(R.layout.main);
//UI组件
Button b1 = (Button) findViewById(R.id.Button01);
Button b2 = (Button) findViewById(R.id.Button02);
Button b3 = (Button) findViewById(R.id.Button03);
Button b4 = (Button) findViewById(R.id.Button04);
//从辅助类获得数据库对象
db = helper.getWritableDatabase();
//初始化数据
initDatabase(db);
//更新下拉列表中的数据
updateSpinner();
//定义按钮点击监听器
OnClickListener ocl = new OnClickListener() {
@Override
public void onClick(View v) {
//ContentValues对象
ContentValues cv = new ContentValues();
switch (v.getId()) {
//添加按钮
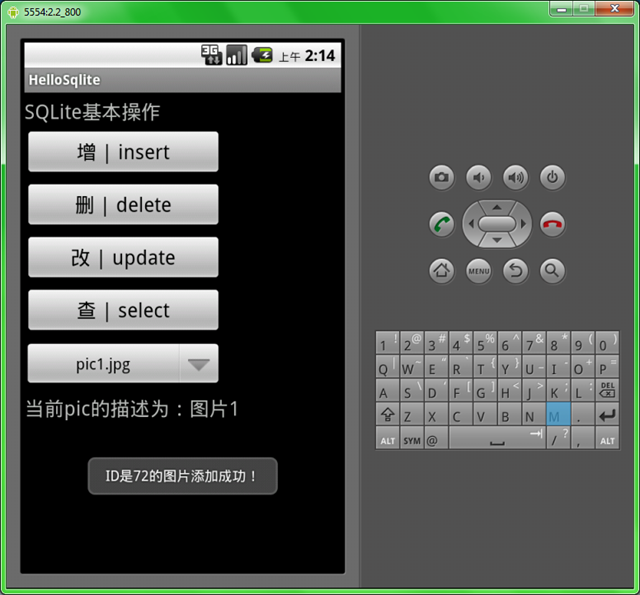
case R.id.Button01:
cv.put("fileName", "pic5.jpg");
cv.put("description", "图片5");
//添加方法
long long1 = db.insert("pic", "", cv);
//添加成功后返回行号,失败后返回-1
if (long1 == -1) {
Toast.makeText(MainHelloSqlite.this,
"ID是" + long1 + "的图片添加失败!", Toast.LENGTH_SHORT)
.show();
} else {
Toast.makeText(MainHelloSqlite.this,
"ID是" + long1 + "的图片添加成功!", Toast.LENGTH_SHORT)
.show();
}
//更新下拉列表
updateSpinner();
break;
//删除描述是'图片5'的数据行
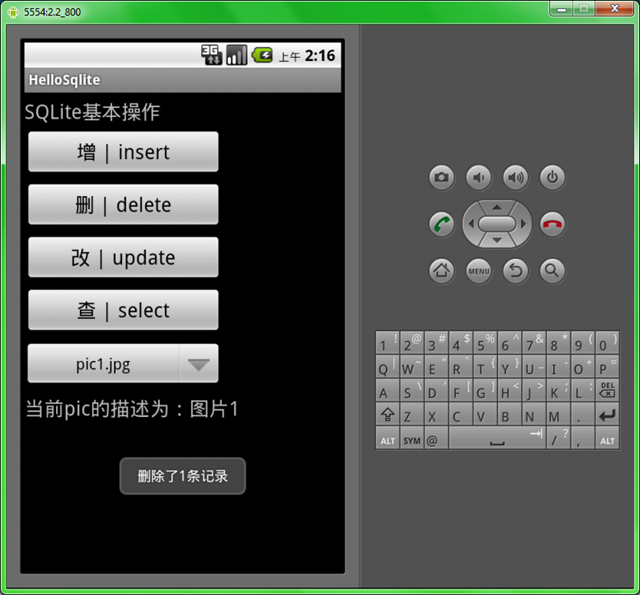
case R.id.Button02:
//删除方法
long long2 = db.delete("pic", "description='图片5'", null);
//删除失败返回0,成功则返回删除的条数
Toast.makeText(MainHelloSqlite.this, "删除了" + long2 + "条记录",
Toast.LENGTH_SHORT).show();
//更新下拉列表
updateSpinner();
break;
//更新文件名是'pic5.jpg'的数据行
case R.id.Button03:
cv.put("fileName", "pic0.jpg");
cv.put("description", "图片0");
//更新方法
int long3 = db.update("pic", cv, "fileName='pic5.jpg'", null);
//删除失败返回0,成功则返回删除的条数
Toast.makeText(MainHelloSqlite.this, "更新了" + long3 + "条记录",
Toast.LENGTH_SHORT).show();
//更新下拉列表
updateSpinner();
break;
//查询当前所有数据
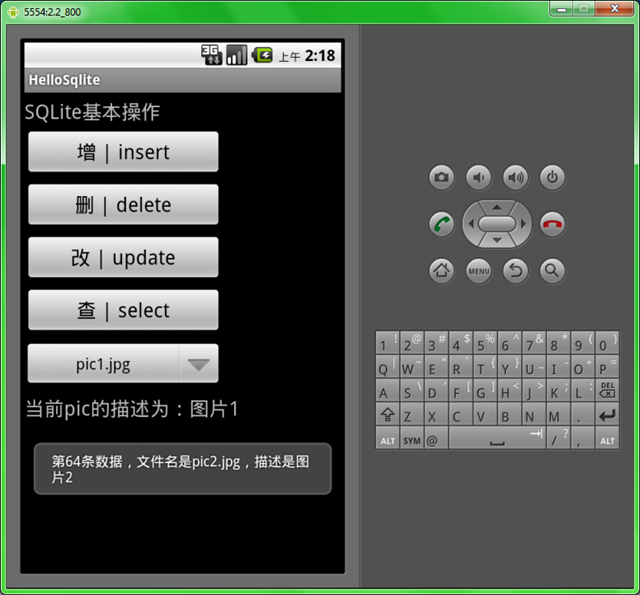
case R.id.Button04:
Cursor c = db.query("pic", null, null, null, null,
null, null);
//cursor.getCount()是记录条数
Toast.makeText(MainHelloSqlite.this,
"当前共有" + c.getCount() + "条记录,下面一一显示:",
Toast.LENGTH_SHORT).show();
//循环显示
for(c.moveToFirst();!c.isAfterLast();c.moveToNext()){
Toast.makeText(MainHelloSqlite.this,
"第"+ c.getInt(0) +"条数据,文件名是" + c.getString(1) + ",描述是"+c.getString(2),
Toast.LENGTH_SHORT).show();
}
//更新下拉列表
updateSpinner();
break;
}
}
};
//给按钮绑定监听器
b1.setOnClickListener(ocl);
b2.setOnClickListener(ocl);
b3.setOnClickListener(ocl);
b4.setOnClickListener(ocl);
}
//初始化表
public void initDatabase(SQLiteDatabase db) {
ContentValues cv = new ContentValues();
cv.put("fileName", "pic1.jpg");
cv.put("description", "图片1");
db.insert(table_name, "", cv);
cv.put("fileName", "pic2.jpg");
cv.put("description", "图片2");
db.insert(table_name, "", cv);
cv.put("fileName", "pic3.jpg");
cv.put("description", "图片3");
db.insert(table_name, "", cv);
cv.put("fileName", "pic4.jpg");
cv.put("description", "图片4");
db.insert(table_name, "", cv);
}
//更新下拉列表
public void updateSpinner() {
//定义UI组件
final TextView tv = (TextView) findViewById(R.id.TextView02);
Spinner s = (Spinner) findViewById(R.id.Spinner01);
//从数据库中获取数据放入游标Cursor对象
final Cursor cursor = db.query("pic", null, null, null, null, null,
null);
//创建简单游标匹配器
SimpleCursorAdapter adapter = new SimpleCursorAdapter(this,
android.R.layout.simple_spinner_item, cursor, new String[] {
"fileName", "description" }, new int[] {
android.R.id.text1, android.R.id.text2 });
adapter.setDropDownViewResource(android.R.layout.simple_spinner_dropdown_item);
//给下拉列表设置匹配器
s.setAdapter(adapter);
//定义子元素选择监听器
OnItemSelectedListener oisl = new OnItemSelectedListener() {
@Override
public void onItemSelected(AdapterView<?> parent, View view,
int position, long id) {
cursor.moveToPosition(position);
tv.setText("当前pic的描述为:" + cursor.getString(2));
}
@Override
public void onNothingSelected(AdapterView<?> parent) {
}
};
//给下拉列表绑定子元素选择监听器
s.setOnItemSelectedListener(oisl);
}
//窗口销毁时删除表中数据
@Override
public void onDestroy() {
super.onDestroy();
db.delete(table_name, null, null);
updateSpinner();
}
}
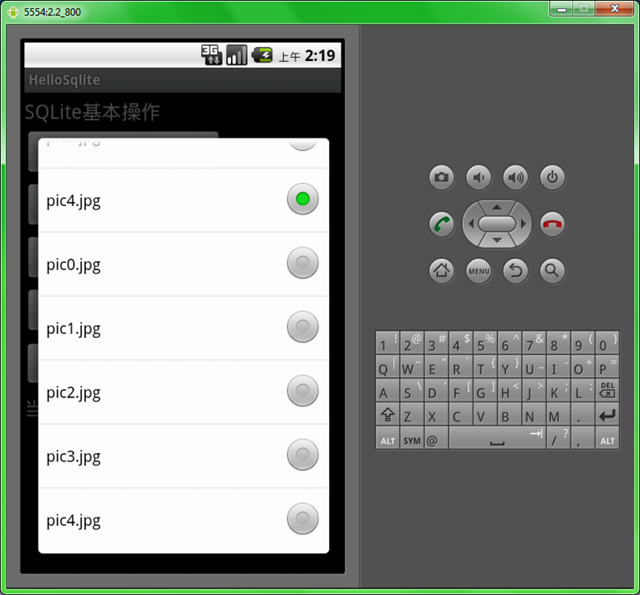
5、运行程序,查看结果:
本例使用的是SQLiteDatabase已经封装好的insert,delete,update,query方法,感兴趣的同学可以用SQLiteDatabase的execSQL()方法和rawQuery()方法来实现。好本讲就到这里。
您可能感兴趣的文章:

- Windows Forms 实现安全的多线程详解(附带程序代码示例)
- Java中的Drag and Drop详解与代码示例
- PCA 降维算法详解 以及代码示例
- DOM4J介绍与代码示例(2)-XPath 详解
- XPath详解及Java示例代码
- [原创] Windows Forms 实现安全的多线程详解(附带程序代码示例)
- [置顶]打log的方式检查程序里面的问题 及示例代码 详解
- 详解异步式(Asynchronous)IO与同步式Synchronous)IO,NodeJS代码示例
- Linux input 子系统详解与代码示例
- Android进步之路二:进度对话框的示例代码以及详解
- Windows Forms 实现安全的多线程详解(附带程序代码示例) (摘自网络)
- JDK6.0新特性详解与代码示例
- Struts1.2+Spring1.2+HIbernate3.1整合示例代码详解(三)
- PCA 降维算法详解 以及代码示例
- linux下的内存映射函数mmap详解及示例代码
- JDK1.6.0新特性详解与代码示例
- Struts1.2+Spring1.2+HIbernate3.1整合示例代码详解(二)
- Java中的Drag and Drop详解与代码示例
- JDK1.6.0新特性详解与代码示例 - 徐明明的博客 - CSDNBlog
- Hadoop RCFile存储格式详解(源码分析、代码示例)