Stingray Traffic Manager10.0 安装
2016-08-05 12:56
363 查看


一、Stingray Traffic Manager10.0 安装:
1.解压缩:
tar -zxvf ZeusTM_100r1_Linux-x86_64.tgz
./zinstall
2.同意license输入“accept”
Enter `accept' to accept this license, or press return to abort:
accept
3.这里更改安装路径:(如果不需要更改就回车默认)
Where should the product be installed? [/usr/local/zeus]:
/usr/local/software/zeus
4.是否初始化配置:(输入“y”是)
Are you ready to perform the initial configuration now ? (Y/N) [Y]:
y
5.如遇此选择,选1
This traffic manager is currently called 'Serverone.Technical' which resolves
to '180.168.41.175', not found in the raised IP addresses: '192.168.60.86'.
Would you like to
1. Keep the current traffic manager name (default)
2. Specify a new resolvable hostname
3. Use an IP address instead of a hostname
Choose option [1]: 1
6.默认回车就好:
Choose a UNIX user for the zxtm process to run as [nobody]:
Would you like to restrict Stingray Traffic Manager management to one IP? Y/N
:
7.输入可用IP地址:(即安装此软件的本机ip地址)
Please enter the IP address to use:192.168.60.86
8.确认重启生效:
Would you like Stingray Traffic Manager to start at boot time? Y/N [Y]:
y
9.看到下面的信息,就表示安装成功了:
Configuration successful
Starting Stingray Traffic Manager Software... OK
10.选择C
You may choose to manually specify a different machine to contact
or create a new cluster
C) Create a new cluster
S) Specify another machine to contact
R) Refresh the cluster list
Select option [C]: c
11.为账户admin输入两次密码(web页面的登录账号和密码)
Please choose a password for the admin server:
Re-enter:
12.关闭防火墙
service iptables stop
现在就可以正常访问Stingray Traffic Manager了:
在浏览器输入: https://192.168.60.86:9090 就可以看到如下的界面:

13.当登录以上界面以后,会出现到Home首页,会要求认证:
那么接下来就使用keygen.elf开始生成授权码:

[root@Serverone ~]# ./keygen.elf -m 00:0C:19:42:B0:C9
-----BEGIN ZEUS LICENSE-----
k0QV2QqSwc7qSHjpnfuUmYKn+LS2MiOQD07ygLir+ll2AhZnSnyZDG810HI79zL6
QTaVZ9G5oiLF97xXvhfmSodnZXwSxnPFBx8mX6bC7qHxQTV4WYQuzmsmrhAGiQTV
PO8o+Oc3R8wF+vk5C2M5EQTNh6/aeHi1nqjfqSOhyQRPZTXyc1PuQ6wNBGy16A1+
Mowkz6mGwzntQO9Ljfo0LTFt3hZ57UCBvYvuu4z3r1jin1QqfTkbc5dcuYtY0PtO
TTg3P6UZsLPgfQT6e6P71gA=
-----END ZEUS LICENSE-----
中间的这一部分就是生成的授权码了。
14.将上面的中间部分的授权码复制出来,黏贴到桌面上新建的txt文本内。
然后在认证的界面选择“install key”
随后就会认证成功啦。如下所示:

二、安装后的初步配置:
因为在实际应用的过程中,一个服务会有多个节点,而通过STM可以给这些节点来实现负载均衡功能,故而在STM里面就有了pools节点池和virtual server虚拟服务。
Virtual server
是虚拟服务器,负责对外提供访问的端口。
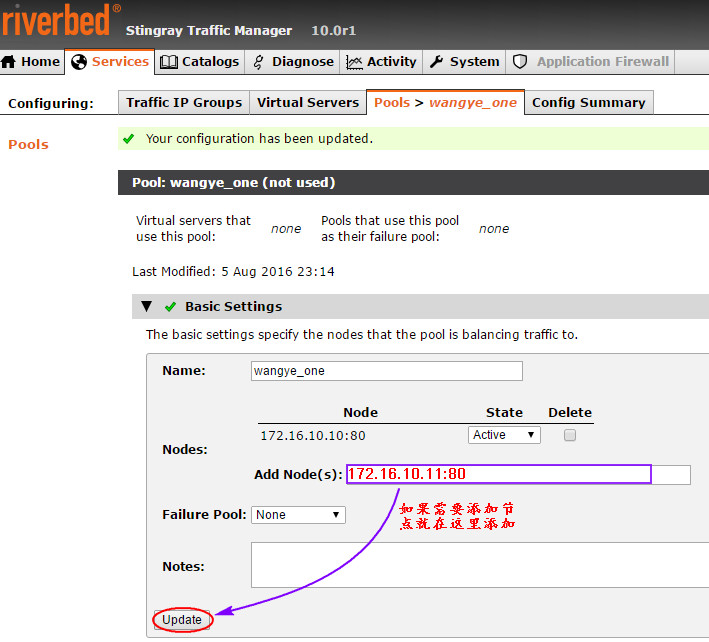
Pools
是节点池,里面存放对内的节点地址和端口号。
如下图所示:

而建立的时候,就这样去建立就可以了。建议virtual server和pools的名称一致,方便使用过程中的对应查找。

注意:
如果勾选了:Use autoscaling for the nodes in this pool
会再次弹出界面:

,需要进行弹性设定,如果选择默认直接“Update”,那么在后面建立成功后的节电池界面不可以再添加节点,因
为“You cannot add ordelete nodes in pools with Autoscaling enabled.”所以如果需要添加多节点,就不能勾选伸缩节点池。
然后建立virtual server:

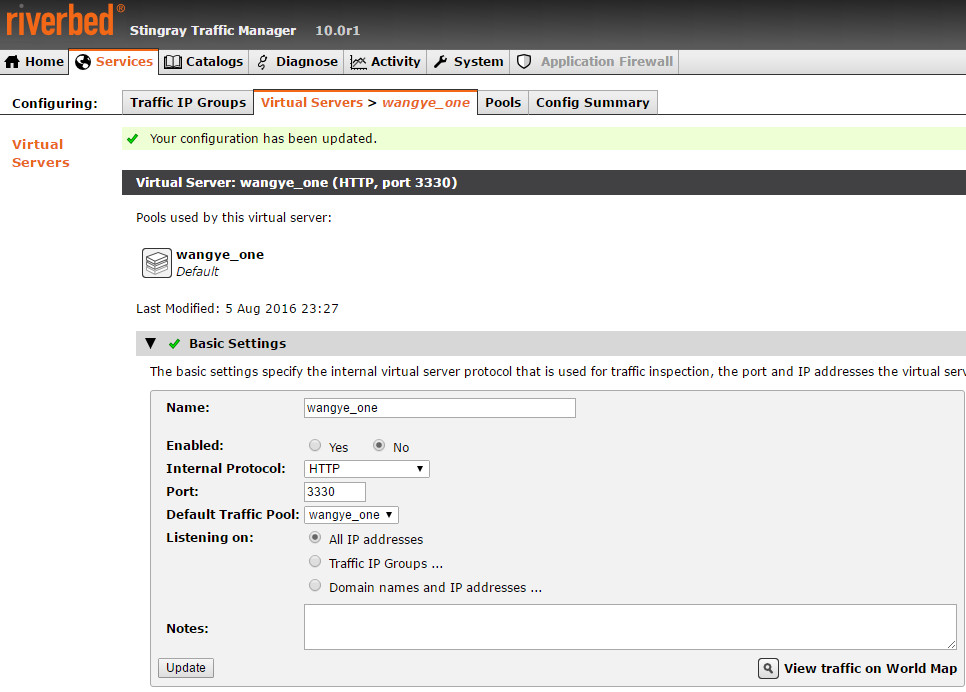
到现在为止,virtual server和pool已经建立好了,但是如果没有启用,那么就是灰色的,像下面这样:


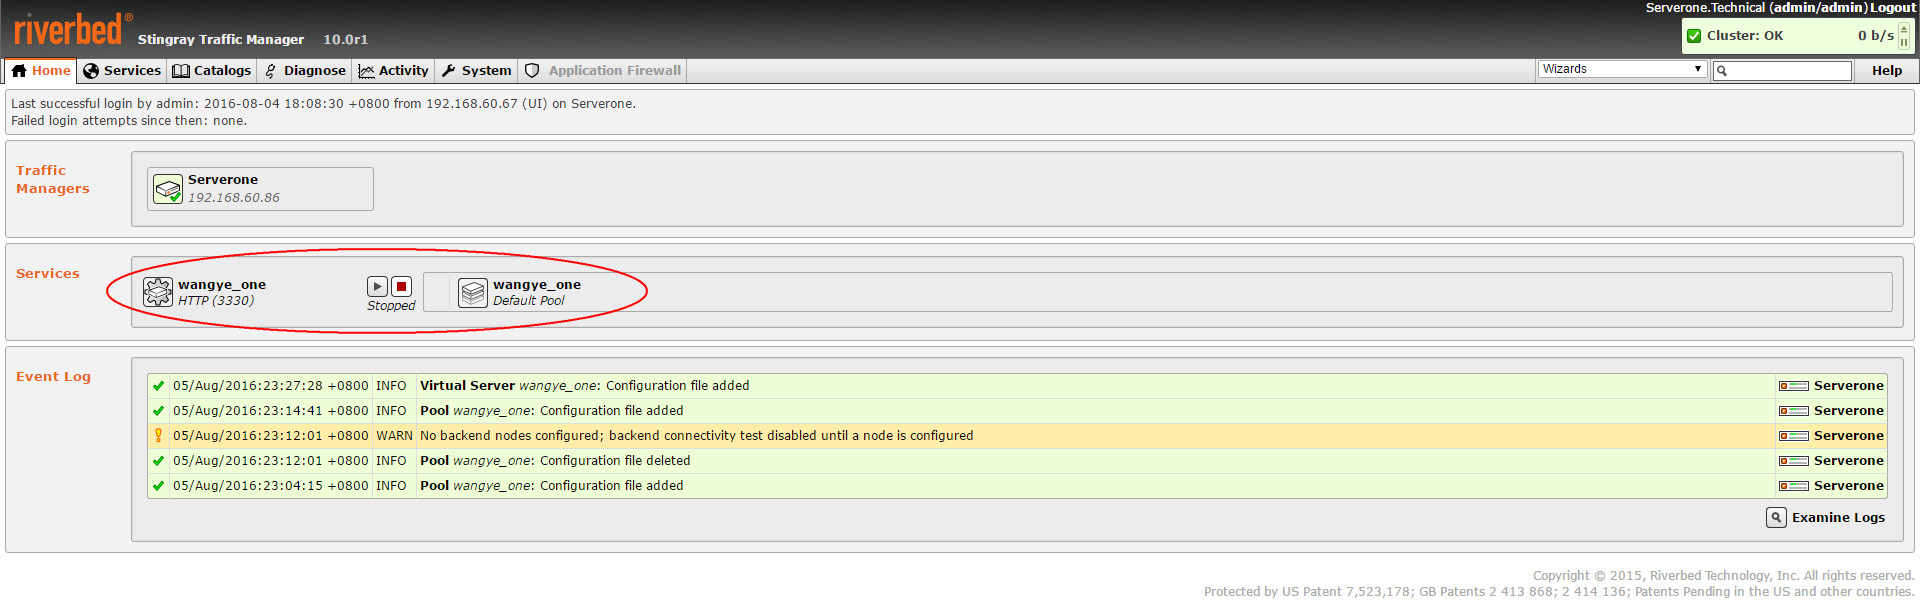
因为这里后面的没有可用的服务器,所以就不开启了,而开启的办法就是在virtual server或者pool的“Enabled”后选择“yes”
这样一个一个的去开启或者直接点选上图中的"

"也可以开启。
以上就是初步的配置了。
后续还会有详细的配置。

相关文章推荐
- linux服务器之LVS、Nginx和HAProxy负载均衡器对比总结
- STM32F4xx那点事(一)——“No Target Connected”解决方法
- CISCO CPOS STM配置示例
- 谈谈STM32F051的 ADC DMA用法
- HAproxy采用粘滞会话吗?
- 如何使用负载均衡设备防御攻击 推荐
- LYNC 2010的DNS负载均衡研究 推荐
- 几个负载均衡器的小结 推荐
- Nginx+Keepalived 做负载均衡器
- 监控Nginx负载均衡器脚本
- 服务器负载均衡算法 推荐
- LVS负载均衡器
- stm32 DMX512核心代码
- STM32F407应用笔记--使用之前的体会
- 一些开发资源的下载地址
- 数据库水平切分的实现原理解析——分库,分表,主从,集群,负载均衡器(转)
- 数据库水平切分实现原理——分库,分表,主从,集群,负载均衡器
- sfr与sbit的理解,及单片机中断
- 工程模板的创建步骤
- Doctor ANS为服务器健康保驾护航!