NGINX网站服务-LNMP平台及应用
2016-07-29 19:28
489 查看
实验需求:
LNMP实现多个虚拟主机,部署wordpress和phpmyadmin,并为phpmyadmin提供https
实验环境:
LNMP CentOS 7.2x86_64 IP:172.16.251.138
测试端 CentOS 6.7x86_64 IP:172.16.251.164
软件包:
initial-setup-ks.cfg
mariadb-5.5.46-linux-x86_64.tar.gz
nginx-1.10.0.tar.gz
php-5.4.26.tar.bz2
phpMyAdmin-4.4.14.1-all-languages.zip
wordpress-4.3.1-zh_CN.zip
实验准备:
安装开发包组,支持软件,解决依赖关系
[root@station138 ~]# iptables -F
[root@station138 ~]# setenforce 0
[root@station138 ~]# yum groupinstall"Development Tools" "Server Platform Development"
[root@station138 ~]# yum -y installpcre-devel openssl-devel zlib-devel
编译安装nginx:
[root@station138 ~]# tar xfnginx-1.10.0.tar.gz
1.创建程序用户:
[root@station138 nginx-1.10.0]# useradd -rnginx
2.进入目录开始编译:
[root@station138 nginx-1.10.0]# ./configure--prefix=/usr/local/nginx --sbin-path=/usr/sbin/nginx--conf-path=/etc/nginx/nginx.conf --error-log-path=/var/log/nginx/error.log--http-log-path=/var/log/nginx/access.log --pid-path=/var/run/nginx.pid--lock-path=/var/run/nginx.lock --user=nginx --group=nginx --with-http_ssl_module --with-http_v2_module--with-http_dav_module --with-http_stub_status_module --with-threads--with-file-aio
[root@station138 nginx-1.10.0]# make&& make install
3.检查配置文件:
[root@station138 nginx-1.10.0]# nginx -t
nginx: the configuration file
/etc/nginx/nginx.conf syntax is ok
nginx: configuration file /etc/nginx/nginx.conf
test is successful
4.启动服务:
[root@station138 nginx-1.10.0]# nginx
[root@station138 nginx-1.10.0]# netstat-anpt |grep nginx
tcp 0 0 0.0.0.0:80 0.0.0.0:* LISTEN 38873/nginx: master
5.创建虚拟主机:
[root@station138 ~]# mkdir -pv
/var/www/v{1,2}
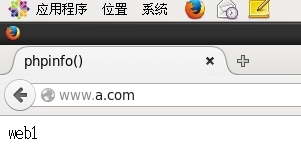
[root@station138 ~]# echo "web1"
>> /var/www/v1/index.html
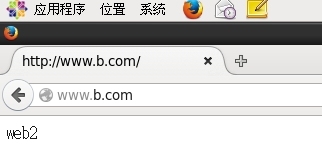
[root@station138 ~]# echo "web2"
>> /var/www/v2/index.html
[root@station138 ~]# vim/etc/nginx/nginx.conf
server {
listen 80;
server_name www.a.com;
location / {
root /var/www/v1;
index index.php index.htmlindex.htm;
}
}
server {
listen 80;
server_name www.b.com;
location / {
root /var/www/v2;
index index.php index.html index.htm;
}
}
[root@station138 ~]# nginx -s reload
6.客户端测试:
二进制安装mariadb:
1.建立mysql系统用户[root@station138~]# useradd -r -M mysql2.建立数据存放的目录[root@station138~]# mkdir -p /testdir/mydata[root@station138~]# chown -R mysql.mysql /testdir/mydata3.解压mariadb安装包[root@station138 ~]#tar xf mariadb-5.5.46-linux-x86_64.tar.gz -C /usr/local[root@station138~]# ln -sv /usr/local/mariadb-5.5.46-linux-x86_64/ mysql [root@station138~]# chown -R root.mysql /usr/local/mysql/*4.使用scripts脚本文件mysql_install_db文件来安装数据库[root@station138mysql]# scripts/mysql_install_db --user=mysql --datadir=/testdir/mydata5.提供配置文件[root@station138mysql]# cp support-files/my-large.cnf /etc/my.cnf[root@station138mysql]# vim /etc/my.cnfdatadir=/testdir/mydata //指明mysql的数据存放路径innodb_file_per_table = ON //成为独立表空间skip_name_resolve = ON //跳过名称解析6.提供mysql服务启动脚本[root@station138 support-files]# cp mysql.server /etc/rc.d/init.d/mysqld [root@station138 support-files]# chkconfig --add mysqld7.添加环境变量[root@station138 ~]# vim /etc/profile.d/mysql.sh export PATH=/usr/local/mysql/bin:$PATH[root@station138 ~]# source /etc/profile.d/mysql.sh8.导出头文件,导出库文件:[root@station138 ~]#ln -s /usr/local/include/ /usr/include/mysql [root@station138 ~]#vim /etc/ld.so.conf.d/mysql.conf9.启动服务[root@station138 ~]# systemctl start mysqld [root@station138 ~]# ss -tnl LISTEN 0 50 *:3306 *:*
源代码安装PHP:
1.安装支持软件,解决依赖关系:
[root@station138 ~]# yum -y install bzip2-devel libmcrypt-devel libxml2-devel openssl-devel
2.编译php[root@station138 php-5.4.26]# ./configure\ --prefix=/usr/local/php --with-openssl --with-mysql=mysqlnd--with-config-file-path=/etc --with-config-file-scan-dir=/etc/php.d --with-bz2[root@station138 php-5.4.26]# make && make install3.php提供配置文件[root@station138 php-5.4.26]# cp php.ini-production /etc/php.ini4.提供php-fpm脚本
[root@station138 php-5.4.26]# chkconfig --add php-fpm5.提供php-fpm配置文件
[root@station138 php-5.4.26]# cp etc/php-fpm.conf.default etc/php-fpm.conf6.启动服务LISTEN 0 128 127.0.0.1:9000 *:*7.配置nginx支持php解析:
[root@station138 ~]# vim/etc/nginx/nginx.conf
server {
listen 80;
server_name www.a.com;
location / {
root /var/www/v1;
index index.php index.html index.htm;
}
error_page 500 502 503 504 /50x.html;
location = /50x.html {
root html;
}
location ~ \.php$ {
root /var/www/v1;
fastcgi_pass 127.0.0.1:9000;
fastcgi_index index.php;
fastcgi_param SCRIPT_FILENAME /var/www/v1/$fastcgi_script_name;
include fastcgi_params;
}
}
server {
listen 80;
server_name www.b.com;
location / {
root /var/www/v2;
index index.php index.html index.htm;
}
location ~ \.php$ {
root /var/www/v2;
fastcgi_pass 127.0.0.1:9000;
fastcgi_index index.php;
fastcgi_param SCRIPT_FILENAME /var/www/v2/$fastcgi_script_name;
include fastcgi_params;
}
}
[root@station138 ~]# nginx -s reload
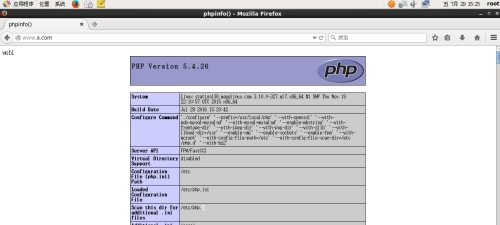
8.客户端测试php:
9.创建数据库,授权用户
[root@station138 nginx]# mysql -uroot –p
MariaDB [(none)]> create database wpdb;
Query OK, 1 row affected (0.00 sec)
MariaDB [(none)]> grant all on wpdb.* to
'wpuser'@'172.16.%.%' identified by 'wp123';
Query OK, 0 rows affected (0.14 sec)
MariaDB [(none)]> create database pma;
Query OK, 1 row affected (0.00 sec)
MariaDB [(none)]> grant all on pma.* to
'pmauser'@'172.16.%.%' identified by 'pma123';
Query OK, 0 rows affected (0.00 sec)
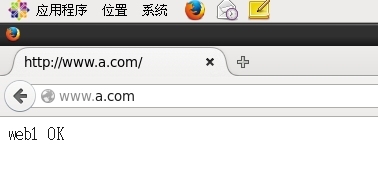
10.测试mysql-php:
[root@station138 ssl]# cat /var/www/v1/index.php
web1
<?php
$link = mysql_connect('localhost','root','123456');
if($link)
echo "OK";
else
echo "no";
?>
部署应用:
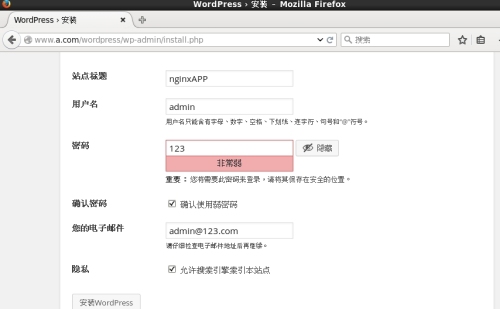
1.部署wordpress:
[root@station138 ~]# unzip
wordpress-4.3.1-zh_CN.zip
[root@station138 ~]# mv wordpress
/var/www/v1/
[root@station138 wordpress]# mv
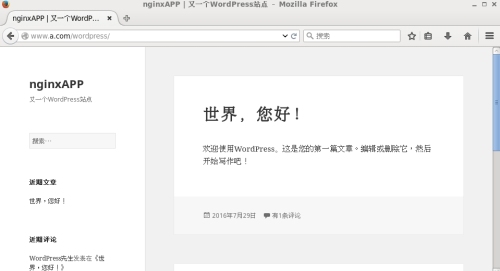
wp-config-sample.php wp-config.phpdefine('DB_HOST', '172.16.251.138');2.部署phpMyAdmin:
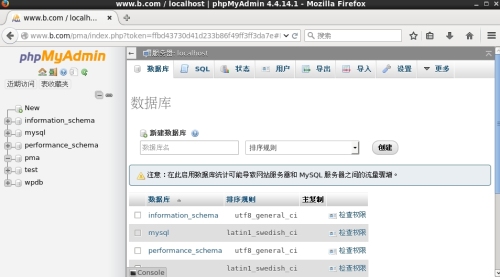
$cfg['Servers'][$i]['password'] = 'pma123';3.客户端测试应用:
为phpmyadmin提供https:
1.生成私钥:
[root@station138 CA]# (umask 077; opensslgenrsa -out private/cakey.pem 2048)
2.生成自签证书:
[root@station138 CA]# openssl req -new-x509 -key private/cakey.pem -out cacert.pem
Country Name (2 letter code) [XX]:CN
State or Province Name (full name) []:bj
Locality Name (eg, city) [Default City]:bj
Organization Name (eg, company) [DefaultCompany Ltd]:yw
Organizational Unit Name (eg, section)[]:Ops
Common Name (eg, your name or your server'shostname) []:www.b.com
Email Address []:admin@b.com
3.提供辅助文件[root@station138 CA]#touch index.txt[root@station138 CA]#echo 01 > serial4.生成私钥:
[root@station138 ssl]# (umask 077; openssl genrsa -out nginx.key1024)
5.生成证书请求:
[root@station138 ssl]# openssl req -new -key nginx.key -outnginx.csr
Country Name (2 letter code) [XX]:CN
State or Province Name (full name) []:bj
Locality Name (eg, city) [Default City]:bj
Organization Name (eg, company) [DefaultCompany Ltd]:yw
Organizational Unit Name (eg, section)[]:Ops
Common Name (eg, your name or your server'shostname) []:www.b.com
Email Address []:admin@b.com
Please enter the following 'extra'attributes
to be sent with your certificate request
A challenge password []:
An optional company name []:
6.签发证书:
[root@station138 ssl]# openssl ca -in /testdir/nginx.csr -out/etc/pki/CA/certs/nginx.crt
[root@station138 ssl]# cp/etc/pki/CA/certs/nginx.crt /etc/nginx/ssl/
7.修改nginx配置文件,添加支持ssl:
[root@station138 ~]# vim /etc/nginx/nginx.conf
server {
listen 443 ssl;
server_name localhost;
ssl_certificate /etc/nginx/ssl/nginx.crt;
ssl_certificate_key /etc/nginx/ssl/nginx.key;
ssl_session_cache shared:SSL:1m;
ssl_session_timeout 5m;
ssl_ciphers HIGH:!aNULL:!MD5;
ssl_prefer_server_ciphers on;
location / {
root html;
index index.php index.html index.htm;
}
}
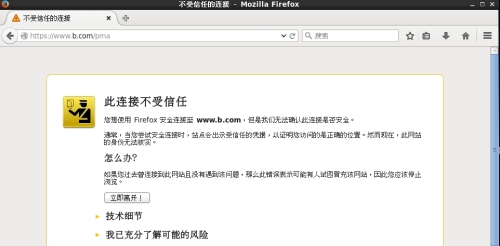
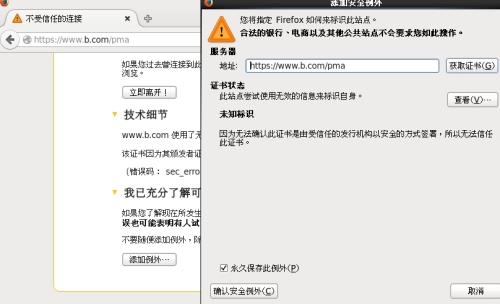
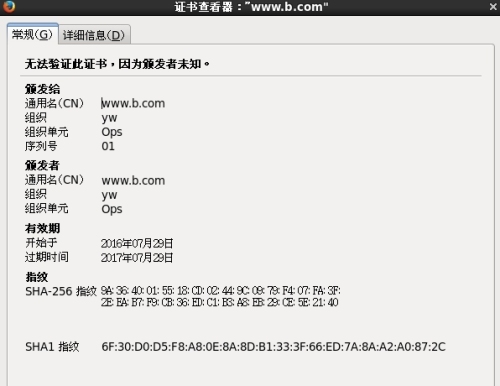
8.测试https:
LNMP实现多个虚拟主机,部署wordpress和phpmyadmin,并为phpmyadmin提供https
实验环境:
LNMP CentOS 7.2x86_64 IP:172.16.251.138
测试端 CentOS 6.7x86_64 IP:172.16.251.164
软件包:
initial-setup-ks.cfg
mariadb-5.5.46-linux-x86_64.tar.gz
nginx-1.10.0.tar.gz
php-5.4.26.tar.bz2
phpMyAdmin-4.4.14.1-all-languages.zip
wordpress-4.3.1-zh_CN.zip
实验准备:
安装开发包组,支持软件,解决依赖关系
[root@station138 ~]# iptables -F
[root@station138 ~]# setenforce 0
[root@station138 ~]# yum groupinstall"Development Tools" "Server Platform Development"
[root@station138 ~]# yum -y installpcre-devel openssl-devel zlib-devel
编译安装nginx:
[root@station138 ~]# tar xfnginx-1.10.0.tar.gz
1.创建程序用户:
[root@station138 nginx-1.10.0]# useradd -rnginx
2.进入目录开始编译:
[root@station138 nginx-1.10.0]# ./configure--prefix=/usr/local/nginx --sbin-path=/usr/sbin/nginx--conf-path=/etc/nginx/nginx.conf --error-log-path=/var/log/nginx/error.log--http-log-path=/var/log/nginx/access.log --pid-path=/var/run/nginx.pid--lock-path=/var/run/nginx.lock --user=nginx --group=nginx --with-http_ssl_module --with-http_v2_module--with-http_dav_module --with-http_stub_status_module --with-threads--with-file-aio
[root@station138 nginx-1.10.0]# make&& make install
3.检查配置文件:
[root@station138 nginx-1.10.0]# nginx -t
nginx: the configuration file
/etc/nginx/nginx.conf syntax is ok
nginx: configuration file /etc/nginx/nginx.conf
test is successful
4.启动服务:
[root@station138 nginx-1.10.0]# nginx
[root@station138 nginx-1.10.0]# netstat-anpt |grep nginx
tcp 0 0 0.0.0.0:80 0.0.0.0:* LISTEN 38873/nginx: master
5.创建虚拟主机:
[root@station138 ~]# mkdir -pv
/var/www/v{1,2}
[root@station138 ~]# echo "web1"
>> /var/www/v1/index.html
[root@station138 ~]# echo "web2"
>> /var/www/v2/index.html
[root@station138 ~]# vim/etc/nginx/nginx.conf
server {
listen 80;
server_name www.a.com;
location / {
root /var/www/v1;
index index.php index.htmlindex.htm;
}
}
server {
listen 80;
server_name www.b.com;
location / {
root /var/www/v2;
index index.php index.html index.htm;
}
}
[root@station138 ~]# nginx -s reload
6.客户端测试:
二进制安装mariadb:
1.建立mysql系统用户[root@station138~]# useradd -r -M mysql2.建立数据存放的目录[root@station138~]# mkdir -p /testdir/mydata[root@station138~]# chown -R mysql.mysql /testdir/mydata3.解压mariadb安装包[root@station138 ~]#tar xf mariadb-5.5.46-linux-x86_64.tar.gz -C /usr/local[root@station138~]# ln -sv /usr/local/mariadb-5.5.46-linux-x86_64/ mysql [root@station138~]# chown -R root.mysql /usr/local/mysql/*4.使用scripts脚本文件mysql_install_db文件来安装数据库[root@station138mysql]# scripts/mysql_install_db --user=mysql --datadir=/testdir/mydata5.提供配置文件[root@station138mysql]# cp support-files/my-large.cnf /etc/my.cnf[root@station138mysql]# vim /etc/my.cnfdatadir=/testdir/mydata //指明mysql的数据存放路径innodb_file_per_table = ON //成为独立表空间skip_name_resolve = ON //跳过名称解析6.提供mysql服务启动脚本[root@station138 support-files]# cp mysql.server /etc/rc.d/init.d/mysqld [root@station138 support-files]# chkconfig --add mysqld7.添加环境变量[root@station138 ~]# vim /etc/profile.d/mysql.sh export PATH=/usr/local/mysql/bin:$PATH[root@station138 ~]# source /etc/profile.d/mysql.sh8.导出头文件,导出库文件:[root@station138 ~]#ln -s /usr/local/include/ /usr/include/mysql [root@station138 ~]#vim /etc/ld.so.conf.d/mysql.conf9.启动服务[root@station138 ~]# systemctl start mysqld [root@station138 ~]# ss -tnl LISTEN 0 50 *:3306 *:*
源代码安装PHP:
1.安装支持软件,解决依赖关系:
[root@station138 ~]# yum -y install bzip2-devel libmcrypt-devel libxml2-devel openssl-devel
2.编译php[root@station138 php-5.4.26]# ./configure\ --prefix=/usr/local/php --with-openssl --with-mysql=mysqlnd--with-config-file-path=/etc --with-config-file-scan-dir=/etc/php.d --with-bz2[root@station138 php-5.4.26]# make && make install3.php提供配置文件[root@station138 php-5.4.26]# cp php.ini-production /etc/php.ini4.提供php-fpm脚本
[root@station138 php-5.4.26]# chkconfig --add php-fpm5.提供php-fpm配置文件
[root@station138 php-5.4.26]# cp etc/php-fpm.conf.default etc/php-fpm.conf6.启动服务LISTEN 0 128 127.0.0.1:9000 *:*7.配置nginx支持php解析:
[root@station138 ~]# vim/etc/nginx/nginx.conf
server {
listen 80;
server_name www.a.com;
location / {
root /var/www/v1;
index index.php index.html index.htm;
}
error_page 500 502 503 504 /50x.html;
location = /50x.html {
root html;
}
location ~ \.php$ {
root /var/www/v1;
fastcgi_pass 127.0.0.1:9000;
fastcgi_index index.php;
fastcgi_param SCRIPT_FILENAME /var/www/v1/$fastcgi_script_name;
include fastcgi_params;
}
}
server {
listen 80;
server_name www.b.com;
location / {
root /var/www/v2;
index index.php index.html index.htm;
}
location ~ \.php$ {
root /var/www/v2;
fastcgi_pass 127.0.0.1:9000;
fastcgi_index index.php;
fastcgi_param SCRIPT_FILENAME /var/www/v2/$fastcgi_script_name;
include fastcgi_params;
}
}
[root@station138 ~]# nginx -s reload
8.客户端测试php:
9.创建数据库,授权用户
[root@station138 nginx]# mysql -uroot –p
MariaDB [(none)]> create database wpdb;
Query OK, 1 row affected (0.00 sec)
MariaDB [(none)]> grant all on wpdb.* to
'wpuser'@'172.16.%.%' identified by 'wp123';
Query OK, 0 rows affected (0.14 sec)
MariaDB [(none)]> create database pma;
Query OK, 1 row affected (0.00 sec)
MariaDB [(none)]> grant all on pma.* to
'pmauser'@'172.16.%.%' identified by 'pma123';
Query OK, 0 rows affected (0.00 sec)
10.测试mysql-php:
[root@station138 ssl]# cat /var/www/v1/index.php
web1
<?php
$link = mysql_connect('localhost','root','123456');
if($link)
echo "OK";
else
echo "no";
?>
部署应用:
1.部署wordpress:
[root@station138 ~]# unzip
wordpress-4.3.1-zh_CN.zip
[root@station138 ~]# mv wordpress
/var/www/v1/
[root@station138 wordpress]# mv
wp-config-sample.php wp-config.phpdefine('DB_HOST', '172.16.251.138');2.部署phpMyAdmin:
$cfg['Servers'][$i]['password'] = 'pma123';3.客户端测试应用:
为phpmyadmin提供https:
1.生成私钥:
[root@station138 CA]# (umask 077; opensslgenrsa -out private/cakey.pem 2048)
2.生成自签证书:
[root@station138 CA]# openssl req -new-x509 -key private/cakey.pem -out cacert.pem
Country Name (2 letter code) [XX]:CN
State or Province Name (full name) []:bj
Locality Name (eg, city) [Default City]:bj
Organization Name (eg, company) [DefaultCompany Ltd]:yw
Organizational Unit Name (eg, section)[]:Ops
Common Name (eg, your name or your server'shostname) []:www.b.com
Email Address []:admin@b.com
3.提供辅助文件[root@station138 CA]#touch index.txt[root@station138 CA]#echo 01 > serial4.生成私钥:
[root@station138 ssl]# (umask 077; openssl genrsa -out nginx.key1024)
5.生成证书请求:
[root@station138 ssl]# openssl req -new -key nginx.key -outnginx.csr
Country Name (2 letter code) [XX]:CN
State or Province Name (full name) []:bj
Locality Name (eg, city) [Default City]:bj
Organization Name (eg, company) [DefaultCompany Ltd]:yw
Organizational Unit Name (eg, section)[]:Ops
Common Name (eg, your name or your server'shostname) []:www.b.com
Email Address []:admin@b.com
Please enter the following 'extra'attributes
to be sent with your certificate request
A challenge password []:
An optional company name []:
6.签发证书:
[root@station138 ssl]# openssl ca -in /testdir/nginx.csr -out/etc/pki/CA/certs/nginx.crt
[root@station138 ssl]# cp/etc/pki/CA/certs/nginx.crt /etc/nginx/ssl/
7.修改nginx配置文件,添加支持ssl:
[root@station138 ~]# vim /etc/nginx/nginx.conf
server {
listen 443 ssl;
server_name localhost;
ssl_certificate /etc/nginx/ssl/nginx.crt;
ssl_certificate_key /etc/nginx/ssl/nginx.key;
ssl_session_cache shared:SSL:1m;
ssl_session_timeout 5m;
ssl_ciphers HIGH:!aNULL:!MD5;
ssl_prefer_server_ciphers on;
location / {
root html;
index index.php index.html index.htm;
}
}
8.测试https:
