android之ImageView+Gallery组件的应用
2016-07-24 22:48
465 查看
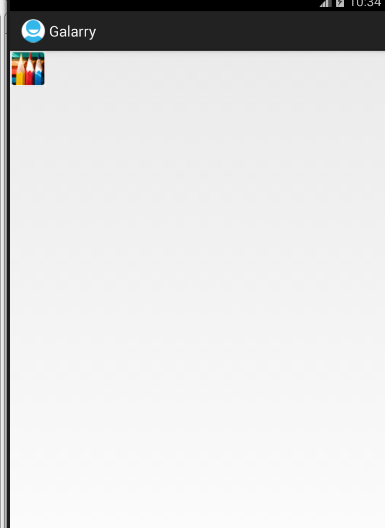
界面:点击添加弹出Dialog图片,单击其中图片添加到加好处:


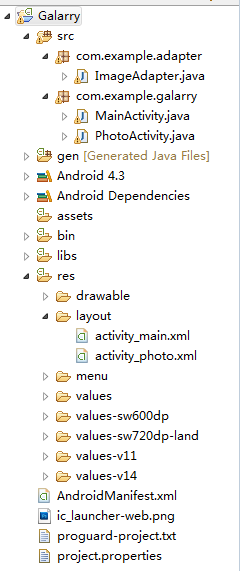
整体代码布局:
代码:
ImageAdapter.java
package com.example.adapter;
import android.content.Context;
import android.view.View;
import android.view.ViewGroup;
import android.widget.BaseAdapter;
import android.widget.Gallery;
import android.widget.ImageView;
import android.widget.Gallery.LayoutParams;
public class ImageAdapter extends BaseAdapter {
//声明两个属性
private Context context;
private int[] photos;
//Alter+Shif+o,s
public ImageAdapter(Context context, int[] photos){
super();
this.context=context;
this.photos=photos;
}
@Override
public int getCount() {
// TODO Auto-generated method stub
return this.photos.length;
}
@Override
public Object getItem(int position) {
// TODO Auto-generated method stub
return this.photos[position];
}
@Override
public long getItemId(int position) {
// TODO Auto-generated method stub
return this.photos[position];
}
@Override
public View getView(int position, View convertView, ViewGroup parent) {
// 创建一个ImageView组件对象
ImageView imageView=new ImageView(context);
//将图片装载到ImageView组件中
imageView.setImageResource(photos[position]);
//设置ImageView组件的大小自适应
imageView.setAdjustViewBounds(true);
//具体设置每张图片的宽和高
imageView.setLayoutParams(new Gallery.LayoutParams(LayoutParams.WRAP_CONTENT,LayoutParams.WRAP_CONTENT));
return imageView;
}
}
MainActivity.java
package com.example.galarry;
import android.os.Bundle;
import android.R.integer;
import android.app.Activity;
import android.content.Intent;
import android.support.v4.widget.SimpleCursorAdapter.ViewBinder;
import android.view.Menu;
import android.view.View;
import android.widget.ImageView;
public class MainActivity extends Activity {
private ImageView photo;
@Override
protected void onCreate(Bundle savedInstanceState) {
super.onCreate(savedInstanceState);
setContentView(R.layout.activity_main);
this.photo=(ImageView) findViewById(R.id.photo);
this.photo.setOnClickListener(new ViewOcl());
}
public class ViewOcl implements View.OnClickListener{
@Override
public void onClick(View v) {
// TODO Auto-generated method stub
switch (v.getId()) {
case R.id.photo:
Intent intent=new Intent();
intent.setClass(MainActivity.this, PhotoActivity.class);
startActivityForResult(intent, 220);
break;
default:
break;
}
}
}
@Override
protected void onActivityResult(int requestCode, int resultCode, Intent intent) {
// TODO Auto-generated method stub
super.onActivityResult(requestCode, resultCode, intent);
int photoId=intent.getIntExtra("photoId", 0);
this.photo.setImageResource(photoId);
}
}
PhotoActivity.java
package com.example.galarry;
import com.example.adapter.ImageAdapter;
import com.example.galarry.R.layout;
import android.os.Bundle;
import android.R.integer;
import android.app.Activity;
import android.content.Context;
import android.content.Intent;
import android.database.CursorJoiner.Result;
import android.view.Menu;
import android.view.View;
import android.view.ViewGroup;
import android.widget.Adapter;
import android.widget.AdapterView;
import android.widget.BaseAdapter;
import android.widget.Gallery;
import android.widget.Gallery.LayoutParams;
import android.widget.ImageView;
public class PhotoActivity extends Activity {
private Gallery myGallery;
//步骤1:创建一个数组(整型)
private int[] photos;
@Override
protected void onCreate(Bundle savedInstanceState) {
super.onCreate(savedInstanceState);
setContentView(R.layout.activity_photo);
this.myGallery=(Gallery) findViewById(R.id.myGallery);
//步骤2:实例化数组对象
this.photos=new int[]{R.drawable.p1,R.drawable.p2,R.drawable.p3,R.drawable.p4,R.drawable.p5,R.drawable.p6,R.drawable.p7,R.drawable.p8,R.drawable.p9,R.drawable.p10};
//步骤4:将图片数组数据装载到自定义的适配器中
ImageAdapter adapter=new ImageAdapter(this, this.photos);
//步骤5:组件绑定适配器
this.myGallery.setAdapter(adapter);
//步骤7:组件绑定监听器
this.myGallery.setOnItemClickListener(new GlareyOcl());
}
//步骤6:创建Gallary监听器
private class GlareyOcl implements AdapterView.OnItemClickListener{
@Override
public void onItemClick(AdapterView<?> adapter, View v, int position,
long id) {
// TODO Auto-generated method stub
Intent intent=new Intent();
intent.setClass(PhotoActivity.this, MainActivity.class);
intent.putExtra("photoId", photos[position]);
setResult(RESULT_OK,intent);
finish();
}
}
//步骤3:自定义一个图片适配器,继承BaseAdapter
// private class ImageAdapter extends BaseAdapter{
//
//
//
// }
@Override
public boolean onCreateOptionsMenu(Menu menu) {
// Inflate the menu; this adds items to the action bar if it is present.
getMenuInflater().inflate(R.menu.photo, menu);
return true;
}
}
activity_main.xml
<LinearLayout xmlns:android="http://schemas.android.com/apk/res/android"
xmlns:tools="http://schemas.android.com/tools"
android:layout_width="match_parent"
android:layout_height="match_parent" >
<!-- Image组件 -->
<ImageView
android:id="@+id/photo"
android:layout_width="wrap_content"
android:layout_height="wrap_content"
android:src="@drawable/myphoto" />
</LinearLayout>
activity_photo.xml
<LinearLayout xmlns:android="http://schemas.android.com/apk/res/android"
xmlns:tools="http://schemas.android.com/tools"
android:layout_width="match_parent"
android:layout_height="match_parent"
android:orientation="vertical" >
<!-- Gallery组件的创立 -->
<Gallery
android:id="@+id/myGallery"
android:layout_width="280dp"
android:layout_height="wrap_content"
android:spacing="8dp"
/>
</LinearLayout>AndroidManifest.xml
<?xml version="1.0" encoding="utf-8"?>
<manifest xmlns:android="http://schemas.android.com/apk/res/android"
package="com.example.galarry"
android:versionCode="1"
android:versionName="1.0" >
<uses-sdk
android:minSdkVersion="18"
android:targetSdkVersion="18" />
<application
android:allowBackup="true"
android:icon="@drawable/ic_launcher"
android:label="@string/app_name"
android:theme="@style/AppTheme" >
<activity
android:name="com.example.galarry.MainActivity"
android:label="@string/app_name" >
<intent-filter>
<action android:name="android.intent.action.MAIN" />
<category android:name="android.intent.category.LAUNCHER" />
</intent-filter>
</activity>
<activity
android:name="com.example.galarry.PhotoActivity"
android:label="@string/title_activity_photo"
android:theme="@android:style/Theme.Dialog" >
</activity>
</application>
</manifest>
重点把握:ImageAdapter自定义适配器及使用(创建数组;实例化数组;将图片数据装载到自定义的适配器中)
acivity传参:
Intent intent=new Intent();
intent.setClass(PhotoActivity.this, MainActivity.class);
intent.putExtra("photoId", photos[position]);
setResult(RESULT_OK,intent);
finish();
接收: protected void onActivityResult(int requestCode, int resultCode, Intent intent) {
super.onActivityResult(requestCode, resultCode, intent);
int photoId=intent.getIntExtra("photoId", 0);
this.photo.setImageResource(photoId);
}

相关文章推荐
- Android图片缓存的框架ImageLoader的使用
- Android数据库的事务
- Android的线程与线程池
- Android多线程之HandlerThread
- Android Binder设计与实现 - 设计篇
- android通知公告栏,textview滚动显示上网实现
- Android多点触摸交互处理
- 探究Android 关于Activity调用finish()方法后的内存释放情况
- android编程基础——Layout
- Android源代码编译完成之后运行模拟器
- Android闹钟设置的解决方案
- Android热修复:Andfix和Hotfix,两种方案的比较与实现
- Android Training--Intent
- Activity的启动模式
- Dagger 源码解析
- NineOldAnimations 源码解析
- 【源码】LruCache源码剖析
- EventBus 源码解析
- PagerSlidingTabStrip 源码解析
- Android闹钟设置的解决方案