Libgdx之AssetManager 资源管理器及进度条的实现
2016-07-20 21:25
281 查看
概述
在前面我们用到的游戏资源,是直接加载的,由于只是一个demo,资源比较少,因此看不出时间用到的长短。实际上我们在游戏开发过程中用到的图片,声音等资源比较多,这时加载游戏过程中会出现黑屏现象,其实就是后台在加载资源了,这时我们需要AssetManager来异步加载资源,同时实现进度条给用户友好的体验。简单介绍AssetManager中常用的方法
* void clear() 清空和销毁已加载和预加载的资源
* void dispose() AssetManager是很耗内存的,不用事要销毁
* void finishLoading() 阻塞线程,直到所有资源加载完毕
* boolean update() 异步加载资源,如资源加载完毕,返回true
* void load(AssetDescriptor desc)
void load(java.lang.String fileName, java.lang.Class type)
上面2个方法都是加载资源时需要使用的方法,只是将资源enqueue,并没有装进内存,只有调用update方法时资源才会被真正加载到内存中
* void unload(java.lang.String fileName) 将不再使用的资源移除
* T get(java.lang.String fileName)
T get(java.lang.String fileName, java.lang.Class type)
根据load的文件名来加载资源,一般推荐使用第二个方法,这样可以节约搜寻的时间
* float getProgress() 获取资源加载的进度
* setLoader(java.lang.Class type, AssetLoader loader) 大多数资源在初始化函数中已经指定了,但有一些没有定义的资源比如:TiledMap需要自己设置资源加载器,此时需要用到此方法
使用方法
AssetManager初始化比较简单:AssetManager am = new AssetManager()这个方法最终调用另外一个初始化函数,指定了默认的Loader
public AssetManager (FileHandleResolver resolver, boolean defaultLoaders) {
this.resolver = resolver;
if (defaultLoaders) {
setLoader(BitmapFont.class, new BitmapFontLoader(resolver));
setLoader(Music.class, new MusicLoader(resolver));
setLoader(Pixmap.class, new PixmapLoader(resolver));
setLoader(Sound.class, new SoundLoader(resolver));
setLoader(TextureAtlas.class, new TextureAtlasLoader(resolver));
setLoader(Texture.class, new TextureLoader(resolver));
setLoader(Skin.class, new SkinLoader(resolver));
setLoader(ParticleEffect.class, new ParticleEffectLoader(resolver));
setLoader(com.badlogic.gdx.graphics.g3d.particles.ParticleEffect.class,
new com.badlogic.gdx.graphics.g3d.particles.ParticleEffectLoader(resolver));
setLoader(PolygonRegion.class, new PolygonRegionLoader(resolver));
setLoader(I18NBundle.class, new I18NBundleLoader(resolver));
setLoader(Model.class, ".g3dj", new G3dModelLoader(new JsonReader(), resolver));
setLoader(Model.class, ".g3db", new G3dModelLoader(new UBJsonReader(), resolver));
setLoader(Model.class, ".obj", new ObjLoader(resolver));
}
executor = new AsyncExecutor(1);
}
注意: 最好不要讲 am 声明为static变量,因为在Android开发环境中有时候AssetManager的生命周期和应用程序的周期并不同步,可能会造成异常
一些Loader在加载资源的时候允许我们传递一些参数,比如下面代码:
TextureParameter param = new TextureParameter();
param.minFilter = TextureFilter.Linear;
param.genMipMaps = true;
manager.load("data/mytexture.png", Texture.class, param);
为了使用资源我们可以通过get()方法获取
Texture tex = am.get("data/mytexture.png", Texture.class);
BitmapFont font = am.get("data/myfont.fnt", BitmapFont.class);
但有时候为了保证资源确实被加载,我们可以使用下面方法
if(am.isLoaded("data/mytexture.png")) {
// texture is available, let's fetch it and do something interesting
Texture tex = am.get("data/mytexture.png", Texture.class);
}
销毁资源,我们可以单个销毁资源
am.unload("data/myfont.fnt");同时我们也可以一次销毁所有资源
am.clear() 或者 am.dispose() //dispose不仅销毁所有加载的资源同时也销毁am本身
在Android应用程序中,调用paused()和resume()方法时,一些OpenGL的资源像Texuture需要被重新加载,如果想再次调用loading screen可以在初始化am设置如下内容: Texture.setAssetManager(am);
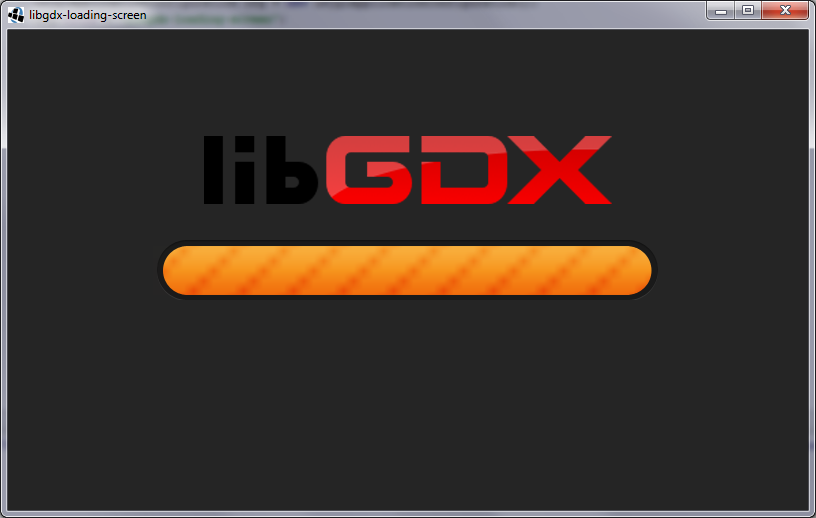
在GitHub上找了一个开源的代码 libgdx-loading-screen,下面是代码简单的展示:
首先定义了LoadingBar.java 主要作用是将加载的进度条做成一个动画,这样更有动感
public class LoadingBar extends Actor {

Animation animation;
TextureRegion reg;
float stateTime;

public LoadingBar(Animation animation) {
this.animation = animation;
reg = animation.getKeyFrame(0);
}

@Override
public void act(float delta) {
stateTime += delta;
reg = animation.getKeyFrame(stateTime);
}

@Override
public void draw(SpriteBatch batch, float parentAlpha) {
batch.draw(reg, getX(), getY());
}
}
其次定义了LoadingScreen.java
public class LoadingScreen extends AbstractScreen {

private Stage stage;

private Image logo;
private Image loadingFrame;
private Image loadingBarHidden;
private Image screenBg;
private Image loadingBg;

private float startX, endX;
private float percent;

private Actor loadingBar;

public LoadingScreen(SomeCoolGame game) {
super(game);
}

@Override
public void show() {
// Tell the manager to load assets for the loading screen
game.manager.load("data/loading.pack", TextureAtlas.class);
// Wait until they are finished loading
game.manager.finishLoading();

// Initialize the stage where we will place everything
stage = new Stage();

// Get our textureatlas from the manager
TextureAtlas atlas = game.manager.get("data/loading.pack", TextureAtlas.class);

// Grab the regions from the atlas and create some images
logo = new Image(atlas.findRegion("libgdx-logo"));
loadingFrame = new Image(atlas.findRegion("loading-frame"));
loadingBarHidden = new Image(atlas.findRegion("loading-bar-hidden"));
screenBg = new Image(atlas.findRegion("screen-bg"));
loadingBg = new Image(atlas.findRegion("loading-frame-bg"));

// Add the loading bar animation
Animation anim = new Animation(0.05f, atlas.findRegions("loading-bar-anim") );
anim.setPlayMode(Animation.LOOP_REVERSED);
loadingBar = new LoadingBar(anim);

// Or if you only need a static bar, you can do
// loadingBar = new Image(atlas.findRegion("loading-bar1"));

// Add all the actors to the stage
stage.addActor(screenBg);
stage.addActor(loadingBar);
stage.addActor(loadingBg);
stage.addActor(loadingBarHidden);
stage.addActor(loadingFrame);
stage.addActor(logo);

// Add everything to be loaded, for instance:
// game.manager.load("data/assets1.pack", TextureAtlas.class);
// game.manager.load("data/assets2.pack", TextureAtlas.class);
// game.manager.load("data/assets3.pack", TextureAtlas.class);
}

@Override
public void resize(int width, int height) {
// Set our screen to always be XXX x 480 in size
width = 480 * width / height;
height = 480;
stage.setViewport(width , height, false);

// Make the background fill the screen
screenBg.setSize(width, height);

// Place the logo in the middle of the screen and 100 px up
logo.setX((width - logo.getWidth()) / 2);
logo.setY((height - logo.getHeight()) / 2 + 100);

// Place the loading frame in the middle of the screen
loadingFrame.setX((stage.getWidth() - loadingFrame.getWidth()) / 2);
loadingFrame.setY((stage.getHeight() - loadingFrame.getHeight()) / 2);

// Place the loading bar at the same spot as the frame, adjusted a few px
loadingBar.setX(loadingFrame.getX() + 15);
loadingBar.setY(loadingFrame.getY() + 5);

// Place the image that will hide the bar on top of the bar, adjusted a few px
loadingBarHidden.setX(loadingBar.getX() + 35);
loadingBarHidden.setY(loadingBar.getY() - 3);
// The start position and how far to move the hidden loading bar
startX = loadingBarHidden.getX();
endX = 440;

// The rest of the hidden bar
loadingBg.setSize(450, 50);
loadingBg.setX(loadingBarHidden.getX() + 30);
loadingBg.setY(loadingBarHidden.getY() + 3);
}

@Override
public void render(float delta) {
// Clear the screen
Gdx.gl.glClear(GL10.GL_COLOR_BUFFER_BIT);

if (game.manager.update()) { // Load some, will return true if done loading
if (Gdx.input.isTouched()) { // If the screen is touched after the game is done loading, go to the main menu screen
game.setScreen(new MainMenuScreen(game));
}
}

// Interpolate the percentage to make it more smooth
percent = Interpolation.linear.apply(percent, game.manager.getProgress(), 0.1f);

// Update positions (and size) to match the percentage
loadingBarHidden.setX(startX + endX * percent);
loadingBg.setX(loadingBarHidden.getX() + 30);
loadingBg.setWidth(450 - 450 * percent);
loadingBg.invalidate();

// Show the loading screen
stage.act();
stage.draw();
}

@Override
public void hide() {
// Dispose the loading assets as we no longer need them
game.manager.unload("data/loading.pack");
}
}
具体效果:

相关文章推荐
- Android使用libgdx实现模拟方向键控制角色移动的方法
- Libgdx之封装简单的脚本机制
- Libgdx学习笔记:UI之技能冷却按钮
- Android中AlertDialog的使用小结
- libgdx html 跨平台的坑
- gwt中 java与js 的相互调用
- libGDX引擎之存入数据到keychain(IOS)
- 二,游戏的game loop搭建
- 三,资源初始化操作和主菜单界面的创建
- 四,主要菜单界面的创建
- 五,一个可以左右滑动的关卡选择界面
- 六,游戏主界面
- 七,游戏世界
- 八,游戏世界的渲染
- 九,碰到的问题
- 学习Libgdx游戏开发(二)
- 学习Libgdx游戏开发(一)
- libgdx 自动适应分辨率的方法
- libgdx学习笔记02