vCenter6.0配置一:配置分布式交换机
2016-07-12 16:13
344 查看
本文将介绍vCenter 6.0的分布式交换机的创建和配置,其实整个过程和vCenter 5.5基本上差不多。主要步骤为:创建分布式交换机、迁移虚拟机网络、迁移物理网卡等。
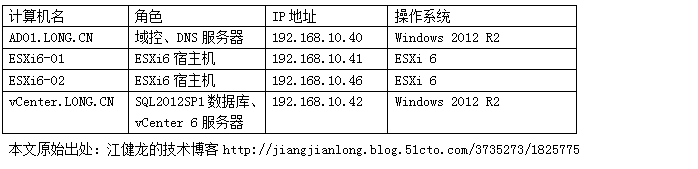
一、部署环境:
二、配置过程:
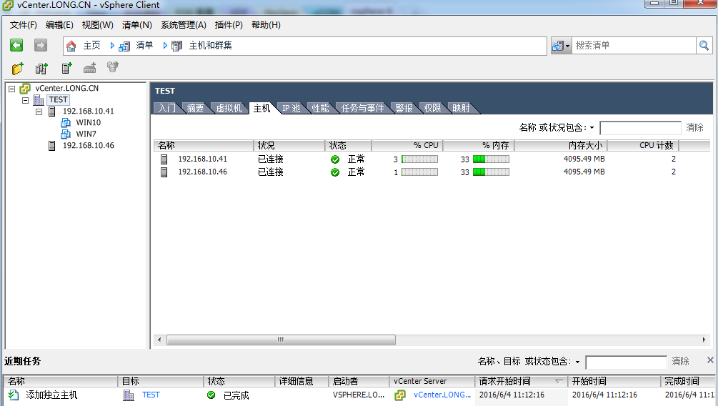
1、添加2台ESXi宿主机。
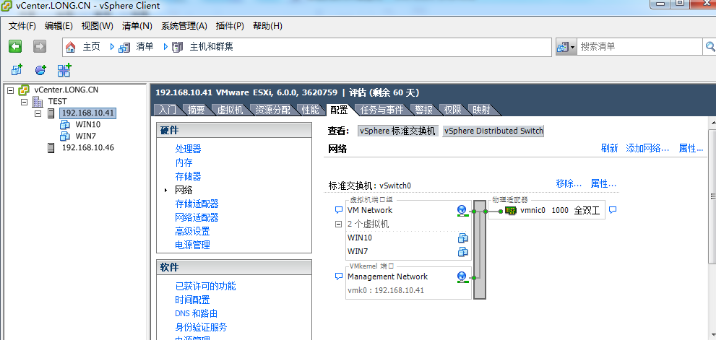
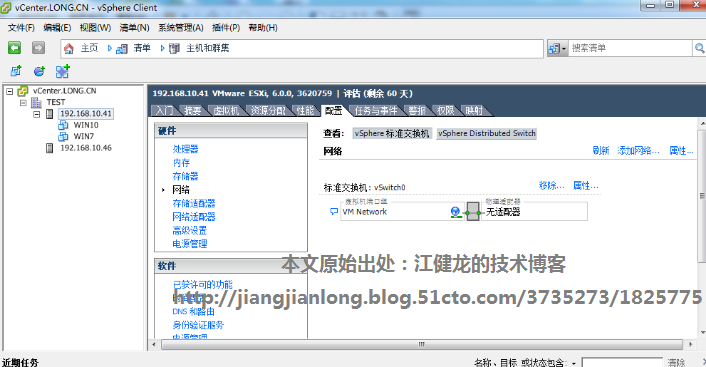
2、确认两台宿主机的两块物理网卡只连了一块,还有一块空闲物理网卡。
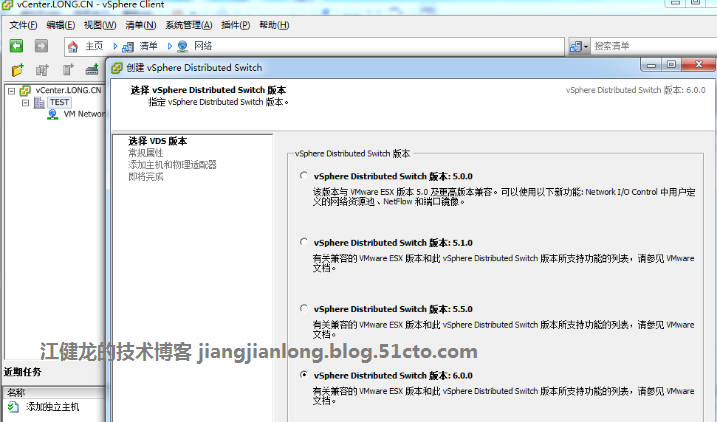
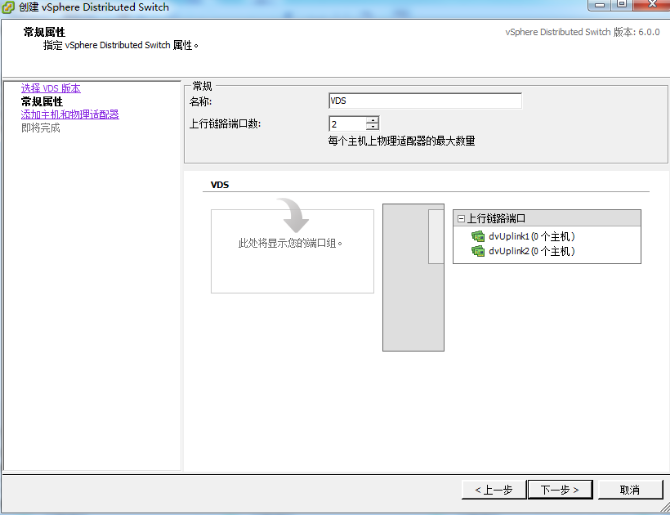
3、创建分布式交换机,选择6.0版本。
4、输入名称,因为宿主机只有2块物理网卡,故选择上行链路端口数为2。
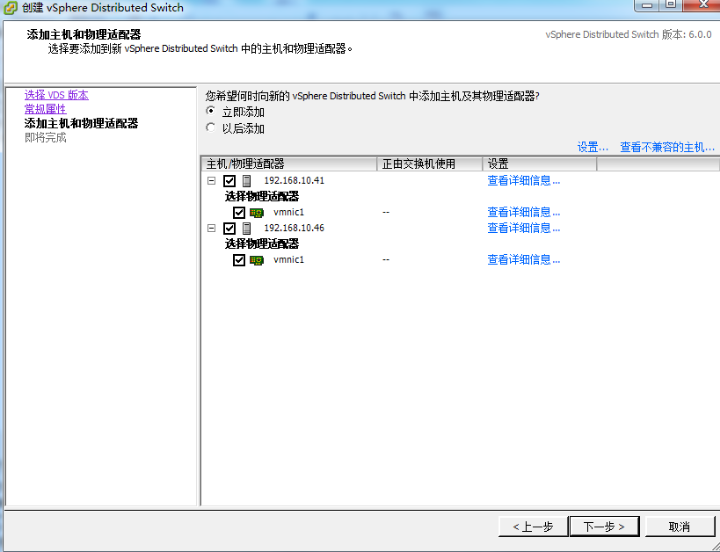
5、勾选宿主机空闲的那块物理网卡添加到分布式交换机。
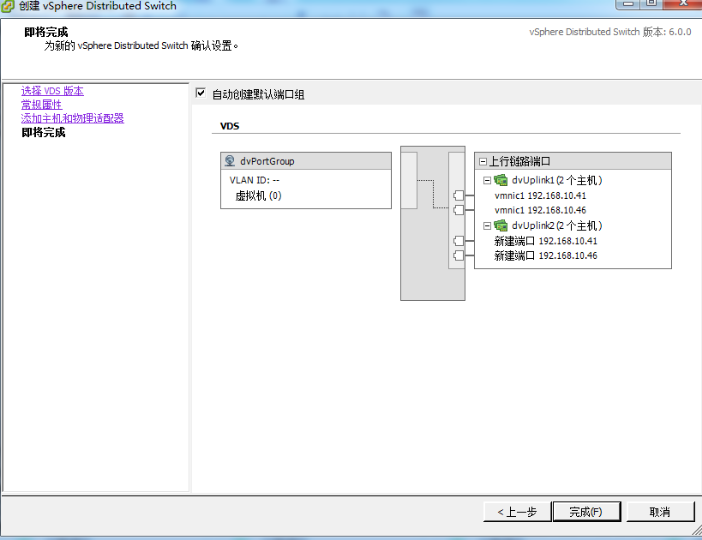
6、完成分布式交换机的创建。
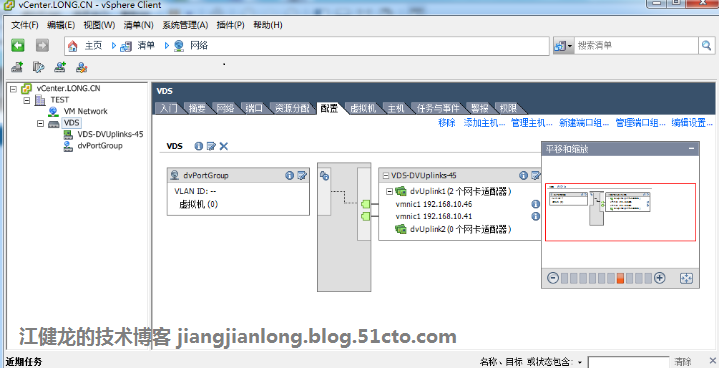
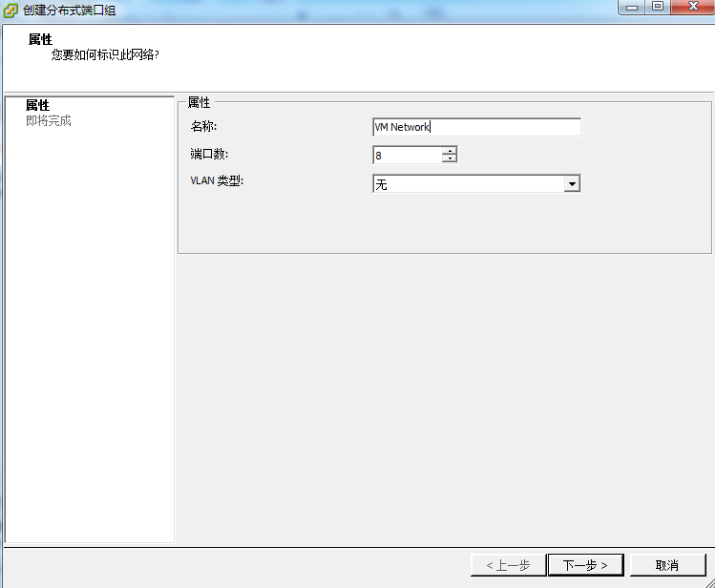
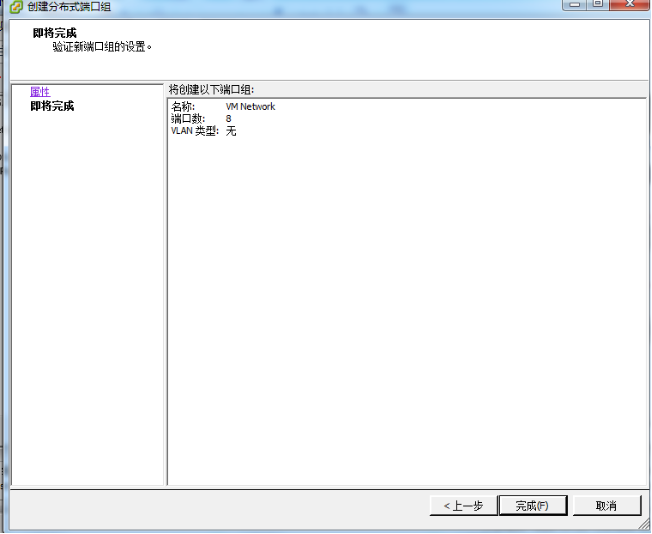
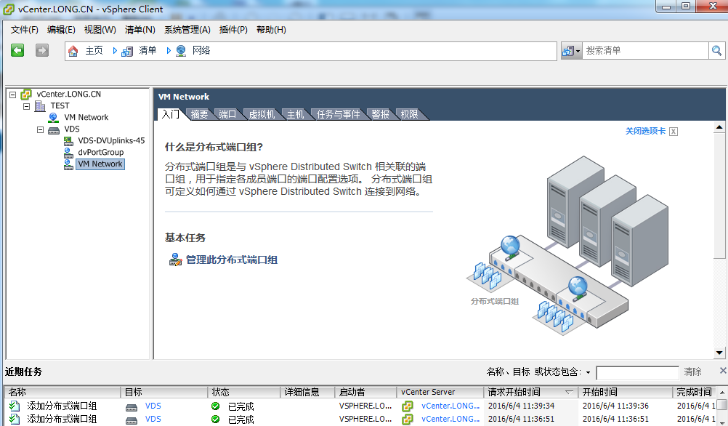
7、在分布式交换机创建虚拟机端口组,命名为VM Network,用于虚拟机连接。
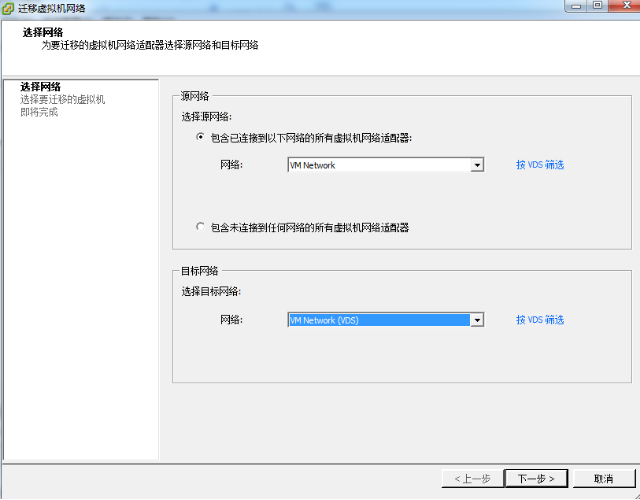
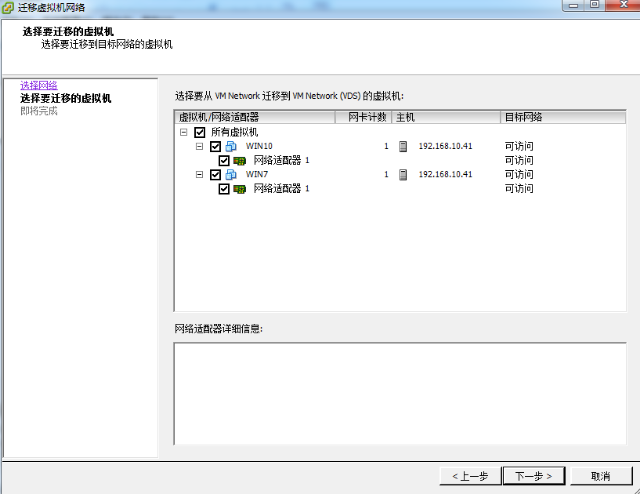
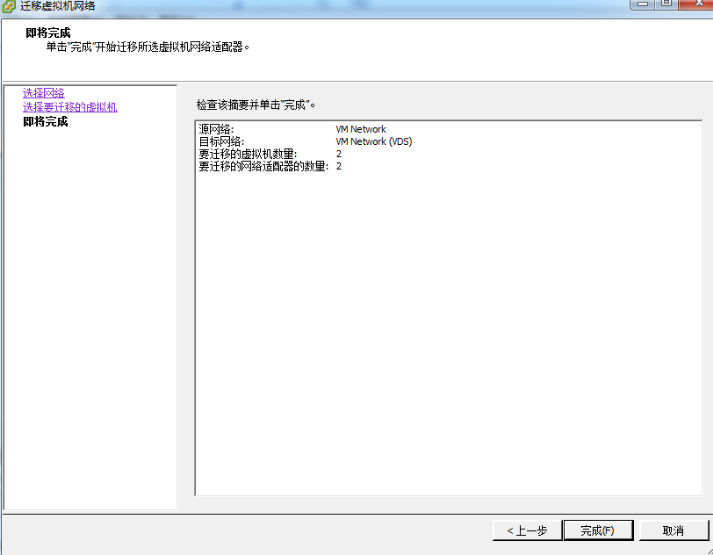
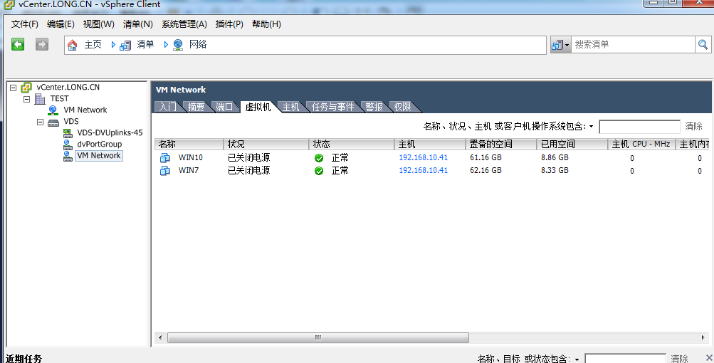
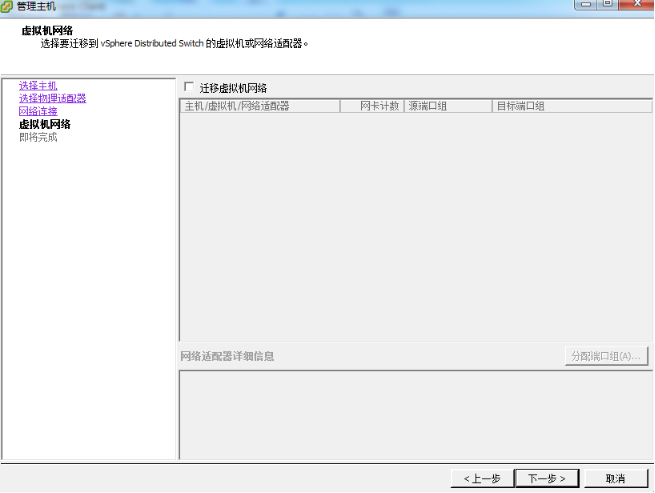
8、迁移虚拟机网络,将标准交换机的VM Network迁移到VDS的VM NetWork。
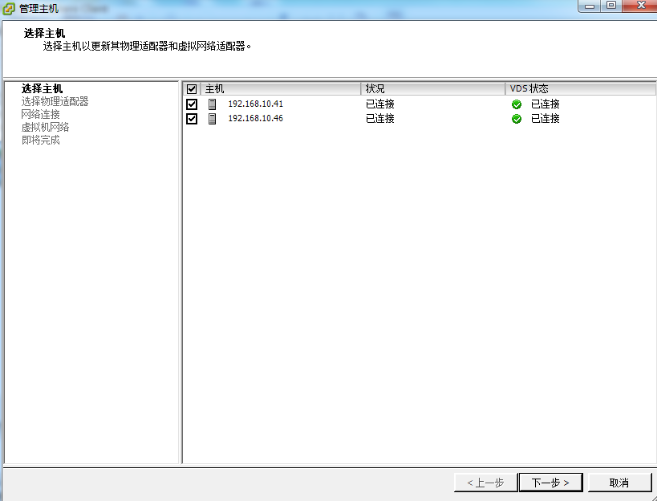
9、迁移物理网络,将宿主机连接到标准交换机的物理网卡迁移到VDS中。
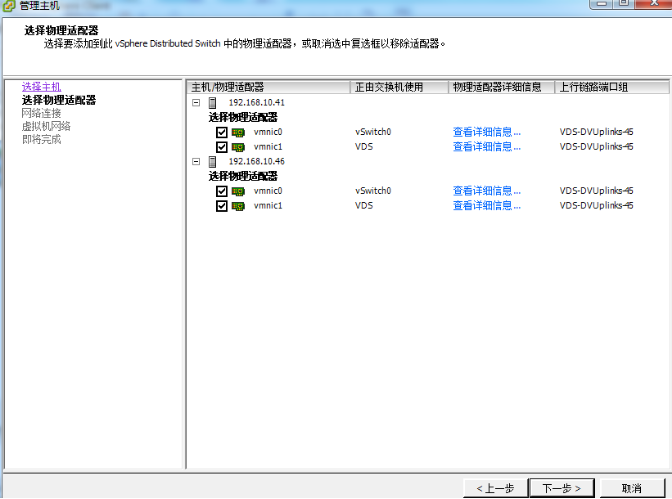

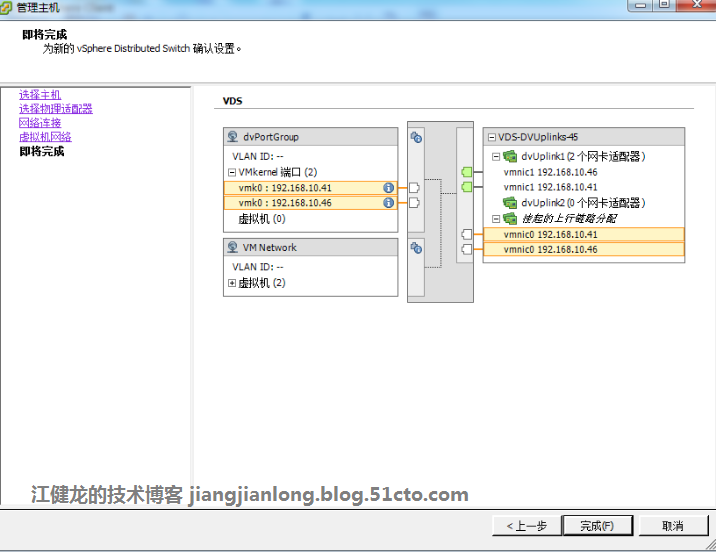
10、确认宿主机的2块物理网卡都已连接到分布式交换机中
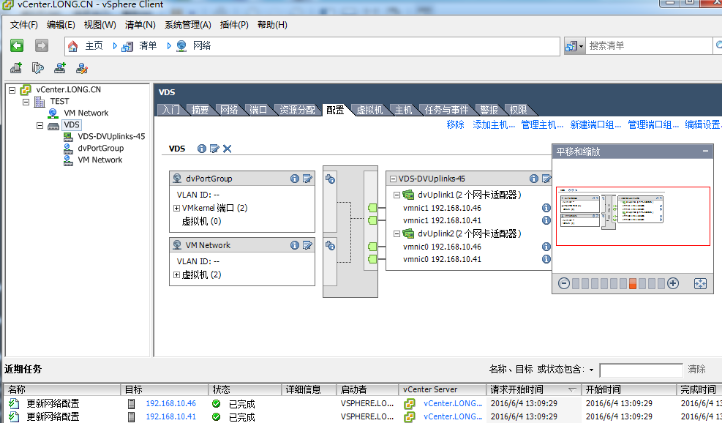
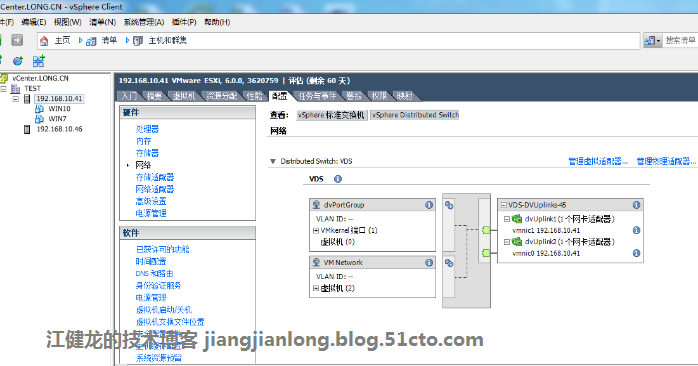
11、确认标准交换机已无物理适配器连接,也无虚拟机连接,这样就完成了分布式交换机的创建和配置,默认的标准交换机已经未在使用,可以直接将标准交换机移除。本文原始出处:江健龙的技术博客http://jiangjianlong.blog.51cto.com/3735273/1825775
一、部署环境:
二、配置过程:
1、添加2台ESXi宿主机。
2、确认两台宿主机的两块物理网卡只连了一块,还有一块空闲物理网卡。
3、创建分布式交换机,选择6.0版本。
4、输入名称,因为宿主机只有2块物理网卡,故选择上行链路端口数为2。
5、勾选宿主机空闲的那块物理网卡添加到分布式交换机。
6、完成分布式交换机的创建。
7、在分布式交换机创建虚拟机端口组,命名为VM Network,用于虚拟机连接。
8、迁移虚拟机网络,将标准交换机的VM Network迁移到VDS的VM NetWork。
9、迁移物理网络,将宿主机连接到标准交换机的物理网卡迁移到VDS中。
10、确认宿主机的2块物理网卡都已连接到分布式交换机中
11、确认标准交换机已无物理适配器连接,也无虚拟机连接,这样就完成了分布式交换机的创建和配置,默认的标准交换机已经未在使用,可以直接将标准交换机移除。本文原始出处:江健龙的技术博客http://jiangjianlong.blog.51cto.com/3735273/1825775

相关文章推荐
- VCenter的经验教训-为了偷懒5分钟结果花了一天的时间来查错
- 从vSphere 5.5升级到6之2-升级vCenter Server 5.5到6.0
- 从vSphere 5.5升级到6之3-使用VUM升级ESXi
- Godaddy VDS Simple Control Panel出错的解决方法
- VMware vCenter 5.5 – You do not have permission to login to the server
- VMware vCenter 5.5 – You do not have permission to login to the server
- VMware vCenter 5.5 – You do not have permission to login to the server
- 主机IPMI系统事件日志状态警告
- 使用vCenter Orchestrator实现VMware vSphere的自动化任务
- VMware vCenter Server 5.5 安装测试与体会
- vCenter Inventory Service无法启动
- firefox vcenter 6.0 插件不可用
- vcenter 5.5 首次登陆
- vmware vcenter 自定义安装数据源问题
- VCenter下更改linux主机的网卡ip地址
- vmware vsphere 5.1 vcenter中 exsi主机使用电子邮件接收预警信息
- VMware vCenter 5.5搭建手册
- vCenter创建用户
- 安装 vCenter Server Appliance 修补程序
- VMware vCenter vShield配置vxlan时候vib未安装