Database and models
2016-07-05 10:42
330 查看
Database and models
The database
Now that we have theAlbummodule set up with controller action methods and view scripts, it is time to look at the model section of our application. Remember that the model is the part that deals with the application's core purpose (the so-called “business rules”) and, in our case, deals with the database. We will make use of zend-db's
Zend\Db\TableGateway\TableGatewayto find, insert, update, and delete rows from a database table.
We are going to use Sqlite, via PHP's PDO driver. Create a text file
data/schema.sqlwith the following contents:
CREATE TABLE album ( id INTEGER PRIMARY KEY AUTOINCREMENT, artist varchar(100) NOT NULL, title varchar(100) NOT NULL);
INSERT INTO album (artist, title) VALUES  ('The  Military  Wives',  'In  My  Dreams');
INSERT INTO album (artist, title) VALUES  ('Adele',  '21');
INSERT INTO album (artist, title) VALUES  ('Bruce  Springsteen',  'Wrecking Ball (Deluxe)');
INSERT INTO album (artist, title) VALUES  ('Lana  Del  Rey',  'Born  To  Die');
INSERT INTO album (artist, title) VALUES  ('Gotye',  'Making  Mirrors');
(The test data chosen happens to be the Bestsellers on Amazon UK at the time of writing!)
Now create the database using the following:
$ sqlite data/zftutorial.db < data/schema.sql
Some systems, including Ubuntu, use the command
sqlite3; check to see which one to use on your system.
Using PHP to create the database
If you do not have Sqlite installed on your system, you can use PHP to load the database using the same SQL schema file created earlier. Create the filedata/load_db.phpwith the following contents:
<?php
$db = new PDO('sqlite:' . realpath(__DIR__) . '/zftutorial.db');
$fh = fopen(__DIR__ . '/schema.sql', 'r');
while ($line = fread($fh, 4096)) {
$db->exec($line);
}
fclose($fh);
Once created, execute it:
$ php data/load_db.php
We now have some data in a database and can write a very simple model for it.
The model files
Zend Framework does not provide a zend-model component because the model is your business logic, and it's up to you to decide how you want it to work. There are many components that you can use for this depending on your needs. One approach is to have model classes represent each entity in your application and then use mapper objects that load and save entities to the database. Another is to use an Object-Relational Mapping (ORM) technology, such as Doctrine or Propel.For this tutorial, we are going to create a model by creating an
AlbumTableclass that consumes a
Zend\Db\TableGateway\TableGateway, and in which each album will be represented as an
Albumobject (known as an entity). This is an implementation of the Table Data Gateway design pattern to allow for interfacing with data in a database table. Be aware, though, that the Table Data Gateway pattern can become limiting in larger systems. There is also a temptation to put database access code into controller action methods as these are exposed by
Zend\Db\TableGateway\AbstractTableGateway. Don't do this!
Let's start by creating a file called
Album.phpunder
module/Album/src/Model:
namespace Album\Model;

class Album
{
public $id;
public $artist;
public $title;

public function exchangeArray(array $data)
{
$this->id     = (!empty($data['id'])) ? $data['id'] : null;
$this->artist = (!empty($data['artist'])) ? $data['artist'] : null;
$this->title  = (!empty($data['title'])) ? $data['title'] : null;
}
}
Our
Albumentity object is a PHP class. In order to work with zend-db's
TableGatewayclass, we need to implement the
exchangeArray()method; this method copies the data from the provided array to our entity's properties. We will add an input filter later to ensure the values injected are valid.
Next, we create our
AlbumTable.phpfile in
module/Album/src/Modeldirectory like this:
namespace Album\Model;

use RuntimeException;
use Zend\Db\TableGateway\TableGatewayInterface;

class AlbumTable
{
private $tableGateway;

public function __construct(TableGatewayInterface $tableGateway)
{
$this->tableGateway = $tableGateway;
}

public function fetchAll()
{
return $this->tableGateway->select();
}

public function getAlbum($id)
{
$id = (int) $id;
$rowset = $this->tableGateway->select(['id' => $id]);
$row = $rowset->current();
if (! $row) {
throw new RuntimeException(sprintf(
'Could not find row with identifier %d',
$id
));
}

return $row;
}

public function saveAlbum(Album $album)
{
$data = [
'artist' => $album->artist,
'title'  => $album->title,
];

$id = (int) $album->id;

if ($id === 0) {
$this->tableGateway->insert($data);
return;
}

if (! $this->getAlbum($id)) {
throw new RuntimeException(sprintf(
'Cannot update album with identifier %d; does not exist',
$id
));
}

$this->tableGateway->update($data, ['id' => $id]);
}

public function deleteAlbum($id)
{
$this->tableGateway->delete(['id' => (int) $id]);
}
}
There's a lot going on here. Firstly, we set the protected property
$tableGatewayto the
TableGatewayinstance passed in the constructor, hinting against the
TableGatewayInterface(which allows us to provide alternate implementations easily, including mock instances during testing). We will use this to perform operations on the database table for our albums.
We then create some helper methods that our application will use to interface with the table gateway.
fetchAll()retrieves all albums rows from the database as a
ResultSet,
getAlbum()retrieves a single row as an
Albumobject,
saveAlbum()either creates a new row in the database or updates a row that already exists, and
deleteAlbum()removes the row completely. The code for each of these methods is, hopefully, self-explanatory.
Using ServiceManager to configure the table gateway and inject into the AlbumTable
In order to always use the same instance of ourAlbumTable, we will use the
ServiceManagerto define how to create one. This is most easily done in the
Moduleclass where we create a method called
getServiceConfig()which is automatically called by the
ModuleManagerand applied to the
ServiceManager. We'll then be able to retrieve when we need it.
To configure the
ServiceManager, we can either supply the name of the class to be instantiated or a factory (closure, callback, or class name of a factory class) that instantiates the object when the
ServiceManagerneeds it. We start by implementing
getServiceConfig()to provide a factory that creates an
AlbumTable. Add this method to the bottom of the
module/Album/src/Module.phpfile:
namespace Album;

// Add these import statements:
use Zend\Db\Adapter\AdapterInterface;
use Zend\Db\ResultSet\ResultSet;
use Zend\Db\TableGateway\TableGateway;
use Zend\ModuleManager\Feature\ConfigProviderInterface;

class Module implements ConfigProviderInterface
{
// getConfig() method is here

// Add this method:
public function getServiceConfig()
{
return [
'factories' => [
Model\AlbumTable::class =>  function($container) {
$tableGateway = $container->get(Model\AlbumTableGateway::class);
return new Model\AlbumTable($tableGateway);
},
Model\AlbumTableGateway::class => function ($container) {
$dbAdapter = $container->get(AdapterInterface::class);
$resultSetPrototype = new ResultSet();
$resultSetPrototype->setArrayObjectPrototype(new Model\Album());
return new TableGateway('album', $dbAdapter, null, $resultSetPrototype);
},
],
];
}
}
This method returns an array of
factoriesthat are all merged together by the
ModuleManagerbefore passing them to the
ServiceManager. The factory for
Album\Model\AlbumTableuses the
ServiceManagerto create an
Album\Model\AlbumTableGatewayservice representing a
TableGatewayto pass to its constructor. We also tell the
ServiceManagerthat the
AlbumTableGatewayservice is created by fetching a
Zend\Db\Adapter\AdapterInterfaceimplementation (also from the
ServiceManager) and using it to create a
TableGatewayobject. The
TableGatewayis told to use an
Albumobject whenever it creates a new result row. The
TableGatewayclasses use the prototype pattern for creation of result sets and entities. This means that instead of instantiating when required, the system clones a previously instantiated object. See PHP Constructor Best Practices and the Prototype Pattern for more details.
Factories
The above demonstrates building factories as closures within your module class. Another option is to build the factory as a class, and then map the class in your module configuration. This approach has a number of benefits:The code is not parsed or executed unless the factory is invoked.
You can easily unit test the factory to ensure it does what it should.
You can extend the factory if desired.
You can re-use the factory across multiple instances that have related construction.
Creating factories is covered in the zend-servicemanager documentation.
The
Zend\Db\Adapter\AdapterInterfaceservice is registered by the zend-db component. You may have noticed earlier that
config/modules.config.phpcontains the following entries:
return [
'Zend\Form',
'Zend\Db',
'Zend\Router',
'Zend\Validator',
/* ... */
],
All Zend Framework components that provide zend-servicemanager configuration are also exposed as modules themselves; the prompts as to where to register the components during our initial installation occurred to ensure that the above entries are created for you.
The end result is that we can already rely on having a factory for the
Zend\Db\Adapter\AdapterInterfaceservice; now we need to provide configuration so it can create an adapter for us.
Zend Framework's
ModuleManagermerges all the configuration from each module's
module.config.phpfile, and then merges in the files in
config/autoload/(first
*.global.phpfiles, and then
*.local.phpfiles). We'll add our database configuration information to
global.php, which you should commit to your version control system. You can use
local.php(outside of the VCS) to store the credentials for your database if you want to. Modify
config/autoload/global.php(in the project root, not inside the
Albummodule) with following code:
return [
'db' => [
'driver' => 'Pdo',
'dsn'    => sprintf('sqlite:%s/data/zftutorial.db', realpath(getcwd())),
],
);
If you were configuring a database that required credentials, you would put the general configuration in your
config/autoload/global.php, and then the configuration for the current environment, including the DSN and credentials, in the
config/autoload/local.phpfile. These get merged when the application runs, ensuring you have a full definition, but allows you to keep files with credentials outside of version control.
Back to the controller
Now that we have a model, we need to inject it into our controller so we can use it.Firstly, we'll add a constructor to our controller. Open the file
module/Album/src/Controller/AlbumController.phpand add the following property and constructor:
namespace Album\Controller;

// Add the following import:
use Album\Model\AlbumTable;
use Zend\Mvc\Controller\AbstractActionController;
use Zend\View\Model\ViewModel;

class AlbumController extends AbstractActionController
{
// Add this property:
private $table;

// Add this constructor:
public function __construct(AlbumTable $table)
{
$this->table = $table;
}

/* ... */
}
Our controller now depends on
AlbumTable, so we will need to create a factory for the controller. Similar to how we created factories for the model, we'll create in in our
Moduleclass, only this time, under a new method,
Album\Module::getControllerConfig():
namespace Album;

use Zend\Db\Adapter\Adapter;
use Zend\Db\ResultSet\ResultSet;
use Zend\Db\TableGateway\TableGateway;
use Zend\ModuleManager\Feature\ConfigProviderInterface;

class Module implements ConfigProviderInterface
{
// getConfig() and getServiceConfig methods are here

// Add this method:
public function getControllerConfig()
{
return [
'factories' => [
Controller\AlbumController::class =>  function($container) {
return new Controller\AlbumController(
$container->get(Model\AlbumTable::class)
);
},
],
];
}
}
Because we're now defining our own factory, we can modify our
module.config.phpto remove the definition. Open
module/Album/config/module.config.phpand remove the following lines:
<?php
namespace Album;

// Remove this:
use Zend\ServiceManager\Factory\InvokableFactory;

return [
// And remove the entire "controllers" section here:
'controllers' => [
'factories' => [
Controller\AlbumController::class => InvokableFactory::class,
],
],

/* ... */
];
We can now access the property
$tablefrom within our controller whenever we need to interact with our model.
Listing albums
In order to list the albums, we need to retrieve them from the model and pass them to the view. To do this, we fill inindexAction()within
AlbumController. Update the
AlbumController::indexAction()as follows:
// module/Album/src/Controller/AlbumController.php:
// ...
public function indexAction()
{
return new ViewModel([
'albums' => $this->table->fetchAll(),
]);
}
// ...
With Zend Framework, in order to set variables in the view, we return a
ViewModelinstance where the first parameter of the constructor is an array containing data we wish to represent. These are then automatically passed to the view script. The
ViewModelobject also allows us to change the view script that is used, but the default is to use
{module name}/{controller name}/{action name}. We can now fill in theindex.phtmlview script:
<?php
// module/Album/view/album/album/index.phtml:

$title = 'My albums';
$this->headTitle($title);
?>
<h1><?= $this->escapeHtml($title); ?></h1>
<p>
<a href="<?= $this->url('album', ['action'=>'add']) ?>">Add new album</a>
</p>

<table class="table">
<tr>
<th>Title</th>
<th>Artist</th>
<th> </th>
</tr>
<?php foreach ($albums as $album) : ?>
<tr>
<td><?= $this->escapeHtml($album->title) ?></td>
<td><?= $this->escapeHtml($album->artist) ?></td>
<td>
<a href="<?= $this->url('album', ['action'=>'edit', 'id' => $album->id]) ?>">Edit</a>
<a href="<?= $this->url('album', ['action'=>'delete', 'id' => $album->id]) ?>">Delete</a>
</td>
</tr>
<?php endforeach; ?>
</table>
The first thing we do is to set the title for the page (used in the layout) and also set the title for the
<head>section using the
headTitle()view helper which will display in the browser's title bar. We then create a link to add a new album.
The
url()view helper is provided by zend-mvc and zend-view, and is used to create the links we need. The first parameter to
url()is the route name we wish to use for construction of the URL, and the second parameter is an array of variables to substitute into route placeholders. In this case we use our
albumroute which is set up to accept two placeholder variables:
actionand
id.
We iterate over the
$albumsthat we assigned from the controller action. zend-view automatically ensures that these variables are extracted into the scope of the view script; you may also access them using
$this->{variable name} in order to differentiate between variables provided to the view script and those created inside it.We then create a table to display each album's title and artist, and provide links to allow for editing and deleting the record. A standard
foreach:loop is used to iterate over the list of albums, and we use the alternate form using a colon and
endforeach;as it is easier to scan than to try and match up braces. Again, the
url()view helper is used to create the edit and delete links.
Escaping
We always use theescapeHtml()view helper to help protect ourselves fromCross Site Scripting (XSS) vulnerabilities.
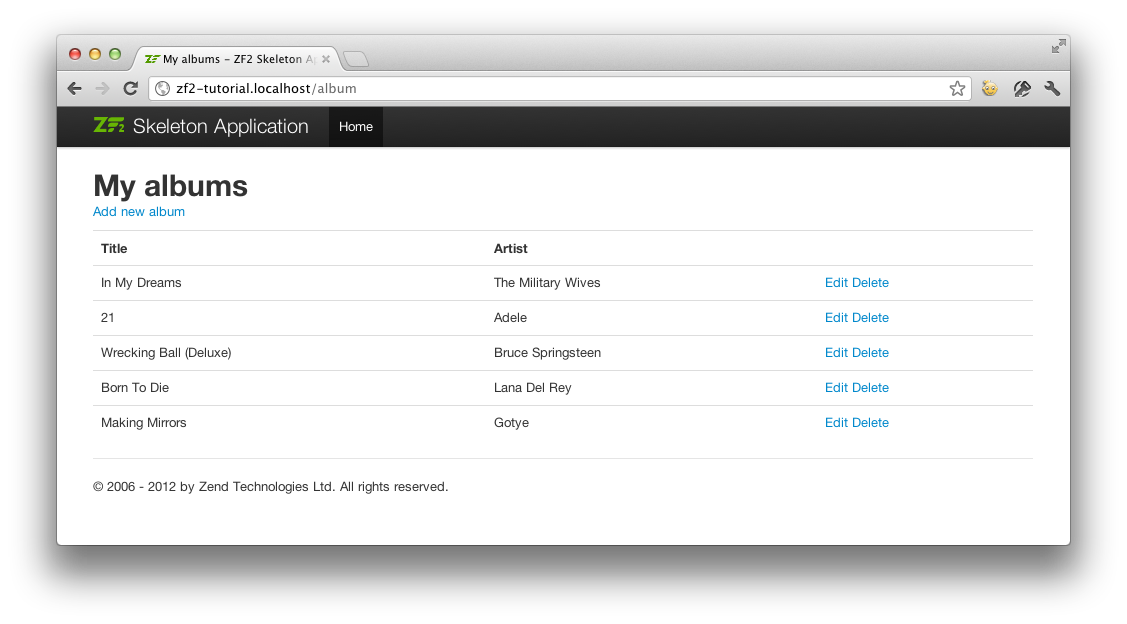
If you open
http://localhost:8080/album(or
http://zf2-tutorial.localhost/albumif you are using self-hosted Apache) you should see this:

相关文章推荐
- C struct的内存对齐
- POJ 3468 A Simple Problem with Integers (树状数组解法 树状数组区间更新 区间查询)
- ucosIII OS_CFG.H 解释
- linker command failed with exit code 1 (use -v to see invocation)
- 使用POI和Dom4j将excel转换为xml格式的excel
- 安装gerrit
- 自定义控件三部曲之绘图篇(十六)——给控件添加阴影效果与发光效果
- Generate Parentheses
- 【学习笔录】Mysql多表删除语句
- html5多文件上传
- 一切都不如意?先改变心态试一试!
- 解析AngularJS表达式
- 用Windows API 编写串口通讯程序
- 【Netty4.X】Unity客户端与Netty服务器的网络通信(一)
- python利用dlib换脸,亲测可用
- SQL优化方案2
- Android 5.0重启恢复Task功能分析
- 人工智能 人们的智能
- cocoapods之 Operation not permitted - /usr/bin/pod 和-bash: pod: command not found
- 给LinkLabel文本绘制颜色