ELK平台搭建 ES
2016-06-24 14:23
225 查看
系统环境:
System: Centos 6.5
ElasticSearch: 2.3.3
Logstash: 2.3.3
Kibana: 4.5.1
Java: jdk_1.8.0_71
新建用户:
ELK不允许root用户启动
java也可到这个地址下载https://www.reucon.com/cdn/java/
CentOS 6
下载:
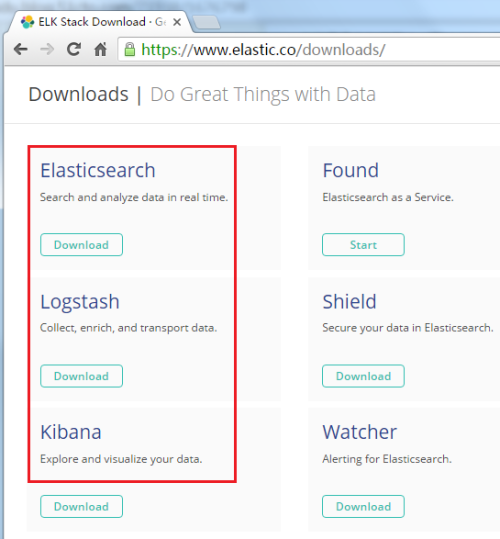
ELK下载:https://www.elastic.co/downloads/
ElasticSearch安装:
建立存放目录:
切记:涉及ElasticSearch的目录和文件,一定要全修改权限,否则启动会报错。
然后编辑ES的配置文件:
使用ctrl+C停止,参数-d 或& 为后台启动
System: Centos 6.5
ElasticSearch: 2.3.3
Logstash: 2.3.3
Kibana: 4.5.1
Java: jdk_1.8.0_71
新建用户:
ELK不允许root用户启动
#useradd elkJDK或JRE下载安装:
java也可到这个地址下载https://www.reucon.com/cdn/java/
# mkdir /usr/java/
# cd /usr/java
# tar -zxvf jdk-8u71-linux-x64.tar.gz
# 修改文件夹名,防止异常,养成好习惯
# mv jdk1.8.0_71 jdk18071
# 配置环境变量
# vi /etc/profile
export JAVA_HOME=/usr/java/jdk18071
export JAVA_BIN=$JAVA_HOME/bin
export JRE_HOME=$JAVA_HOME/jre
export JRE_bin=$JRE_HOME/bin
export CLASSPATH=.:$JAVA_HOME/lib:$JRE_HOME/lib
export PATH=$JAVA_BIN:$PATH
# 配置生效
# source /etc/profile
Redis安装
# yum install epel-release –y
# yum install redis –y
修改redis配置文件使redis监听所有ip,默认情况下只监听127.0.0.01
# vi /etc/redis.conf
bind 0.0.0.0
启动Redis
CentOS 6
# service redis startCentOS 7
# systemctl restart redis.service
下载:
ELK下载:https://www.elastic.co/downloads/
ElasticSearch安装:
建立存放目录:
切记:涉及ElasticSearch的目录和文件,一定要全修改权限,否则启动会报错。
# mkdir -p /elk/{data,logs,work,plugins,scripts}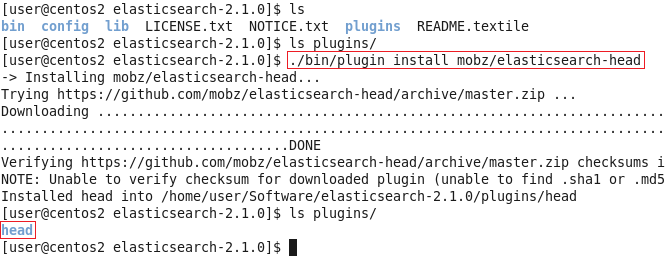
# chown -R elk:elk /elk配置ElasticSearch:# tar -zxvf elasticsearch-2.3.3.tar.gz # chown -R elk:elk elasticsearch-2.3.3 # cd elasticsearch-2.3.3安装Head插件(Optional):
# ./bin/plugin install mobz/elasticsearch-head
然后编辑ES的配置文件:
# vi config/elasticsearch.yml修改以下配置项:
cluster.name:cluster(集群名称)
node.name:"test-node1"(集群结点名称)
path.data:/elk/data(数据)
path.logs:/elk/logs(日志路径)
node.master: true(是否可被选为主结点,默认true)
node.data: true(结点是否存储数据,默认true)
index.number_of_shards:5(索引分片数)
index.number_of_replicas:1(索引副本数)
transport.tcp.port:9300(数据传输IP)
network.host:192.168.1.100(当前hostname或IP,我这里是IP)
http.port: 9200(对外访问监听IP)
启动ES:
使用ctrl+C停止,参数-d 或& 为后台启动
$ ./bin/elasticsearch -d
$ ./bin/elasticsearch &测试:
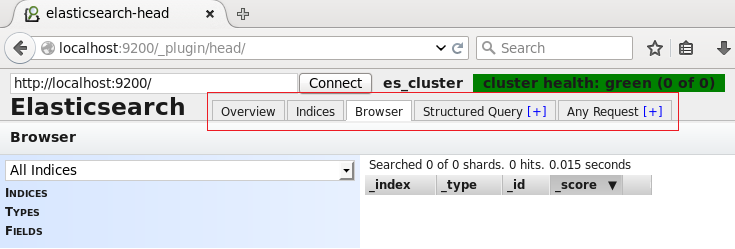
curl -X GET http://IP:9200[/code]返回展示了配置的cluster_name和name,以及安装的ES的版本等信息。刚刚安装的head插件,它是一个用浏览器跟ES集群交互的插件,可以查看集群状态、集群的doc内容、执行搜索和普通的Rest请求等。 现在也可以使用它打开http://IP:9200/_plugin/head页面来查看ES集群状态。
可以看到,现在,ES集群中没有index,也没有type,因此这两条是空的。
Logstash安装:
配置Logstash:tar -zxvf logstash-2.1.1.tar.gz cd logstash-2.1.1
编写配置文件(名字和位置可以随意,这里我放在config目录下,取名为log4j_to_es.conf):mkdir config vi config/log4j_to_es.conf输入以下内容:# For detail structure of this file # Set: https://www.elastic.co/guide/en/logstash/current/configuration-file-structure.html input { # For detail config for log4j as input, # See: https://www.elastic.co/guide/en/logstash/current/plugins-inputs-log4j.html log4j { mode => "server" host => "192.168.1.100" #IP or HostName port => 4567 } } filter { #Only matched data are send to output. } output { # For detail config for elasticsearch as output, # See: https://www.elastic.co/guide/en/logstash/current/plugins-outputs-elasticsearch.html elasticsearch { action => "index" #The operation on ES hosts => "192.168.1.100:9200" #IP or HostName,ElasticSearch host, can be array. index => "applog" #The index to write data to. } }
启动:
使用agent来启动它(使用-f指定配置文件):./bin/logstash agent -f config/log4j_to_es.conf启动成功
参考文章:
http://my.oschina.net/itblog/blog/547250
http://blog.csdn.net/gongzi2311/article/details/51699958
http://blog.csdn.net/laoyang360/article/details/51417097
本文出自 “悟透的杂货铺” 博客,请务必保留此出处http://wutou.blog.51cto.com/615096/1792548


相关文章推荐
- label上的文字加上划线
- C++11中的std::function
- Scala入门学习笔记二-基本数据类型、程序控制结构
- 用curl判断url是否有效
- libevent源代码分析--libevent核心event
- JWPlayer快速入门指南(中文)
- 跟着SY速学Ubuntu系列五:Ubuntu 16 安装Composer
- 构造函数的返回值
- 如何 “解决” WPF中空域问题(Airspace issuse)
- CNN卷积神经网络
- python操作mongodb之七时间和时区
- lampp下配置https,并设置cookie跨域
- Java学习笔记(17) Binary I/O
- SICP 习题2.29 二叉活动体
- 51. spring boot属性文件之多环境配置【从零开始学Spring Boot】
- Swift 析构器deinit
- org.springframework.beans.factory.BeanDefinitionStoreException
- Directx11 6.15EXERCISES(给自己看的)
- RHEL7下Nginx虚拟主机配置(三)
- android函数调用堆栈打印方法