yii2高级模板安装和yii migrate的使用
2016-06-15 12:16
716 查看
1.通过composer 安装高级版
C:wampwwwyii>composer create-project --prefer-dist yiisoft/yii2-app-advanced advanced
2. 进入 advanced 目录中 执行 init 初始化
[php] view
plain copy
print?
C:wampwwwyii>cd advanced
C:wampwwwyiiadvanced>init
Yii Application Initialization Tool v1.0
Which environment do you want the application to be initialized in?
[0] Development
[1] Production
Your choice [0-1, or “q” to quit] 0
Initialize the application under ‘Development’ environment? [yes|no] y
Start initialization …
generate backend/config/main-local.php
generate backend/config/params-local.php
generate backend/web/index-test.php
generate backend/web/index.php
generate common/config/main-local.php
generate common/config/params-local.php
generate console/config/main-local.php
generate console/config/params-local.php
generate frontend/config/main-local.php
generate frontend/config/params-local.php
generate frontend/web/index-test.php
generate frontend/web/index.php
generate yii
generate cookie validation key in backend/config/main-local.php
generate cookie validation key in frontend/config/main-local.php
chmod 0777 backend/runtime
chmod 0777 backend/web/assets
chmod 0777 frontend/runtime
chmod 0777 frontend/web/assets
chmod 0755 yii
… initialization completed.
windows环境下直接运行根目录下的init.bat命令。
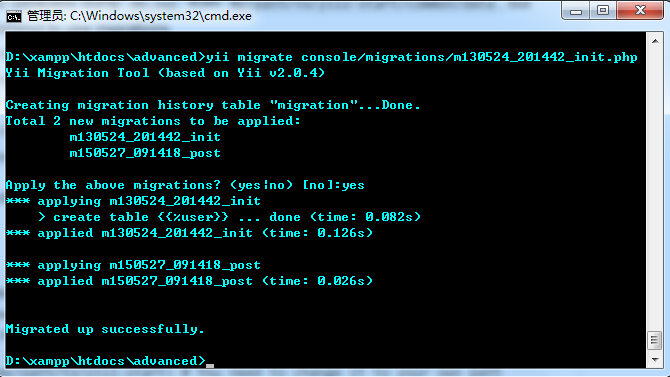
3.到此为止我们配置好了 数据库联系信息 以及数据库,但是我们还没有表,我们使用 yii migrate 命令
[php] view
plain copy
print?
C:wampwwwyiiadvanced>yii migrate
Yii Migration Tool (based on Yii v2.0.0)
Creating migration history table “migration”…done.
Total 1 new migration to be applied:
m130524_201442_init
Apply the above migration? (yes|no) [no]:y
*** applying m130524_201442_init
> create table {{%user}} … done (time: 0.031s)
*** applied m130524_201442_init (time: 0.055s)
Migrated up successfully.
在windows下打卡cmd命令窗口,切换到Yii项目所在目录(包含Yii.bat),就可以在cmd中运行Yii命令了。
使用Yii migrate命令执行sql语句:
也可以在输入./yii查看有哪些命令可用。
直接运行yii migrate会自动找到console/migrations下的*_init.php。
4.RBAC权限
以下代码展示使用 yii\rbac\DbManager 时如何在应用配置文件中配置
yii\rbac\DbManager::$itemTable: 该表存放授权条目(译者注:即角色和权限)。默认表名为 "auth_item" 。
yii\rbac\DbManager::$itemChildTable: 该表存放授权条目的层次关系。默认表名为 "auth_item_child"。
yii\rbac\DbManager::$assignmentTable: 该表存放授权条目对用户的指派情况。默认表名为 "auth_assignment"。
yii\rbac\DbManager::$ruleTable: 该表存放规则。默认表名为 "auth_rule"。
继续之前,你需要在数据库中创建这些表。你可以使用存放在
RBAC 数据库迁移文件中):
现在可以通过
5.
如果你的权限层次结构不会发生改变,而且你的用户数是恒定的,你可以通过
在用
6.RbacController.php放在basic模板里面的commands文件夹下,放在advanced的console/controllers文件夹下,注意命名空间。
C:wampwwwyii>composer create-project --prefer-dist yiisoft/yii2-app-advanced advanced
2. 进入 advanced 目录中 执行 init 初始化
[php] view
plain copy
print?
C:wampwwwyii>cd advanced
C:wampwwwyiiadvanced>init
Yii Application Initialization Tool v1.0
Which environment do you want the application to be initialized in?
[0] Development
[1] Production
Your choice [0-1, or “q” to quit] 0
Initialize the application under ‘Development’ environment? [yes|no] y
Start initialization …
generate backend/config/main-local.php
generate backend/config/params-local.php
generate backend/web/index-test.php
generate backend/web/index.php
generate common/config/main-local.php
generate common/config/params-local.php
generate console/config/main-local.php
generate console/config/params-local.php
generate frontend/config/main-local.php
generate frontend/config/params-local.php
generate frontend/web/index-test.php
generate frontend/web/index.php
generate yii
generate cookie validation key in backend/config/main-local.php
generate cookie validation key in frontend/config/main-local.php
chmod 0777 backend/runtime
chmod 0777 backend/web/assets
chmod 0777 frontend/runtime
chmod 0777 frontend/web/assets
chmod 0755 yii
… initialization completed.
windows环境下直接运行根目录下的init.bat命令。
3.到此为止我们配置好了 数据库联系信息 以及数据库,但是我们还没有表,我们使用 yii migrate 命令
[php] view
plain copy
print?
C:wampwwwyiiadvanced>yii migrate
Yii Migration Tool (based on Yii v2.0.0)
Creating migration history table “migration”…done.
Total 1 new migration to be applied:
m130524_201442_init
Apply the above migration? (yes|no) [no]:y
*** applying m130524_201442_init
> create table {{%user}} … done (time: 0.031s)
*** applied m130524_201442_init (time: 0.055s)
Migrated up successfully.
在windows下打卡cmd命令窗口,切换到Yii项目所在目录(包含Yii.bat),就可以在cmd中运行Yii命令了。
使用Yii migrate命令执行sql语句:
也可以在输入./yii查看有哪些命令可用。
直接运行yii migrate会自动找到console/migrations下的*_init.php。
4.RBAC权限
以下代码展示使用 yii\rbac\DbManager 时如何在应用配置文件中配置
authManager:
return [
// ...
'components' => [
'authManager' => [
'class' => 'yii\rbac\DbManager',
],
// ...
],
];
DbManager使用4个数据库表存放它的数据:
yii\rbac\DbManager::$itemTable: 该表存放授权条目(译者注:即角色和权限)。默认表名为 "auth_item" 。
yii\rbac\DbManager::$itemChildTable: 该表存放授权条目的层次关系。默认表名为 "auth_item_child"。
yii\rbac\DbManager::$assignmentTable: 该表存放授权条目对用户的指派情况。默认表名为 "auth_assignment"。
yii\rbac\DbManager::$ruleTable: 该表存放规则。默认表名为 "auth_rule"。
继续之前,你需要在数据库中创建这些表。你可以使用存放在
@yii/rbac/migrations目录中的数据库迁移文件来做这件事(译者注:根据本人经验,最好是将授权数据初始化命令也写到这个
RBAC 数据库迁移文件中):
yii migrate --migrationPath=@yii/rbac/migrations
现在可以通过
\Yii::$app->authManager访问
authManager。
5.
如果你的权限层次结构不会发生改变,而且你的用户数是恒定的,你可以通过
authManager提供的 API 创建一个 控制台命令 一次性初始化授权数据:
<?php
namespace app\commands;

use Yii;
use yii\console\Controller;

class RbacController extends Controller
{
public function actionInit()
{
$auth = Yii::$app->authManager;

// 添加 "createPost" 权限
$createPost = $auth->createPermission('createPost');
$createPost->description = 'Create a post';
$auth->add($createPost);

// 添加 "updatePost" 权限
$updatePost = $auth->createPermission('updatePost');
$updatePost->description = 'Update post';
$auth->add($updatePost);

// 添加 "author" 角色并赋予 "createPost" 权限
$author = $auth->createRole('author');
$auth->add($author);
$auth->addChild($author, $createPost);

// 添加 "admin" 角色并赋予 "updatePost"
// 和 "author" 权限
$admin = $auth->createRole('admin');
$auth->add($admin);
$auth->addChild($admin, $updatePost);
$auth->addChild($admin, $author);

// 为用户指派角色。其中 1 和 2 是由 IdentityInterface::getId() 返回的id (译者注:user表的id)
// 通常在你的 User 模型中实现这个函数。
$auth->assign($author, 2);
$auth->assign($admin, 1);
}
}
在用
yii rbac/init执行了这个命令后,我们将得到下图所示的层次结构:
6.RbacController.php放在basic模板里面的commands文件夹下,放在advanced的console/controllers文件夹下,注意命名空间。

相关文章推荐
- YII Framework框架教程之安全方案详解
- Yii PHP Framework实用入门教程(详细介绍)
- PHP的Yii框架中Model模型的学习教程
- 详解PHP的Yii框架中自带的前端资源包的使用
- jQuery Migrate 1.1.0 Released 注意事项
- Yii操作数据库的3种方法
- 在yii中新增一个用户验证的方法详解
- 详解PHP的Yii框架中的Controller控制器
- PHP的Yii框架中过滤器相关的使用总结
- Yii框架在页面输出执行sql语句以方便调试的实现方法
- YII动态模型(动态表名)支持分析
- 浅析Yii中使用RBAC的完全指南(用户角色权限控制)
- Yii2前后台分离及migrate使用(七)
- 详解在PHP的Yii框架中使用行为Behaviors的方法
- Yii 连接、修改 MySQL 数据库及phpunit 测试连接
- 深入讲解PHP的Yii框架中的属性(Property)
- yii实现使用CUploadedFile上传文件的方法
- 实例讲解如何在PHP的Yii框架中进行错误和异常处理
- 解读PHP的Yii框架中请求与响应的处理流程
- Yii 2 —— session