android声音检测仪---分贝仪 (附源码)
2016-06-06 10:16
639 查看
android声音检测仪---分贝仪
文章出处:大黑个人博客--android声音检测仪---分贝仪源码下载地址:https://github.com/halibobo/SoundMeter
背景
最近小区旁边工地施工,今一大早就被工地传来的guang!guang!...吵醒了。很响很响的那种,你们肯定会问具体有多响?具体要多响?怎么描述呢?顿时就萌生出开发一款记录声音响度的app,忙活了一下午于是就出了这个声音检测仪简介
android端的声音检测程序,实时获取当前周围环境的声压级,也就是平常所说的分贝值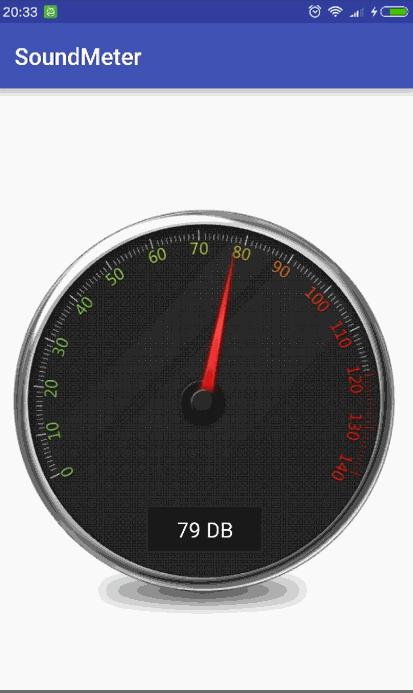
源码
声音采集利用系统的MediaRecorder/**
* 录音
* @return 是否成功开始录音
*/
public boolean startRecorder(){
if (myRecAudioFile == null) {
return false;
}
try {
mMediaRecorder = new MediaRecorder();
mMediaRecorder.setAudioSource(MediaRecorder.AudioSource.MIC);
mMediaRecorder.setOutputFormat(MediaRecorder.OutputFormat.THREE_GPP);
mMediaRecorder.setAudioEncoder(MediaRecorder.AudioEncoder.AMR_NB);
mMediaRecorder.setOutputFile(myRecAudioFile.getAbsolutePath());
mMediaRecorder.prepare();
mMediaRecorder.start();
isRecording = true;
return true;
} catch(IOException exception) {
mMediaRecorder.reset();
mMediaRecorder.release();
mMediaRecorder = null;
isRecording = false ;
exception.printStackTrace();
}catch(IllegalStateException e){
stopRecording();
e.printStackTrace();
isRecording = false ;
}
return false;
}
/**
* 获取声压值
*/
public float getMaxAmplitude() {
if (mMediaRecorder != null) {
try {
return mMediaRecorder.getMaxAmplitude();
} catch (IllegalArgumentException e) {
e.printStackTrace();
return 0;
}
} else {
return 5;
}
}在MainActivity中开启一个线程定时获取声压值并转为分贝
private void startListenAudio() {
thread = new Thread(new Runnable() {
@Override
public void run() {
while (isThreadRun) {
try {
if(bListener) {
volume = mRecorder.getMaxAmplitude();  //获取声压值
if(volume > 0 && volume < 1000000) {
World.setDbCount(20 * (float)(Math.log10(volume)));  //将声压值转为分贝值
}
}
Thread.sleep(100);
} catch (InterruptedException e) {
e.printStackTrace();
bListener = false;
}
}
}
});
thread.start();
}
自定义显示分贝值得大圆盘View 取名SoundDiscView
private float scaleWidth, scaleHeight;
private int newWidth, newHeight;
private Matrix mMatrix = new Matrix();
private Bitmap indicatorBitmap;
private Paint paint = new Paint();
static final long  ANIMATION_INTERVAL = 100;

private void init() {
Bitmap myBitmap = BitmapFactory.decodeResource(getResources(), R.drawable.noise_index);
int bitmapWidth = myBitmap.getWidth();
int bitmapHeight = myBitmap.getHeight();
newWidth = getWidth();
newHeight = getHeight();
scaleWidth = ((float) newWidth) /(float) bitmapWidth;  // 获取缩放比例
scaleHeight = ((float) newHeight) /(float) bitmapHeight;  //获取缩放比例
mMatrix.postScale(scaleWidth, scaleHeight);   //设置mMatrix的缩放比例
indicatorBitmap = Bitmap.createBitmap(myBitmap, 0, 0, bitmapWidth, bitmapHeight, mMatrix,true);  //获取同等和背景宽高的指针图的bitmap

paint = new Paint();
paint.setTextSize(55);
paint.setAntiAlias(true);
paint.setTextAlign(Paint.Align.CENTER);  //抗锯齿
paint.setColor(Color.WHITE);
}

@Override
protected void onDraw(Canvas canvas) {
super.onDraw(canvas);
currentAngle = getAngle(World.dbCount); //获取指针应该显示的角度
mMatrix.setRotate(getAngle(World.dbCount), newWidth / 2, newHeight * 215 / 460);   //片相对位置
canvas.drawBitmap(indicatorBitmap, mMatrix, paint);
postInvalidateDelayed(ANIMATION_INTERVAL);
canvas.drawText((int)World.dbCount+" DB", newWidth/2,newHeight*36/46, paint); //图片相对位置
}
运行发现指针滑动的太突兀,做个缓慢过度
public static float dbCount = 40;

private static float lastDbCount = dbCount;
public static void setDbCount(float dbValue) {
dbCount = lastDbCount + (dbValue - lastDbCount) * 0.2f;
lastDbCount = dbCount;
}
结果
这里的分贝值是手机系统录音时获取的,手机厂商都对这个值设置了上限而且手机厂商之间都是有差别的,所以获取声音的分贝值会有点偏差。但是最终运行起来的效果还是很满意的。下面附上源码源码下载地址

相关文章推荐
- Android RecyclerView 加载更多数据 及 不同类型itemView的使用
- Android闪屏问题的分析思路
- android studio 的坑 自己来填
- Android Studio_Android Studio Template
- Android中用Handle做定时器,显示实时时间
- Android Date 的前一天,前一个月的设置
- android之BadTokenException异常
- 【Android基础知识】ContentProvider(一)
- Android_Component_example
- Android Animation动画(很详细)
- Android中Button的基本用法
- Android AudioManager修改设备默认音量
- HAL开发全流程(验证)
- 初涉RxAndroid .map() . filter() flatMap()
- 初涉RxAndroid .map() . filter() flatMap()
- MaterialDesign_兼容性控件的使用
- Android 状态栏工具类(实现沉浸式状态栏/变色状态栏)
- Android 通用流行框架梳理
- 两个android警告
- Android_listView_exc