centos6安装tengine
2016-05-18 00:00
399 查看
摘要: centos6安装tengine
1、安装必要的编译环境好
由于Tengine安装需要使用源代码自行编译,所以在安装前需要安装必要的编译工具:
2、安装需要的组件
A、PCRE
PCRE(Perl Compatible Regular Expressions)是一个Perl库,包括 perl 兼容的正则表达式库。nginx rewrite依赖于PCRE库,所以在安装Tengine前一定要先安装PCRE,最新版本的PCRE可在官网(http://www.pcre.org/)获取。具体安装流程为:
附加信息:
源码的安装一般由3个步骤组成:配置(configure)、编译(make)、安装(make install)。
Configure是一个可执行脚本,它有很多选项,在待安装的源码路径下使用命令./configure –help输出详细的选项列表。其中–prefix选项是配置安装的路径,如果不配置该选项,安装后可执行文件默认放在/usr /local/bin,库文件默认放在/usr/local/lib,配置文件默认放在/usr/local/etc,其它的资源文件放在/usr /local/share,比较凌乱。
如果配置–prefix,如:./configure –prefix=/usr/local/test,可以把所有资源文件放在/usr/local/test的路径中,不会杂乱。
用了—prefix选项的另一个好处是卸载软件或移植软件。当某个安装的软件不再需要时,只须简单的删除该安装目录,就可以把软件卸载得干干净净;移植软件只需拷贝整个目录到另外一个机器即可(相同的操作系统)。当然要卸载程序,也可以在原来的make目录下用一次make uninstall,但前提是make文件指定过uninstall。
B、OpenSSL
OpenSSL 是一个强大的安全套接字层密码库,囊括主要的密码算法、常用的密钥和证书封装管理功能及SSL协议,并提供丰富的应用程序供测试或其它目的使用。,安装OpenSSL(http://www.openssl.org/source/)主要是为了让tengine支持Https的访问请求。具体是否安装看需求。
C、Zlib
Zlib是提供资料压缩之用的函式库,当Tengine想启用GZIP压缩的时候就需要使用到Zlib(http://www.zlib.net/)。
D、jemalloc
jemalloc(http://www.canonware.com/jemalloc/)是一个更好的内存管理工具,使用jemalloc可以更好的优化Tengine的内存管理。
3、安装Tengine
在主要核心的组件安装完毕以后就可以安装Tegine了,最新版本的Tegine可从官网(http://tengine.taobao.org/)获取。
在编译安装前还需要做的一件事是添加一个专门的用户来执行Tengine。当然你也可以用root(不建议)。
接下来才是进行安装:
注意配置的时候 –with-pcre 、–with-openssl、–with-jemalloc、–with-zlib的路径为源文件的路径。
4、配置Tengine,设置tengine自动启动
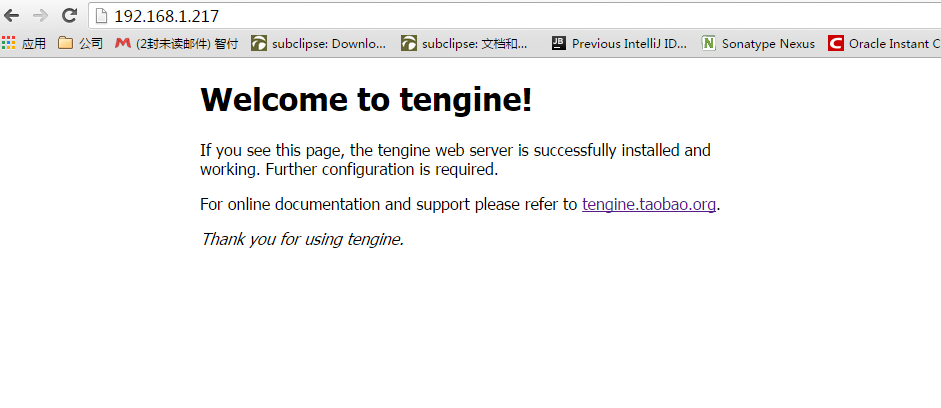
浏览器中输入地址访问如下
参考:
http://tengine.taobao.org/document_cn/install_cn.html http://blog.csdn.net/shirdrn/article/details/9731215
1、安装必要的编译环境好
由于Tengine安装需要使用源代码自行编译,所以在安装前需要安装必要的编译工具:
[code=plain]# yum update
# yum install gcc gcc-c++ autoconf automake
2、安装需要的组件
A、PCRE
PCRE(Perl Compatible Regular Expressions)是一个Perl库,包括 perl 兼容的正则表达式库。nginx rewrite依赖于PCRE库,所以在安装Tengine前一定要先安装PCRE,最新版本的PCRE可在官网(http://www.pcre.org/)获取。具体安装流程为:
[code=plain]# cd /usr/local/src
# wget http://ncu.dl.sourceforge.net/project/pcre/pcre/8.38/pcre-8.38.tar.gz # tar zxvf pcre-8.38.tar.gz
# cd pcre-8.38
# ./configure --prefix=/usr/local/pcre
# make && make install
附加信息:
源码的安装一般由3个步骤组成:配置(configure)、编译(make)、安装(make install)。
Configure是一个可执行脚本,它有很多选项,在待安装的源码路径下使用命令./configure –help输出详细的选项列表。其中–prefix选项是配置安装的路径,如果不配置该选项,安装后可执行文件默认放在/usr /local/bin,库文件默认放在/usr/local/lib,配置文件默认放在/usr/local/etc,其它的资源文件放在/usr /local/share,比较凌乱。
如果配置–prefix,如:./configure –prefix=/usr/local/test,可以把所有资源文件放在/usr/local/test的路径中,不会杂乱。
用了—prefix选项的另一个好处是卸载软件或移植软件。当某个安装的软件不再需要时,只须简单的删除该安装目录,就可以把软件卸载得干干净净;移植软件只需拷贝整个目录到另外一个机器即可(相同的操作系统)。当然要卸载程序,也可以在原来的make目录下用一次make uninstall,但前提是make文件指定过uninstall。
B、OpenSSL
OpenSSL 是一个强大的安全套接字层密码库,囊括主要的密码算法、常用的密钥和证书封装管理功能及SSL协议,并提供丰富的应用程序供测试或其它目的使用。,安装OpenSSL(http://www.openssl.org/source/)主要是为了让tengine支持Https的访问请求。具体是否安装看需求。
[code=plain]# cd /usr/local/src
# wget http://www.openssl.org/source/openssl-1.0.2.tar.gz # tar zxvf openssl-1.0.2.tar.gz
# cd openssl-1.0.2
# ./Configure --prefix=/usr/local/openssl
# make && make install
C、Zlib
Zlib是提供资料压缩之用的函式库,当Tengine想启用GZIP压缩的时候就需要使用到Zlib(http://www.zlib.net/)。
[code=plain]# cd /usr/local/src
# wget http://zlib.net/zlib-1.2.8.tar.gz # tar zxvf zlib-1.2.8.tar.gz
# cd zlib-1.2.8
# ./configure --prefix=/usr/local/zlib
# make && make install
D、jemalloc
jemalloc(http://www.canonware.com/jemalloc/)是一个更好的内存管理工具,使用jemalloc可以更好的优化Tengine的内存管理。
[code=plain]# cd /usr/local/src
# wget http://www.canonware.com/download/jemalloc/jemalloc-3.6.0.tar.bz2 # tar jxvf jemalloc-3.6.0.tar.bz2
# cd jemalloc-3.6.0
# ./configure --prefix=/usr/local/jemalloc
# make && make install
3、安装Tengine
在主要核心的组件安装完毕以后就可以安装Tegine了,最新版本的Tegine可从官网(http://tengine.taobao.org/)获取。
在编译安装前还需要做的一件事是添加一个专门的用户来执行Tengine。当然你也可以用root(不建议)。
[code=plain]# groupadd www-data
# useradd -s /sbin/nologin -g www-data www-data
接下来才是进行安装:
[code=plain]# cd /usr/local/src
# wget http://tengine.taobao.org/download/tengine-2.1.2.tar.gz # tar -zxvf tengine-2.1.2.tar.gz
# cd tengine-2.1.2
# ./configure --prefix=/usr/local/nginx \
--user=www-data \
--group=www-data \
--with-pcre=/usr/local/src/pcre-8.38 \
--with-openssl=/usr/local/src/openssl-1.0.2 \
--with-jemalloc=/usr/local/src/jemalloc-3.6.0 \
--with-http_gzip_static_module \
--with-http_realip_module \
--with-http_stub_status_module \
--with-http_concat_module \
--with-zlib=/usr/local/src/zlib-1.2.8
# make && make install
注意配置的时候 –with-pcre 、–with-openssl、–with-jemalloc、–with-zlib的路径为源文件的路径。
4、配置Tengine,设置tengine自动启动
[code=plain]#vim /etc/rc.d/init.d/nginx
#编辑启动文件添加下面内容
#!/bin/bash
# nginx Startup script for the Nginx HTTP Server
# it is v.0.0.2 version.
# chkconfig: - 85 15
# description: Nginx is a high-performance web and proxy server.
# It has a lot of features, but it's not for everyone.
# processname: nginx
# pidfile: /var/run/nginx.pid
# config: /usr/local/nginx/conf/nginx.conf
nginxd=/usr/local/nginx/sbin/nginx
nginx_config=/usr/local/nginx/conf/nginx.conf
nginx_pid=/usr/local/nginx/logs/nginx.pid
RETVAL=0
prog="nginx"
# Source function library.
. /etc/rc.d/init.d/functions
# Source networking configuration.
. /etc/sysconfig/network
# Check that networking is up.
[ ${NETWORKING} = "no" ] && exit 0
[ -x $nginxd ] || exit 0
# Start nginx daemons functions.
start() {
if [ -e $nginx_pid ];then
echo "nginx already running...."
exit 1
fi
echo -n $"Starting $prog: "
daemon $nginxd -c ${nginx_config}
RETVAL=$?
echo
[ $RETVAL = 0 ] && touch /var/lock/subsys/nginx
return $RETVAL
}
# Stop nginx daemons functions.
stop() {
echo -n $"Stopping $prog: "
killproc $nginxd
RETVAL=$?
echo
[ $RETVAL = 0 ] && rm -f /var/lock/subsys/nginx /usr/local/nginx/logs/nginx.pid
}
reload() {
echo -n $"Reloading $prog: "
#kill -HUP `cat ${nginx_pid}`
killproc $nginxd -HUP
RETVAL=$?
echo
}
# See how we were called.
case "$1" in
start)
start
;;
stop)
stop
;;
reload)
reload
;;
restart)
stop
start
;;
status)
status $prog
RETVAL=$?
;;
*)
echo $"Usage: $prog {start|stop|restart|reload|status|help}"
exit 1
esac
exit $RETVAL
保存退出
chmod 775 /etc/rc.d/init.d/nginx #赋予文件执行权限
chkconfig nginx on #设置开机启动
service nginx restart #启动服务
浏览器中输入地址访问如下
参考:
http://tengine.taobao.org/document_cn/install_cn.html http://blog.csdn.net/shirdrn/article/details/9731215

相关文章推荐
- Linux IO实时监控iostat命令详解
- linux 调用 setgid()、initgroups()、setuid() 修改执行权限
- centOS 安装gitlab
- linux 好用的命令积累
- Linux中搜索命令简记
- 【Linux开发】linux设备驱动归纳总结(十三):1.触摸屏与ADC时钟
- Linux中find用法
- 【Linux开发】linux设备驱动归纳总结(十二):简单的数码相框
- 【Linux开发】linux设备驱动归纳总结(十一):写个简单的看门狗驱动
- 【Linux开发】linux设备驱动归纳总结(十):1.udev&misc
- 【Linux开发】linux设备驱动归纳总结(九):1.platform总线的设备和驱动
- 【Linux开发】linux设备驱动归纳总结(八):4.总线热插拔
- 【Linux开发】linux设备驱动归纳总结(八):3.设备管理的分层与面向对象思想
- 【Linux开发】linux设备驱动归纳总结(八):2.总线、设备和驱动的关系
- 【Linux开发】linux设备驱动归纳总结(八):1.总线、设备和驱动
- 【Linux开发】linux设备驱动归纳总结(七):2.内核定时器
- 【Linux开发】linux设备驱动归纳总结(七):1.时间管理与内核延时
- 【Linux开发】linux设备驱动归纳总结(六):3.中断的上半部和下半部——工作队列
- 【Linux开发】linux设备驱动归纳总结(六):3.中断的上半部和下半部——tasklet
- 【Linux开发】linux设备驱动归纳总结(六):2.分享中断号