实战~REDHAT 6.5 X64上安装ORACLE双机(ROSE-HA9.0)
2016-05-16 13:04
1446 查看
以下是一次实施的全程介绍,非虚拟机环境。
1、系统环境配置介绍
1.1、操作系统规划
| 主机名 | 服务器配置 | 操作系统版本 | 安装数据库版本 | 双机软件版本 |
| Jzzf-db1 | E5-2609 v3*2 128GB内存 300G硬盘 | Redhat linux 6.5 x64 | Oracle 10.2.0.5 | Rose ha 9.0 |
| Jzzf-db2 | E5-2609 v3*2 128GB内存 300G硬盘 | Redhat linux 6.5 x64 | Oracle 10.2.0.5 | Rose ha 9.0 |
1.2、IP地址规划
| 主机名 | IP地址 | 浮动IP |
| Jzzf-db1 | Eth0:10.20.160.165 Eth1:192.168.1.1 Eth2:172.16.0.1 | 10.20.160.101 |
| Jzzf-db2 | Eth0:10.20.160.166 Eth1:192.168.1.2 Eth2:172.16.0.2 |
1.3、磁盘规划
| 主机名 | 数据磁盘 | 仲裁磁盘 |
| Jzzf-db1 | sdb/sdd聚合为/dev/mapper/oradata 1TB | sdc/sde聚合为/dev/mapper/vote 10GB |
| Jzzf-db2 | sdb/sdd聚合为/dev/mapper/oradata 1TB | sdc/sde聚合为/dev/mapper/vote 10GB |
2、安装ORACLE数据库软件
2.1修改主机名及HOSTS文件等
具体的修改方法我就不写了。VI编辑就行[root@jzzf-db1 ~]# cat /etc/hosts
127.0.0.1 localhost localhost.localdomain localhost4 localhost4.localdomain4
::1 localhost localhost.localdomain localhost6 localhost6.localdomain6
10.20.160.165 jzzf-db1
10.20.160.166 jzzf-db2
[root@jzzf-db1 ~]# cat /etc/sysconfig/network
NETWORKING=yes
HOSTNAME=jzzf-db1
[root@jzzf-db1 ~]# cat /etc/redhat-release
Red Hat Enterprise Linux Server release 6.5 (Santiago) //先安装10.2.0.1,要修改该文件,修改过程见2.2
[root@jzzf-db1 ~]# uname -a
Linux localhost.localdomain 2.6.32-431.el6.x86_64 #1 SMP Sun Nov 10 22:19:54 EST 2013 x86_64 x86_64 x86_64 GNU/Linux
[root@jzzf-db1 ~]# uname -r
2.6.32-431.el6.x86_64
[root@jzzf-db2 ~]# cat /etc/hosts
127.0.0.1 localhost localhost.localdomain localhost4 localhost4.localdomain4
::1 localhost localhost.localdomain localhost6 localhost6.localdomain6
10.20.160.165 jzzf-db1
10.20.160.166 jzzf-db2
[root@jzzf-db2 ~]# cat /etc/sysconfig/network
NETWORKING=yes
HOSTNAME=jzzf-db2
[root@jzzf-db2 ~]# cat /etc/redhat-release
Red Hat Enterprise Linux Server release 6.5 (Santiago)
[root@jzzf-db2 ~]# uname -a
Linux localhost.localdomain 2.6.32-431.el6.x86_64 #1 SMP Sun Nov 10 22:19:54 EST 2013 x86_64 x86_64 x86_64 GNU/Linux
[root@jzzf-db2 ~]# uname -r
2.6.32-431.el6.x86_64
2.2、修改系统各个参数配置文件
[root@jzzf-db1 ~]# grep -v "^#" /etc/security/limits.conforacle soft nproc 2047
oracle hard nproc 16384
oracle soft nofile 1024
oracle hard nofile 65536
[root@jzzf-db2 ~]#grep -v "^#" /etc/security/limits.conf
oracle soft nproc 2047
oracle hard nproc 16384
oracle soft nofile 1024
oracle hard nofile 65536
[root@jzzf-db1 ~]# grep -v "^#" /etc/sysctl.conf
net.ipv4.ip_forward = 0
net.ipv4.conf.default.rp_filter = 1
net.ipv4.conf.default.accept_source_route = 0
kernel.sysrq = 0
kernel.core_uses_pid = 1
net.ipv4.tcp_syncookies = 1
net.bridge.bridge-nf-call-ip6tables = 0
net.bridge.bridge-nf-call-iptables = 0
net.bridge.bridge-nf-call-arptables = 0
kernel.msgmnb = 65536
kernel.msgmax = 65536
kernel.shmmax = 68719476736
kernel.shmall = 4294967296
kernel.shmmni = 4096
kernel.sem = 250 32000 100 128
fs.file-max = 65536
net.ipv4.ip_local_port_range = 1024 65000
net.core.rmem_default = 262144
net.core.rmem_max = 262144
net.core.wmem_default = 262144
net.core.wmem_max = 262144
[root@jzzf-db2 ~]# grep -v "^#" /etc/sysctl.conf
net.ipv4.ip_forward = 0
net.ipv4.conf.default.rp_filter = 1
net.ipv4.conf.default.accept_source_route = 0
kernel.sysrq = 0
kernel.core_uses_pid = 1
net.ipv4.tcp_syncookies = 1
net.bridge.bridge-nf-call-ip6tables = 0
net.bridge.bridge-nf-call-iptables = 0
net.bridge.bridge-nf-call-arptables = 0
kernel.msgmnb = 65536
kernel.msgmax = 65536
kernel.shmmax = 68719476736
kernel.shmall = 4294967296
kernel.shmmni = 4096
kernel.sem = 250 32000 100 128
fs.file-max = 65536
net.ipv4.ip_local_port_range = 1024 65000
net.core.rmem_default = 262144
net.core.rmem_max = 262144
net.core.wmem_default = 262144
net.core.wmem_max = 262144
[root@jzzf-db1 tmp]# cat /etc/redhat-release
Red Hat Enterprise Linux Server release 6.5 (Santiago)
[root@jzzf-db1 tmp]# cp /etc/redhat-release /tmp/
[root@jzzf-db1 tmp]# vi /etc/redhat-release
[root@jzzf-db1 tmp]# cat /etc/redhat-release
redhat-4
2.3、创建ORACLE用户及软件安装路径
groupadd -g 6000 oinstallgroupadd -g 6001 dba
useradd -g oinstall -G dba -u 601 oracle
passwd oracle
mkdir -p /u01/app/oracle/product/10.2.0/db_1
chown -R oracle:oinstall /u01/
chmod -R 775 /u01
2.4、配置yum源安装所需要的软件包
两节点都需要配置配置YUM源
挂载操作系统光盘到mnt目录
[root@jzzf-db1 ~]#mount /dev/cdrom /mnt
[root@jzzf-db1 ~]# rpm --import /etc/pki/rpm-gpg/RPM-GPG-KEY-redhat-release
[root@jzzf-db1 ~]# cat /etc/yum.repos.d/local.repo
[DISK]
name=DISK
baseurl=file:///mnt/Server
gpgchekc=0
enable=1
安装需求包:
[root@jzzf-db1 ~]# mount -o loop /tmp/rhel-server-6.5-x86_64-dvd.iso /mnt
yum install -y libXp.i686 libXp.x86_64 libXp-devel.i686 libXp-devel.x86_64 libXpm.i686 libXpm-devel.i686 libXpm-devel.x86_64 libXpm.x86_64
yum install -y libXtst.x86_64 libXtst-devel.x86_64 libXtst.i686 libXtst-devel.i686
yum install -y binutils* compat-libstdc++-* elfutils-libelf-* elfutils-libelf-devel-* elfutils-libelf-devel-static-* gcc-* gcc-c++-* glibc-* glibc-common-* glibc-devel-* glibc-headers-* ksh libaio-* libaio-devel-* libgcc libstdc++-* libstdc++-devel make sysstat unixODBC unixODBC-devel compat-libstdc++-33.i386 compat-libstdc++-296.i386 glibc.i686 glibc-devel.i386 unixODBC.i386 unixODBC-devel.i386 libaio.i386 libaio-devel.i386 libgcc.i386 libstdc++.i386 libstdc++-devel.i386 libaio-devel.i386 libXp.i386
yum install -y binutils* compat-db setarch compat-libstdc++-* control-center elfutils-libelf-* elfutils-libelf-devel-* elfutils-libelf-devel-static-* gcc-* gcc-c++-* glibc-* glibc-common-* glibc-devel-* glibc-headers-* ksh libaio-* libaio-devel-* libgcc libstdc++-* libstdc++-devel make sysstat unixODBC unixODBC-devel compat-libstdc++-33.i386 compat-libstdc++-296.i386 glibc.i686 glibc-devel.i386 unixODBC.i386 unixODBC-devel.i386 libaio.i386 libaio-devel.i386 libgcc.i386 libstdc++.i386 libstdc++-devel.i386 libaio-devel.i386 libXp.i386
yum install binutils compat-db compat-libstdc++-33 glibc glibc-devel glibc-headers gcc gcc-c++ libstdc++ cpp make libaio ksh elfutils-libelf sysstat libaio libaio-devel setarch gcc make binutils openmotif glibc setarch libaio compat-db libXp openmotif compat-libstdc++-33-3.2.3 compat-gcc-34-c++-
cd /mnt/Packages
rpm -ivh glibc-devel-2.12-1.132.el6.i686.rpm
2.5、安装多路径,配置存储
[root@jzzf-db1 ~]# yum install device-mapper*Loaded plugins: product-id, refresh-packagekit, security, subscription-manager
This system is not registered to Red Hat Subscription Management. You can use subscription-manager to register.
Setting up Install Process
Package device-mapper-persistent-data-0.2.8-2.el6.x86_64 already installed and latest version
Package device-mapper-event-libs-1.02.79-8.el6.x86_64 already installed and latest version
Package device-mapper-1.02.79-8.el6.x86_64 already installed and latest version
Package device-mapper-libs-1.02.79-8.el6.x86_64 already installed and latest version
Package device-mapper-event-1.02.79-8.el6.x86_64 already installed and latest version
Resolving Dependencies
--> Running transaction check
---> Package device-mapper-multipath.x86_64 0:0.4.9-72.el6 will be installed
---> Package device-mapper-multipath-libs.x86_64 0:0.4.9-72.el6 will be installed
--> Finished Dependency Resolution
Dependencies Resolved
======================================================================================================================================
Package Arch Version Repository Size
======================================================================================================================================
Installing:
device-mapper-multipath x86_64 0.4.9-72.el6 DISK 116 k
device-mapper-multipath-libs x86_64 0.4.9-72.el6 DISK 180 k
Transaction Summary
======================================================================================================================================
Install 2 Package(s)
Total download size: 297 k
Installed size: 653 k
Is this ok [y/N]: y
Downloading Packages:
--------------------------------------------------------------------------------------------------------------------------------------
Total 7.2 MB/s | 297 kB 00:00
Running rpm_check_debug
Running Transaction Test
Transaction Test Succeeded
Running Transaction
Warning: RPMDB altered outside of yum.
Installing : device-mapper-multipath-libs-0.4.9-72.el6.x86_64 1/2
Installing : device-mapper-multipath-0.4.9-72.el6.x86_64 2/2
Verifying : device-mapper-multipath-0.4.9-72.el6.x86_64 1/2
Verifying : device-mapper-multipath-libs-0.4.9-72.el6.x86_64 2/2
Installed:
device-mapper-multipath.x86_64 0:0.4.9-72.el6 device-mapper-multipath-libs.x86_64 0:0.4.9-72.el6
Complete!
配置多路径服务开机启动
[root@jzzf-db2 ~]# chkconfig --level 35 multipathd on
[root@jzzf-db2 ~]# chkconfig --list |grep multipathd
multipathd 0:off 1:off 2:off 3:on 4:off 5:on 6:off
[root@jzzf-db2 /]# /etc/init.d/multipathd start
Starting multipathd daemon: [ OK ]
[root@jzzf-db2 /]# touch /etc/multipath.conf
[root@jzzf-db2 /]# multipath -ll
2694f7863475a3844 dm-1 INSPUR,SANVDSK
size=10G features='0' hwhandler='0' wp=rw
|-+- policy='round-robin 0' prio=1 status=active
| `- 1:0:0:2 sdc 8:32 active ready running
`-+- policy='round-robin 0' prio=1 status=enabled
`- 2:0:0:2 sde 8:64 active ready running
270746443556c555a dm-0 INSPUR,SANVDSK
size=1.0T features='0' hwhandler='0' wp=rw
|-+- policy='round-robin 0' prio=1 status=active
| `- 1:0:0:1 sdb 8:16 active ready running
`-+- policy='round-robin 0' prio=1 status=enabled
`- 2:0:0:1 sdd 8:48 active ready running
[root@jzzf-db2 /]# grep -v "^#" /etc/multipath.conf
blacklist {
devnode "^sda"
}
defaults {
user_friendly_names yes
}
multipaths {
multipath {
wwid 2694f7863475a3844
alias vote
path_grouping_policy multibus
path_selector "round-robin 0"
failback manual
rr_weight priorities
no_path_retry 5
}
multipath {
wwid 270746443556c555a
alias oradata
path_grouping_policy multibus
path_selector "round-robin 0"
failback manual
rr_weight priorities
no_path_retry 5
}
}
[root@jzzf-db2 /]# /etc/init.d/multipathd restart
[root@jzzf-db2 /]# multipath -F
[root@jzzf-db2 /]# multipath -v2
create: oradata (270746443556c555a) undef INSPUR,SANVDSK
size=1.0T features='0' hwhandler='0' wp=undef
`-+- policy='round-robin 0' prio=1 status=undef
|- 1:0:0:1 sdb 8:16 undef ready running
`- 2:0:0:1 sdd 8:48 undef ready running
create: vote (2694f7863475a3844) undef INSPUR,SANVDSK
size=10G features='0' hwhandler='0' wp=undef
`-+- policy='round-robin 0' prio=1 status=undef
|- 1:0:0:2 sdc 8:32 undef ready running
`- 2:0:0:2 sde 8:64 undef ready running
[root@jzzf-db2 /]# multipath -ll
oradata (270746443556c555a) dm-0 INSPUR,SANVDSK
size=1.0T features='1 queue_if_no_path' hwhandler='0' wp=rw
`-+- policy='round-robin 0' prio=1 status=active
|- 1:0:0:1 sdb 8:16 active ready running
`- 2:0:0:1 sdd 8:48 active ready running
vote (2694f7863475a3844) dm-1 INSPUR,SANVDSK
size=10G features='1 queue_if_no_path' hwhandler='0' wp=rw
`-+- policy='round-robin 0' prio=1 status=active
|- 1:0:0:2 sdc 8:32 active ready running
`- 2:0:0:2 sde 8:64 active ready running
[root@jzzf-db2 mapper]# pwd
/dev/mapper
[root@jzzf-db2 mapper]# ls
control oradata vote
[root@jzzf-db1 mapper]# fdisk /dev/mapper/oradata
Device contains neither a valid DOS partition table, nor Sun, SGI or OSF disklabel
Building a new DOS disklabel with disk identifier 0x181ae45d.
Changes will remain in memory only, until you decide to write them.
After that, of course, the previous content won't be recoverable.
Warning: invalid flag 0x0000 of partition table 4 will be corrected by w(rite)
The device presents a logical sector size that is smaller than
the physical sector size. Aligning to a physical sector (or optimal
I/O) size boundary is recommended, or performance may be impacted.
WARNING: DOS-compatible mode is deprecated. It's strongly recommended to
switch off the mode (command 'c') and change display units to
sectors (command 'u').
Command (m for help): n
Command action
e extended
p primary partition (1-4)
p
Partition number (1-4): 1
First cylinder (1-133674, default 1):
Using default value 1
Last cylinder, +cylinders or +size{K,M,G} (1-133674, default 133674):
Using default value 133674
Command (m for help): p
Disk /dev/mapper/oradata: 1099.5 GB, 1099511627776 bytes
255 heads, 63 sectors/track, 133674 cylinders
Units = cylinders of 16065 * 512 = 8225280 bytes
Sector size (logical/physical): 512 bytes / 4096 bytes
I/O size (minimum/optimal): 4096 bytes / 524288 bytes
Disk identifier: 0x181ae45d
Device Boot Start End Blocks Id System
/dev/mapper/oradatap1 1 133674 1073736373+ 83 Linux
Partition 1 does not start on physical sector boundary.
Command (m for help): w
The partition table has been altered!
Calling ioctl() to re-read partition table.
WARNING: Re-reading the partition table failed with error 22: Invalid argument.
The kernel still uses the old table. The new table will be used at
the next reboot or after you run partprobe(8) or kpartx(8)
Syncing disks.
创建完分区后,可能需要重启才能识别出/dev/mapper/oradatap1文件
[root@jzzf-db1 mapper]# mkfs.ext4 /dev/mapper/oradatap1
mke2fs 1.41.12 (17-May-2010)
/dev/mapper/oradatap1 alignment is offset by 512 bytes.
This may result in very poor performance, (re)-partitioning suggested.
Filesystem label=
OS type: Linux
Block size=4096 (log=2)
Fragment size=4096 (log=2)
Stride=1 blocks, Stripe blocks
67108864 inodes, 268434093 blocks
13421704 blocks (5.00%) reserved for the super user
First data block=0
Maximum filesystem blocks=4294967296
8192 block groups
32768 blocks per group, 32768 fragments per group
8192 inodes per group
Superblock backups stored on blocks:
32768, 98304, 163840, 229376, 294912, 819200, 884736, 1605632, 2654208,
4096000, 7962624, 11239424, 20480000, 23887872, 71663616, 78675968,
102400000, 214990848
Writing inode tables: done
Creating journal (32768 blocks): done
Writing superblocks and filesystem accounting information:
Message from syslogd@jzzf-db1 at May 12 14:04:00 ...
kernel:BUG: soft lockup - CPU#6 stuck for 67s! [mkfs.ext4:11569]
done
This filesystem will be automatically checked every 21 mounts or
180 days, whichever comes first. Use tune2fs -c or -i to override.
[root@jzzf-db1 mapper]# mkdir /oradata
[root@jzzf-db1 mapper]# chown -R oracle:dba /oradata/
[root@jzzf-db1 mapper]# chmod -R 775 /oradata/
[root@jzzf-db1 mapper]# mount /dev/mapper/oradatap1 /oradata/
[root@jzzf-db1 mapper]# chown -R oracle:dba /oradata/
[root@jzzf-db1 mapper]# chmod -R 775 /oradata/
2.6、安装ORACLE及升级版本
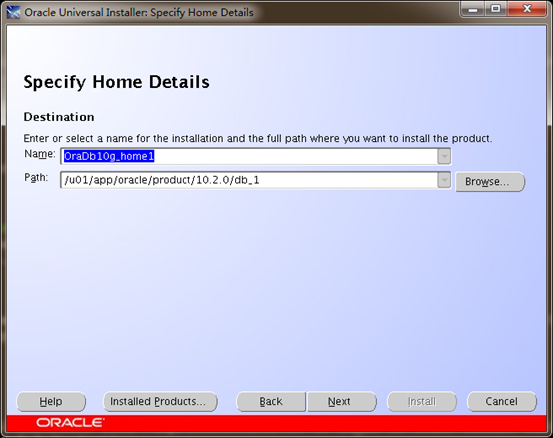
1、配置ORACLE环境变量,修改/home/oracle/.bash_profile增加以下内容export ORACLE_BASE=/u01/app/oracle
export ORACLE_HOME=$ORACLE_BASE/product/10.2.0/db_1
export ORACLE_SID=orcl
export PATH=$PATH:$ORACLE_HOME/bin
2、执行 . .bash_profile 生效配置
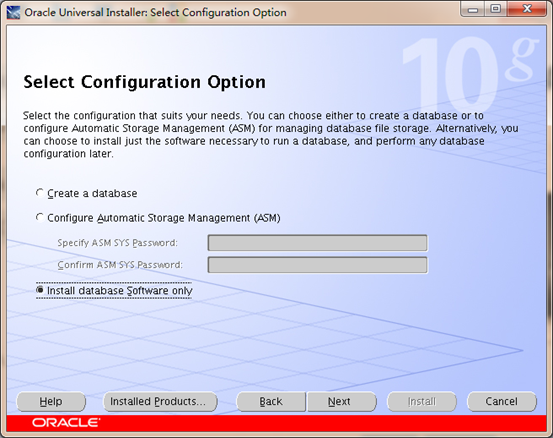
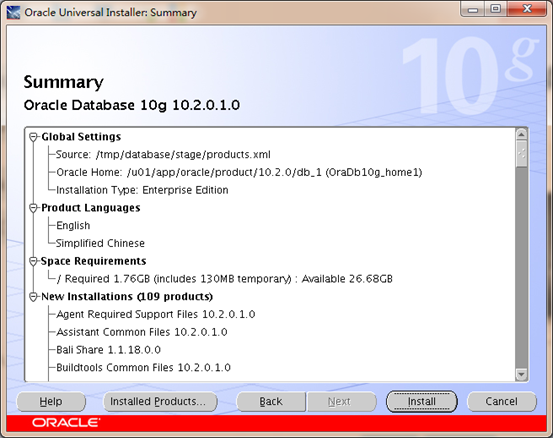
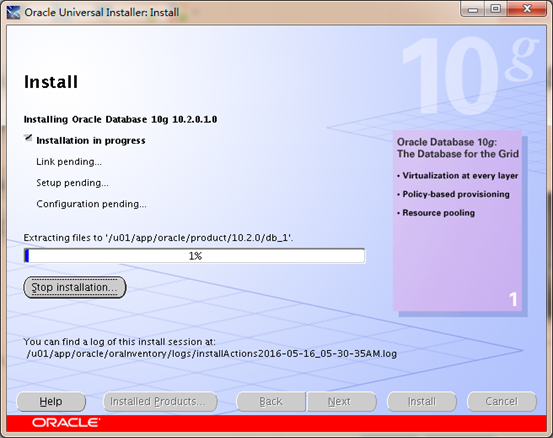
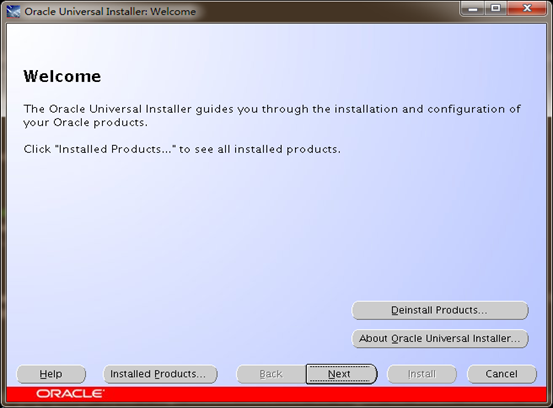
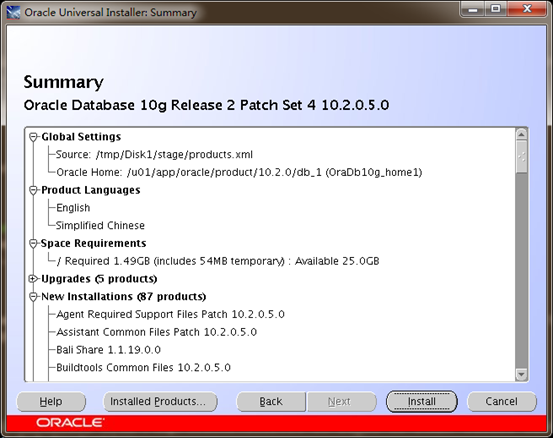
3、切换到ORACLE用户,su – oracle 然后进入到ORACLE10.2.01的安装目录,执行安装
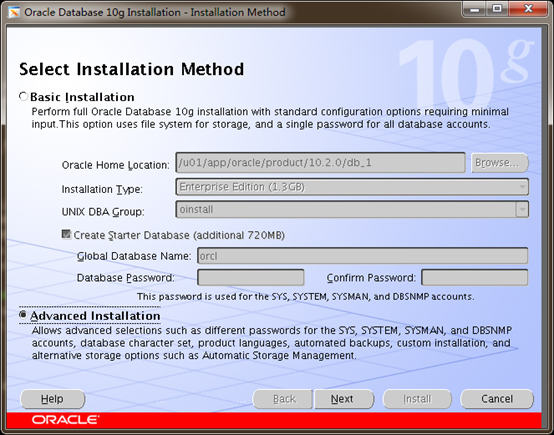
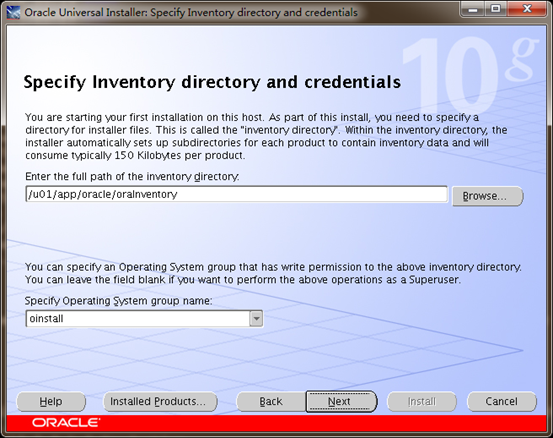

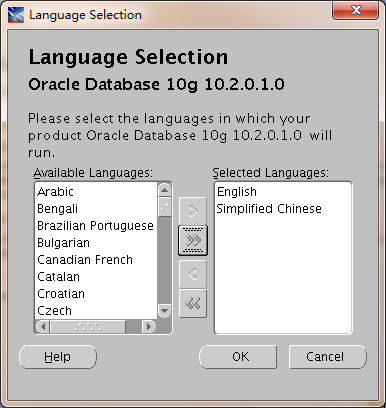

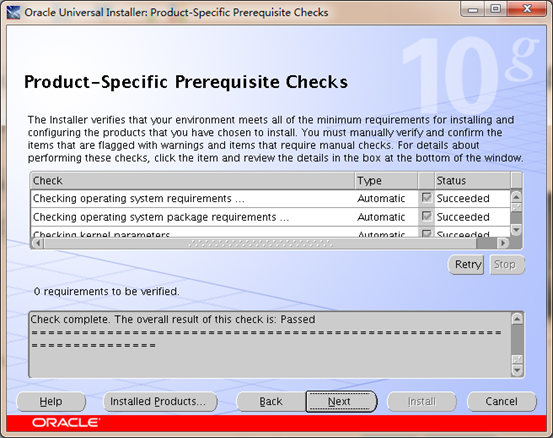
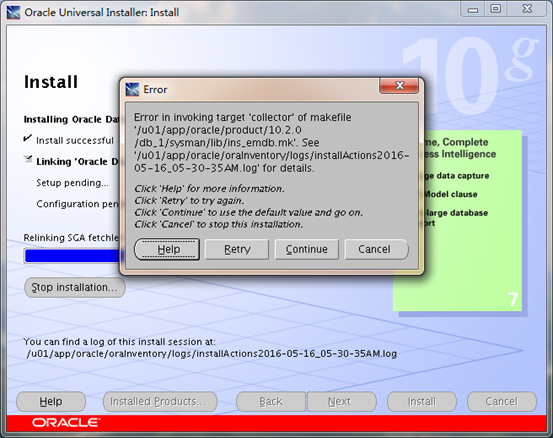
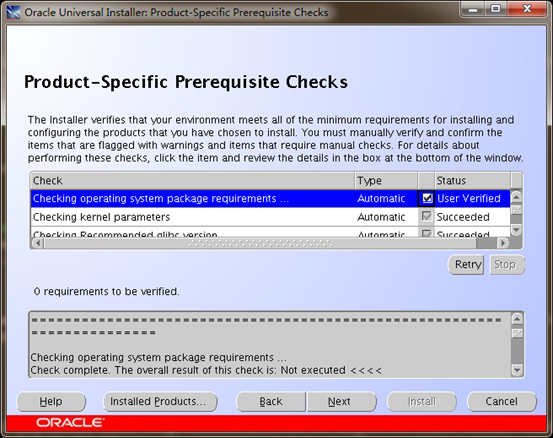
此处如出现如下提示,直接continue继续即可,等安装补丁的时候会解决。
4、执行完脚本安装完毕后,使用ROOT用户替换之前修改过的redhat-release文件
cp /tmp/redhat-release /etc/
再进入到10.2.0.5的安装目录,使用ORACLE用户安装补丁
5、都安装完毕后,执行DBCA创建数据库实例。
所有文件都要放到共享存储/oradata目录下。
3、安装并配置ROSE HA双机
3.1、安装ROSE HA 9.0
[root@jzzf-db1 RoseHA-9.0.0-9009-RHEL6-x86_64]# lsinstall resource.tar
[root@jzzf-db1 RoseHA-9.0.0-9009-RHEL6-x86_64]# ./install
RoseHA Installation
-----------------------------------
Version: 9.0.0 (buildno:9009)
1. Cluster Engine
2. Cluster Manager(hcc)
3. Cluster Command Line Interface(hcli)
4. Cluster User Interface for Text Window(hcuiw)
5. ALL
Q. Quit
Choose model(s,compart with space) you want to Install[1-4,5(def),Q]:5
you select 5:
5. ALL
Are you sure?[y,n(def)]:y
Please specify the path to install, [/opt/(def)]:
insatll...OK
Starting clusterd service: [ OK ]
Starting monitord service: [ OK ]
Starting hclid service: [ OK ]
[root@jzzf-db1 RoseHA-9.0.0-9009-RHEL6-x86_64]#
3.2、测试ROSE HA脚本
替换ORACLE里的TNSNAME文件及LISNTENER文件(红色斜体字根据实际情况修改)TNSNAME.ORA文件替换成如下内容:
# tnsnames.ora Network Configuration File: /u01/app/oracle/product/10.2.0/db_1/network/admin/tnsnames.ora
# Generated by Oracle configuration tools.
EXTPROC_CONNECTION_DATA =
(DESCRIPTION =
(ADDRESS_LIST =
(ADDRESS = (PROTOCOL = IPC)(KEY = EXTPROC0))
)
(CONNECT_DATA =
(SID = PLSExtProc)
(PRESENTATION = RO)
)
)
ORA_BC =
(DESCRIPTION =
(ADDRESS_LIST =
(ADDRESS = (PROTOCOL = TCP)(HOST = 10.20.160.101)(PORT = 1521))
)
(CONNECT_DATA =
(SERVICE_NAME = ora_bc)
)
)
listener.ora文件替换成如下内容:
# listener.ora Network Configuration File: /u01/app/oracle/product/10.2.0/db_1/network/admin/listener.ora
# Generated by Oracle configuration tools.
SID_LIST_LISTENER =
(SID_LIST =
(SID_DESC =
(SID_NAME = PLSExtProc)
(ORACLE_HOME = /u01/app/oracle/product/10.2.0/db_1)
(PROGRAM = extproc)
)
)
LISTENER =
(DESCRIPTION_LIST =
(DESCRIPTION =
(ADDRESS = (PROTOCOL = TCP)(HOST = 10.20.160.101)(PORT = 1521))
(ADDRESS = (PROTOCOL = IPC)(KEY = EXTPROC0))
)
)
#static-set
SID_LIST_LISTENER =
(SID_LIST =
(SID_DESC =
(GLOBAL_DBNAME = ora_bc)
(ORACLE_HOME = /u01/app/oracle/product/10.2.0/db_1)
(SID_NAME = ora_bc)
)
)
1、手动mount文件系统到/oradata目录
Mount /dev/mapper/oradatap1 /oradata
2、手动加载子IP
ifconfig eth0:1 10.20.160.101 up
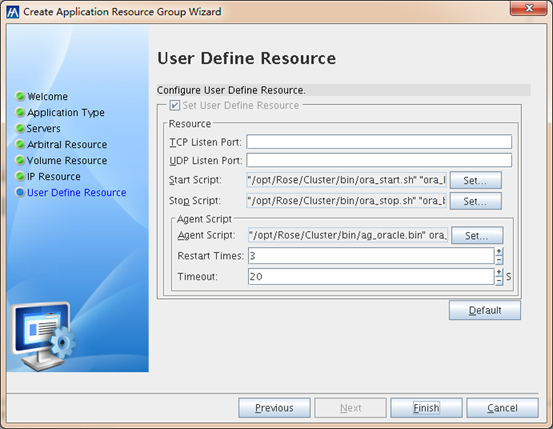
3、进入到ROSE HA目录/opt/Rose/Cluster/bin/
执行./ora_start.sh <实例名> LISTENER <服务名>
查看是否可以正常启动ORACLE实例及监听,如成功通过检查
4、进入到ROSE HA目录/opt/Rose/Cluster/bin/
执行./ag_oracle.bin <实例名> <服务名> 0
查看返回结果是否成功,如成功通过检查
5、进入到ROSE HA目录/opt/Rose/Cluster/bin/
执行./ora_stop.sh <实例名> LISTENER <服务名>
查看是否可以停止ORACLE实例及监听,如成功通过检查
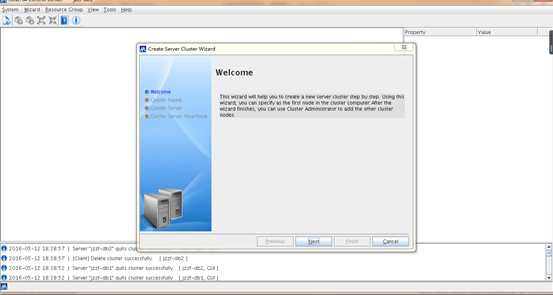
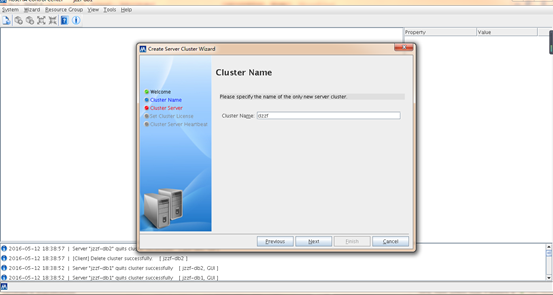
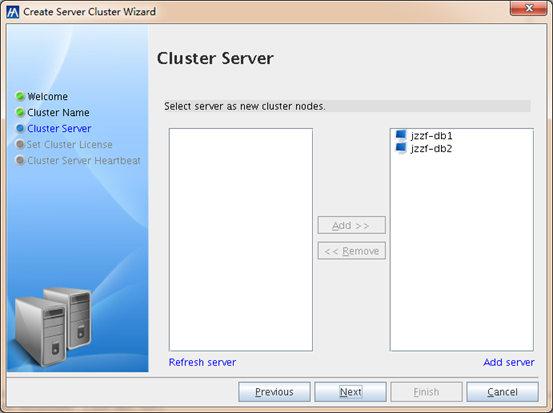
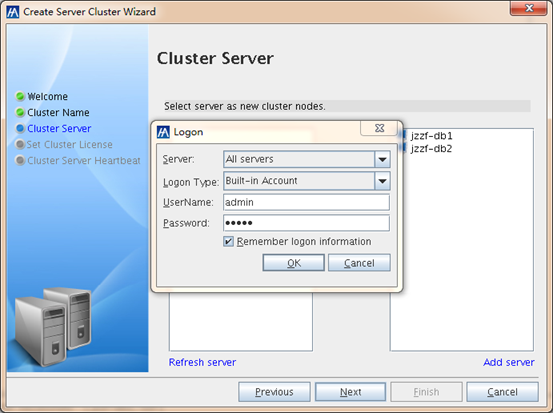
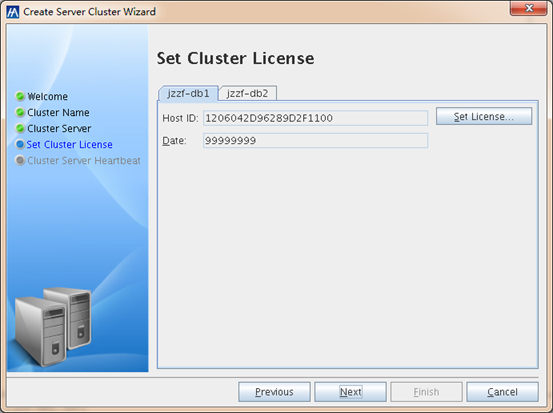
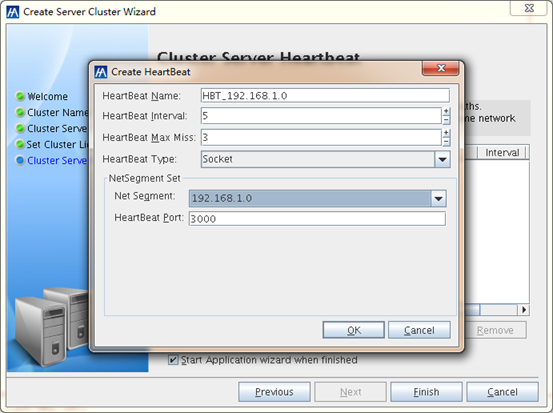
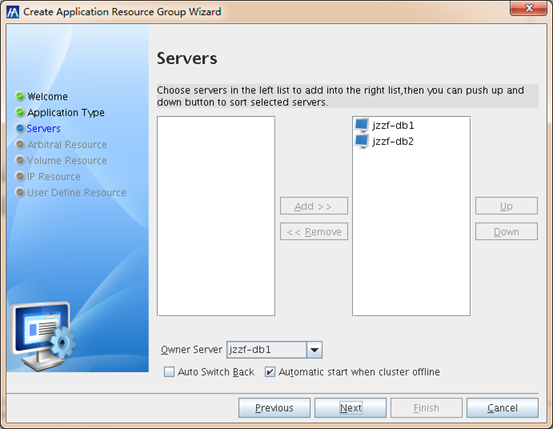
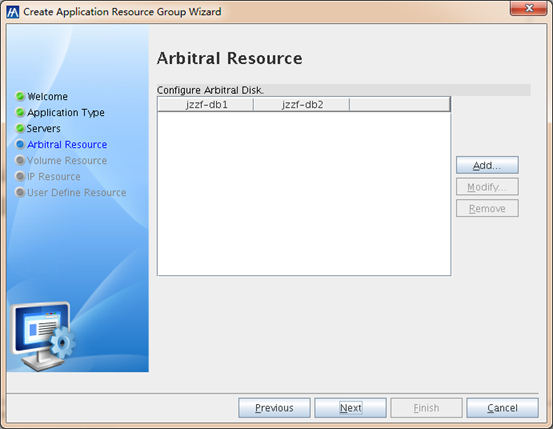
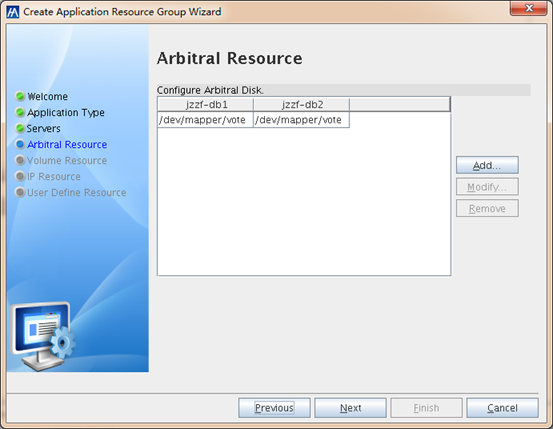
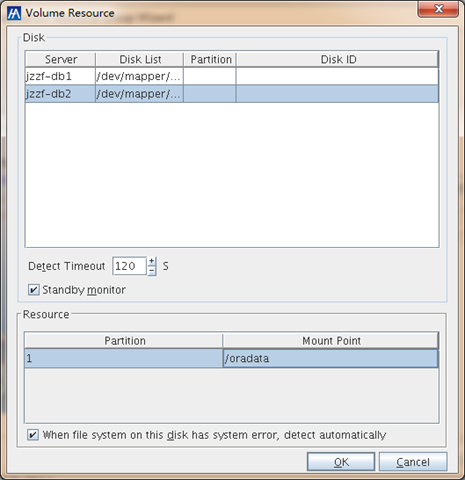
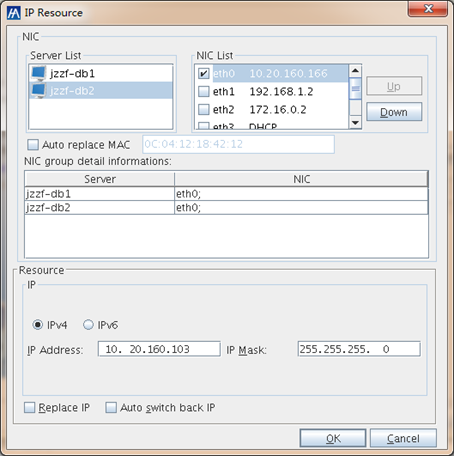
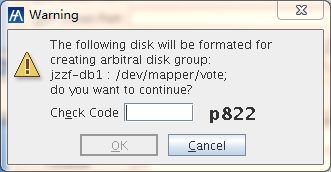
3.3、配置ROSE HA数据库集群
Ceate cluster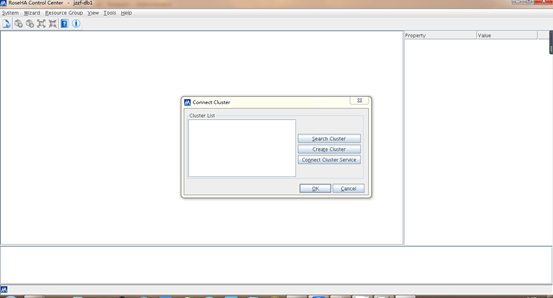


欢迎拍砖!

相关文章推荐
- 基于 Red Hat 的发行版 Oracle Linux 正式发布Oracle Linux 7.1
- Oracle Containers for J2EE远程安全漏洞(CVE-2014-0413)
- Oracle 10g R2不能使用EM的问题
- 表空间操作
- PreparedStatement中in子句的处理
- VMware下RedHat4.8_64位安装Oracle 10g RAC--简略脚本
- oracle sql日期比较
- 基于 Red Hat 的发行版 Oracle Linux 正式发布Oracle Linux 7.1
- OS block size和Oracle block size,查找OS Blocksize的方法
- oracle中创建数据库和表空间的几点总结
- 数据库自动备份脚本
- oracle的nvl函数的使用介绍
- 解决oracle用户连接失败的解决方法
- oracle的一些tips技巧
- Oracle 下的开发日积月累
- Oracle存储过程之数据库中获取数据实例
- Windows下ORACLE 10g完全卸载的方法分析
- Oracle 函数大全[字符串函数,数学函数,日期函数]第1/4页
- ORACLE LATERAL-SQL-INJECTION 个人见解