实例对比WPF中的Timer和DispatcherTimer
2016-05-08 16:35
351 查看
本文使用Timer和DispatcherTimer制作电子时钟,通过实例对比来了解两者的本质区别。
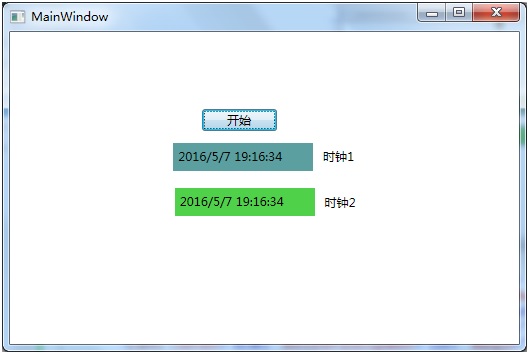
下面是实例最终的运行画面。其中时钟1使用Timer实现,时钟2使用DispatcherTimer实现。
下面给出完整的实例代码(省略画面代码)。
若将timer_Elapsed方法中的代码替换成dtimer_Tick方法中的代码,会出现异常“由于其他线程拥有此对象,因此调用线程无法对其进行访问。”这是因为Timer运行在非UI 线程,如果Timer需要更新UI画面,需要使用this.Dispatcher切换到UI线程后使用Invoke或者 BeginInvoke方法更新UI画面。而DispatcherTimer运行在UI 线程,可以直接更新UI画面。这便是两者本质的区别。
下面是实例最终的运行画面。其中时钟1使用Timer实现,时钟2使用DispatcherTimer实现。
下面给出完整的实例代码(省略画面代码)。
using System;
using System.Windows;

namespace DispatcherTimereExp
{
/// <summary>
/// MainWindow.xaml 的交互逻辑
/// </summary>
public partial class MainWindow : Window
{
System.Windows.Threading.DispatcherTimer dtimer;
System.Timers.Timer timer;
public MainWindow()
{
InitializeComponent();
if (dtimer == null)
{
dtimer = new System.Windows.Threading.DispatcherTimer();
dtimer.Interval = TimeSpan.FromSeconds(1);
dtimer.Tick += dtimer_Tick;
}
if (timer == null)
{
timer = new System.Timers.Timer();
timer.Interval = 1000;
timer.Elapsed += timer_Elapsed;
}
}

void timer_Elapsed(object sender, System.Timers.ElapsedEventArgs e)
{
this.Dispatcher.BeginInvoke(new Action(() =>
{
this.Label_OtherResult.Content = DateTime.Now.ToString();
}), null);
}

void dtimer_Tick(object sender, EventArgs e)
{
this.Label_Result.Content = DateTime.Now.ToString();
}

private void Button_Click_1(object sender, RoutedEventArgs e)
{
dtimer.Start();
timer.Start();
}
}
}
若将timer_Elapsed方法中的代码替换成dtimer_Tick方法中的代码,会出现异常“由于其他线程拥有此对象,因此调用线程无法对其进行访问。”这是因为Timer运行在非UI 线程,如果Timer需要更新UI画面,需要使用this.Dispatcher切换到UI线程后使用Invoke或者 BeginInvoke方法更新UI画面。而DispatcherTimer运行在UI 线程,可以直接更新UI画面。这便是两者本质的区别。

相关文章推荐
- C#及WPF获取本机所有字体和颜色的方法
- WPF MVVM示例讲解
- WPF实现时钟特效
- PowerShell中调用WPF生成炫酷窗口实例
- C#中Forms.Timer、Timers.Timer、Threading.Timer的用法分析
- 详解C#中的定时器Timer类及其垃圾回收机制
- C#使用timer实现的简单闹钟程序
- C#中timer定时器用法实例
- C#自定义基于控制台的Timer实例
- C#中的Timer和DispatcherTimer使用实例
- WPF实现类似360安全卫士界面的程序源码分享
- C#中WPF使用多线程调用窗体组件的方法
- php实现的Timer页面运行时间监测类
- .NET中的Timer类型用法详解
- WPF实现渐变淡入淡出的登陆窗口效果
- WPF的数据绑定详细介绍
- WPF绑定实例详解
- asp.net中Timer无刷新定时器的实现方法
- 关于WPF使用MultiConverter控制Button状态的详细介绍
- 如何搭建新的WPF项目框架