美女拼图小游戏
2016-04-14 16:35
381 查看
先看一下效果然后贴代码
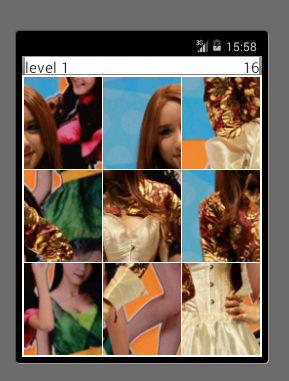
最上面是自定义的ActionBar,布局里面有两个TextView。一个用于显示level,一个用于显示倒计时
下面就是自定义的RelativeLayout。用于显示九个一打乱的bitmap
接下来就是代码:
首先是将图片分割的工具类
ImageUtil.java
分割后的每一个ImagePiece的实体类
ImagePiece.java
接下来是自定义的GameLayout.java
GameLayout实现如下几个功能
1.自定义容器
2.实现图片交换onCLickListener
3.实现过关逻辑interface GameListener
4.实现游戏的结束和暂停,这需要配合activity的onPause和onResume
接下来就是MainActivity.java
适合自定义ActionBar还要在styles.xml添加
以及修改AndroidManifest.xml
最后给出两个布局
main.xml
以及自定义的actionbar的布局title.xml
最上面是自定义的ActionBar,布局里面有两个TextView。一个用于显示level,一个用于显示倒计时
下面就是自定义的RelativeLayout。用于显示九个一打乱的bitmap
接下来就是代码:
首先是将图片分割的工具类
ImageUtil.java
package com.example.util;

import java.util.ArrayList;
import java.util.List;

import android.graphics.Bitmap;

public class ImageUtil {
/*
* 将图片分成piece*piece份小图片,每份就是ImagePiece,存在imgList里面
*/
public static List<ImagePiece> splitImage(Bitmap bitmap, int piece) {
List<ImagePiece> imgList = new ArrayList<ImagePiece>();

//每张图片的宽高
int pieceWidth = bitmap.getWidth() / piece;
int pieceHeight = bitmap.getHeight() / piece;

for (int i = 0; i < piece; i++) {
for (int j = 0; j < piece; j++) {
ImagePiece imagePiece = new ImagePiece();
imagePiece.setIndex(j + i * piece);

int x = j * pieceWidth;
int y = i * pieceHeight;

imagePiece.setBitmap(Bitmap.createBitmap(bitmap, x, y,
pieceWidth, pieceHeight));

imgList.add(imagePiece);
}
}

return imgList;
}
}
分割后的每一个ImagePiece的实体类
ImagePiece.java
package com.example.util;

import android.graphics.Bitmap;

public class ImagePiece {
private int index;//每小张图片的编号
private Bitmap bitmap;

public ImagePiece() {}

public ImagePiece(int index, Bitmap bitmap) {
this.index = index;
this.bitmap = bitmap;
}

public int getIndex() {
return index;
}

public void setIndex(int index) {
this.index = index;
}

public Bitmap getBitmap() {
return bitmap;
}

public void setBitmap(Bitmap bitmap) {
this.bitmap = bitmap;
}

@Override
public String toString() {
return "ImagePiece [index=" + index + ", bitmap=" + bitmap + "]";
}
}
接下来是自定义的GameLayout.java
package com.example.view;

import java.util.Collections;
import java.util.Comparator;
import java.util.List;

import android.content.Context;
import android.graphics.Bitmap;
import android.graphics.BitmapFactory;
import android.graphics.Color;
import android.os.Handler;
import android.os.Message;
import android.util.AttributeSet;
import android.util.TypedValue;
import android.view.View;
import android.view.View.OnClickListener;
import android.view.animation.Animation;
import android.view.animation.Animation.AnimationListener;
import android.view.animation.TranslateAnimation;
import android.widget.ImageView;
import android.widget.RelativeLayout;
import android.widget.Toast;

import com.example.pintu.R;
import com.example.util.ImagePiece;
import com.example.util.ImageUtil;

public class GameLayout extends RelativeLayout implements OnClickListener {
private int GameLayoutWidth;
private int GameLayoutHeight;
private int column;
private int padding;// 类似于xml中的android:padding
private int margin;// 类似于xml中的android:layout_margin
private ImageView[] gameItem;
private int itemWidth;
private int itemHeight;

private Bitmap bitmap;
private List<ImagePiece> imgList;

private boolean once;

public GameLayout(Context context) {
super(context);
init();
}

public GameLayout(Context context, AttributeSet attrs) {
super(context, attrs);
init();
}

public GameLayout(Context context, AttributeSet attrs, int defStyle) {
super(context, attrs, defStyle);
init();
}

// 初始化参数
private void init() {
column = 3;

margin = (int) TypedValue.applyDimension(TypedValue.COMPLEX_UNIT_DIP,
2, getResources().getDisplayMetrics());

padding = min(getPaddingLeft(), getPaddingRight(), getPaddingTop(),
getPaddingBottom());

once = false;
}

private int min(int... params) {
int min = params[0];
for (int param : params) {
min = Math.min(min, param);
}
return min;
}

@Override
// onMeasure和onLayout会多次调用,所有要有once标识符
protected void onMeasure(int widthMeasureSpec, int heightMeasureSpec) {
super.onMeasure(widthMeasureSpec, heightMeasureSpec);

if (!once) {
GameLayoutHeight = getMeasuredHeight();
GameLayoutWidth = getMeasuredWidth();

// 进行切图,并打乱次序
initBitmap();
// 九宫格的绘制
initItem();
// 判断是否开启时间
checkTimeEnable();

once = true;
}

setMeasuredDimension(GameLayoutWidth, GameLayoutHeight);
}

// 进行切图,并排序
private void initBitmap() {
// 获取bitmap,然后转化为和屏幕一样大小
if (bitmap == null) {
bitmap = BitmapFactory.decodeResource(getResources(),
R.drawable.girl);
bitmap = Bitmap.createScaledBitmap(bitmap, GameLayoutWidth,
GameLayoutHeight, true);
}
// 切图
imgList = ImageUtil.splitImage(bitmap, column);
// 使用sort打乱次序
Collections.sort(imgList, new Comparator<ImagePiece>() {
@Override
public int compare(ImagePiece lhs, ImagePiece rhs) {
return Math.random() > 0.5 ? 1 : -1;
}
});
}

// 九宫格的绘制
private void initItem() {
// 设置gameItem的宽高
itemWidth = (GameLayoutWidth - padding * 2 - margin * (column - 1))
/ column;
itemHeight = (GameLayoutHeight - padding * 2 - margin * (column - 1))
/ column;

gameItem = new ImageView[column * column];

// 设置九宫格中每个格子对应的Bitmap,id和tag以及LayoutParams
// 最后添加到GameLayout中
for (int i = 0; i < gameItem.length; i++) {
ImageView item = new ImageView(getContext());
item.setImageBitmap(imgList.get(i).getBitmap());
item.setId(i + 1);// **********************************
// index是本质编号,id是打乱后的编号
item.setTag(i + "_" + imgList.get(i).getIndex());
item.setOnClickListener(this);// 实现图片的交换

gameItem[i] = item;

RelativeLayout.LayoutParams lp = new RelativeLayout.LayoutParams(
itemWidth, itemHeight);
// 设置横向间距,通过leftMargin。如果不是第一列
if ((i % column) != 0) {
lp.leftMargin = margin;
lp.addRule(RelativeLayout.RIGHT_OF, gameItem[i - 1].getId());
}
// 设置横向间距。如果不是第一行,设置topMargin和rule
if ((i + 1) > column) {
lp.topMargin = margin;
lp.addRule(RelativeLayout.BELOW, gameItem[i - column].getId());
// anchor------The id of another view to use as an anchor,
// or a boolean value(represented as RelativeLayout.TRUE) for
// true
// or 0 for false). For verbs that don't refer to another
// sibling
// (for example, ALIGN_WITH_PARENT_BOTTOM) just use -1.
// 注意,后面的参数不能为0(0 for false),所以打星号的地方要+1
}
addView(item, lp);
}
}

private int time;
private boolean isTimeEnabled = false;// 默认不开启时间

private void checkTimeEnable() {
if (isTimeEnabled) {
// 根据当前等级设置时间
time = (int) Math.pow(3.0, column);
myHandler.sendEmptyMessage(TIME_CHANGED);
}
}

private ImageView mFirst;
private ImageView mSecond;
private boolean isAnimation = false;

// 实现图片的交换
@Override
public void onClick(View v) {
// 防止用户疯狂的点
if (isAnimation) {
return;
}
// 两次点击同一个item
if (mFirst == v) {
mFirst.setColorFilter(null);
mFirst = null;
return;
}

if (mFirst == null) {// 第一次点击的是新的图片
mFirst = (ImageView) v;
mFirst.setColorFilter(Color.parseColor("#55FF0000"));
} else {// 第二次点击也是新的图片
mSecond = (ImageView) v;
exchageView();// 交换图片
}
}

private RelativeLayout mAnimLayout;// 实现动画切换的变量

// 交换图片
private void exchageView() {
mFirst.setColorFilter(null);

final String firstTag = (String) mFirst.getTag();
final String secondTag = (String) mSecond.getTag();

final Bitmap firstBitmap = imgList.get(getImageIdByTag(firstTag))
.getBitmap();
final Bitmap secondBitmap = imgList.get(getImageIdByTag(secondTag))
.getBitmap();

// 构造动画层
if (mAnimLayout == null) {
mAnimLayout = new RelativeLayout(getContext());
addView(mAnimLayout);
}
// 构造图片交换动画
final ImageView first = new ImageView(getContext());
first.setImageBitmap(firstBitmap);
LayoutParams lp = new LayoutParams(itemWidth, itemHeight);
lp.leftMargin = mFirst.getLeft() - padding;
lp.topMargin = mFirst.getTop() - padding;
first.setLayoutParams(lp);
mAnimLayout.addView(first);

final ImageView second = new ImageView(getContext());
second.setImageBitmap(secondBitmap);
LayoutParams lp2 = new LayoutParams(itemWidth, itemHeight);
lp2.leftMargin = mSecond.getLeft() - padding;
lp2.topMargin = mSecond.getTop() - padding;
second.setLayoutParams(lp2);
mAnimLayout.addView(second);

TranslateAnimation animation = new TranslateAnimation(0,
mSecond.getLeft() - mFirst.getLeft(), 0, mSecond.getTop()
- mFirst.getTop());
animation.setDuration(300);
animation.setFillAfter(true);
first.startAnimation(animation);

TranslateAnimation animation2 = new TranslateAnimation(0,
mFirst.getLeft() - mSecond.getLeft(), 0, mFirst.getTop()
- mSecond.getTop());
animation2.setDuration(300);
animation2.setFillAfter(true);
second.startAnimation(animation2);

animation.setAnimationListener(new AnimationListener() {
@Override
public void onAnimationStart(Animation animation) {
isAnimation = true;
mFirst.setVisibility(View.INVISIBLE);
mSecond.setVisibility(View.INVISIBLE);
}

@Override
public void onAnimationRepeat(Animation animation) {
}

@Override
public void onAnimationEnd(Animation animation) {
// 交换图片(注意tag也要交换)
isAnimation = false;

mFirst.setImageBitmap(secondBitmap);
mSecond.setImageBitmap(firstBitmap);

mFirst.setTag(secondTag);
mSecond.setTag(firstTag);

mFirst.setVisibility(View.VISIBLE);
mSecond.setVisibility(View.VISIBLE);

mFirst = mSecond = null;

mAnimLayout.removeAllViews();

checkSuccess();// 判断是否过关
}
});
}

private int getImageIdByTag(String tag) {
String[] split = tag.split("_");
return Integer.parseInt(split[0]);
}

// item.setTag(i + "_" + imgList.get(i).getIndex());
private int getImageIndexByTag(String tag) {
String[] split = tag.split("_");
return Integer.parseInt(split[1]);
}

// 判断是否过关。过关条件就是0到8有序排列
private void checkSuccess() {
boolean isSuccess = true;
for (int i = 0; i < gameItem.length; i++) {
ImageView imageView = gameItem[i];
if (getImageIndexByTag((String) imageView.getTag()) != i) {
isSuccess = false;
}
}
if (isSuccess) {
isGameSuccess = true;
myHandler.removeMessages(TIME_CHANGED);
Toast.makeText(getContext(), "Success ! Level Up !",
Toast.LENGTH_SHORT).show();
myHandler.sendEmptyMessage(NEXT_LEVEL);// 进入下一关
}
}

private static final int NEXT_LEVEL = 0x001;
private static final int TIME_CHANGED = 0x002;
private boolean isGameSuccess;
private boolean isGameOver;
private Handler myHandler = new Handler() {
public void handleMessage(Message msg) {
switch (msg.what) {
case NEXT_LEVEL:// 进入下一关
column++;
if (mListener != null) {
mListener.nextLevel(column);
}
break;
case TIME_CHANGED:
if (isGameSuccess || isGameOver || isPause)
return;
if (mListener != null) {
mListener.timeChanged(time);
if (time == 0) {
isGameOver = true;
mListener.gameOver();
return;
}
}
time--;
myHandler.sendEmptyMessageDelayed(TIME_CHANGED, 1000);
break;
}
};
};

public void nextLevel() {
this.removeAllViews();
mAnimLayout = null;
isGameSuccess = false;
checkTimeEnable();
initBitmap();
initItem();
};

public void restart() {
isGameOver = false;
nextLevel();
}
private boolean isPause;
public void pause(){
isPause = true;
myHandler.removeMessages(TIME_CHANGED);
}

public void resume(){
if(isPause){
isPause = false;
myHandler.sendEmptyMessage(TIME_CHANGED);
}
}

// 定义接口,用于通知主界面的level和time
public interface GameListener {
void nextLevel(int level);
void timeChanged(int currentTime);
void gameOver();
}

public GameListener mListener;

public void setOnGameListener(GameListener Listener) {
this.mListener = Listener;
}

public void setTimeEnabled(boolean isTimeEnabled) {
this.isTimeEnabled = isTimeEnabled;
}
}
GameLayout实现如下几个功能
1.自定义容器
2.实现图片交换onCLickListener
3.实现过关逻辑interface GameListener
4.实现游戏的结束和暂停,这需要配合activity的onPause和onResume
接下来就是MainActivity.java
package com.example.pintu;

import android.app.Activity;
import android.app.AlertDialog;
import android.content.DialogInterface;
import android.content.DialogInterface.OnClickListener;
import android.os.Bundle;
import android.view.Window;
import android.widget.TextView;

import com.example.view.GameLayout;
import com.example.view.GameLayout.GameListener;

public class MainActivity extends Activity {
private GameLayout gameLayout;
private TextView levelView, timeView;

@Override
protected void onCreate(Bundle savedInstanceState) {
super.onCreate(savedInstanceState);
// 自定义ActionBar,
// 用法参考http://blog.csdn.net/jia20003/article/details/12966489
requestWindowFeature(Window.FEATURE_CUSTOM_TITLE);
setContentView(R.layout.main);
getWindow().setFeatureInt(Window.FEATURE_CUSTOM_TITLE, R.layout.title);

levelView = (TextView) findViewById(R.id.id_level);
levelView.setText("level 1");
timeView = (TextView) findViewById(R.id.id_time);

gameLayout = (GameLayout) findViewById(R.id.pintu);
gameLayout.setTimeEnabled(true);
gameLayout.setOnGameListener(new GameListener() {
@Override
public void timeChanged(int currentTime) {
timeView.setText("" + currentTime);
}

@Override
public void nextLevel(int level) {
new AlertDialog.Builder(MainActivity.this).setTitle("LEVEL UP")
.setPositiveButton("next level", new OnClickListener() {
@Override
public void onClick(DialogInterface dialog,
int which) {
gameLayout.nextLevel();
}
}).show();
// 3*3对应level 1;4*4对应level 2
levelView.setText("level " + (level - 2));
}

@Override
public void gameOver() {
new AlertDialog.Builder(MainActivity.this)
.setTitle("Game Over")
.setPositiveButton("RESTART", new OnClickListener() {
@Override
public void onClick(DialogInterface dialog,
int which) {
gameLayout.restart();
}
}).setNegativeButton("QUIT", new OnClickListener() {
@Override
public void onClick(DialogInterface dialog,
int which) {
finish();
}
}).show();
}
});
}

@Override
protected void onPause() {
super.onPause();
gameLayout.pause();
}

@Override
protected void onResume() {
super.onResume();
gameLayout.resume();
}
}
适合自定义ActionBar还要在styles.xml添加
<style name="MyTheme" parent="android:Theme.Light">
</style>
以及修改AndroidManifest.xml
android:theme="@style/MyTheme"
<!--         就算MyTheme和自动生成的AppBaseTheme一样,还是要重新定义 -->
<!--         因为ActionBar布局改变了 -->
最后给出两个布局
main.xml
<RelativeLayout xmlns:android="http://schemas.android.com/apk/res/android"
xmlns:tools="http://schemas.android.com/tools"
android:layout_width="match_parent"
android:layout_height="match_parent"
tools:context="com.example.pintu.MainActivity" >

<com.example.view.GameLayout
android:id="@+id/pintu"
android:layout_width="match_parent"
android:layout_height="match_parent"
android:padding="2dp" >
</com.example.view.GameLayout>

</RelativeLayout>
以及自定义的actionbar的布局title.xml
<?xml version="1.0" encoding="utf-8"?>
<LinearLayout xmlns:android="http://schemas.android.com/apk/res/android"
xmlns:tools="http://schemas.android.com/tools"
android:layout_width="match_parent"
android:layout_height="match_parent"
android:orientation="horizontal"
tools:context=".MainActivity"
android:background="#FFFFFF" >

<TextView
android:id="@+id/id_level"
android:layout_width="0sp"
android:layout_weight="1"
android:gravity="left"
android:textSize="20sp"
android:layout_height="wrap_content" />

<TextView
android:id="@+id/id_time"
android:layout_width="0sp"
android:layout_weight="1"
android:gravity="right"
android:textSize="20sp"
android:layout_height="wrap_content" />

</LinearLayout>

相关文章推荐
- 【学习】Spring 的 AOP :基于Annotation 的“零配置”方式
- 作业3
- FOJ Problem 2221 RunningMan
- EditView的监听者TextWatcher
- python常用的一些东西——sys、os等
- androd欢迎页播放视频和广告页面
- 10的阶乘
- 淘宝封装的一款ui 非常不错
- 关于委托,事件和类的设计准则
- 一个flag
- 10个随机数的和
- 【JS】:JS实现页面的刷新,后退和前进
- ASP.NET自定义控件开发示例(一)
- 【LeetCode】96. Unique Binary Search Trees 解法及注释
- <css 十五>尺寸设置
- 九种求和方法
- C#开发微信门户及应用(32)--微信支付接入和API封装使用
- js最新手机号码、电话号码正则表达式
- MySQL入门很简单: 4 创建 修改删除表
- 转]解析C语言中的sizeof