开源框架android-times-square实现日历选择日期
2016-04-10 19:39
876 查看
一.概述
今天给大家介绍一个开源框架android-times-square,这是干嘛的呢?当我们在项目中需要使用日历选择时间的时候,就可以用到了,下面开始介绍。二.使用
1.使用一地址如下
https://github.com/square/android-times-square
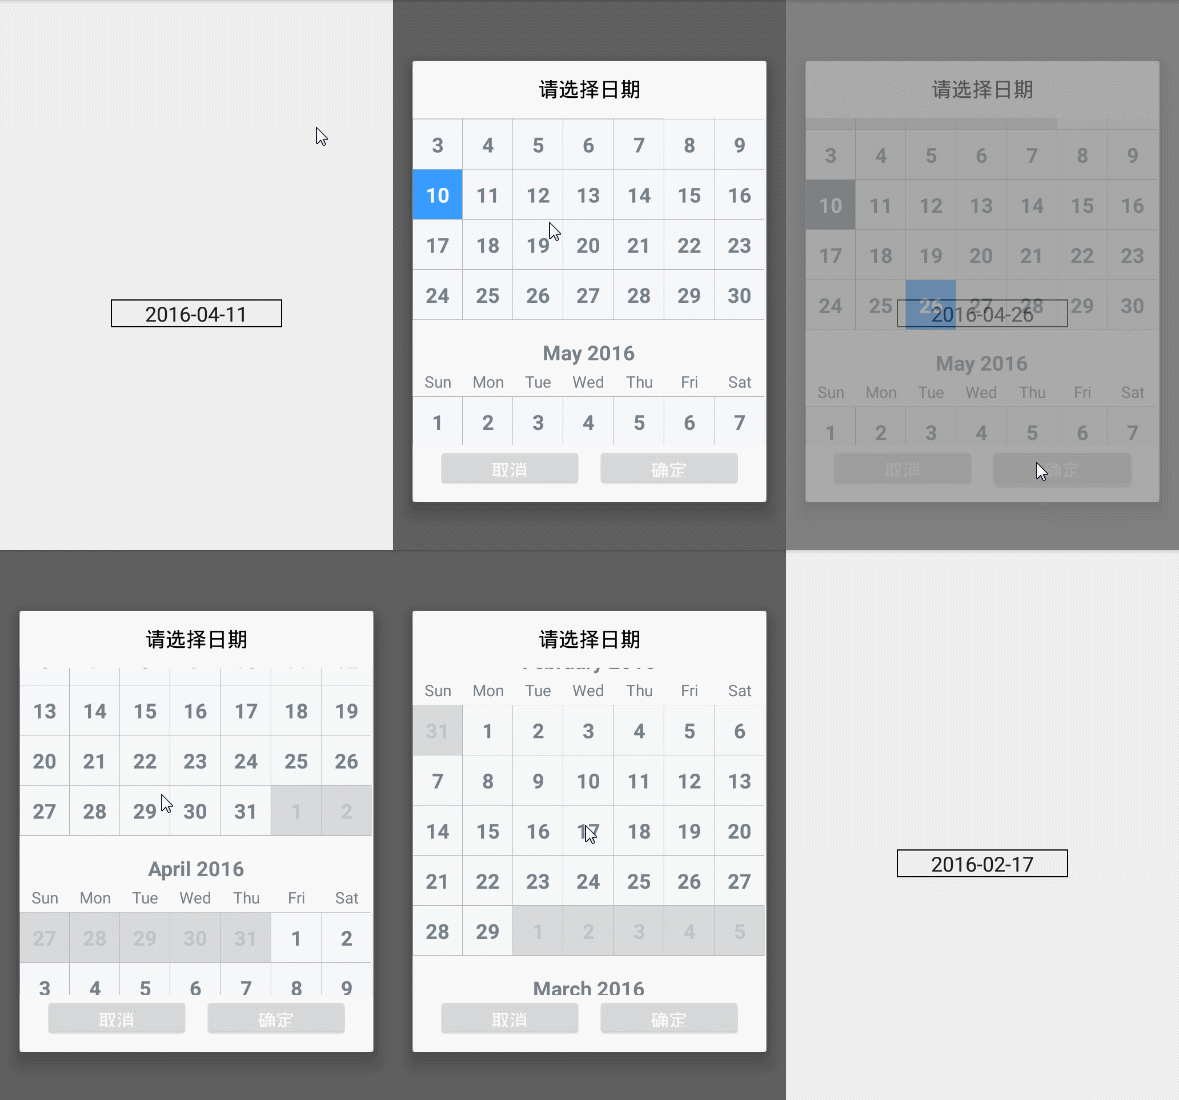
我们先看下效果图,再讲解如何实现

1.CustomerDialog
public class CustomerDialog {

private Activity context;
private int res;
private CustomerViewInterface listener;
private AlertDialog dlg;

public CustomerDialog(Activity context, int res) {
this.context = context;
this.res = res;
}

/**
* 调用这个构造方法之后必须调用init方法
*/
public CustomerDialog() {

}

public void init(Activity context, int res) {
this.context = context;
this.res = res;
}

/**
* 在调用这个方法之前最好先调用setOnCustomerViewCreated来控制dialog自定义界面上的内容
*/
public void showDlg() {
dlg = new AlertDialog.Builder(context).create();
dlg.setCanceledOnTouchOutside(true);
dlg.setCancelable(true);
dlg.show();
Window window = dlg.getWindow();
// 下面的清除flag主要是为了在dialog中有editText时弹出软件盘所用。
window.clearFlags(WindowManager.LayoutParams.FLAG_NOT_FOCUSABLE | WindowManager.LayoutParams.FLAG_ALT_FOCUSABLE_IM);
window.setSoftInputMode(WindowManager.LayoutParams.SOFT_INPUT_STATE_VISIBLE);
window.setContentView(res);
if (listener != null) {
listener.getCustomerView(window, dlg);
}
}

public void setDlgIfClick(boolean ifClick) {
if (dlg != null) {
dlg.setCancelable(ifClick);
dlg.setCanceledOnTouchOutside(ifClick);
}
}

public void dismissDlg() {
if (dlg != null) {
dlg.dismiss();
context = null;
listener = null;
dlg = null;
}
}

public AlertDialog getDlg() {
return dlg;
}

public interface CustomerViewInterface {

void getCustomerView(final Window window, final AlertDialog dlg);
}

public interface ClickCallBack {

void onOk(CustomerDialog dlg);

void onCancel(CustomerDialog dlg);
}

public void setOnCustomerViewCreated(CustomerViewInterface listener) {
this.listener = listener;
}
}
2.Util
public class Util {
public static CustomerDialog showChooseDateDialog(final Activity context, final String title, final String okText, final String cancelText, final CustomerDialog.ClickCallBack clickCallBack, final TextView view) {
final CustomerDialog customerDialog = new CustomerDialog(context, R.layout.dialog_choosedate_layout);
customerDialog.setOnCustomerViewCreated(new CustomerDialog.CustomerViewInterface() {
@Override
public void getCustomerView(Window window, AlertDialog dlg) {
TextView tv_title = (TextView) window.findViewById(R.id.title);
Button left_button = (Button) window.findViewById(R.id.left_button);
Button right_button = (Button) window.findViewById(R.id.right_button);
final CalendarPickerView pickerView = (CalendarPickerView) window.findViewById(R.id.calendar_picker);
Calendar lastYear = Calendar.getInstance();
lastYear.add(Calendar.DAY_OF_WEEK, -1);
Calendar currentYear = Calendar.getInstance();
currentYear.add(Calendar.DAY_OF_WEEK, 0);
Calendar nextYear = Calendar.getInstance();
nextYear.add(Calendar.DAY_OF_WEEK, 1);
pickerView.init(lastYear.getTime(), nextYear.getTime()).withSelectedDate(new Date());
//点击范围之外时的提示
pickerView.setOnInvalidDateSelectedListener(new CalendarPickerView.OnInvalidDateSelectedListener() {
@Override
public void onInvalidDateSelected(Date date) {
Toast.makeText(context, "非法的日期", Toast.LENGTH_SHORT).show();
}
});
if (!TextUtils.isEmpty(title)) {
tv_title.setText(title);
} else {
tv_title.setVisibility(View.GONE);
}
if (!TextUtils.isEmpty(cancelText)) {
left_button.setText(cancelText);
}
left_button.setOnClickListener(new View.OnClickListener() {
@Override
public void onClick(View v) {
clickCallBack.onCancel(customerDialog);
}
});
if (!TextUtils.isEmpty(okText)) {
right_button.setText(okText);
}
right_button.setOnClickListener(new View.OnClickListener() {
@Override
public void onClick(View v) {
clickCallBack.onOk(customerDialog);
long time = pickerView.getSelectedDate().getTime();
SimpleDateFormat format = new SimpleDateFormat("yyyy-MM-dd");
String result = format.format(time);
view.setText(result);
}
});
}
});
customerDialog.showDlg();
return customerDialog;
}
}
3.MainActivity
Utils.showChooseDateDialog(MainActivity.this, "请选择日期", "确定", "取消", new CustomerDialog.ClickCallBack() {
@Override
public void onOk(CustomerDialog dlg) {
dlg.dismissDlg();
}
@Override
public void onCancel(CustomerDialog dlg) {
dlg.dismissDlg();
}
},et_date);
最后我们看布局文件:
<RelativeLayout xmlns:android="http://schemas.android.com/apk/res/android"
android:layout_width="match_parent"
android:layout_height="wrap_content"
android:background="@android:color/transparent" >

<FrameLayout
android:layout_width="match_parent"
android:layout_height="wrap_content"
android:layout_centerInParent="true"
android:background="@drawable/bg_title_custom_dialog" >

<TextView
android:id="@+id/title"
android:layout_width="wrap_content"
android:layout_height="wrap_content"
android:layout_gravity="center_horizontal"
android:layout_marginBottom="8dp"
android:layout_marginTop="12dp"
android:text="选择日期"
android:textColor="#000000"
android:textSize="18sp" />

<ScrollView
android:id="@+id/sv_message"
android:layout_width="match_parent"
android:layout_height="match_parent"
android:layout_marginBottom="50dp"
android:layout_marginTop="50dp"
android:lineSpacingExtra="5dp"
android:lineSpacingMultiplier="1.5"
android:fadingEdge="none"
android:overScrollMode="never"
android:scrollbars="none" >

<com.squareup.timessquare.CalendarPickerView
android:id="@+id/calendar_picker"
android:layout_width="wrap_content"
android:overScrollMode="never"
android:fadingEdge="none"
android:scrollbars="none"
android:layout_height="wrap_content">
</com.squareup.timessquare.CalendarPickerView>

</ScrollView>

<LinearLayout
android:id="@+id/bottom_layout"
android:layout_width="match_parent"
android:layout_height="wrap_content"
android:layout_gravity="bottom"
android:layout_marginBottom="12dp"
android:layout_marginLeft="12dp"
android:layout_marginRight="12dp"
android:gravity="center"
android:orientation="horizontal"
android:weightSum="2.5" >

<Button
android:id="@+id/left_button"
android:layout_width="90dp"
android:layout_height="37dp"
android:layout_weight="1"
android:gravity="center"
android:text="取消"
android:textColor="#ffffff"
android:textSize="16sp" />

<Button
android:id="@+id/right_button"
android:layout_width="90dp"
android:layout_height="37dp"
android:layout_marginLeft="12dp"
android:layout_weight="1"
android:gravity="center"
android:text="确定"
android:textColor="#ffffff"
android:textSize="16sp" />
</LinearLayout>
</FrameLayout>

</RelativeLayout>
2.使用二
上面是使用默认的样式,下面我们看看如何改变样式
我们把布局文件改成如下样子,
<com.squareup.timessquare.CalendarPickerView
android:id="@+id/calendar_picker"
android:layout_width="wrap_content"
android:overScrollMode="never"
android:fadingEdge="none"
android:scrollbars="none"
android:layout_height="wrap_content"
android:background="@color/custom_background"
android:scrollbarStyle="outsideOverlay"
android:clipToPadding="false"
app:tsquare_dayBackground="@drawable/custom_calendar_bg_selector"
app:tsquare_dayTextColor="@color/custom_calendar_text_selector"
app:tsquare_dividerColor="@color/transparent"
app:tsquare_titleTextColor="@color/custom_calendar_text_selector"
app:tsquare_headerTextColor="@color/custom_header_text"
>
</com.squareup.timessquare.CalendarPickerView>
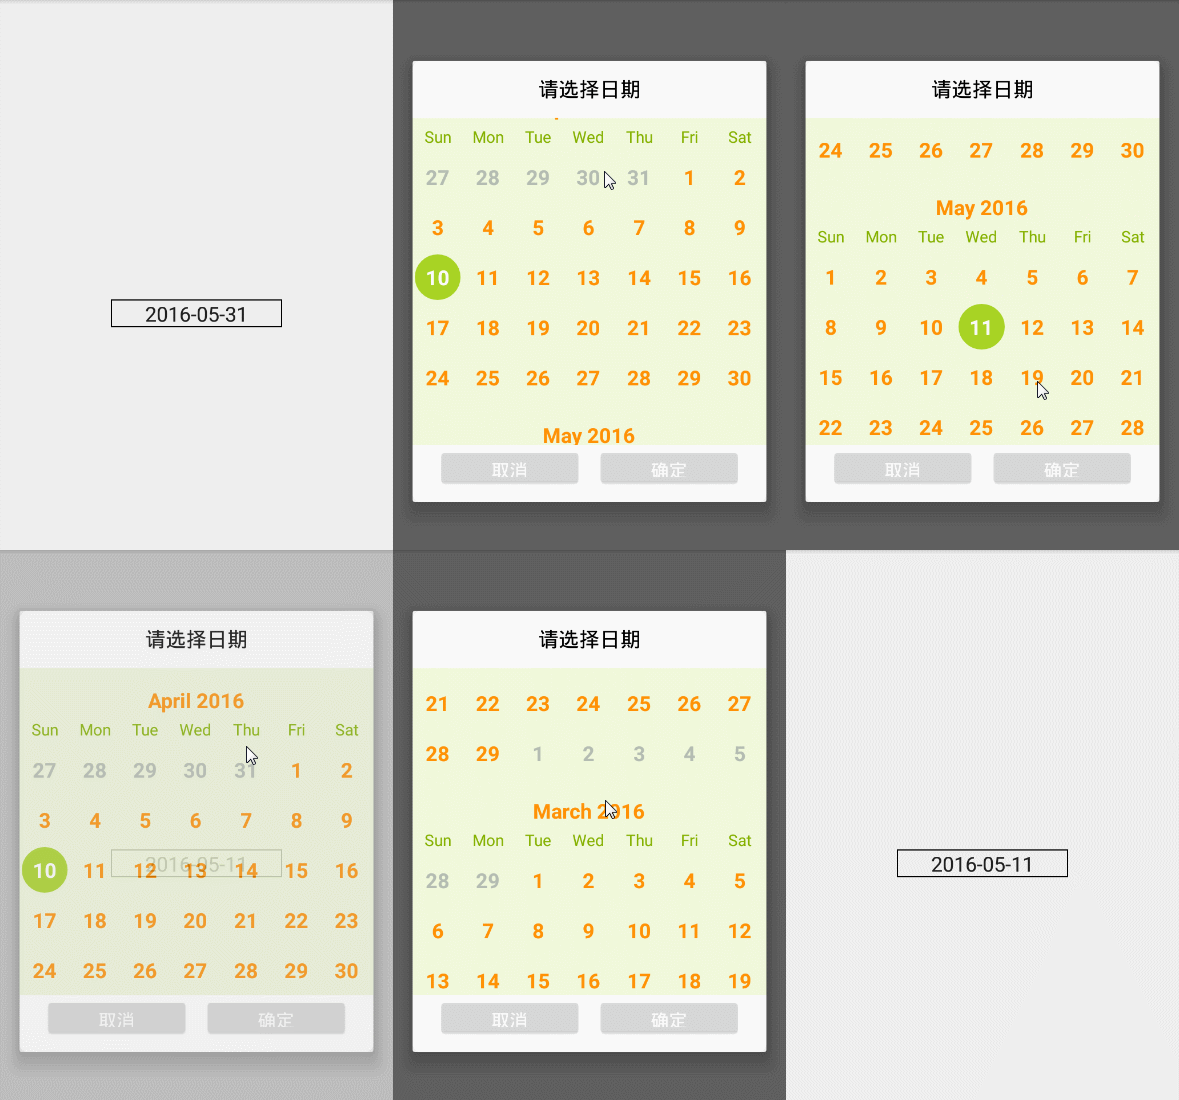
这样就改变了样式,我们看看效果图

这次是不是变得好看多了呢,最后给出项目代码下载地址
项目源码
官方项目源码及demo如下
android-times-square
相关文章推荐
- 【Android基础】学生管理系统
- Android Studio之基本设置与运行
- Android中内存优化
- Android Studio调试功能使用总结
- Android ServiceConnection详解
- Android设置Dialog是否可隐藏
- android中自定义组合组件(一)
- android 常见的一些异常和错误
- android新浪客户端学习心得(一)
- Rxjava RxAndroid 使用
- Android应用程序包解析过程浅析
- MVC的一些个人看法
- Android中日历控件的使用
- Android Studio开发Android问题集【持续更新】
- android 读取Bitmap的几种方式
- 在android中使用单元测试框架
- 从源代码解释Android事件分发机制
- Android中IntentService与Service的区别
- Android电子书阅读器的设计与实现
- Android实训案例(六)——四大组件之一BroadcastReceiver的基本使用,拨号,短信,SD卡,开机,应用安装卸载监听
