RGBD物体识别(2)--点云分割
2016-03-24 01:49
369 查看
对于RGBD物体识别问题,我采用的思路是先从几何特征,将物体的点云分割好,也就是将不同物体通过点云分割出来,然后通过成像关系和RGBD配准信息,在图像上找到对应的区域ROI,然后对图像进行识别,后续根据识别结果再进行抓取。当然其中还有一个很重要的地方,就是物体的姿态估计,或者说最佳抓取点的选取,这个问题暂且不管。
本文重点关注未知物体的点云分割
SegmenterLight
我使用的时pcl1.8,到github上下载PCL压缩包,解压到pcl文件夹。
选择”BUILD_surface_on_nurbs” 为 “ON” (default “OFF”)
2,安装依赖项
3,下载SegmenterLight
解压到pcl同级目录,如下图
In CMakeLists.txt , change “PCL 1.5 REQUIRED” to “PCL 1.8 REQUIRED”
* set “OPENNI_INCLUDE_DIRS” = “/usr/include/ni” *
* set “OPENNI_LIBRARY” = “/usr/lib/libOpenNI.so” *
* press c and then g *
注意,有可能只能找到openni2,填写对应目录和so文件即可
4,测试
现在已经将其编译到系统的库目录下了,可以把这个当做一个库使用,当然,它是有demo的,但是demo的代码太过于庞杂。到SegmenterLight目录下的bin中可以找到可执行文件SegmenterLight
执行
可以看到操作说明,执行
learn0.pcd是放到bin下的待分割文件,出现Debug image的窗口后,点击该窗口按下F9,即可看到分割效果:
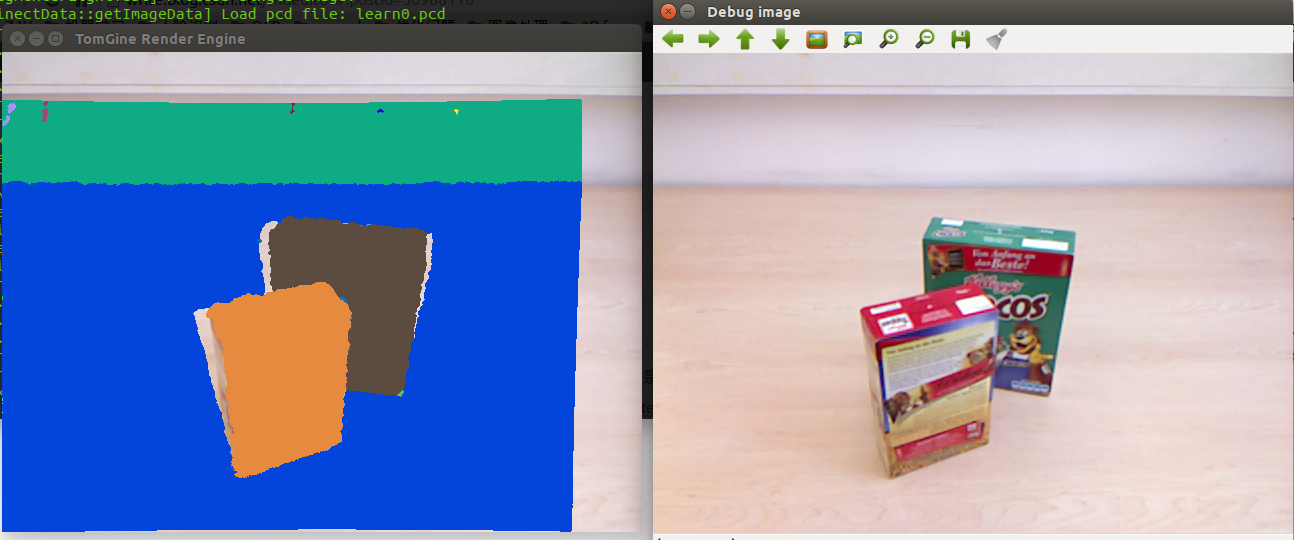
效果不错。
5,使用编译出的库
要嵌入到自己的工程中,可以直接使用编译出的动态库,
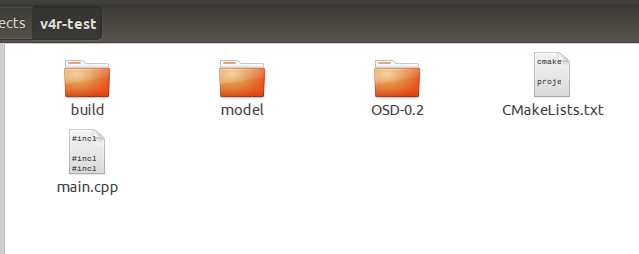
工程目录如下:
CMakeLists.txt内容
main.cpp
效果:

非常不错。
好了,折腾点云分割去吧。
本文重点关注未知物体的点云分割
工具
PCLSegmenterLight
步骤
1,安装和编译PCL1.7以上版本我使用的时pcl1.8,到github上下载PCL压缩包,解压到pcl文件夹。
mkdir build
cd build/
sudo apt-get install cmake-curses-gui
ccmake ..
选择”BUILD_surface_on_nurbs” 为 “ON” (default “OFF”)
cmake ..
make -j4
sudo make install
2,安装依赖项
sudo apt-get install libopenni-sensor-primesense-dev
sudo apt-get install libopenni-dev
sudo apt-get install libopenni-sensor-primesense0
sudo apt-get install libopenni0
3,下载SegmenterLight
解压到pcl同级目录,如下图
cd SegmenterLight/
gedit ./v4r/CMakeLists.txt
In CMakeLists.txt , change “PCL 1.5 REQUIRED” to “PCL 1.8 REQUIRED”
mkdir build
cd build/
ccmake ..
* set “OPENNI_INCLUDE_DIRS” = “/usr/include/ni” *
* set “OPENNI_LIBRARY” = “/usr/lib/libOpenNI.so” *
* press c and then g *
注意,有可能只能找到openni2,填写对应目录和so文件即可
make -j4
sudo make install
4,测试
现在已经将其编译到系统的库目录下了,可以把这个当做一个库使用,当然,它是有demo的,但是demo的代码太过于庞杂。到SegmenterLight目录下的bin中可以找到可执行文件SegmenterLight
cd SegmenterLight/bin
执行
./SegmenterLight -h
可以看到操作说明,执行
./SegmenterLight -f learn0.pcd
learn0.pcd是放到bin下的待分割文件,出现Debug image的窗口后,点击该窗口按下F9,即可看到分割效果:
效果不错。
5,使用编译出的库
要嵌入到自己的工程中,可以直接使用编译出的动态库,
工程目录如下:
CMakeLists.txt内容
cmake_minimum_required(VERSION 2.8 FATAL_ERROR)
project(v4r_test)
find_package( OpenCV 3 REQUIRED )
find_package(PCL 1.8 REQUIRED)
include_directories(${PCL_INCLUDE_DIRS})
link_directories(${PCL_LIBRARY_DIRS})
add_definitions(${PCL_DEFINITIONS})

SET(CMAKE_CXX_FLAGS "${CMAKE_CXX_FLAGS} -fopenmp")
SET(CMAKE_C_FLAGS "${CMAKE_C_FLAGS} -fopenmp")
SET(CMAKE_BUILD_TYPE Release)   # Mandatory for openmp!

add_executable(main main.cpp)
target_link_libraries(main ${PCL_LIBRARIES} ${OpenCV_LIBS} v4rTomGine v4rSegmenterLight)
main.cpp
#include <iostream>

#include <pcl/io/pcd_io.h>
#include <pcl/io/ply_io.h>
#include <pcl/point_cloud.h>
#include <pcl/console/parse.h>
#include <pcl/common/transforms.h>
#include <pcl/visualization/pcl_visualizer.h>
#include <pcl/visualization/cloud_viewer.h>

#include <iostream>

#include <boost/thread/thread.hpp>
#include <pcl/common/common_headers.h>
#include <pcl/features/normal_3d.h>
#include <pcl/io/pcd_io.h>
#include <pcl/visualization/pcl_visualizer.h>
#include <pcl/console/parse.h>

#include <v4r/SegmenterLight/SegmenterLight.h>

#include <opencv2/highgui/highgui.hpp>
#include <opencv2/core/core.hpp>
#include <opencv2/opencv.hpp>

#include <time.h>
using namespace std;
using namespace cv;

// This function displays the help
void showHelp(char * program_name)
{
std::cout << std::endl;
std::cout << "Usage: " << program_name << " cloud_filename.[pcd|ply]" << std::endl;
std::cout << "-h:  Show this help." << std::endl;
}

void PCLCloud2Image(const pcl::PointCloud<pcl::PointXYZRGB>::Ptr & pcl_cloud, cv::Mat_<cv::Vec3b> &image){
unsigned pcWidth = pcl_cloud->width;
unsigned pcHeight = pcl_cloud->height;
unsigned position = 0;

image = cv::Mat_<cv::Vec3b>(pcHeight, pcWidth);

for (unsigned row = 0; row < pcHeight; row++) {
for (unsigned col = 0; col < pcWidth; col++) {
cv::Vec3b &cvp = image.at<cv::Vec3b> (row, col);
position = row * pcWidth + col;
const pcl::PointXYZRGB &pt = pcl_cloud->points[position];

cvp[2] = pt.r;
cvp[1] = pt.g;
cvp[0] = pt.b;
}
}

}

int getLabels(pcl::PointCloud<pcl::PointXYZRGBL>::Ptr cloud){
int max_label = 0;

set<int> result;
for(int i=0; i<cloud->points.size(); i++){
if(cloud->points[i].label > max_label){
max_label = cloud->points[i].label;
}
result.insert(cloud->points[i].label);

}

cout <<"set cout begin " <<endl;
cout <<"set.size = " << result.size()<<endl;
for(set<int>::iterator it = result.begin(); it != result.end(); it++){
cout << *it <<" ";
}
cout <<endl;

return max_label;

}

typedef union
{
struct
{
unsigned char b; // Blue channel
unsigned char g; // Green channel
unsigned char r; // Red channel
unsigned char a; // Alpha channel
};
float float_value;
long long_value;
} RGBValue;

inline float GetRandomColor()
{
RGBValue x;
x.b = std::rand()%255;
x.g = std::rand()%255;
x.r = std::rand()%255;
x.a = 0.;
return x.float_value;
}

// This is the main function
int main (int argc, char** argv)
{
pcl::PointCloud<pcl::PointXYZRGB>::Ptr pcl_cloud(new pcl::PointCloud<pcl::PointXYZRGB>);

pcl::io::loadPCDFile("learn1.pcd", *pcl_cloud);
cout << pcl_cloud->points[0].r <<endl;
pcl::io::savePCDFileASCII("1111.txt", *pcl_cloud);
std::string modelPath = "../model/";
pcl::PointCloud<pcl::PointXYZRGBL>::Ptr pcl_cloud_labeled(new pcl::PointCloud<pcl::PointXYZRGBL>);
segment::SegmenterLight seg(modelPath);
seg.setFast(true);
seg.setDetail(2);
pcl_cloud_labeled = seg.processPointCloud(pcl_cloud);

int max_label = getLabels(pcl_cloud_labeled);

RGBValue colors[max_label+1];
for(int i=0; i<=max_label; i++){
colors[i].float_value = GetRandomColor();
}

for(int i=0; i<pcl_cloud_labeled->points.size(); i++){
pcl::PointXYZRGB &p = pcl_cloud->points[i];
p.rgb = colors[pcl_cloud_labeled->points[i].label].float_value;

}

pcl::visualization::PCLVisualizer viewer("saldfjald");

viewer.addPointCloud(pcl_cloud);
viewer.addCoordinateSystem(1.0, "cloud", 0);
while(!viewer.wasStopped()){
viewer.spinOnce();
}
std::cout << "okkkkk" << std::endl;
cv::Mat_<cv::Vec3b> src;
long int t1,t2;
t1 = getTickCount();

PCLCloud2Image(pcl_cloud, src);
t2 = getTickCount();
cout << "frequency = " << getTickFrequency() <<endl;
cout << (t2- t1)/getTickFrequency() << " s" <<endl;

cout << "time = " << t2 - t1 << " ms " <<endl;
cv::imshow("saf", src);
cv::waitKey(0);

return 0;
}
效果:
非常不错。
好了,折腾点云分割去吧。

相关文章推荐
- UVa 1583 Digit Generator --- 水题+打表
- 墙裂推荐4款js网页烟花特效
- Block实现-block存储域
- RGBD物体识别(1)--开篇
- Apache的Order Allow,Deny 规则
- 二分查找法,查询指定的值
- 一种生成当中帧技术,异步时间扭曲(Asynchronous Timewarp)
- 两种实现选项卡功能----自定义和TabLayout
- django 的数据库操作
- Aidl 实现进程之间的通讯
- 作业3:PSP记录耗时情况
- 前置++与后置++之一道简单的题目引发的思考
- 批量解决Xcode更新后,插件过期问题
- android学习——判断APP(程序)是否第一次启动
- Netty系列之Netty线程模型
- UVa 1584 Circular Sequence --- 水题
- 安装聊天软件telegram-cli
- 癌症有克星了吗?
- Android学习之仿QQ侧滑功能的实现
- [3783]:ZOJ