OpenGL with PyOpenGL Python and PyGame p.3 - Movement and Navigation
2016-03-15 18:16
645 查看

Understanding navigation within the 3D environment via OpenGL
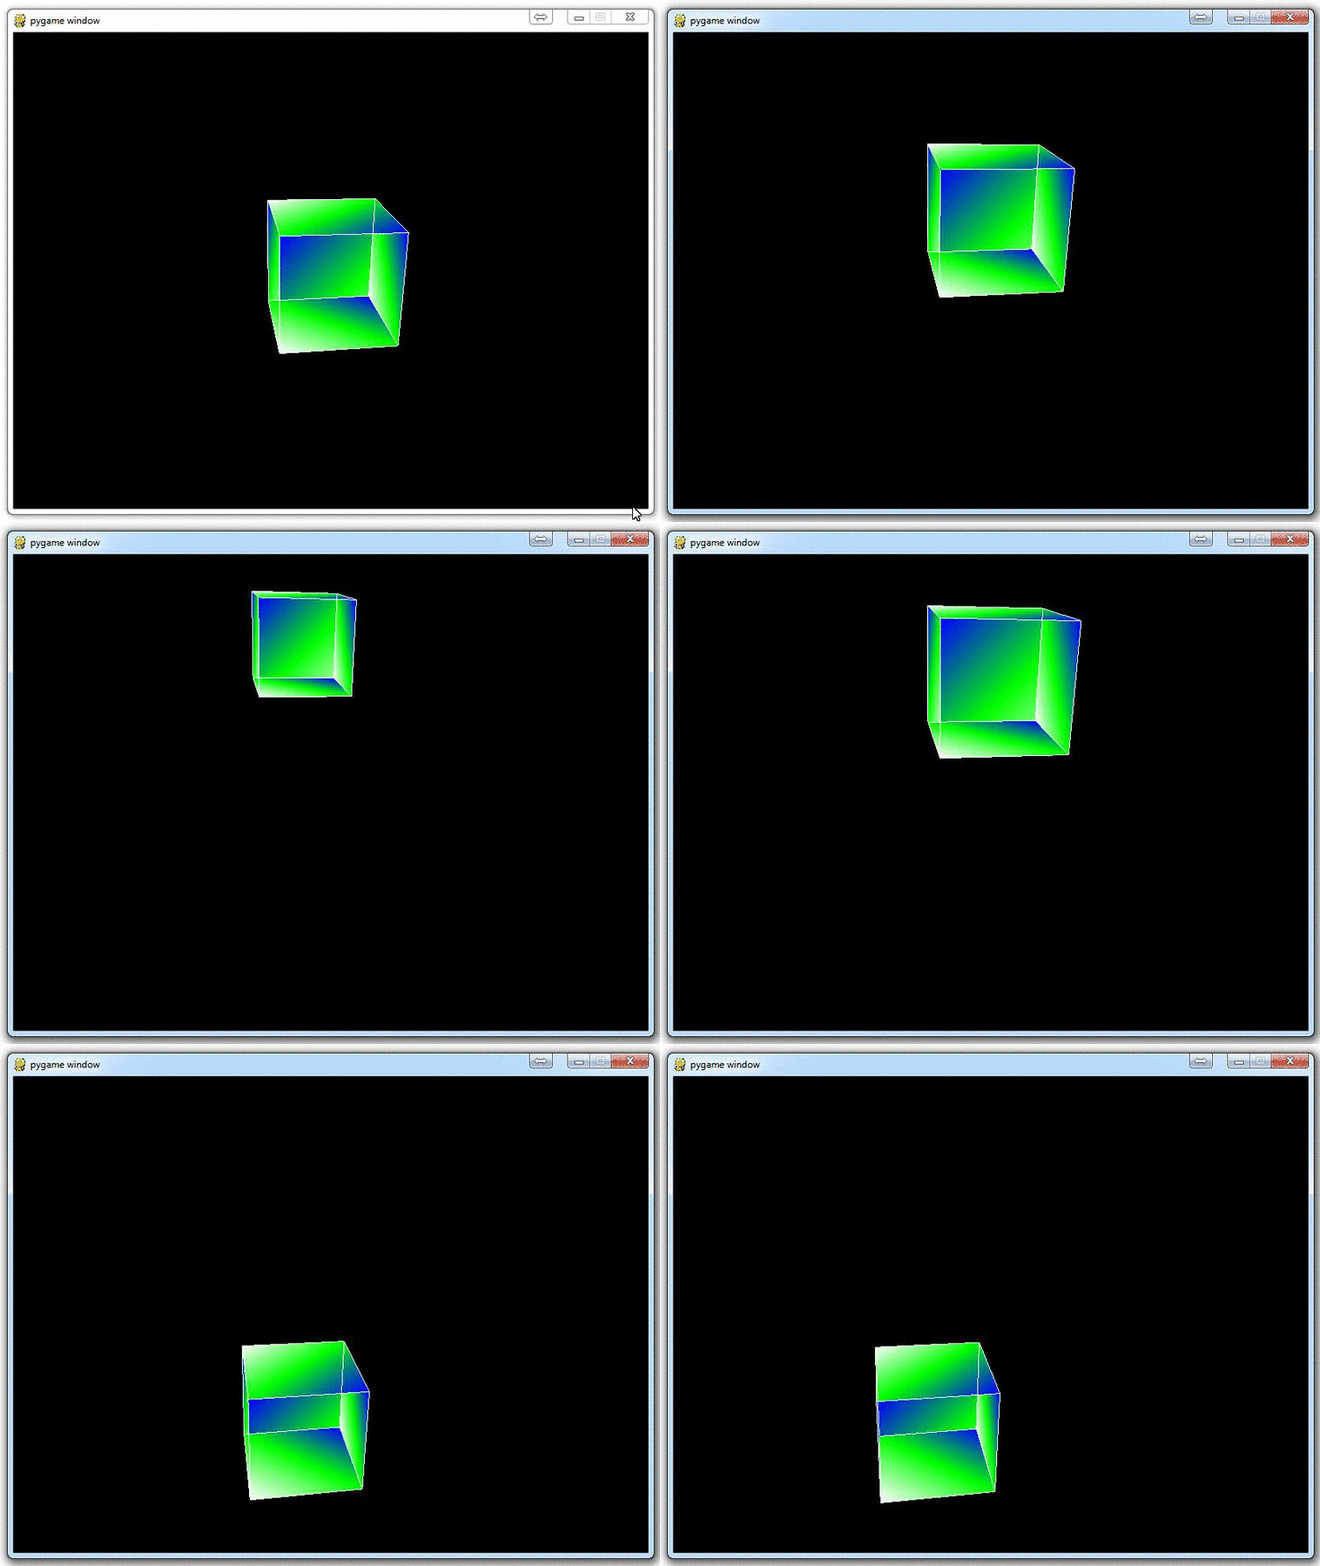
Now that you have drawn a 3D object, and shown it moving, it's time to show why a real 3D environment really shines: Navigating the environment yourself.This can come in two major ways, but can be quite confusing. The question you need to answer at the end of this tutorial is: Are you moving the object, or are you moving your perspective
of the object? So, in the previous tutorial, are we spinning the cube, or are we rotating around the cube? In this tutorial, are we moving the cube, or are we moving around the cube?
So let's say our objective is to "move the cube" with our arrow keys. How might we do this?
Now, we make our main function look like:
#!/usr/bin/python
# -*- coding:utf-8 -*-
import pygame
from pygame.locals import *

from OpenGL.GL import *
from OpenGL.GLU import *

verticies = (
    (1, -1, -1),
    (1, 1, -1),
    (-1, 1, -1),
    (-1, -1, -1),
    (1, -1, 1),
    (1, 1, 1),
    (-1, -1, 1),
    (-1, 1, 1)
    )

edges = (
    (0,1),
    (0,3),
    (0,4),
    (2,1),
    (2,3),
    (2,7),
    (6,3),
    (6,4),
    (6,7),
    (5,1),
    (5,4),
    (5,7)
    )
surfaces = (

    (0,1,5,4),  #创建平面时平面的顺序不一定要相临,但是每个面的顶点一定要按顺时针或者逆时针写
    (5,4,6,7),
    (6,7,2,3),
    (2,7,5,1),
    (0,1,2,3),
    (0,3,6,4)
)
colors = (
    (1,0,0),
    (0,1,0),
    (0,0,1),
    (1,1,0),
    (1,0,1),
    (1,1,1),
    (1,0,0),
    (0,1,0),
    (0,0,1),
    (1,0,0),
    (1,1,1),
    (0,1,1),
    )

def Cube():
    glBegin(GL_QUADS)
    x = 0
    for surface in surfaces:
        x+=1
        for vertex in surface:

            glColor3fv(colors[x])
            glVertex3fv(verticies[vertex])
    glEnd()
    glBegin(GL_LINES)
    for edge in edges:
        for vertex in edge:
            glVertex3fv(verticies[vertex])
    glEnd()

def main():
    pygame.init()                              #pygame的一些初始化不用管
    display = (800,600)
    pygame.display.set_mode(display, DOUBLEBUF|OPENGL)

    gluPerspective(45,(display[0]/display[1]), 0.5, 50.0)
    #参数1是我们看显示物体的远近
    #参数2是物体显示的长宽比,和窗口长宽比相同就行
    #参数3和4是z轴近和远的裁剪面的距离,但是还是不太明白要这干啥
    glTranslatef(0.0,0.0, -5) #Z轴就是我们眼睛到屏幕方向的轴,负是远,正是近,其实就是让物体相对与屏幕在XYZ各方向移动几个距离

    glRotatef(360, 1, 1, 1)   #360是让他转360度,它最终回到原来初始位置

    while True:
        for event in pygame.event.get():
            if event.type == pygame.QUIT:   #退出事件响应
                pygame.quit()
                quit()
            if event.type == pygame.KEYDOWN:
                if event.key == pygame.K_LEFT:
                    glTranslatef(-0.5,0,0)
                if event.key == pygame.K_RIGHT:
                    glTranslatef(0.5,0,0)

                if event.key == pygame.K_UP:
                    glTranslatef(0,1,0)
                if event.key == pygame.K_DOWN:
                    glTranslatef(0,-1,0)

            if event.type == pygame.MOUSEBUTTONDOWN:
                if event.button == 1:
                    glTranslatef(0,0,1.0)

                if event.button == 3:
                    glTranslatef(0,0,-1.0)

        #glRotatef(0.05, 1, 1, 1)
        #参数1是每次旋转的度数是多少,
        #参数2是x, y and z的一个坐标,表示从(0,0,0)点到(x,y,z)这条线为轴进行旋转
        glClear(GL_COLOR_BUFFER_BIT|GL_DEPTH_BUFFER_BIT) #用来删除就得画面,清空画布
        Cube()                                           #创建模型
        pygame.display.flip()                            #显示画面
        pygame.time.wait(10)                             #10ms刷新一次

main()
Notice the main change being the keydown and keyup events. Also, note the pygame.MOUSEBUTTONDOWN. pygame.MOUSEBUTTONDOWN allows us to pull data from the user's mouse wheel, so we can
have it perform an expected action.
Now, again, is it the cube that is moving, or is it our perspective? Think about X, Y, Z, what direction we're "moving" whatever is being moved, and what we're seeing as a result.

相关文章推荐
- Python动态类型的学习---引用的理解
- Python3写爬虫(四)多线程实现数据爬取
- 垃圾邮件过滤器 python简单实现
- 下载并遍历 names.txt 文件,输出长度最长的回文人名。
- install and upgrade scrapy
- Scrapy的架构介绍
- Centos6 编译安装Python
- 使用Python生成Excel格式的图片
- 让Python文件也可以当bat文件运行
- [Python]推算数独
- Python中zip()函数用法举例
- Python中map()函数浅析
- Python将excel导入到mysql中
- Python在CAM软件Genesis2000中的应用
- 使用Shiboken为C++和Qt库创建Python绑定
- FREEBASIC 编译可被python调用的dll函数示例
- Python 七步捉虫法
