百思学习笔记13-推荐关注左侧
2016-03-01 10:26
330 查看
网络请求的数据有了 下面开始着手写推荐关注的左侧
首先创建一个ViewController 带xib的
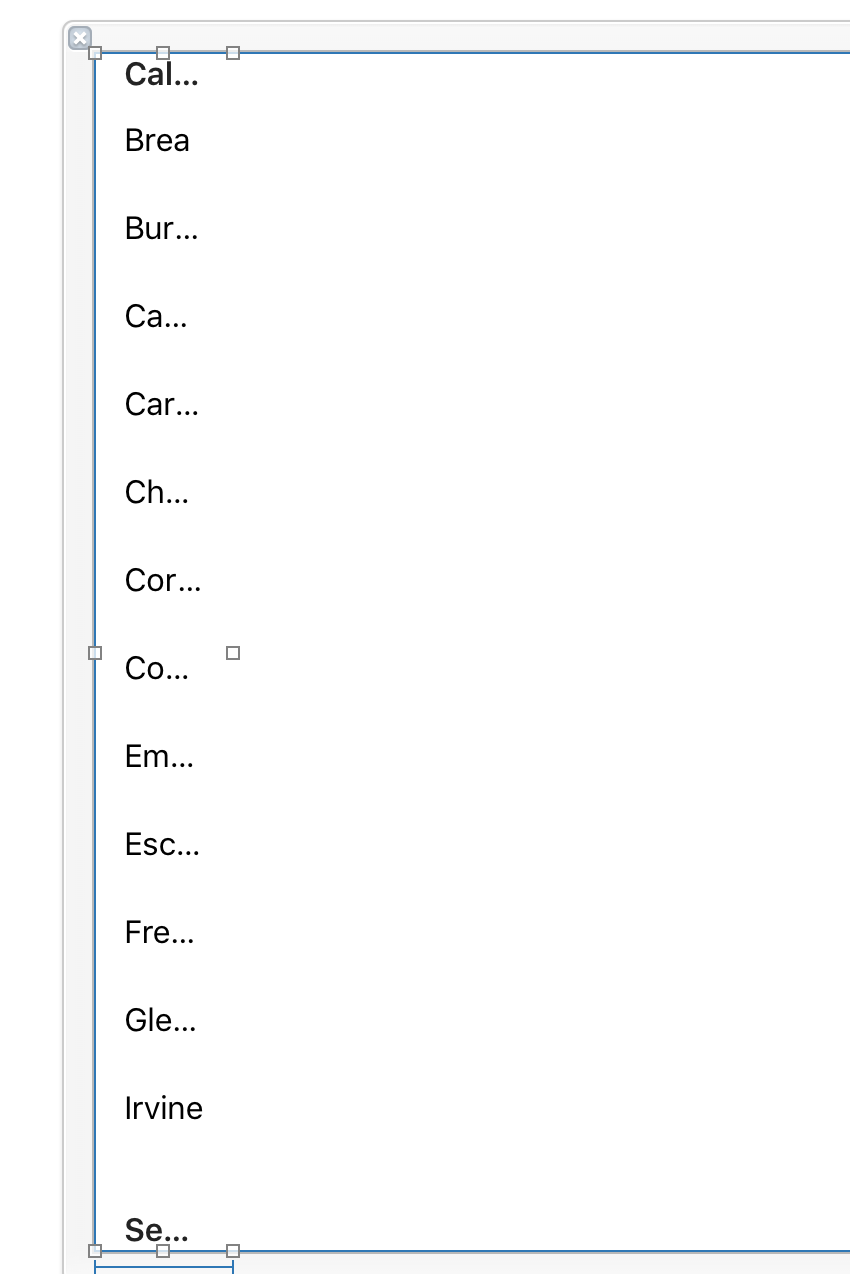
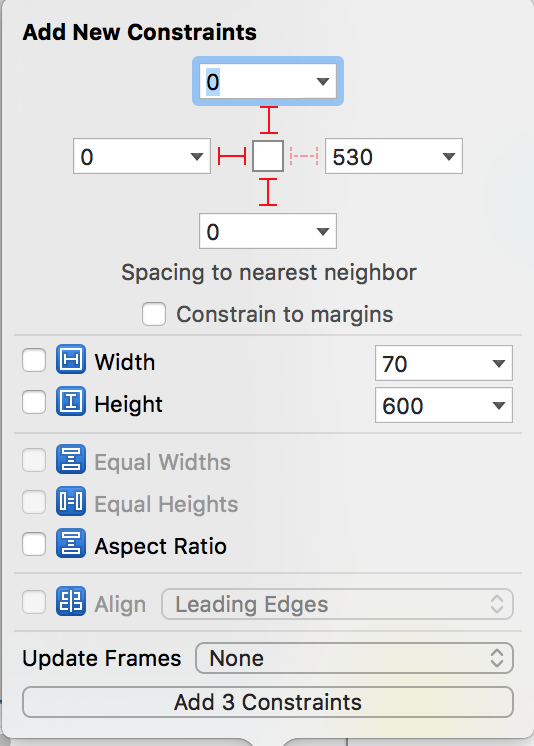
然后进入xib 拖一个tableview到View中,使用自动布局使它上、左、下的边距为0
然后我们要把这个tableview的代理和数据源和 file‘s Ower连线
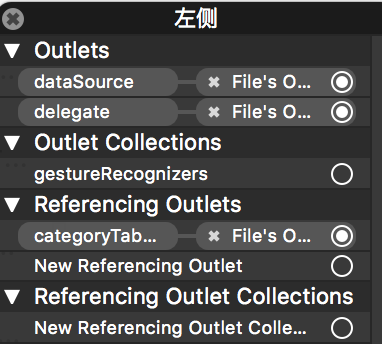
我们要把这个tableview拖进M文件中,以便将来可以方便控制它

接下来我们创建tableViewCell,我们还是采取xib的方法,要设置Identifier 方便日后引用这个cell使用
首先我们看到效果是这样的
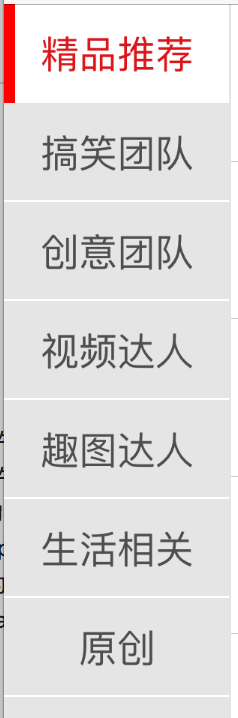
每次点击左侧都会有个红色的竖线来显示,下面的分隔线也是白色的,这些都是需要我们在xib中设置的
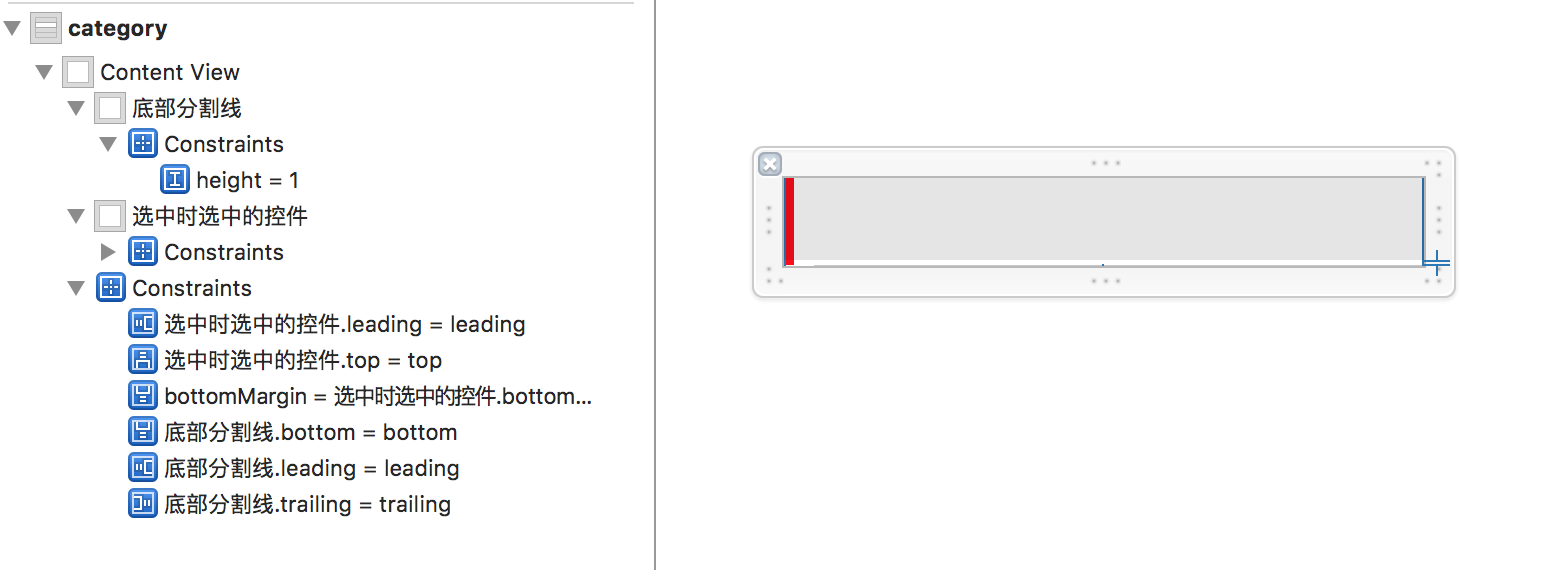
将底部的分隔线高度为1,左边的红色宽度为5
底部分隔线至左、右、下的边距为0
红色的距上、左、下的边距为0
然后将红色拖进M文件,方便日后隐藏使用

下面为了显示数据,我们要新建一个模型
新建一个继承NSObject的类
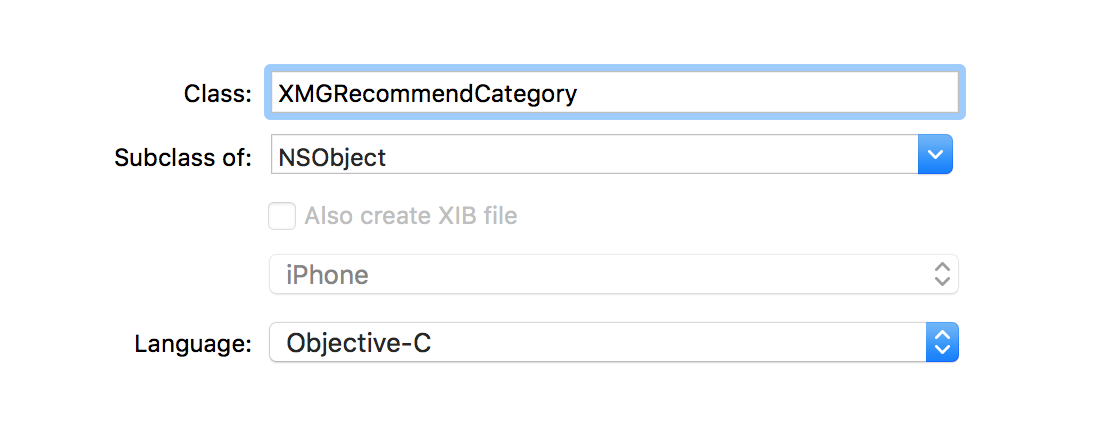
然后在h文件中设置需要的数据
/** id */
@property (nonatomic, assign) NSInteger id;
/** 总数 */
@property (nonatomic, assign) NSInteger count;
/** 名字 */
@property (nonatomic, copy) NSString *name;
下面我们是左边数据的代码
/** 左边的类别数据 */
@property (nonatomic, strong) NSArray *categories;
/** 左边的类别表格 */
@property (weak, nonatomic) IBOutlet UITableView *categoryTableView;
@end
@implementation XMGRecommendViewController
static NSString * const XMGCategoryId = @"category";
- (void)viewDidLoad {
[super viewDidLoad];
// 注册
[self.categoryTableView registerNib:[UINib nibWithNibName:NSStringFromClass([XMGRecommendCategoryCell class]) bundle:nil] forCellReuseIdentifier:XMGCategoryId];
self.title = @"推荐关注";
// 设置背景色
self.view.backgroundColor = XMGGlobalBg;
// 显示指示器
[SVProgressHUD showWithMaskType:SVProgressHUDMaskTypeBlack];
// 发送请求
NSMutableDictionary *params = [NSMutableDictionary dictionary];
params[@"a"] = @"category";
params[@"c"] = @"subscribe";
[[AFHTTPSessionManager manager] GET:@"http://api.budejie.com/api/api_open.php" parameters:params success:^(NSURLSessionDataTask *task, id responseObject) {
// 隐藏指示器
[SVProgressHUD dismiss];
// 服务器返回的JSON数据
self.categories = [XMGRecommendCategory objectArrayWithKeyValuesArray:responseObject[@"list"]];
// 刷新表格
[self.categoryTableView reloadData];
// 默认选中首行
[self.categoryTableView selectRowAtIndexPath:[NSIndexPath indexPathForRow:0 inSection:0] animated:NO scrollPosition:UITableViewScrollPositionTop];
} failure:^(NSURLSessionDataTask *task, NSError *error) {
// 显示失败信息
[SVProgressHUD showErrorWithStatus:@"加载推荐信息失败!"];
}];
}
#pragma mark - <UITableViewDataSource>
- (NSInteger)tableView:(UITableView *)tableView numberOfRowsInSection:(NSInteger)section
{
return self.categories.count;
}
- (UITableViewCell *)tableView:(UITableView *)tableView cellForRowAtIndexPath:(NSIndexPath *)indexPath
{
XMGRecommendCategoryCell *cell = [tableView dequeueReusableCellWithIdentifier:XMGCategoryId];
cell.category = self.categories[indexPath.row];
return cell;
}
下面开始个性化cell
首先要在h文件中定义模型
/** 类别模型 */
@property (nonatomic, strong) XMGRecommendCategory *category;
下面是m文件的代码
/** 选中时显示的指示器控件 */
@property (weak, nonatomic) IBOutlet UIView *selectedIndicator;
@end
@implementation XMGRecommendCategoryCell
- (void)awakeFromNib {
self.backgroundColor = XMGRGBColor(244, 244, 244);
self.selectedIndicator.backgroundColor = XMGRGBColor(219, 21, 26);
// 当cell的selection为None时, cell被选中时, 内部的子控件就不会进入高亮状态
// self.textLabel.textColor = XMGRGBColor(78, 78, 78);
// self.textLabel.highlightedTextColor = XMGRGBColor(219, 21, 26);
// UIView *bg = [[UIView alloc] init];
// bg.backgroundColor = [UIColor clearColor];
// self.selectedBackgroundView = bg;
}
- (void)setCategory:(XMGRecommendCategory *)category
{
_category = category;
self.textLabel.text = category.name;
}
- (void)layoutSubviews
{
[super layoutSubviews];
// 重新调整内部textLabel的frame
self.textLabel.y = 2;
self.textLabel.height = self.contentView.height - 2 * self.textLabel.y;
}
- (void)setSelected:(BOOL)selected animated:(BOOL)animated
{
[super setSelected:selected animated:animated];
self.selectedIndicator.hidden = !selected;
self.textLabel.textColor = selected ? self.selectedIndicator.backgroundColor : XMGRGBColor(78, 78, 78);
}
首先创建一个ViewController 带xib的
然后进入xib 拖一个tableview到View中,使用自动布局使它上、左、下的边距为0
然后我们要把这个tableview的代理和数据源和 file‘s Ower连线
我们要把这个tableview拖进M文件中,以便将来可以方便控制它
接下来我们创建tableViewCell,我们还是采取xib的方法,要设置Identifier 方便日后引用这个cell使用
首先我们看到效果是这样的
每次点击左侧都会有个红色的竖线来显示,下面的分隔线也是白色的,这些都是需要我们在xib中设置的
将底部的分隔线高度为1,左边的红色宽度为5
底部分隔线至左、右、下的边距为0
红色的距上、左、下的边距为0
然后将红色拖进M文件,方便日后隐藏使用
下面为了显示数据,我们要新建一个模型
新建一个继承NSObject的类
然后在h文件中设置需要的数据
/** id */
@property (nonatomic, assign) NSInteger id;
/** 总数 */
@property (nonatomic, assign) NSInteger count;
/** 名字 */
@property (nonatomic, copy) NSString *name;
下面我们是左边数据的代码
/** 左边的类别数据 */
@property (nonatomic, strong) NSArray *categories;
/** 左边的类别表格 */
@property (weak, nonatomic) IBOutlet UITableView *categoryTableView;
@end
@implementation XMGRecommendViewController
static NSString * const XMGCategoryId = @"category";
- (void)viewDidLoad {
[super viewDidLoad];
// 注册
[self.categoryTableView registerNib:[UINib nibWithNibName:NSStringFromClass([XMGRecommendCategoryCell class]) bundle:nil] forCellReuseIdentifier:XMGCategoryId];
self.title = @"推荐关注";
// 设置背景色
self.view.backgroundColor = XMGGlobalBg;
// 显示指示器
[SVProgressHUD showWithMaskType:SVProgressHUDMaskTypeBlack];
// 发送请求
NSMutableDictionary *params = [NSMutableDictionary dictionary];
params[@"a"] = @"category";
params[@"c"] = @"subscribe";
[[AFHTTPSessionManager manager] GET:@"http://api.budejie.com/api/api_open.php" parameters:params success:^(NSURLSessionDataTask *task, id responseObject) {
// 隐藏指示器
[SVProgressHUD dismiss];
// 服务器返回的JSON数据
self.categories = [XMGRecommendCategory objectArrayWithKeyValuesArray:responseObject[@"list"]];
// 刷新表格
[self.categoryTableView reloadData];
// 默认选中首行
[self.categoryTableView selectRowAtIndexPath:[NSIndexPath indexPathForRow:0 inSection:0] animated:NO scrollPosition:UITableViewScrollPositionTop];
} failure:^(NSURLSessionDataTask *task, NSError *error) {
// 显示失败信息
[SVProgressHUD showErrorWithStatus:@"加载推荐信息失败!"];
}];
}
#pragma mark - <UITableViewDataSource>
- (NSInteger)tableView:(UITableView *)tableView numberOfRowsInSection:(NSInteger)section
{
return self.categories.count;
}
- (UITableViewCell *)tableView:(UITableView *)tableView cellForRowAtIndexPath:(NSIndexPath *)indexPath
{
XMGRecommendCategoryCell *cell = [tableView dequeueReusableCellWithIdentifier:XMGCategoryId];
cell.category = self.categories[indexPath.row];
return cell;
}
下面开始个性化cell
首先要在h文件中定义模型
/** 类别模型 */
@property (nonatomic, strong) XMGRecommendCategory *category;
下面是m文件的代码
/** 选中时显示的指示器控件 */
@property (weak, nonatomic) IBOutlet UIView *selectedIndicator;
@end
@implementation XMGRecommendCategoryCell
- (void)awakeFromNib {
self.backgroundColor = XMGRGBColor(244, 244, 244);
self.selectedIndicator.backgroundColor = XMGRGBColor(219, 21, 26);
// 当cell的selection为None时, cell被选中时, 内部的子控件就不会进入高亮状态
// self.textLabel.textColor = XMGRGBColor(78, 78, 78);
// self.textLabel.highlightedTextColor = XMGRGBColor(219, 21, 26);
// UIView *bg = [[UIView alloc] init];
// bg.backgroundColor = [UIColor clearColor];
// self.selectedBackgroundView = bg;
}
- (void)setCategory:(XMGRecommendCategory *)category
{
_category = category;
self.textLabel.text = category.name;
}
- (void)layoutSubviews
{
[super layoutSubviews];
// 重新调整内部textLabel的frame
self.textLabel.y = 2;
self.textLabel.height = self.contentView.height - 2 * self.textLabel.y;
}
- (void)setSelected:(BOOL)selected animated:(BOOL)animated
{
[super setSelected:selected animated:animated];
self.selectedIndicator.hidden = !selected;
self.textLabel.textColor = selected ? self.selectedIndicator.backgroundColor : XMGRGBColor(78, 78, 78);
}

相关文章推荐
- https://projecteuler.net/problem=12
- POJ解题报告-小优
- android动态换肤系列4——从apk文件中获取Resources对象(下)
- Android中自定义水平进度条样式之黑色虚线
- playFramework2 JDBC连接数据库
- 泛型
- UIAlertController 两个按钮的样式
- PXE实现批量部署linux系统
- AndroidStudio(2.0 Beta 6) 如何将新建的工程放到GitHub上
- 【设计模式】13、责任链模式
- 40多个关于人脸检测/识别的API、库和软件
- iOS开发推送--客户端 服务端
- Debian/Ubutun 之 桌面自定义
- YII 数据缓存
- 时间差、星期、时间显示、学习记录
- 观察者模式——Head First
- 在Android Studio中隐藏标题出现BUG
- 初学者怎么在github上上传自己的项目
- 为iPhone6设计自适应布局(一)
- JavaScript 判断一个对象的数据类型。