zabbix 安装使用笔记
2016-02-26 14:16
288 查看
环境:
Ubuntu 14.04(zabbix_server)docker Ubuntu 14.04(zabbix_agent)*3
Ubuntu下安装Zabbix
首先安装php5,mysql,apache or nginx
sudo apt-get install php5

sudo apt-get install mysql-server

sudo apt-get install php5-mysql
Zabbix安装
//我使用的是阿里的源,使用官方的源有可能没这软件
sudo apt-get install zabbix-server-mysql zabbix-frontend-php
配置数据库
root@zabbix:/# mysql -uroot -p123123 -e "create database zabbix character set utf8; "
root@zabbix:/# mysql -uroot -p123123 -e "create user 'zabbix'@'%' identified by 'zabbix'; "
root@zabbix:/# mysql -uroot -p123123 -e "grant all on zabbix.* to 'zabbix'@'%' identified by 'zabbix';"
查看一下安装的位置
root@zabbix:/# dpkg -L zabbix-server-mysql
/.
/var
/var/log
/var/log/zabbix-server
/usr
/usr/sbin
/usr/sbin/zabbix_server
/usr/share
/usr/share/man
/usr/share/man/man8
/usr/share/man/man8/zabbix_server.8.gz
/usr/share/man/man1
/usr/share/man/man1/zabbix_get.1.gz
/usr/share/zabbix-server-mysql
/usr/share/zabbix-server-mysql/images.sql.gz
/usr/share/zabbix-server-mysql/data.sql.gz
/usr/share/zabbix-server-mysql/zabbix_server.conf
/usr/share/zabbix-server-mysql/schema.sql.gz
/usr/share/doc
/usr/share/doc/zabbix-server-mysql
/usr/share/doc/zabbix-server-mysql/NEWS.Debian.gz
/usr/share/doc/zabbix-server-mysql/copyright
/usr/share/doc/zabbix-server-mysql/changelog.Debian.gz
/usr/share/doc/zabbix-server-mysql/README.Debian
/usr/bin
/usr/bin/zabbix_get
/etc
/etc/default
/etc/default/zabbix-server
/etc/zabbix
/etc/zabbix/alert.d
/etc/init.d
/etc/init.d/zabbix-server
/etc/logrotate.d
/etc/logrotate.d/zabbix-server-mysql
/etc/init
/etc/init/zabbix-server.conf
这3个压缩文件需要解压后导入mysql
zcat /usr/share/zabbix-server-mysql/{schema,images,data}.sql.gz | mysql -uzabbix -pzabbix zabbix修改zabbix配置文件
vim.tiny /etc/zabbix/zabbix_server.conf

...
DBName=zabbix

### Option: DBSchema
# Schema name. Used for IBM DB2.
#
# Mandatory: no
# Default:
# DBSchema=

### Option: DBUser
# Database user. Ignored for SQLite.
#
# Mandatory: no
# Default:
# DBUser=

DBUser=zabbix

### Option: DBPassword
# Database password. Ignored for SQLite.
# Comment this line if no password is used.
#
# Mandatory: no
# Default:
DBPassword=zabbix

...
启动服务
vim.tiny /etc/default/zabbix-server

# defaults file for zabbix-server-mysql

# Start the Zabbix server from the init.d script? # (Possible values: "yes" or "no") # # This is by default set to "no" because a MySQL database needs to be prepared # and configured before you can start the Zabbix server for the first time. # # Instructions on how to set up the database can be found in # /usr/share/doc/zabbix-server-mysql/README.Debian START=no #默认是on,改成yes # Absolute path to the configuration file CONFIG_FILE="/etc/zabbix/zabbix_server.conf"
service zabbix-server start
安装zabbix web
我这已经安装nginx就用nginx吧vim.tiny /etc/nginx/sites-available/zabbix
server {
listen 80;
root /usr/share/zabbix/;
index index.php index.html index.htm;

location / {
try_files $uri $uri/ =404;
}

error_page 404 /404.html;
access_log /var/log/nginx/php_access.log;
error_log /var/log/nginx/php_error.log;
location ~ \.php$ {
fastcgi_split_path_info ^(.+\.php)(/.+)$; fastcgi_param SCRIPT_FILENAME $document_root$fastcgi_script_name; fastcgi_pass 127.0.0.1:9000; fastcgi_index index.php; include fastcgi_params; } }
rm /etc/nginx/sites-enabled/default ln -s /etc/nginx/sites-available/zabbix /etc/nginx/sites-enabled/ service nginx restart
访问 http://服务器地址或域名/
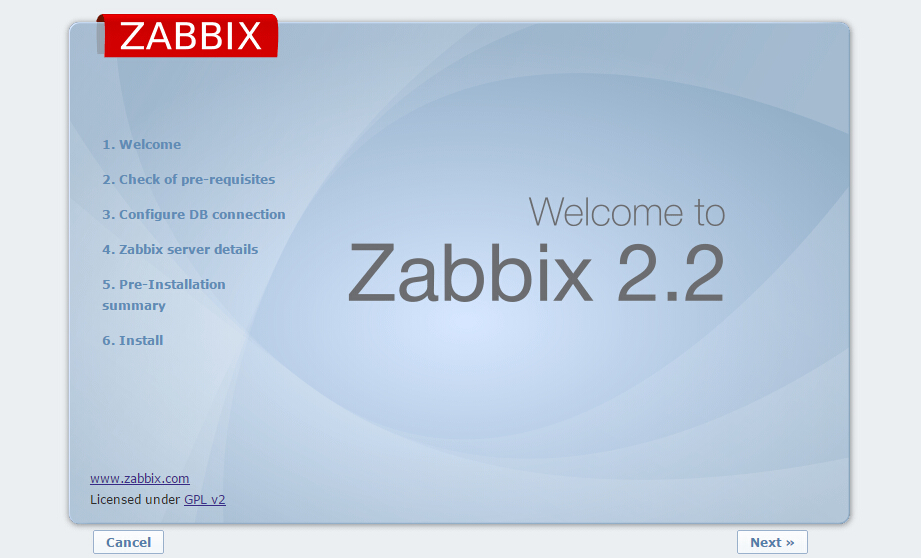
点击next
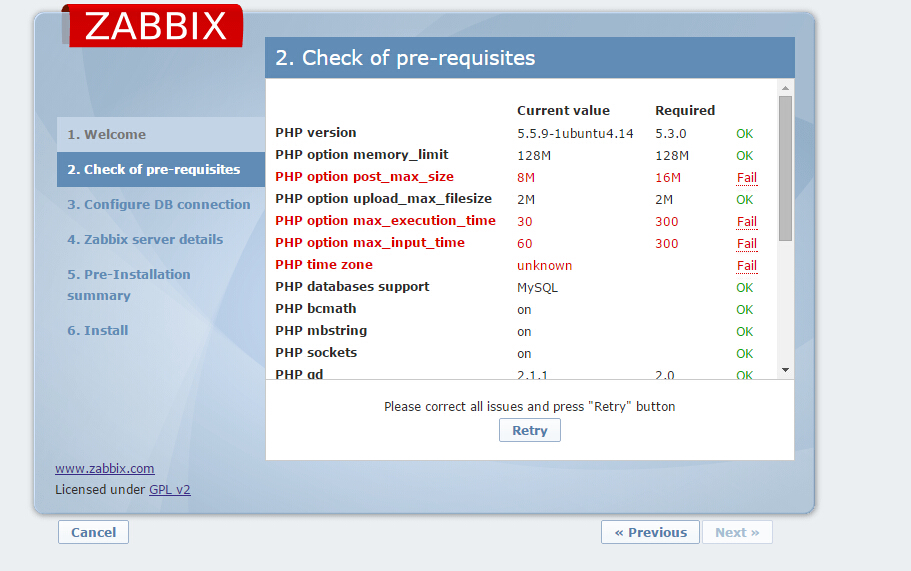
这里需要修改php.ini配置
vim /etc/php5/fpm/php.ini #我使用的是nginx +php5-fpm

...... ; http://php.net/post-max-size post_max_size = 16M .....
; Note: This directive is hardcoded to 0 for the CLI SAPI
max_execution_time = 300

; Maximum amount of time each script may spend parsing request data. It's a good
; idea to limit this time on productions servers in order to eliminate unexpectedly
; long running scripts.
; Note: This directive is hardcoded to -1 for the CLI SAPI
; Default Value: -1 (Unlimited)
; Development Value: 60 (60 seconds)
; Production Value: 60 (60 seconds)
; http://php.net/max-input-time max_input_time = 300
...... [Date] ; Defines the default timezone used by the date functions ; http://php.net/date.timezone date.timezone = Asia/Shanghai ; http://php.net/date.default-latitude ;date.default_latitude = 31.7667 .....
重启php5-fpm,然后刷新页面
service php5-fpm restart
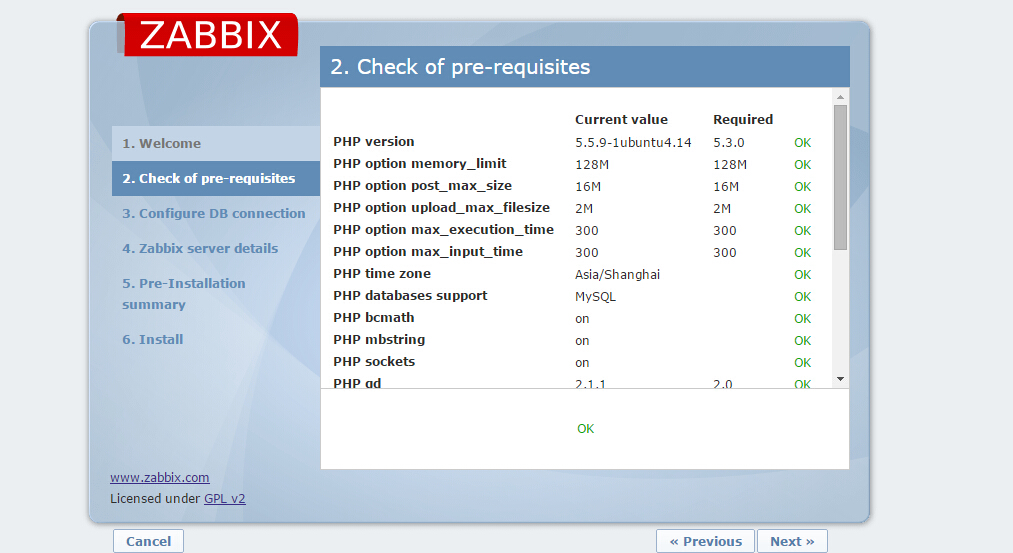
都已经OK,下一步
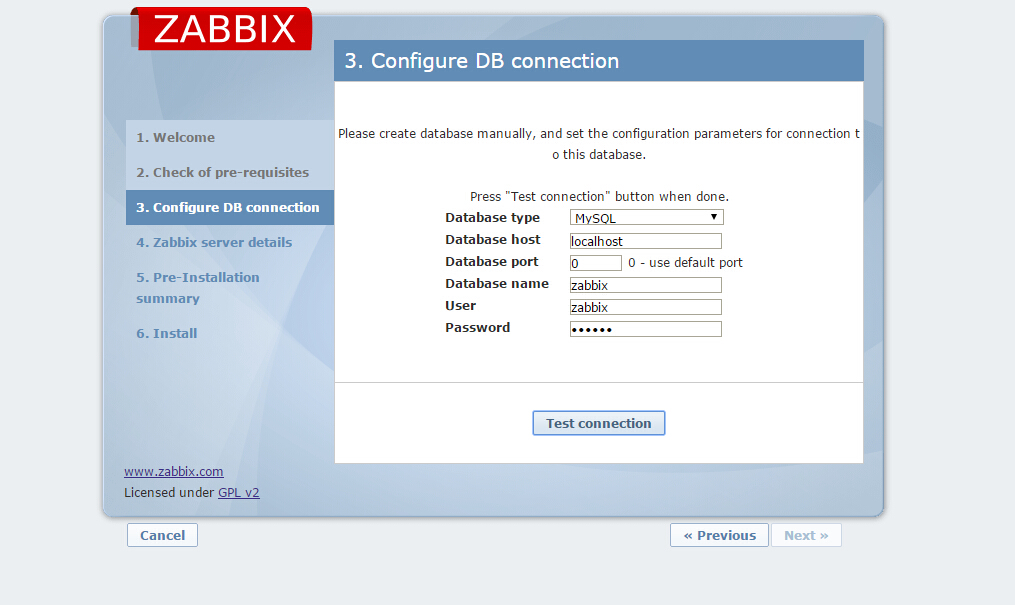
配置数据库信息然后测试一下,在下一步

直接下一步
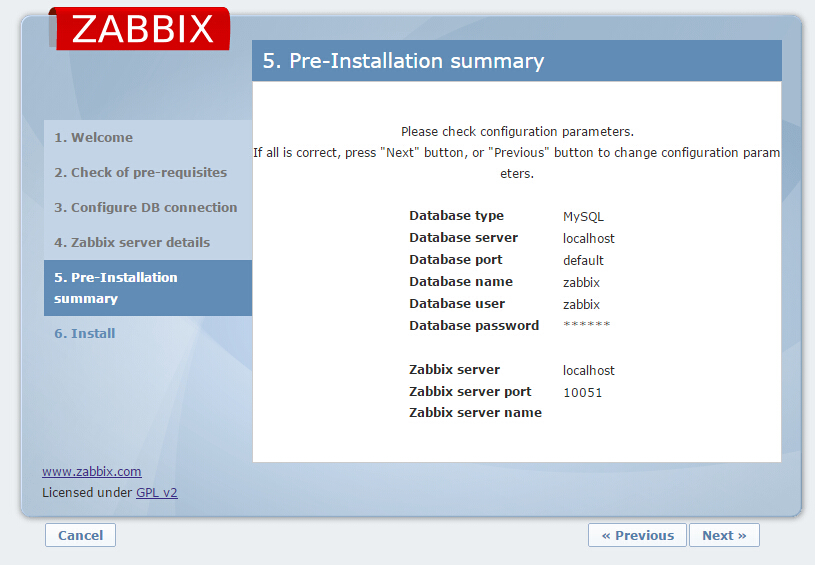
核对一下信息,没问题就下一步
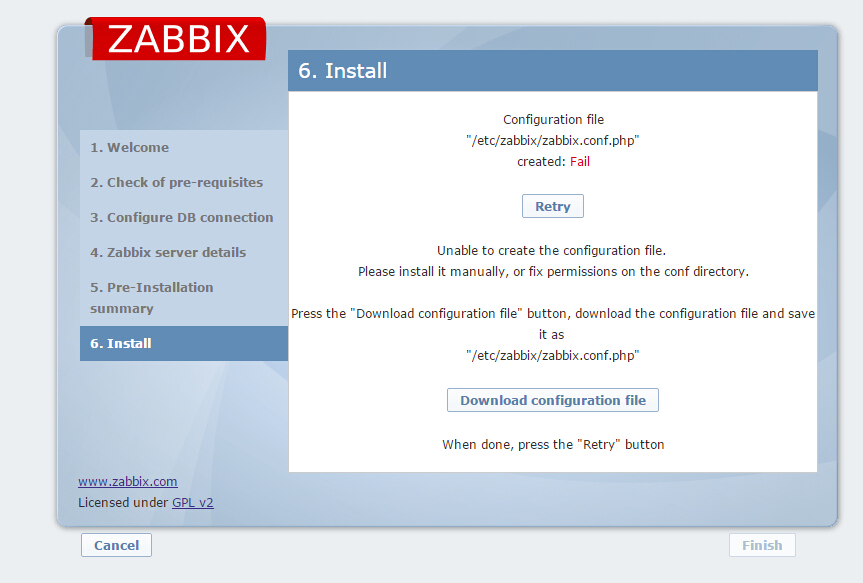
没权限创建/etc/zabbix/zabbix.conf.php
下载文件手动复制到/etc/zabbix/
然后点击Retry 在点击Finish web就安装完成的
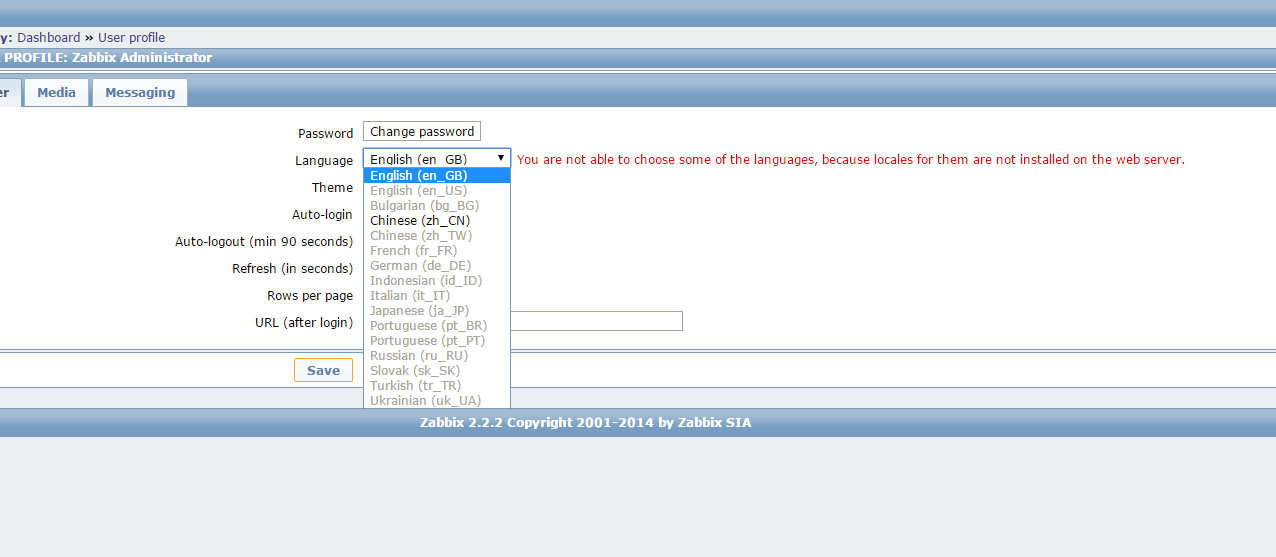
管理员是admin zabbix

在右上角的profile可以改成中文,
如果服务器没安装中文
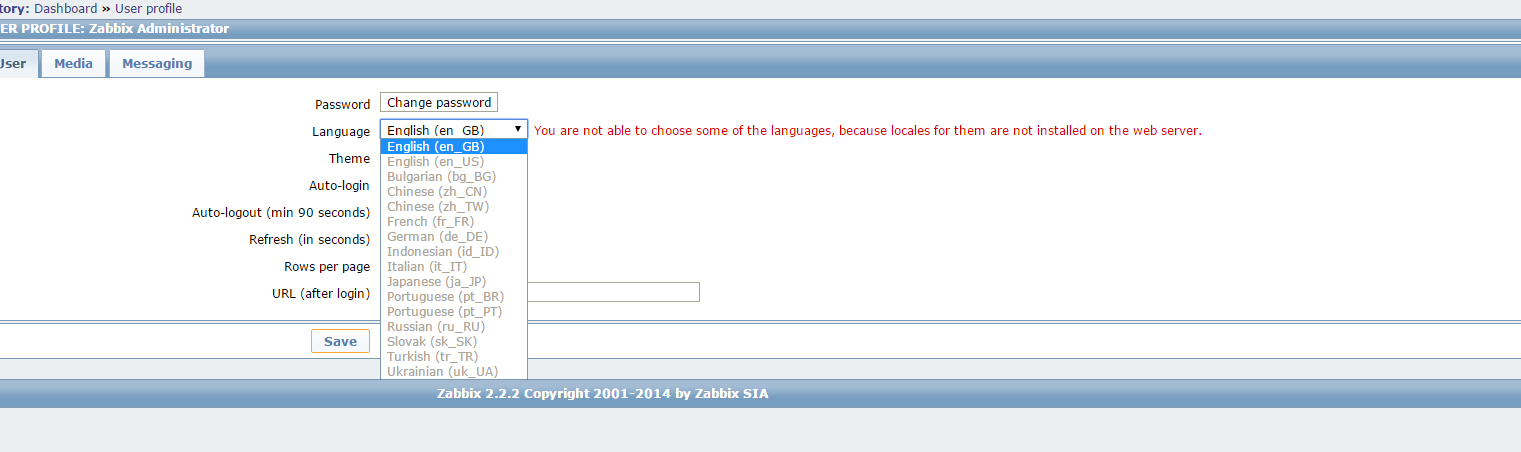
locale-gen zh_CN.UTF-8
刷新页面就有了
可能出现的问题
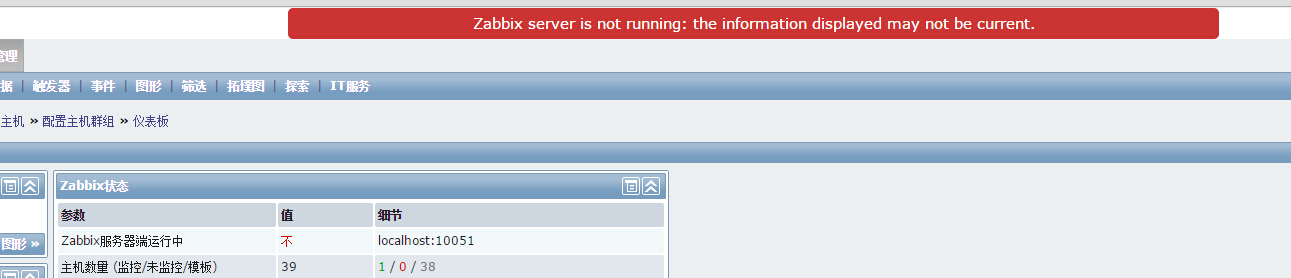
zabbix 服务没启动,根据日志找原因
/var/log/zabbix-server/zabbix_server.log
安装zabbix客户端
监控zabbix 服务端
apt-get install zabbix-agent
service zabbix-agent start

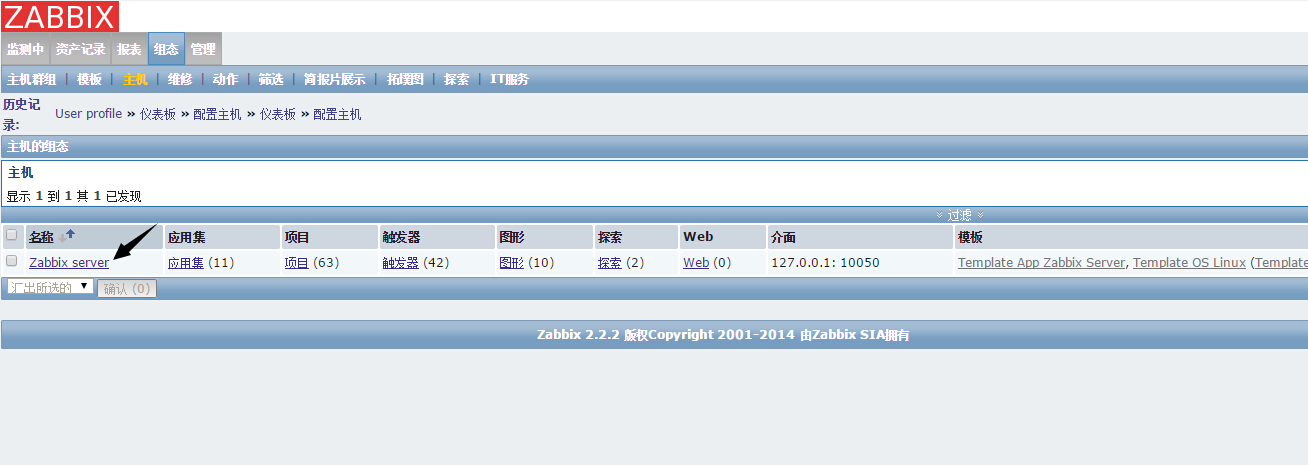
点击未受监测 启动监控
客户端安装zabbix agent
在需要监控的主机上安装zabbix-agentapt-get install zabbix-agent
vim.tiny /etc/zabbix/zabbix_agentd.conf ..... Server=zabbix 服务端IP ServerActive=zabbix 服务端IP .....
# 需要和主机名称一直(可能遇到的问题)
Hostname=Zabbix server
service zabbix-agent start
然后在web页面上 组态>主机》添加主机
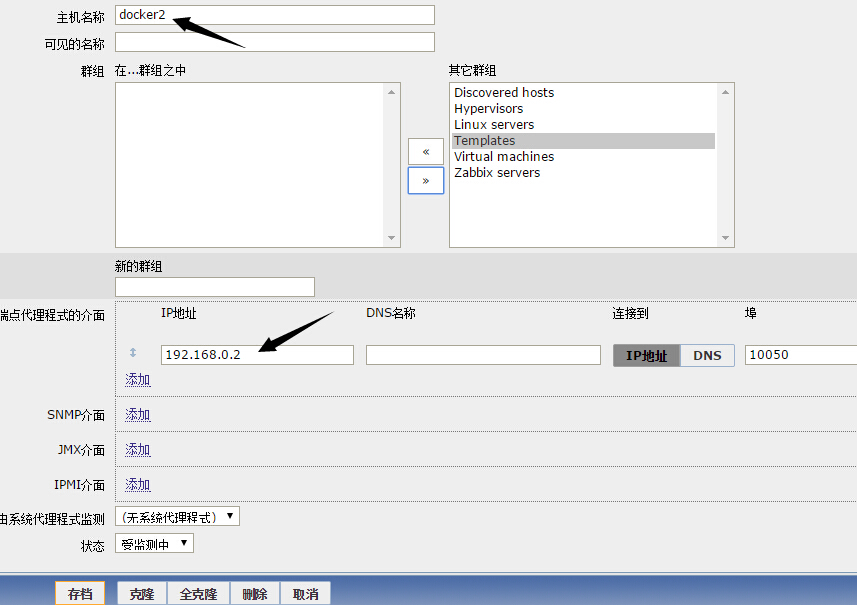
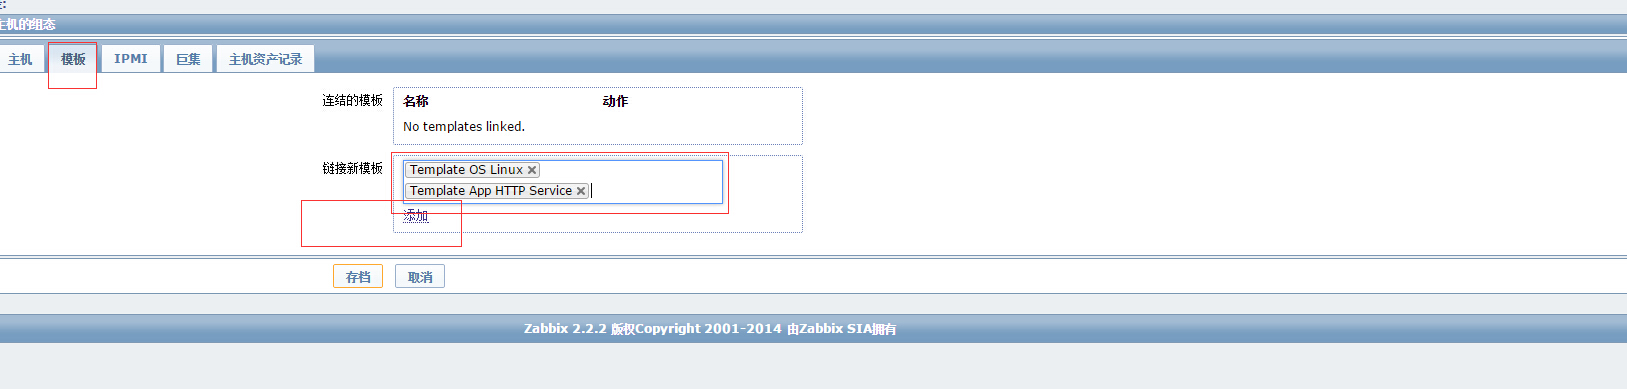
比如我这台主机是做web服务器,可以添加http的监控,
然后存档
可能出现的问题

报警通知
创建脚本通知管理>示警媒介类型>创建媒体类型
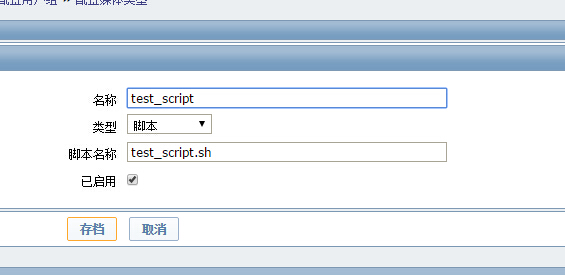
默认的脚本放在 /etc/zabbix/alert.d/目录一下,需要有可执行权限
客户端没连接上,查看日志 /var/log/zabbix-agent/zabbix_agentd.log
vim.tiny  /etc/zabbix/alert.d/test_script.sh

#!/bin/sh
# 可以在这里发邮件或者其他操作
echo $* >> /tmp/za.log
选择用户
管理>用户>Admin>示警媒介

自定义监控
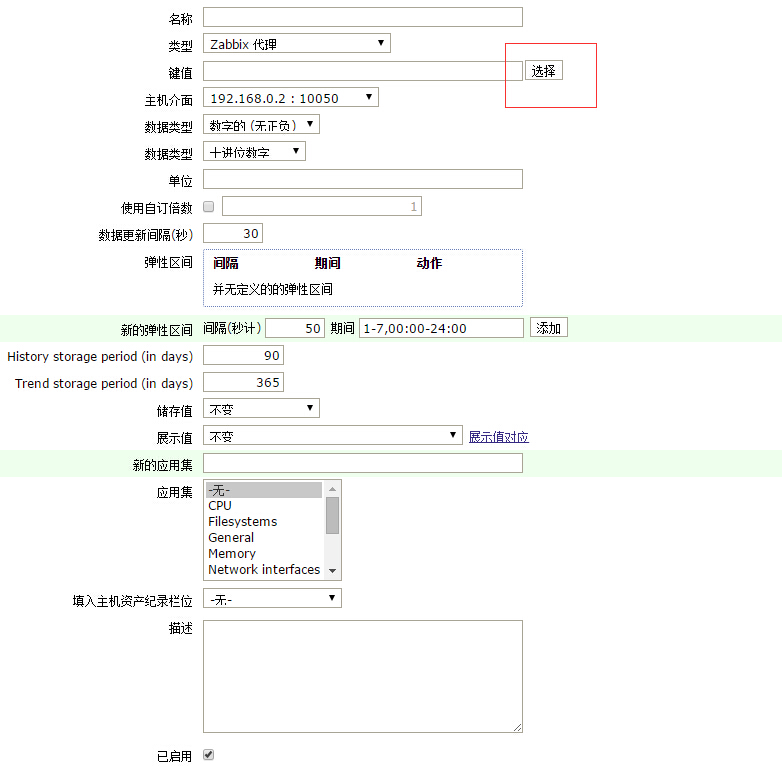
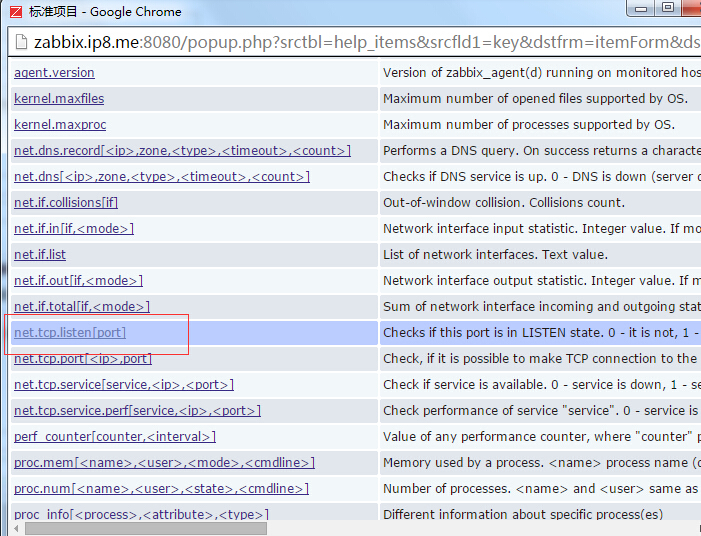
创建监控80端口的监控组态>主机>docker2>项目 >创建监控项

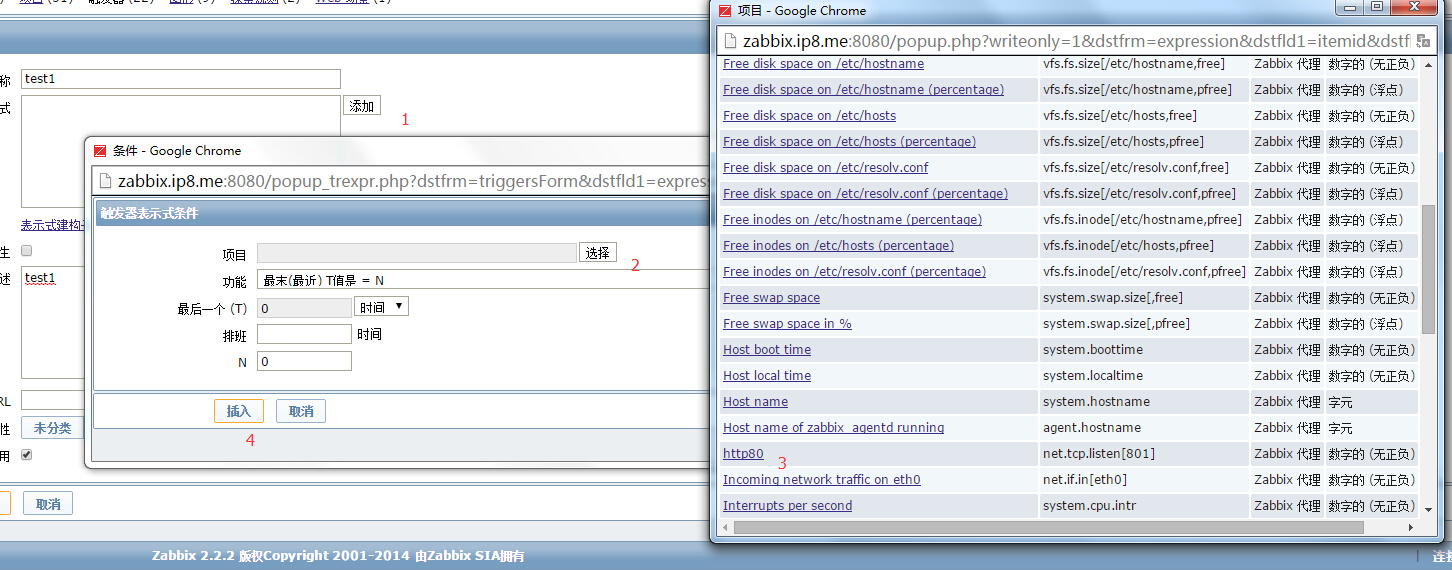
组态>主机>docker2>触发器 >创建触发器
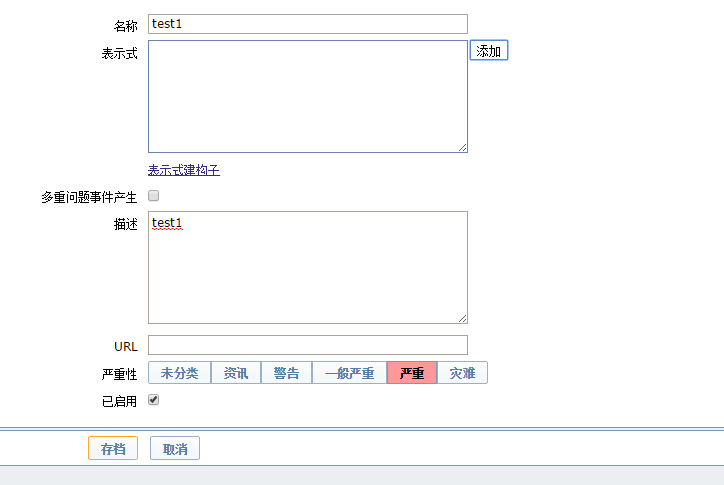
就可以测试一下停止http服务,首页上会出现警告
查看/tmp/za.log

相关文章推荐
- Pony ORM
- 记一次不错的电话面试
- 第3章 Android Dalvik虚拟机 第三节(上)
- 八、UiScrollable API 详细介绍
- Leet Code OJ 226. Invert Binary Tree [Difficulty: Easy]
- 嵌入式开发板iTOP4412学习开发板
- Spark:利用Eclipse构建Spark集成开发环境
- memcached性能监控
- 匿名函数
- VOIp资料
- linux iptables 笔记
- innobackupex mysql备份及恢复(全量和增量)
- pssh进行并行批量操作
- 修饰器
- ubuntu keepalived 笔记
- lvs 笔记
- ubuntu iptables 共享上网
- iptables进行端口转发
- 关于wincvs1.3中文版对比版本中文乱码的解决方案
- 关于Mybatis的文章