Nginx+uwsgi+django配置小结
2016-02-24 08:53
806 查看
1.uwsgi参数说明
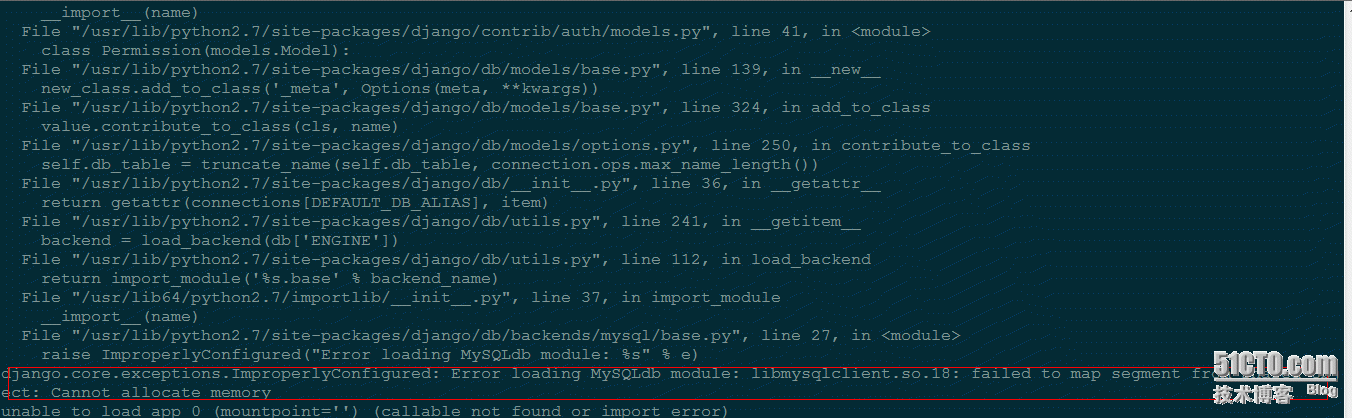
解决方法
修改uwsgi参数 limit-as =512
3.
后两个参数类似于nginx最后两个参数在哪设置都一样
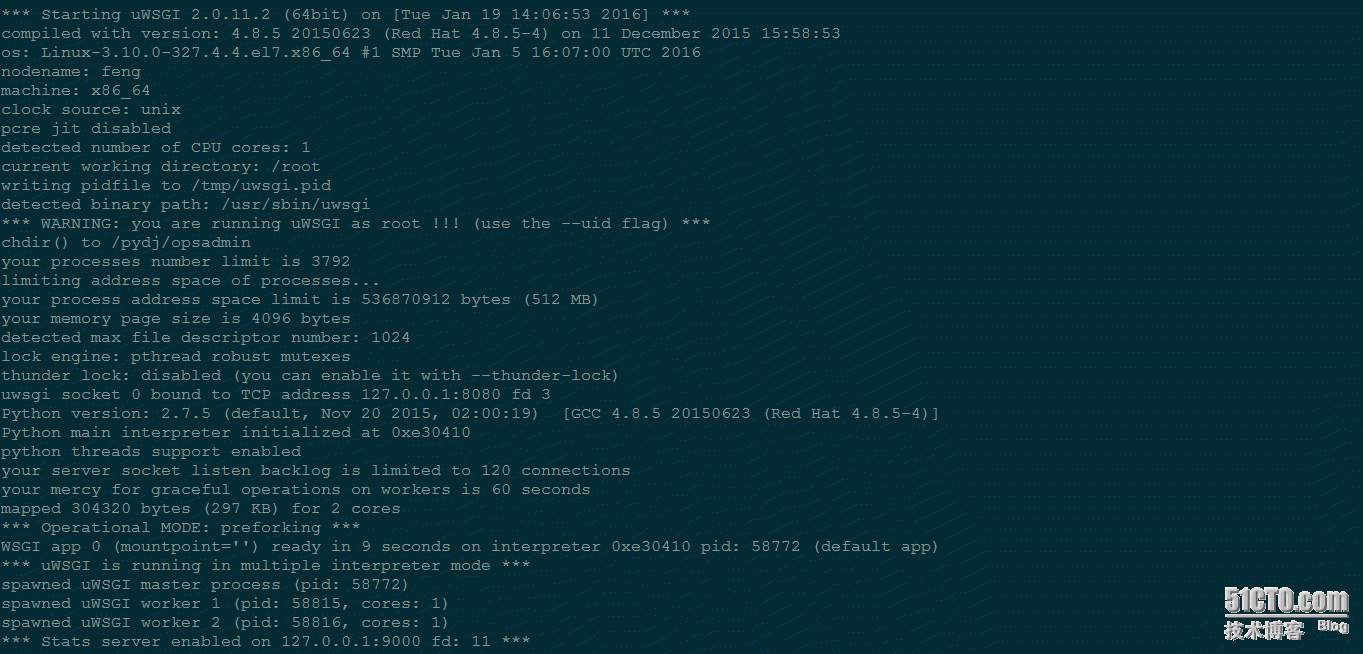
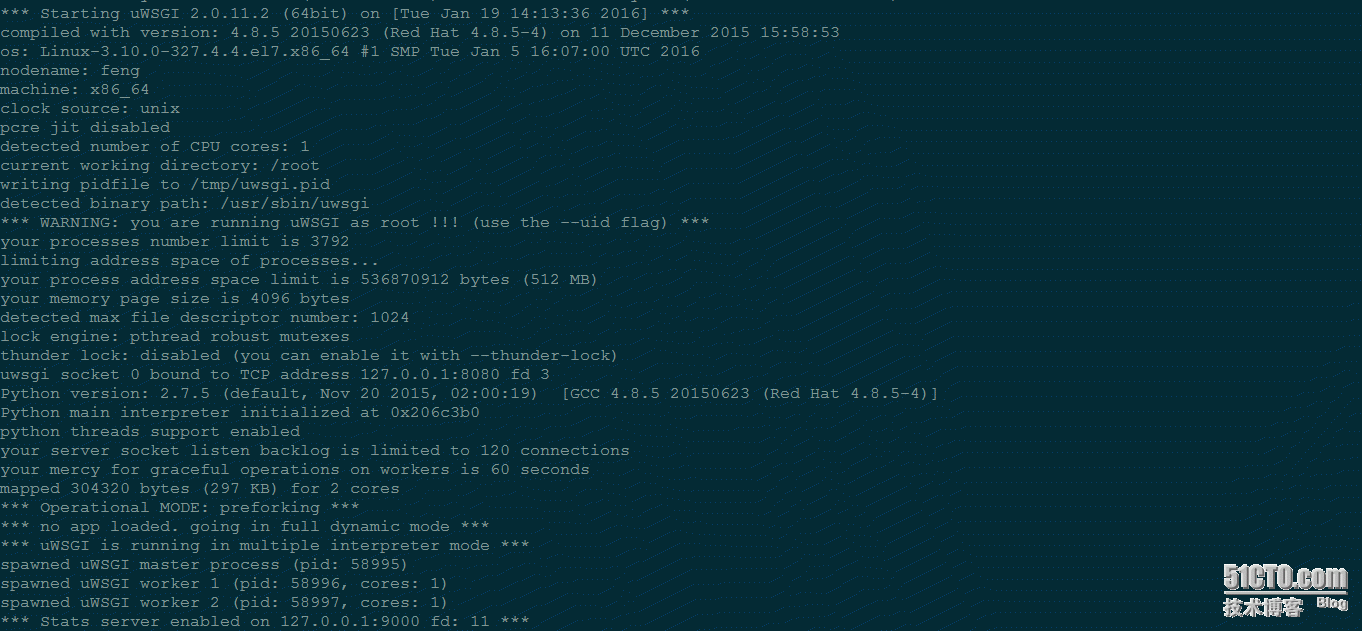
正常运行的日志
4)小结
环境:
Centos7.2
Nginx 1.6.3
Django1.8.8
Uwsgi 2.0.11.2
MySQL-python1.2.3
uwsgi-plugin-python2.0.11.2
关键配置
uwsgi
nginx与uwsgi通信
[uwsgi]
uid = nginx #使用nginx用户和组
gid = nginx
chdir = /usr/local/myapp #指定项目目录
module = myapp.wsgi #加载myapp/wsgi.py这个模块
master = true  #启动主进程。
processes = 2 #启动2个工作进程
listen = 120 #设置socket的监听队列大小(默认:100)
socket = /test/myapp.sock#指定socket文件
socket = 127.0.0.1:8080
pidfile = /var/run/uwsgi.pid #指定pid文件
vacuum = true #当服务器退出的时候自动删除unixsocket文件和pid文件。
enable-threads = true #允许用内嵌的语言启动线程。这将允许你在app程序中产生一个子线程
buffer-size = 32768 #设置用于uwsgi包解析的内部缓存区大小为64k。默认是4k。

reload-mercy = 8 #设置在平滑的重启(直到接收到的请求处理完才重启)一个工作子进程中,等待这个工作结束的最长秒数。这个配置会使在平滑地重启工作子进程中,如果工作进程结束时间超过了8秒就会被强行结束(忽略之前已经接收到的请求而直接结束)
max-requests = 5000 #为每个工作进程设置请求数的上限。当一个工作进程处理的请求数达到这个值,那么该工作进程就会被回收重用(重启)。你可以使用这个选项来默默地对抗内存泄漏
limit-as = 256 #通过使用POSIX/UNIX的setrlimit()函数来限制每个uWSGI进程的虚拟内存使用数。这个配置会限制uWSGI的进程占用虚拟内存不超过256M。如果虚拟内存已经达到256M,并继续申请虚拟内存则会使程序报内存错误,本次的http请求将返回500错误。
harakiri = 60 #一个请求花费的时间超过了这个harakiri超时时间,那么这个请求都会被丢弃,并且当前处理这个请求的工作进程会被回收再利用(即重启)
daemonize= /var/log/myapp_uwsgi.log # 使进程在后台运行,并将日志打到指定的日志文件或者udp服务器
2.日志报错
解决方法
修改uwsgi参数 limit-as =512
3.
后两个参数类似于nginx最后两个参数在哪设置都一样
正常运行的日志
4)小结
环境:
Centos7.2
Nginx 1.6.3
Django1.8.8
Uwsgi 2.0.11.2
MySQL-python1.2.3
uwsgi-plugin-python2.0.11.2
关键配置
uwsgi
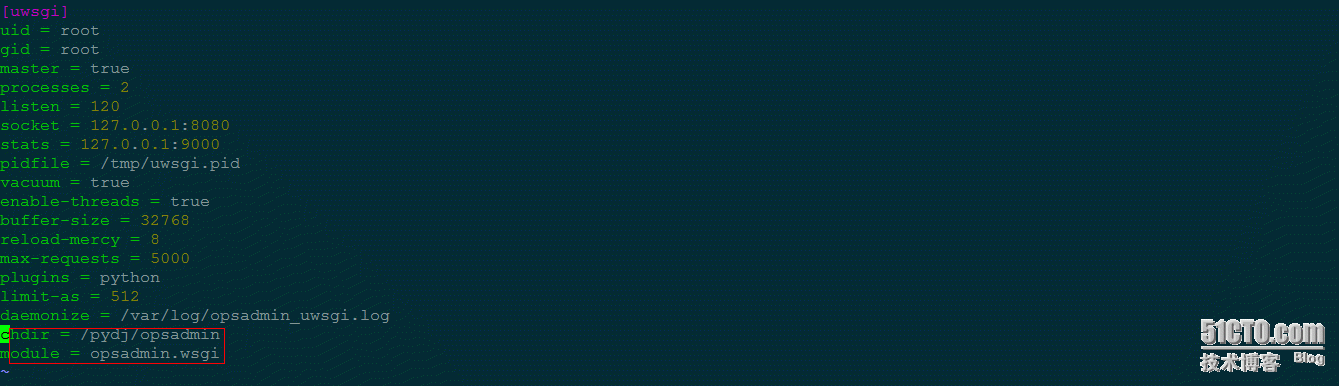
uwsgi.ini

[uwsgi]
uid = root
gid = root
master = true
processes = 2
listen = 120
socket = 127.0.0.1:8080
stats = 127.0.0.1:9000
pidfile = /tmp/uwsgi.pid
vacuum = true
enable-threads = true
buffer-size = 32768
reload-mercy = 8
max-requests = 5000
plugins = python
limit-as = 512
daemonize = /var/log/opsadmin_uwsgi.log
;chdir = /pydj/opsadmin
;module = opsadmin.wsgi
nginx
django-nginx.conf

# the port your site will be served on
listen     8000;
# the domain name it will serve for
server_name localhost; # substitute yourmachine's IP address or FQDN
charset    utf-8;

access_log /pydj/opsadmin/access_log;
error_log /pydj/opsadmin/error_log;

# max upload size
client_max_body_size 900M;   # adjust to taste

# Django media
#location /media  {
#   alias /to/your/mysite/media;  #your Django project's media files - amend as required
#}

location /static {

alias /pydj/opsadmin/static; # your Djangoproject's static files - amend as required
}

# Finally, send all non-media requests tothe Django server.
location / {

include    uwsgi_params; # theuwsgi_params file you installed
uwsgi_pass 127.0.0.1:8080;
#uwsgi_modifier1 7;
uwsgi_param UWSGI_SCRIPT opsadmin.wsgi;
uwsgi_paramUWSGI_CHDIR /pydj/opsadmin;
}
}
nginx与uwsgi通信
uwsgi_pass 127.0.0.1:8080  #nginx
socket = 127.0.0.1:8080    #uwsgi

相关文章推荐
- nginx代理指定目录
- 访问Nginx发生SSL connection error的一种情况
- 启动uwsgi 时候遇见的问题
- Nginx+Naxsi部署专业级Web应用防火墙
- CentOS 6.2实战部署Nginx+MySQL+PHP
- nginx中http核心模块的配置指令2
- nginx中http核心模块的配置指令3
- nginx中http核心模块的配置指令4
- nginx中http的fastcgi模块的配置指令1
- Nginx 学习笔记(一)
- 网站502与504错误分析
- 艰难完成 nginx + puma 部署 rails 4的详细记录
- 把Lua编译进nginx步骤方法
- web 应用中常用的各种 cache详解
- Linux系统上配置Nginx+Ruby on Rails+MySQL超攻略
- window+nginx+php环境配置 附配置搭配说明
- django中使用jquery ajax post数据出现403错误的解决办法(两种方法)
- django使用ajax post数据出现403错误如何解决
- 解析CI即CodeIgniter框架在Nginx下的重写规则