第四课:彩色立方体
2016-02-15 09:46
375 查看
转载自:http://www.opengl-tutorial.org/cn/beginners-tutorials/tutorial-4-a-colored-cube/
第四课:彩色立方体
欢迎来到第四课!您将学到:绘制立方体,向单调的三角形说再见
加上绚丽的色彩
深度缓冲(Z-Buffer)
绘制立方体
立方体有六个方形表面,而OpenGL只支持画三角形,因此需要画12个三角形,每个面两个。我们用定义三角形顶点的方式来定义这些顶点。1 // Our vertices. Tree consecutive floats give a 3D vertex; Three consecutive vertices give a triangle.
2 // A cube has 6 faces with 2 triangles each, so this makes 6*2=12 triangles, and 12*3 vertices
3 static const GLfloat g_vertex_buffer_data[] = {
4 -1.0f,-1.0f,-1.0f, // triangle 1 : begin
5 -1.0f,-1.0f, 1.0f,
6 -1.0f, 1.0f, 1.0f, // triangle 1 : end
7 1.0f, 1.0f,-1.0f, // triangle 2 : begin
8 -1.0f,-1.0f,-1.0f,
9 -1.0f, 1.0f,-1.0f, // triangle 2 : end
10 1.0f,-1.0f, 1.0f,
11 -1.0f,-1.0f,-1.0f,
12 1.0f,-1.0f,-1.0f,
13 1.0f, 1.0f,-1.0f,
14 1.0f,-1.0f,-1.0f,
15 -1.0f,-1.0f,-1.0f,
16 -1.0f,-1.0f,-1.0f,
17 -1.0f, 1.0f, 1.0f,
18 -1.0f, 1.0f,-1.0f,
19 1.0f,-1.0f, 1.0f,
20 -1.0f,-1.0f, 1.0f,
21 -1.0f,-1.0f,-1.0f,
22 -1.0f, 1.0f, 1.0f,
23 -1.0f,-1.0f, 1.0f,
24 1.0f,-1.0f, 1.0f,
25 1.0f, 1.0f, 1.0f,
26 1.0f,-1.0f,-1.0f,
27 1.0f, 1.0f,-1.0f,
28 1.0f,-1.0f,-1.0f,
29 1.0f, 1.0f, 1.0f,
30 1.0f,-1.0f, 1.0f,
31 1.0f, 1.0f, 1.0f,
32 1.0f, 1.0f,-1.0f,
33 -1.0f, 1.0f,-1.0f,
34 1.0f, 1.0f, 1.0f,
35 -1.0f, 1.0f,-1.0f,
36 -1.0f, 1.0f, 1.0f,
37 1.0f, 1.0f, 1.0f,
38 -1.0f, 1.0f, 1.0f,
39 1.0f,-1.0f, 1.0f
40 };OpenGL的缓冲由一些标准的函数(glGenBuffers, glBindBuffer, glBufferData, glVertexAttribPointer)来创建、绑定、填充和配置;这些可参阅第二课。若有遗忘,可参见第二课。绘制的调用也没变,只需改变绘制的点的个数:
1 // Draw the triangle !
2 glDrawArrays(GL_TRIANGLES, 0, 12*3); // 12*3 indices starting at 0 -> 12 triangles -> 6 squares
关于这段代码,有几点要说明一下:
截至目前我们使用的三维模型都是固定的:只能在源码中修改模型,重新编译,然后祈祷不要出什么差错。我们将在第七课中学习如何动态地加载模型。
实际上,每个顶点至少出现了三次(在以上代码中搜索”-1.0f,-1.0f,-1.0f”看看)。这严重浪费了内存空间。我们将在第九课中学习怎样对此进行优化。
现在您已具备绘制一个白色立方体的所有条件。试着让着色器运行起来吧:)
增色添彩
从概念上讲,颜色与位置是一回事:就是数据嘛。OpenGL术语中称之为”属性(attribute)”。其实我们之前已用glEnableVertexAttribArray()和glVertexAttribPointer()设置过属性了。现在加上颜色属性,代码很相似。首先声明颜色:每个顶点一个RGB三元组。这里随机生成一些颜色,所以效果看起来可能不太好;您可以调整得更好些,例如把顶点的位置作为颜色值。
1 // One color for each vertex. They were generated randomly.
2 static const GLfloat g_color_buffer_data[] = {
3 0.583f, 0.771f, 0.014f,
4 0.609f, 0.115f, 0.436f,
5 0.327f, 0.483f, 0.844f,
6 0.822f, 0.569f, 0.201f,
7 0.435f, 0.602f, 0.223f,
8 0.310f, 0.747f, 0.185f,
9 0.597f, 0.770f, 0.761f,
10 0.559f, 0.436f, 0.730f,
11 0.359f, 0.583f, 0.152f,
12 0.483f, 0.596f, 0.789f,
13 0.559f, 0.861f, 0.639f,
14 0.195f, 0.548f, 0.859f,
15 0.014f, 0.184f, 0.576f,
16 0.771f, 0.328f, 0.970f,
17 0.406f, 0.615f, 0.116f,
18 0.676f, 0.977f, 0.133f,
19 0.971f, 0.572f, 0.833f,
20 0.140f, 0.616f, 0.489f,
21 0.997f, 0.513f, 0.064f,
22 0.945f, 0.719f, 0.592f,
23 0.543f, 0.021f, 0.978f,
24 0.279f, 0.317f, 0.505f,
25 0.167f, 0.620f, 0.077f,
26 0.347f, 0.857f, 0.137f,
27 0.055f, 0.953f, 0.042f,
28 0.714f, 0.505f, 0.345f,
29 0.783f, 0.290f, 0.734f,
30 0.722f, 0.645f, 0.174f,
31 0.302f, 0.455f, 0.848f,
32 0.225f, 0.587f, 0.040f,
33 0.517f, 0.713f, 0.338f,
34 0.053f, 0.959f, 0.120f,
35 0.393f, 0.621f, 0.362f,
36 0.673f, 0.211f, 0.457f,
37 0.820f, 0.883f, 0.371f,
38 0.982f, 0.099f, 0.879f
39 };
缓冲的创建、绑定和填充方法与之前一样:
1 GLuint colorbuffer;
2 glGenBuffers(1, &colorbuffer);
3 glBindBuffer(GL_ARRAY_BUFFER, colorbuffer);
4 glBufferData(GL_ARRAY_BUFFER, sizeof(g_color_buffer_data), g_color_buffer_data, GL_STATIC_DRAW);
配置也一样:
1 // 2nd attribute buffer : colors
2 glEnableVertexAttribArray(1);
3 glBindBuffer(GL_ARRAY_BUFFER, colorbuffer);
4 glVertexAttribPointer(
5 1, // attribute. No particular reason for 1, but must match the layout in the shader.
6 3, // size
7 GL_FLOAT, // type
8 GL_FALSE, // normalized?
9 0, // stride
10 (void*)0 // array buffer offset
11 );
现在在顶点着色器中已经能访问这个新增的缓冲了:
1 // Notice that the "1" here equals the "1" in glVertexAttribPointer
2 layout(location = 1) in vec3 vertexColor;
这一课的顶点着色器没有什么复杂的效果,仅仅是简单地把颜色传递到片段着色器:
1 // Output data ; will be interpolated for each fragment.
2 out vec3 fragmentColor;
3
4 void main(){
5
6 [...]
7
8 // The color of each vertex will be interpolated
9 // to produce the color of each fragment
10 fragmentColor = vertexColor;
11 }
在片段着色器中要再次声明片段颜色:
1 // Interpolated values from the vertex shaders
2 in vec3 fragmentColor;
然后将其拷贝到输出颜色:
1 // Output color = color specified in the vertex shader,
2 // interpolated between all 3 surrounding vertices
3 color = fragmentColor;
于是得到:
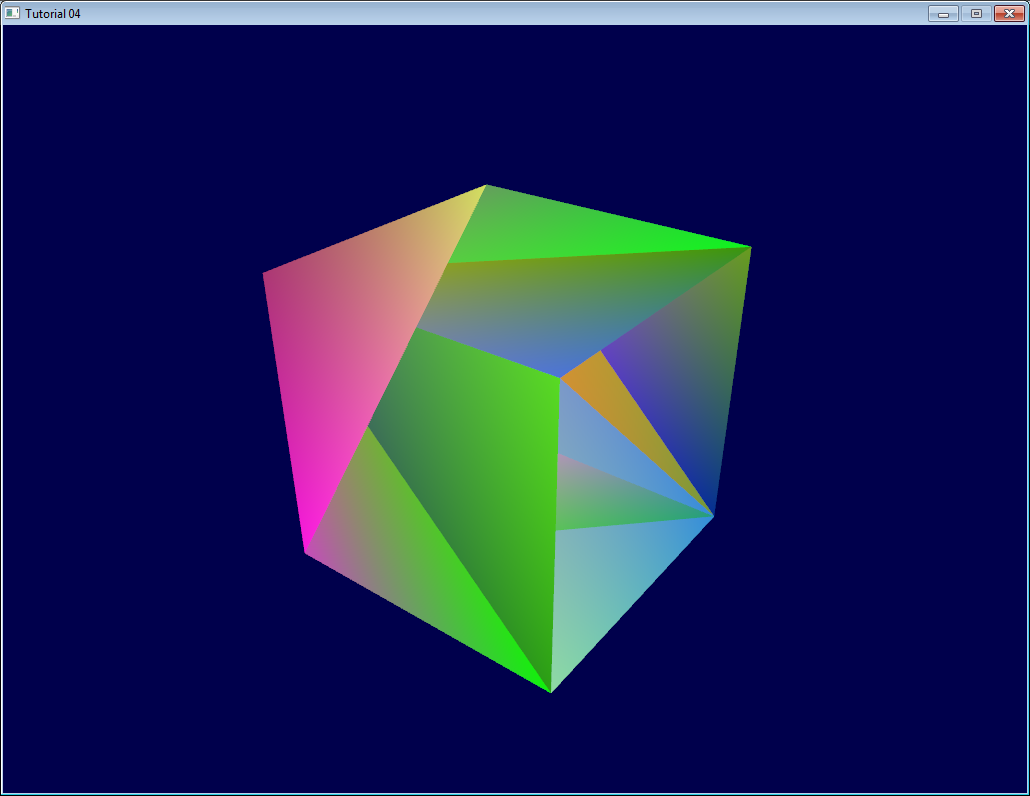
呃,太难看了。为了搞清楚出现这种情况原因,我们先看看画一个”远”和”近”的三角形会发生什么:
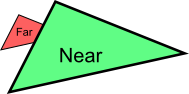
似乎挺好。现在画”远”三角形:
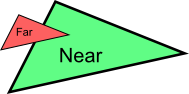
它遮住了”近”三角形!它本应该在”近”三角形后面的!我们的立方体问题就在这里:一些理应被遮挡的面,因为绘制次序靠后,竟然变成可见的了。我们将用深度缓冲(Z-Buffer)算法解决它。
便签1如果您没发现问题,把摄像机放到(4,3,-3)试试便签2如果”颜色和位置同为属性”,那为什么颜色要声明 out vec3 fragmentColor,而位置不需要?实际上,位置有点特殊:它是唯一必须赋初值的(否则OpenGL不知道在哪画三角形)。所以在顶点着色器里, gl_Position是内置变量。
深度缓冲(Z-Buffer)The Z-Buffer
该问题的解决方案是:在缓冲中存储每个片段的深度(即”Z”值);并且每次绘制片段之前要比较当前与先前片段的深度值,看谁离摄像机更近。您可以自己实现深度缓冲,但让硬件自动完成更简单:
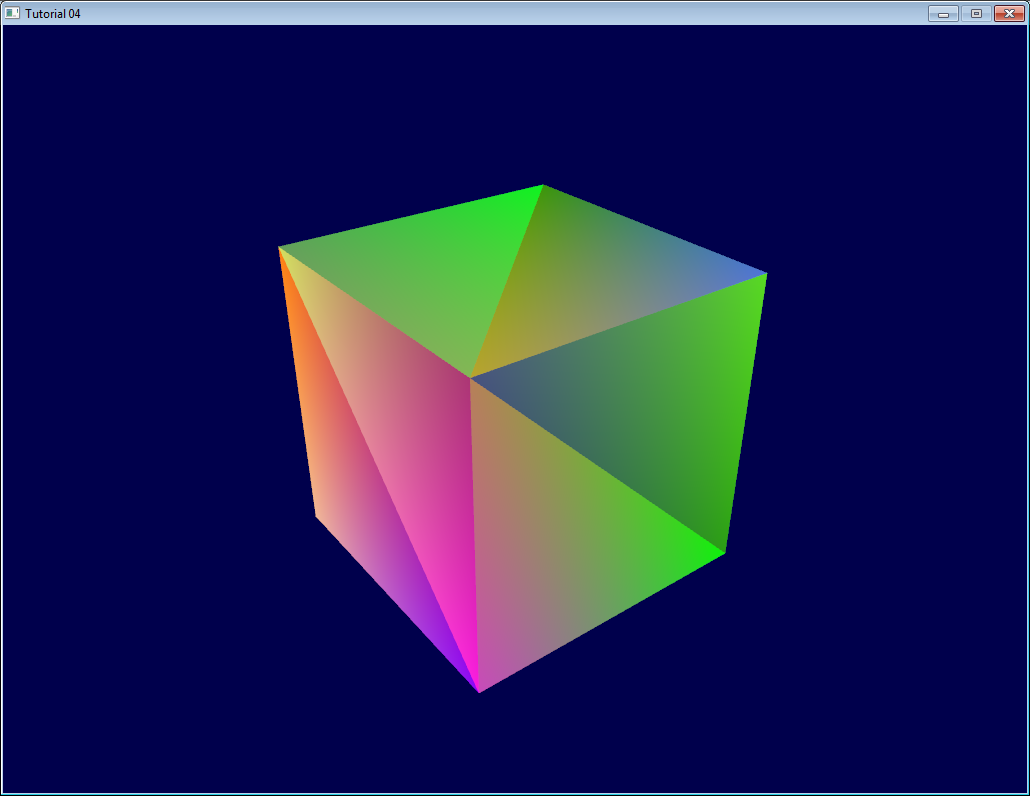
1 // Enable depth test
2 glEnable(GL_DEPTH_TEST);
3 // Accept fragment if it closer to the camera than the former one
4 glDepthFunc(GL_LESS);
问题解决了。
练习
在不同的位置画立方体和三角形。您得构造两个MVP矩阵,在主循环中进行两次绘制调用,但只需一个着色器。自己生成颜色值。一些点子:随机生成颜色,这样每次运行时颜色都不同;根据顶点位置生成颜色;把前面两种思路结合起来;或其他创意:)。若您不了解C,参考以下语法:
1 static GLfloat g_color_buffer_data[12*3*3];
2 for (int v = 0; v < 12*3 ; v++){
3 g_color_buffer_data[3*v+0] = your red color here;
4 g_color_buffer_data[3*v+1] = your green color here;
5 g_color_buffer_data[3*v+2] = your blue color here;
6 }
完成上面习题后,尝试每帧都改变颜色。您得在每帧都调用
glBufferData。请确保已绑定(
glBindBuffer)了合适的缓冲!

相关文章推荐
- iOS沙盒目录结构解析
- Redis分区探究
- Android样式的开发:Drawable汇总篇
- 使用C++实现简单线程池
- 五大管理决定人的一生
- HDU 1754线段树基本操作,建树,更新,查询
- win8系统怎么让任务管理器显示PID?
- 最全面的65条最常用正则表达式
- GIS+=地理信息+云计算技术——私有云架构设计(2)网络资源规划
- 关于[UIBarButtonItem alloc] initWithImage:颜色被冲的解决办法
- 在JavaScript中使用JSON数据
- spring websocket stomp如何向服务端传递参数
- 将ios程序运行中的异常发送到指定邮箱
- ViewPager 详解(二)---详解四大函数
- Linux进程调度原理
- Log4j配置详解
- Redis 中文论坛推广
- binder中的红黑树
- 天气
- Swift学习网址收集