KVM虚拟化笔记(九)------kvm虚拟机快照备份
2016-02-04 17:47
525 查看
kvm虚拟机默认使用raw格式的镜像格式,性能最好,速度最快,它的缺点就是不支持一些新的功能,如支持镜像,zlib磁盘压缩,AES加密等。 要使用镜像功能,磁盘格式必须为qcow2。下面开始kvm虚拟机快照备份的过程
1,查看现有磁盘镜像格式与转换
(1)查看现有磁盘的格式
(2)关闭需要转换磁盘的虚拟机
-o 目标镜像的格式
查看转换后的格式,已经转换成了qcow2, 这里是拷贝一份,并将格式转成qcow2
<domain type='qemu'>
<name>hadoop3</name>
<uuid>586b3cae-943f-e283-d8e7-ed72b01bfa34</uuid>
<memory unit='KiB'>1048576</memory>
<currentMemory unit='KiB'>1048576</currentMemory>
<vcpu placement='static'>1</vcpu>
<os>
<type arch='x86_64' machine='rhel6.6.0'>hvm</type>
<boot dev='hd'/>
</os>
<features>
<acpi/>
<apic/>
<pae/>
</features>
<clock offset='localtime'/>
<on_poweroff>destroy</on_poweroff>
<on_reboot>restart</on_reboot>
<on_crash>restart</on_crash>
<devices>
<emulator>/usr/libexec/qemu-kvm</emulator>
<disk type='file' device='disk'>
<driver name='qemu' type='qcow2' cache='none'/>
<source file='/images/test/hadoop3.qcow2'/>
<target dev='hda' bus='ide'/>

3,对虚拟机进行快照管理
(1)对hadoop3虚拟机创建快照
4,恢复虚拟机快照
(1)恢复虚拟机快照必须关闭虚拟机
5,删除虚拟机快照
(1)查看虚拟机快照
至此虚拟机快照从创建,查看,删除。如果有报错,再一一的进行拍错。
1,查看现有磁盘镜像格式与转换
(1)查看现有磁盘的格式
[root@KVM test]# qemu-img info hadoop3.img
image: hadoop3.img
file format: raw
virtual size: 10G (10737418240 bytes)
disk size: 877M
把raw格式转换成qcow2格式
(2)关闭需要转换磁盘的虚拟机
[root@KVM test]# virsh destroy hadoop3
Domain hadoop3 destroyed
[root@KVM test]# virsh list --all
Id    Name                           State
----------------------------------------------------
1     win7                           running
6     hadoop2                        running
-     hadoop1                        shut off
-     hadoop3                        shut off
-     hadoop4                        shut off
(3)转换磁盘的格式
[root@KVM test]# qemu-img convert -f raw -O qcow2 hadoop3.img hadoop3.qcow2-f 源镜像的格式
-o 目标镜像的格式
查看转换后的格式,已经转换成了qcow2, 这里是拷贝一份,并将格式转成qcow2
[root@KVM test]# qemu-img convert -f raw -O qcow2 hadoop3.img hadoop3.qcow2
[root@KVM test]# ll
total 14975352
-rwxr-xr-x 1 root root 10737418240 Feb  4 14:38 hadoop1.img
-rwxr-xr-x 1 qemu qemu 10737418240 Feb  4 16:51 hadoop2.img
-rwxr-xr-x 1 root root 10737418240 Feb  4 16:48 hadoop3.img
-rw-r--r-- 1 root root   923926528 Feb  4 16:51 hadoop3.qcow2
-rwxr-xr-x 1 root root 10737418240 Feb  4 15:11 hadoop4.img
-rwxr-xr-x 1 qemu qemu  8589934592 Feb  2 15:03 win7.img
[root@KVM test]# qemu-img info hadoop3.qcow2
image: hadoop3.qcow2
file format: qcow2
virtual size: 10G (10737418240 bytes)
disk size: 881M
cluster_size: 65536
2,修改虚拟机配置文件
[root@KVM qemu]# virsh edit hadoop3
<domain type='qemu'>
<name>hadoop3</name>
<uuid>586b3cae-943f-e283-d8e7-ed72b01bfa34</uuid>
<memory unit='KiB'>1048576</memory>
<currentMemory unit='KiB'>1048576</currentMemory>
<vcpu placement='static'>1</vcpu>
<os>
<type arch='x86_64' machine='rhel6.6.0'>hvm</type>
<boot dev='hd'/>
</os>
<features>
<acpi/>
<apic/>
<pae/>
</features>
<clock offset='localtime'/>
<on_poweroff>destroy</on_poweroff>
<on_reboot>restart</on_reboot>
<on_crash>restart</on_crash>
<devices>
<emulator>/usr/libexec/qemu-kvm</emulator>
<disk type='file' device='disk'>
<driver name='qemu' type='qcow2' cache='none'/>
<source file='/images/test/hadoop3.qcow2'/>
<target dev='hda' bus='ide'/>
3,对虚拟机进行快照管理
(1)对hadoop3虚拟机创建快照
[root@KVM qemu]# virsh snapshot-create hadoop3
Domain snapshot 1454577228 created
(2)查看虚拟机快照的版本
[root@KVM qemu]# virsh snapshot-list hadoop3
Name                 Creation Time             State
------------------------------------------------------------
1454577228           2016-02-04 17:13:48 +0800 shutoff
(3)查看当前虚拟机镜像快照的版本
[root@KVM qemu]# virsh snapshot-current hadoop3 <domainsnapshot> <name>1454577442</name> <state>shutoff</state> <parent> <name>1454577228</name> </parent> <creationTime>1454577442</creationTime> <memory snapshot='no'/> <disks> <disk name='hda' snapshot='internal'/> <disk name='hdc' snapshot='no'/> </disks> <domain type='qemu'> <name>hadoop3</name> <uuid>586b3cae-943f-e283-d8e7-ed72b01bfa34</uuid> <memory unit='KiB'>1048576</memory> <currentMemory unit='KiB'>1048576</currentMemory> <vcpu placement='static'>1</vcpu> <os> <type arch='x86_64' machine='rhel6.6.0'>hvm</type> <boot dev='hd'/> </os> <features> <acpi/> <apic/> <pae/> </features> <clock offset='localtime'/> <on_poweroff>destroy</on_poweroff> <on_reboot>restart</on_reboot> <on_crash>restart</on_crash> <devices> <emulator>/usr/libexec/qemu-kvm</emulator> <disk type='file' device='disk'> <driver name='qemu' type='qcow2' cache='none'/> <source file='/images/test/hadoop3.qcow2'/> <target dev='hda' bus='ide'/> <address type='drive' controller='0' bus='0' target='0' unit='0'/> </disk> <disk type='block' device='cdrom'> <driver name='qemu' type='raw'/> <target dev='hdc' bus='ide'/> <readonly/> <address type='drive' controller='0' bus='1' target='0' unit='0'/> </disk> <controller type='usb' index='0' model='ich9-ehci1'> <address type='pci' domain='0x0000' bus='0x00' slot='0x04' function='0x7'/> </controller> <controller type='usb' index='0' model='ich9-uhci1'> <master startport='0'/> <address type='pci' domain='0x0000' bus='0x00' slot='0x04' function='0x0' multifunction='on'/> </controller> <controller type='usb' index='0' model='ich9-uhci2'> <master startport='2'/> <address type='pci' domain='0x0000' bus='0x00' slot='0x04' function='0x1'/> </controller> <controller type='usb' index='0' model='ich9-uhci3'> <master startport='4'/> <address type='pci' domain='0x0000' bus='0x00' slot='0x04' function='0x2'/> </controller> <controller type='ide' index='0'> <address type='pci' domain='0x0000' bus='0x00' slot='0x01' function='0x1'/> </controller> <interface type='network'> <mac address='52:54:00:fe:f5:a3'/> <source network='default'/> <address type='pci' domain='0x0000' bus='0x00' slot='0x03' function='0x0'/> </interface> <serial type='pty'> <target port='0'/> </serial> <console type='pty'> <target type='serial' port='0'/> </console> <input type='mouse' bus='ps2'/> <graphics type='vnc' port='5913' autoport='no' listen='0.0.0.0'> <listen type='address' address='0.0.0.0'/> </graphics> <video> <model type='cirrus' vram='9216' heads='1'/> <address type='pci' domain='0x0000' bus='0x00' slot='0x02' function='0x0'/> </video> <memballoon model='virtio'> <address type='pci' domain='0x0000' bus='0x00' slot='0x05' function='0x0'/> </memballoon> </devices> </domain> </domainsnapshot>(4)查看当前虚拟机镜像文件,快照文件的路径在/var/lib/libvirt/qemu/snapshot/ 下
[root@KVM qemu]# ll /var/lib/libvirt/qemu/snapshot/hadoop3/
total 8
-rw------- 1 root root 3402 Feb  4 17:17 1454577228.xml
-rw------- 1 root root 3453 Feb  4 17:17 1454577442.xml
4,恢复虚拟机快照
(1)恢复虚拟机快照必须关闭虚拟机
[root@KVM qemu]# virsh list --all
Id    Name                           State
----------------------------------------------------
1     win7                           running
6     hadoop2                        running
-     hadoop1                        shut off
-     hadoop3                        shut off
-     hadoop4                        shut off
(2)确认恢复快照的时间,这里是恢复到1454577442
[root@KVM qemu]# virsh snapshot-list hadoop3 Name Creation Time State ------------------------------------------------------------ 1454577228 2016-02-04 17:13:48 +0800 shutoff(3)执行恢复,并确认恢复版本
1454577442 2016-02-04 17:17:22 +0800 shutoff
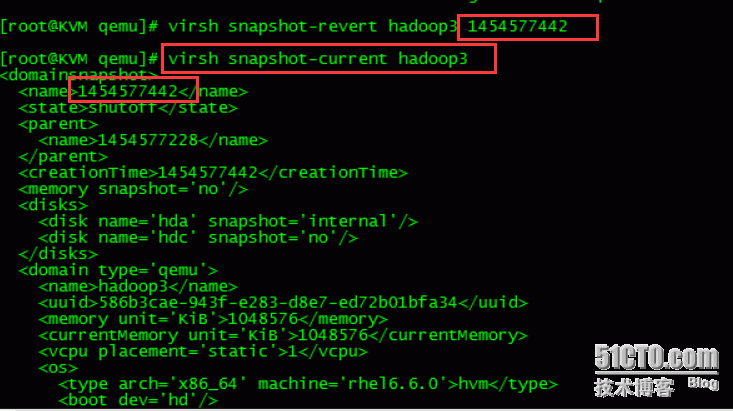
[root@KVM qemu]# virsh snapshot-revert hadoop3 1454577442
[root@KVM qemu]# virsh snapshot-current hadoop3
5,删除虚拟机快照
(1)查看虚拟机快照
[root@KVM test]# qemu-img info hadoop3.qcow2
image: hadoop3.qcow2
file format: qcow2
virtual size: 10G (10737418240 bytes)
disk size: 881M
cluster_size: 65536
Snapshot list:
ID        TAG                 VM SIZE                DATE       VM CLOCK
1         1454577228                0 2016-02-04 17:13:48   00:00:00.000
2         1454577442                0 2016-02-04 17:17:22   00:00:00.000
(2)删除快照
[root@KVM test]# virsh snapshot-delete hadoop3 1454577228
Domain snapshot 1454577228 deleted
[root@KVM test]# qemu-img info hadoop3.qcow2
image: hadoop3.qcow2
file format: qcow2
virtual size: 10G (10737418240 bytes)
disk size: 881M
cluster_size: 65536
Snapshot list:
ID        TAG                 VM SIZE                DATE       VM CLOCK
2         1454577442                0 2016-02-04 17:17:22   00:00:00.000
至此虚拟机快照从创建,查看,删除。如果有报错,再一一的进行拍错。

相关文章推荐
- Linux下三大免费桌面虚拟机评测
- convert(一)—— 部署managed
- convirt(二)—— 创建第一台虚机
- QEMU 1: 使用QEMU创建虚拟机
- QEMU 2: 参数解析
- 虚拟磁盘空间不足虚拟电脑运行发生错误的原因及解决
- 搭建CloudStack
- SNAPSHOT or RELEASE
- KVM网络性能测试(1)
- KVM网络性能测试(2)
- KVM网络性能测试(3)
- 全虚拟化和半虚拟化的区别 cpu的ring0 ring1又是什么概念?
- 微软给出虚拟化管理工具的价格以及发布日期
- 虚拟化改变网络结构
- 戴尔集中统一虚拟化方案助力温岭公安局
- How to install VMware ESXi Server 4.1 in VMware workstation 7.0
- How to attach iSCSI LUN to ESXi server
- 某虚拟化项目中思科与华为交换机链路聚合互连案例
- KVM虚拟化笔记(十五)------kvm虚拟化存储池配置