Git入门及上传项目到github中
2016-02-01 16:39
399 查看
最近需要将课设代码上传到Github上,之前只是用来fork别人的代码。
这篇文章写得是windows下的使用方法。
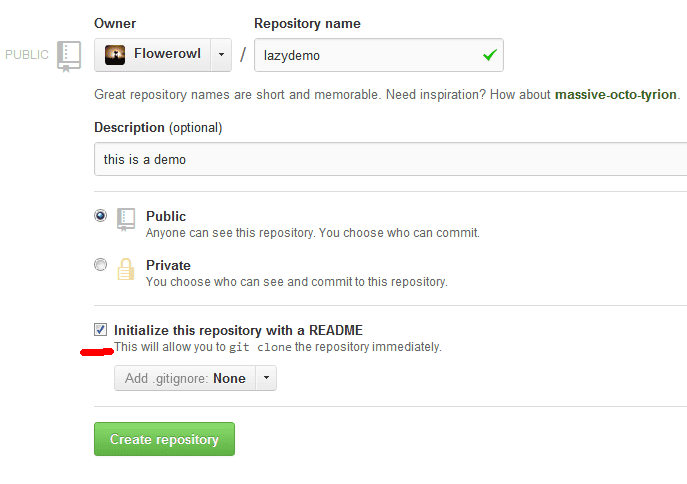
第一步:创建Github新账户
第二步:新建仓库
第三部:填写名称,简介(可选),勾选Initialize this repository with a README选项,这是自动创建REAMDE.md文件,省的你再创建。
第四步:安装Github shell程序,地址:http://windows.github.com/
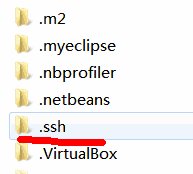
第五步:打开Git Shell,输入以下命令生成密钥来验证身份
连续三个回车之后会在windows当前用户目录下生成.ssh文件夹,和linux一样。
把文件夹下的id_rsa.pub文件内容全部复制。
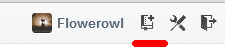
然后打开github账户设置,如图
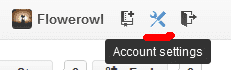
打开ssh keys
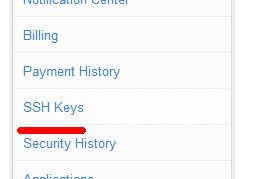
右上角点击add ssh key

然后在title随便输入,key栏粘贴刚才的密钥。
第六步:在Git Shell下输入命令测试刚才的公钥是否认证正确。
正确结果会显示:
warning 不用理会。
第七步:clone刚才新建的repository 到本地,输入命令:

这篇文章写得是windows下的使用方法。
第一步:创建Github新账户
第二步:新建仓库
第三部:填写名称,简介(可选),勾选Initialize this repository with a README选项,这是自动创建REAMDE.md文件,省的你再创建。
第四步:安装Github shell程序,地址:http://windows.github.com/
第五步:打开Git Shell,输入以下命令生成密钥来验证身份
ssh-keygen -C 'your@email.address' -t rsa
连续三个回车之后会在windows当前用户目录下生成.ssh文件夹,和linux一样。
把文件夹下的id_rsa.pub文件内容全部复制。
然后打开github账户设置,如图
打开ssh keys
右上角点击add ssh key
然后在title随便输入,key栏粘贴刚才的密钥。
第六步:在Git Shell下输入命令测试刚才的公钥是否认证正确。
ssh -T git@github.com
正确结果会显示:
Warning:Permanently added 'github.com,207.97.227.239' (RSA) to the list of known hosts.
  Hi Flowerowl! You've successfully authenticated, but GitHub does not provide shell access.
warning 不用理会。
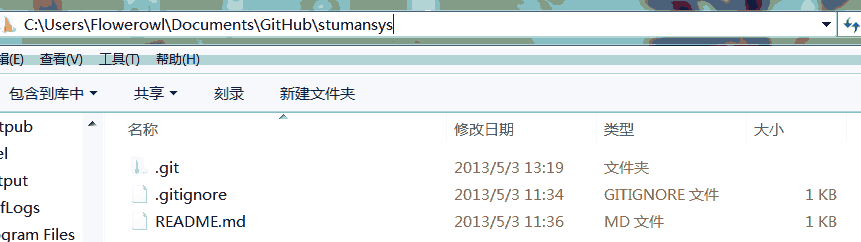
第七步:clone刚才新建的repository 到本地,输入命令:
git clone https://github.com/Flowerowl/stumansys.git[/code] 这时会在目录下生成:
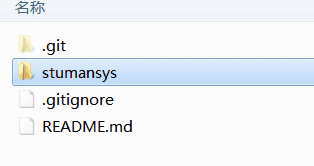
第八步:将想上传的代码目录拷贝到此文件夹下:
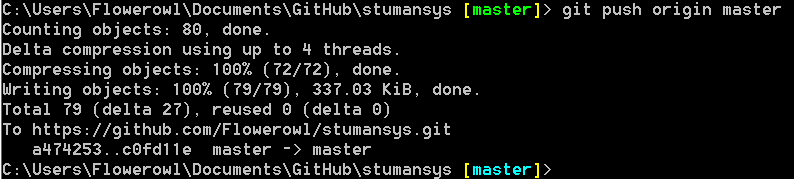
第九步:切换到Git shell 命令行下,输入命令:cd stumansys git init git add . git commit -m 'stumansys' git remote add origin https://github.com/Flowerowl/stumansys.git git push origin master
如果执行git remote add originhttps://github.com/Flowerowl/stumansys.git
,出现错误:fatal: remote origin already exists
则执行以下语句:git remote rm origin
再往后执行git remote add origin https://github.com/Flowerowl/stumansys.git 即可。
在执行git push origin master时,报错:error:failed to push som refs to.......
则执行以下语句:git pull origin master
先把远程服务器github上面的文件拉先来,再push 上去。
最后,你可以去项目页面查看了~~代码上传成功!
有问题可以在下方留言,大家一起解决~

相关文章推荐
- Git入门及上传项目到github中
- php_curl.dll libssh2.dll 始终无法加载的原因 及解决办法
- 注意增强代码逻辑,过滤掉不需要的数据
- ubuntu12.04 安装配置jdk1.7
- 如何批量清理系统临时文件(语言:C#、 C/C++、 php 、python 、java )
- Mongoose学习参考文档
- ubuntu12.04 安装配置jdk1.7
- matlab中的小符号
- PHP 启动 cURL模块以及启动失败的解决方案
- Windows 8 IIS配置PHP运行环境
- 编程王道,唯“慢”不破
- Windows 8 IIS配置PHP运行环境
- PHP 启动 cURL模块以及启动失败的解决方案
- Java中怎么将数据封装成XML格式
- 《API Design for C++》读书笔记(一):API 简介
- java泛型
- java_AES加密解密文件以及字符串
- python数据导入
- 京东价格监控软件开发技术探讨九:C#判断京东登录是否需要验证码
- python MySQLdb在windows环境下的快速安装、问题解决方式