Material Design动画(一)
2016-01-28 18:16
435 查看
说明:本文中的代码均是在Android Studio 2.0 preview版本中编译。
动画是Material Design风格中最重要的组成部分之一,与其他动画不同,Material Design动画需要符合自然界中的重力加速度(如与重力反向的自由落体运动、重力方向的自由落体运动),本文模拟贴近自然界中物体运行轨迹的动画效果。
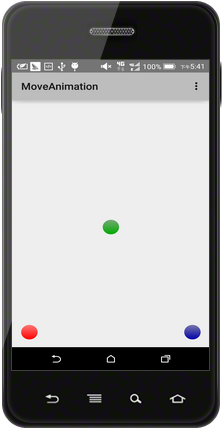
红球主要模拟了上升时逐渐减速、下降时逐渐加速并在落地时产生回弹的动画效果,这是Google推荐的动画效果;
绿球模拟了从屏幕外加速飞入,接着逐渐减速,返回时逐渐加速并飞出屏幕的动画效果,这也是Google推荐的动画效果;
蓝球模拟了匀速运动的动画效果,这是Google不推荐的动画效果。
在menu中定义了三个item项分别用于触发三个小球产生动画。其中属性
需要说明的是,本文中的插值器(Interpolator)来自一个第三方的开源框架,具体内容请参见博客类别”Android5.X的新特性”中的博文。
动画是Material Design风格中最重要的组成部分之一,与其他动画不同,Material Design动画需要符合自然界中的重力加速度(如与重力反向的自由落体运动、重力方向的自由落体运动),本文模拟贴近自然界中物体运行轨迹的动画效果。
效果简述
红球主要模拟了上升时逐渐减速、下降时逐渐加速并在落地时产生回弹的动画效果,这是Google推荐的动画效果;
绿球模拟了从屏幕外加速飞入,接着逐渐减速,返回时逐渐加速并飞出屏幕的动画效果,这也是Google推荐的动画效果;
蓝球模拟了匀速运动的动画效果,这是Google不推荐的动画效果。
menu菜单的XML代码
<menu xmlns:android="http://schemas.android.com/apk/res/android"
xmlns:app="http://schemas.android.com/apk/res-auto"
xmlns:tools="http://schemas.android.com/tools"
tools:context=".MainActivity">
<item
android:id="@+id/action_ball1"
android:orderInCategory="100"
android:title="Ball1"
app:showAsAction="never" />

<item
android:id="@+id/action_ball2"
android:orderInCategory="100"
android:title="Ball2"
app:showAsAction="never" />

<item
android:id="@+id/action_ball3"
android:orderInCategory="100"
android:title="Ball3"
app:showAsAction="never" />
</menu>
在menu中定义了三个item项分别用于触发三个小球产生动画。其中属性
android:orderInCategory表示在action overflow中的摆放顺序,数值越小优先级越高;属性
app:showAsAction="never"表示该item项只能显示在action overflow中,具体知识点请参见我的博文《ActionBar使用要点》。
activity逻辑实现
public class MainActivity extends Activity {

private View ball1;
private View ball2;
private View ball3;

@Override
protected void onCreate(Bundle savedInstanceState) {
super.onCreate(savedInstanceState);
setContentView(R.layout.activity_main);

ball1 = findViewById(R.id.ball1);
ball2 = findViewById(R.id.ball2);
ball3 = findViewById(R.id.ball3);
}

@Override
public boolean onCreateOptionsMenu(Menu menu) {
// Inflate the menu; this adds items to the action bar if it is present.
getMenuInflater().inflate(R.menu.menu_main, menu);
return true;
}

@Override
public boolean onOptionsItemSelected(MenuItem item) {
// Handle action bar item clicks here. The action bar will
// automatically handle clicks on the Home/Up button, so long
// as you specify a parent activity in AndroidManifest.xml.
int id = item.getItemId();
//noinspection SimplifiableIfStatement
startAnimation(id);
return super.onOptionsItemSelected(item);
}
//设置动画
private void startAnimation(int id) {
//设置小球上升时的移动距离
float distance1 = getResources().getDimensionPixelOffset(R.dimen.distance1);
//设置小球下降时的移动距离
float distance2 = getResources().getDimensionPixelOffset(R.dimen.distance2);
switch (id) {
case R.id.action_ball1:
//设置一组动画集
AnimatorSet redBall = new AnimatorSet();
//创建小球上升时的属性动画,运动方向为纵向,运动方向为上升
ObjectAnimator redBall1 = ObjectAnimator.ofFloat(ball1, "TranslationY", 0, -distance1);
//设置动画的持续时间
redBall1.setDuration(2000);
//设置插值器(Interpolator)
redBall1.setInterpolator(new EaseCircularOutInterpolator());

//创建小球下降时的属性动画,运动方向为纵向,运动方向为下降
ObjectAnimator redBall2 = ObjectAnimator.ofFloat(ball1, "TranslationY", -distance1, 0);
//设置动画的持续时间
redBall2.setDuration(2000);
//设置插值器(Interpolator)
redBall2.setInterpolator(new EaseBounceOutInterpolator());
//设置动画的执行顺序
redBall.playSequentially(redBall1, redBall2);
//启动动画
redBall.start();
break;
case R.id.action_ball2:
AnimatorSet gBall = new AnimatorSet();
//go
ObjectAnimator gBall1 = ObjectAnimator.ofFloat(ball2, "TranslationY", 0, -distance2);
gBall1.setDuration(2000);
gBall1.setInterpolator(new EaseCircularOutInterpolator());

//back
ObjectAnimator gBall2 = ObjectAnimator.ofFloat(ball2, "TranslationY", -distance2, 0);
gBall2.setDuration(2000);
gBall2.setInterpolator(new EaseCircularInInterpolator());

gBall.playSequentially(gBall1, gBall2);

gBall.start();
break;

case R.id.action_ball3:

AnimatorSet bBall = new AnimatorSet();
//go
ObjectAnimator bBall1 = ObjectAnimator.ofFloat(ball3, "TranslationY", 0, -distance1);
bBall1.setDuration(2000);
bBall1.setInterpolator(new LinearInterpolator());

//back
ObjectAnimator bBall2 = ObjectAnimator.ofFloat(ball3, "TranslationY", -distance1, 0);
bBall2.setDuration(2000);
bBall2.setInterpolator(new LinearInterpolator());

bBall.playSequentially(bBall1, bBall2);

bBall.start();
break;
default:
break;
}

}
}
需要说明的是,本文中的插值器(Interpolator)来自一个第三方的开源框架,具体内容请参见博客类别”Android5.X的新特性”中的博文。

相关文章推荐
- 图文详解Android属性动画
- Android 5.0系统编译 JAVA设置
- android属性动画animator
- 安卓 属性动画 ValueAnimator ObjectAnimator 源码分析 关键处
- nineoldandroids的使用
- Android动画学习笔记-Android Animation
- Android动画之Property Animation(二)
- android propertyAnimator--()
- android 动画之 属性动画propertyAnimator(一)
- 欢迎使用CSDN-markdown编辑器
- 【安卓-动画】使用ObjectAnimator实现ArcMenu动画效果
- 挨踢人的工作日志(2015.11.26)
- android 5.0以上使用AlertDialog出现未充满屏幕的灰色背景
- 从零学Android(十二)、Android中的图形和动画之属性动画
- 属性动画、事件分发和自定义控件
- Android 属性动画(Property Animation) 完全解析 (下)
- Android 属性动画(Property Animation) 完全解析 (上)
- ApiDemos – BouncingBalls分析
- RecycleView的基本使用(一)
- 基于Android的卫星菜单效果实现