全文检索Solr + Solrnet
2016-01-20 00:00
302 查看
由于公司当前项目需要整合全文检索功能,比较了Lucene.net和Solr+Solrnet,毅然选择了后者,先了解下区别:
Lucene:
Apache Lucene is a high-performance, full-featured text search engine library written entirely in Java. It is a technology suitable for nearly any application that requires full-text search
Solr:
Solr is an open source enterprise search server based on the Lucene Java search library, with XML/HTTP and JSON APIs, hit highlighting, faceted search, caching, replication, a web administration interface and ... (摘自http://stackoverflow.com/questions/1400892/search-engine-lucene-or-solr)
所以Lucene是内嵌在Solr中的,同时Solr具有更多的功能,方便我们使用。
Setup:Tomcat + Solr + Solrnet
首先要安装Tomcat(Solr需要host在Servelt container中,比如Tomcat,Glassfish,JBoss,Jetty,Resin,WebLogic等,所以不能用IIS);
在安装好的Tomcat中部署你的Solr实例;
如果用C#的话,需要引入Solrnet或SolrSharp的dll来编写客户端代码;
参考http://crazorsharp.blogspot.com/search/label/SolrNet
上面这篇文章介绍的很详细,但笔者用的旧版的Tomcat6,solr1.4.0,和SolrNet0.2.3,而且有很多细节的介绍,这里就不再重述了,我主要介绍下我的搭建环境(这里用的都是新版本:Tomcat7.0.33,Solr 4.0.0,SolrNet-0.4)和中间遇到的问题,希望对大家有帮助:
1,因为Solr是Java web app,需要Java Servlet来host,所以要先安装Java JDK和JRE,地址:http://www.oracle.com/technetwork/java/javase/downloads/index.html,之后要记得配置环境变量;
2,安装Tomcat7.0.33(Windows7 64bit,做测试用,之后会移到Linux上):
下载地址:http://tomcat.apache.org/download-70.cgi
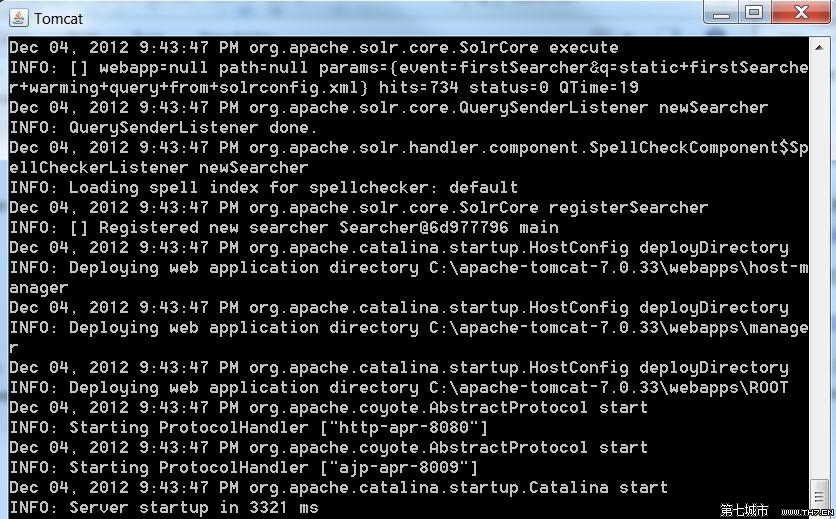
下载完成解压缩,然后把整个folder拷到你的C盘下就可以了C:/apache-tomcat-7.0.33,不需要安装,记得要配置环境变量,然后进入C:/apache-tomcat-7.0.33/bin,双击startup.bat就启动Tomcat了,你会看到类似画面,
,表示启动成功,之后要关闭用shutdown.bat,这时候打开浏览器,输入http://localhost:8080/,会看到Tomcat的管理界面,

,
这时要自己配置一下管理员权限,进入C:/apache-tomcat-7.0.33/conf,找到tomcat-users.xml,加上下面的配置:
<tomcat-users>
<role rolename="manager-gui"/>
<role rolename="manager-script"/>
<role rolename="manager-jmx"/>
<role rolename="manager-status"/>
<user username="admin" password="admin" roles="manager-gui,manager-script,manager-jmx,manager-status"/>
</tomcat-users>
之后就可以用admin/admin进入“Manager App”来管理你host的所有App了;
3,安装Solr,起初我用的是旧版本的solr1.4.0,因为新版的solr,在用SolrNet做commit的时候一直出错,但后来用旧版本从MS SQL Server做index的时候,又发现旧版本的solr不能很好的支持jdbc driver,所以迫不得已从新换回来新版solr4.0.0(地址:http://www.apache.org/dyn/closer.cgi/lucene/solr/4.0.0),接下来就要解决commit出错的问题,后来从github下载(https://github.com/mausch/SolrNet)了最新的SolrNet的code重新编译,用编译后的dll就成功了(不想下载整个project的同学可以在后面的附件下载)!;
关闭Tomcat,然后把刚下好文件解压后,进入/apache-solr-4.0.0/dist,拷贝文件apache-solr-4.0.0.war到C:/apache-tomcat-7.0.33/webapps,并改名为solr.war,返回/apache-solr-4.0.0/example,拷贝文件夹solr到C:/下面,然后配置solr的主目录(这部分之前也出现很多bug,因为旧的方法对Tomcat7无效),在C:/apache-tomcat-7.0.33/conf/Catalina/localhost中新建一个solr.xml文件,内容输入:
<?xml version="1.0" encoding="UTF-8"?>
<Context docBase="C:/apache-tomcat-7.0.33/webapps/solr.war" debug="0" crossContext="true" >
<Environment name="solr/home" type="java.lang.String" value="C:/solr" override="true" />
</Context>
然后重启Tomcat,在浏览器中输入http://localhost:8080/solr/,就可以看到solr搭建成功了

这时可以在Query String中输入*:*来测试,具体查询方法去看Solr Wiki;
起初默认的Core Admin就只有collection1一个,如果要想建新的,就可以进入C:/solr,拷贝文件夹collection1到当前目录,改成自己的名字,好比CS,然后配置schema.xml和solrconfig.xml,重启tomcat,进入http://localhost:8080/solr/#的Core Admin中,选择Add Core,然后用相同的名字新建,然后刷新就ok了;
4,测试SolrNet:
这里我用的是http://crazorsharp.blogspot.com/search/label/SolrNet中的例子,对应的是Core Admin中的默认collection1,下载笔者提供的工具/TextFileHarvester2008/TextFileHarvester.exe,在cmd中输入TextFileHarvester.exe "./SQLEXPRESS" "TextFilesDatabase" "C:/MyTextFiles” 1000(表示下载1000个文本文件,存入C:/MyTextFiles,并在数据库实例./SQLEXPRESS中建db和table,把对于的记录存进去),接下来要修改schema.xml和solrconfig.xml,
打开schema.xml,因为主键变成了FileId,所以删除下面两句:
<field name="id" type="string" indexed="true" stored="true" required="true" multiValued="false" />
<uniqueKey>id</uniqueKey>
然后再</fields>前面加上:
<field name="fileid" type="int" indexed="true" stored="true" required="true" />
<field name="doctext" type="text_general" indexed="true" stored="false" required="false" />
<field name="title" type="text_general" indexed="true" stored="false" required="false" />
<field name="datecreated" type="date" indexed="true" stored="false" />
在</fields>后面加上:
<uniqueKey>fileid</uniqueKey>
<defaultSearchField>doctext</defaultSearchField>
<solrQueryParser defaultOperator="OR" />
同时进入solrconfig.xml删除QueryElevationComponent这一段;
然后用SolrnetDemoSln中的IndexingCon先做index,后用SearchingCon来测试搜索功能,搞定!
5,对MS SQL Server中的数据做index:
这里我新建了一个Core Admin叫CS,用来对MS SQL Server中的数据做index,然后搜索,好比我有一个数据库是./TestDB,有一个表加Login,有三个字段UserID,UserName,Password;
进入C:/solr/CS/conf,新建配置文件data-config.xml,内容如下:
<dataConfig>
<dataSource type="JdbcDataSource" driver="com.microsoft.sqlserver.jdbc.SQLServerDriver" url="jdbc:sqlserver://.; databaseName=TestDB; responseBuffering=adaptive; selectMethod=cursor"
user="admin"
password="admin"/>
<document name="Login">
<entity name="user" query="select * from Login">
<field column="UserID" name="UserID" />
<field column="UserName" name="UserName" />
<field column="Password" name="Password" />
<!--如果有外键,可以用多个entity来包含其他表的信息-->
<!-- <entity name="feature" query="select description from UserInfo where item_id='${user.UserID}'">
<field name="features" column="description" />
</entity> -->
</entity>
</document>
</dataConfig>
这里用的driver是Microsoft JDBC Driver for SQL Server,所以要检查C:/apache-tomcat-7.0.33/lib中是否包含sqljdbc4.jar(同时要删除sqljdbc.jar,因为默认会用这个,但是JRE1.7是不支持的),没有去http://www.microsoft.com/en-us/download/details.aspx?displaylang=en&id=11774下载;
最后打开solrconfig.xml,添加:
<requestHandler name="/dataimport" class="org.apache.solr.handler.dataimport.DataImportHandler">
<lst name="defaults">
<str name="config">data-config.xml</str>
</lst>
</requestHandler>
和
<lib dir="C:/solr/dist/" regex="apache-solr-dataimporthandler-/d.*/.jar" />
重启tomcat,进入http://localhost:8080/solr/#/CS,选择“Dataimport”,选择“full-import”(delta-import是只对最新insert/update的数据index),然后记得勾选“Commit”,点击“Execute Import”就大功告成了,然后进入“Query”测试!
6,接下来会介绍怎么对多个数据库,多个表来进行index和寻找最佳搜索的方案,to be continued...
Lucene:
Apache Lucene is a high-performance, full-featured text search engine library written entirely in Java. It is a technology suitable for nearly any application that requires full-text search
Solr:
Solr is an open source enterprise search server based on the Lucene Java search library, with XML/HTTP and JSON APIs, hit highlighting, faceted search, caching, replication, a web administration interface and ... (摘自http://stackoverflow.com/questions/1400892/search-engine-lucene-or-solr)
所以Lucene是内嵌在Solr中的,同时Solr具有更多的功能,方便我们使用。
Setup:Tomcat + Solr + Solrnet
首先要安装Tomcat(Solr需要host在Servelt container中,比如Tomcat,Glassfish,JBoss,Jetty,Resin,WebLogic等,所以不能用IIS);
在安装好的Tomcat中部署你的Solr实例;
如果用C#的话,需要引入Solrnet或SolrSharp的dll来编写客户端代码;
参考http://crazorsharp.blogspot.com/search/label/SolrNet
上面这篇文章介绍的很详细,但笔者用的旧版的Tomcat6,solr1.4.0,和SolrNet0.2.3,而且有很多细节的介绍,这里就不再重述了,我主要介绍下我的搭建环境(这里用的都是新版本:Tomcat7.0.33,Solr 4.0.0,SolrNet-0.4)和中间遇到的问题,希望对大家有帮助:
1,因为Solr是Java web app,需要Java Servlet来host,所以要先安装Java JDK和JRE,地址:http://www.oracle.com/technetwork/java/javase/downloads/index.html,之后要记得配置环境变量;
2,安装Tomcat7.0.33(Windows7 64bit,做测试用,之后会移到Linux上):
下载地址:http://tomcat.apache.org/download-70.cgi
下载完成解压缩,然后把整个folder拷到你的C盘下就可以了C:/apache-tomcat-7.0.33,不需要安装,记得要配置环境变量,然后进入C:/apache-tomcat-7.0.33/bin,双击startup.bat就启动Tomcat了,你会看到类似画面,
,表示启动成功,之后要关闭用shutdown.bat,这时候打开浏览器,输入http://localhost:8080/,会看到Tomcat的管理界面,
,
这时要自己配置一下管理员权限,进入C:/apache-tomcat-7.0.33/conf,找到tomcat-users.xml,加上下面的配置:
<tomcat-users>
<role rolename="manager-gui"/>
<role rolename="manager-script"/>
<role rolename="manager-jmx"/>
<role rolename="manager-status"/>
<user username="admin" password="admin" roles="manager-gui,manager-script,manager-jmx,manager-status"/>
</tomcat-users>
之后就可以用admin/admin进入“Manager App”来管理你host的所有App了;
3,安装Solr,起初我用的是旧版本的solr1.4.0,因为新版的solr,在用SolrNet做commit的时候一直出错,但后来用旧版本从MS SQL Server做index的时候,又发现旧版本的solr不能很好的支持jdbc driver,所以迫不得已从新换回来新版solr4.0.0(地址:http://www.apache.org/dyn/closer.cgi/lucene/solr/4.0.0),接下来就要解决commit出错的问题,后来从github下载(https://github.com/mausch/SolrNet)了最新的SolrNet的code重新编译,用编译后的dll就成功了(不想下载整个project的同学可以在后面的附件下载)!;
关闭Tomcat,然后把刚下好文件解压后,进入/apache-solr-4.0.0/dist,拷贝文件apache-solr-4.0.0.war到C:/apache-tomcat-7.0.33/webapps,并改名为solr.war,返回/apache-solr-4.0.0/example,拷贝文件夹solr到C:/下面,然后配置solr的主目录(这部分之前也出现很多bug,因为旧的方法对Tomcat7无效),在C:/apache-tomcat-7.0.33/conf/Catalina/localhost中新建一个solr.xml文件,内容输入:
<?xml version="1.0" encoding="UTF-8"?>
<Context docBase="C:/apache-tomcat-7.0.33/webapps/solr.war" debug="0" crossContext="true" >
<Environment name="solr/home" type="java.lang.String" value="C:/solr" override="true" />
</Context>
然后重启Tomcat,在浏览器中输入http://localhost:8080/solr/,就可以看到solr搭建成功了
这时可以在Query String中输入*:*来测试,具体查询方法去看Solr Wiki;
起初默认的Core Admin就只有collection1一个,如果要想建新的,就可以进入C:/solr,拷贝文件夹collection1到当前目录,改成自己的名字,好比CS,然后配置schema.xml和solrconfig.xml,重启tomcat,进入http://localhost:8080/solr/#的Core Admin中,选择Add Core,然后用相同的名字新建,然后刷新就ok了;
4,测试SolrNet:
这里我用的是http://crazorsharp.blogspot.com/search/label/SolrNet中的例子,对应的是Core Admin中的默认collection1,下载笔者提供的工具/TextFileHarvester2008/TextFileHarvester.exe,在cmd中输入TextFileHarvester.exe "./SQLEXPRESS" "TextFilesDatabase" "C:/MyTextFiles” 1000(表示下载1000个文本文件,存入C:/MyTextFiles,并在数据库实例./SQLEXPRESS中建db和table,把对于的记录存进去),接下来要修改schema.xml和solrconfig.xml,
打开schema.xml,因为主键变成了FileId,所以删除下面两句:
<field name="id" type="string" indexed="true" stored="true" required="true" multiValued="false" />
<uniqueKey>id</uniqueKey>
然后再</fields>前面加上:
<field name="fileid" type="int" indexed="true" stored="true" required="true" />
<field name="doctext" type="text_general" indexed="true" stored="false" required="false" />
<field name="title" type="text_general" indexed="true" stored="false" required="false" />
<field name="datecreated" type="date" indexed="true" stored="false" />
在</fields>后面加上:
<uniqueKey>fileid</uniqueKey>
<defaultSearchField>doctext</defaultSearchField>
<solrQueryParser defaultOperator="OR" />
同时进入solrconfig.xml删除QueryElevationComponent这一段;
然后用SolrnetDemoSln中的IndexingCon先做index,后用SearchingCon来测试搜索功能,搞定!
5,对MS SQL Server中的数据做index:
这里我新建了一个Core Admin叫CS,用来对MS SQL Server中的数据做index,然后搜索,好比我有一个数据库是./TestDB,有一个表加Login,有三个字段UserID,UserName,Password;
进入C:/solr/CS/conf,新建配置文件data-config.xml,内容如下:
<dataConfig>
<dataSource type="JdbcDataSource" driver="com.microsoft.sqlserver.jdbc.SQLServerDriver" url="jdbc:sqlserver://.; databaseName=TestDB; responseBuffering=adaptive; selectMethod=cursor"
user="admin"
password="admin"/>
<document name="Login">
<entity name="user" query="select * from Login">
<field column="UserID" name="UserID" />
<field column="UserName" name="UserName" />
<field column="Password" name="Password" />
<!--如果有外键,可以用多个entity来包含其他表的信息-->
<!-- <entity name="feature" query="select description from UserInfo where item_id='${user.UserID}'">
<field name="features" column="description" />
</entity> -->
</entity>
</document>
</dataConfig>
这里用的driver是Microsoft JDBC Driver for SQL Server,所以要检查C:/apache-tomcat-7.0.33/lib中是否包含sqljdbc4.jar(同时要删除sqljdbc.jar,因为默认会用这个,但是JRE1.7是不支持的),没有去http://www.microsoft.com/en-us/download/details.aspx?displaylang=en&id=11774下载;
最后打开solrconfig.xml,添加:
<requestHandler name="/dataimport" class="org.apache.solr.handler.dataimport.DataImportHandler">
<lst name="defaults">
<str name="config">data-config.xml</str>
</lst>
</requestHandler>
和
<lib dir="C:/solr/dist/" regex="apache-solr-dataimporthandler-/d.*/.jar" />
重启tomcat,进入http://localhost:8080/solr/#/CS,选择“Dataimport”,选择“full-import”(delta-import是只对最新insert/update的数据index),然后记得勾选“Commit”,点击“Execute Import”就大功告成了,然后进入“Query”测试!
6,接下来会介绍怎么对多个数据库,多个表来进行index和寻找最佳搜索的方案,to be continued...

相关文章推荐
- [solr] - 环境搭建
- SDWebImage
- jaxp的Sax解析
- Golang-import-introduce
- WinCE6.0学习笔记之三——快速编译驱动及BSP
- 环形缓冲区
- java web项目中只编译java文件,不编译application.xml
- 厦门巨游网络科技有限公司(HOTPOWER)承接游戏UI外包
- Zbrush如何位移、缩放和旋转
- 在蜂窝教育Android培训 努力成为IT人才
- java视频教程之数据库连接池配置的两种方法
- joomla 第一单元第六节分享K2到社交网络
- joomla第一单元第七节修改时间格式及组件模板定制
- 【JS--基础--语句】--for in 循环遍历语句
- iOS 7 navigation bar custom back button without title ===自定义导航栏返回按钮
- 初学unity(简单场景制作)
- python中的注释
- select 选中提交
- 秒学Swift语言
- 加油卡充值接口