Android 自定义View画‘√’
2016-01-18 15:38
791 查看
Android 自定义View画‘√’
Android自定义View,最近开始学习学习这块内容,所以写了一个画‘√’的项目试试,先看看效果图:
效果还是不错的,代码也很简单,现在把代码贴出来。
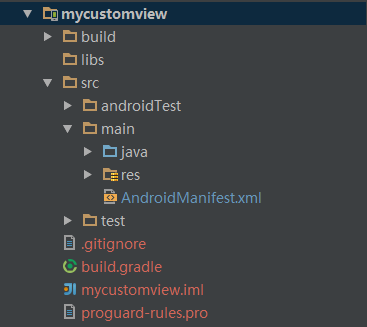
新建一个项目MyCustomView,推荐大家使用Android Studio,特别好用,谁用谁知道。

在values目录下新建一个attr.xml文件,里面定义一些属性,目前知道√有两条线,第一条长度,第二条长度,还有颜色,划线的速度可以自行设置
<?xml version="1.0" encoding="utf-8"?>
<resources>
<!--画一个 √ -->
<declare-styleable name="CustomYes">
<attr name="firstLength" format="integer"/>
<attr name="secondLength" format="integer"/>
<attr name="customColor" format="color"/>
</declare-styleable>
</resources>
新建一个自定义View的类,完整代码如下,都有注释我就不赘述了
public class MyView3 extends View {

//    <attr name="firstLength" format="integer"/>
//    <attr name="secondLength" format="integer"/>
//    <attr name="speed" format="integer"/>
//    <attr name="customColor" format="color"/>
/**
* 第一个勾的长度
*/
private int firstLength;
/**
* 第二个勾的长度
*/
private int secondLength;
/**
* 自定义勾的颜色
*/
private int customColor;

/**
* 定义画笔
*/
private Paint mPaint;
/**
* 临时的长度,用于++
*/
private int tempFirst=0,tempSecond = 0;

public MyView3(Context context) {
this(context,null);
}

public MyView3(Context context, AttributeSet attrs) {
this(context, attrs,0);
}

public MyView3(Context context, AttributeSet attrs, int defStyleAttr) {
super(context, attrs, defStyleAttr);
/**
* 获取定义的属性并复制
*/
TypedArray a = context.getTheme().obtainStyledAttributes(attrs, R.styleable.CustomYes,defStyleAttr,0);

firstLength = a.getInt(R.styleable.CustomYes_firstLength, 35);
secondLength = a.getInt(R.styleable.CustomYes_secondLength, 80);
customColor = a.getColor(R.styleable.CustomYes_customColor, Color.BLUE);
a.recycle();

mPaint = new Paint();
/**
* 启动线程画图
*/
final Thread drawLines = new Thread(new Runnable() {
@Override
public void run() {
while(true){
if (firstLength==tempFirst){
if(tempSecond==secondLength){
/**
* 如果第二根线画完就停1s再接着来
*/
tempFirst = 0;
tempSecond= 0;
try {
Thread.sleep(1000);
} catch (InterruptedException e) {
e.printStackTrace();
}
}else
tempSecond+=5;
}else
tempFirst+=5;
postInvalidate();
try {
/**
* 设置划线的速度
*/
Thread.sleep(60);
} catch (InterruptedException e) {
e.printStackTrace();
}
}
}
});
drawLines.start();
}

@Override
protected void onDraw(Canvas canvas) {
/**
* 计算出偏移量,否则第二跟线会超出边界
*/
int deviation = secondLength-firstLength;
/**
* 设置线宽
*/
mPaint.setStrokeWidth((float) 5.0);
/**
* 设置自定义画笔颜色
*/
mPaint.setColor(customColor);
/**
* 画第一跟线
*/
canvas.drawLine(0, deviation, tempFirst, tempFirst+deviation, mPaint);
/**
* 如果第一跟线长度达到设定的长度就开始画第二根线
*/
if(tempFirst == firstLength)
canvas.drawLine(tempFirst,tempFirst+deviation,tempSecond+firstLength,firstLength-tempSecond+deviation,mPaint);
}

}
接下来就是引用了,在布局文件中引用自定义view,我这里使用的–xmlns:hjc=”http://schemas.android.com/apk/res-auto”–是res-auto,你也可以写自己的view所在包名
<?xml version="1.0" encoding="utf-8"?>
<RelativeLayout xmlns:android="http://schemas.android.com/apk/res/android"
xmlns:tools="http://schemas.android.com/tools"
xmlns:hjc="http://schemas.android.com/apk/res-auto"
android:layout_width="match_parent"
android:layout_height="match_parent"
tools:context=".MainActivity">
<com.hjc.mycustemview.view.MyView3
android:layout_width="fill_parent"
android:layout_height="fill_parent"
hjc:customColor="#124578"
hjc:firstLength="75"
hjc:secondLength="150"
/>
</RelativeLayout>
现在就大功告成了,可以运行看看效果如何!
相关文章推荐
- 使用C++实现JNI接口需要注意的事项
- Android IPC进程间通讯机制
- Android Manifest 用法
- [转载]Activity中ConfigChanges属性的用法
- Android之获取手机上的图片和视频缩略图thumbnails
- Android之使用Http协议实现文件上传功能
- Android学习笔记(二九):嵌入浏览器
- android string.xml文件中的整型和string型代替
- i-jetty环境搭配与编译
- android之定时器AlarmManager
- android wifi 无线调试
- Android Native 绘图方法
- Android java 与 javascript互访(相互调用)的方法例子
- android 代码实现控件之间的间距
- android FragmentPagerAdapter的“标准”配置
- Android"解决"onTouch和onClick的冲突问题
- android:installLocation简析
- android searchView的关闭事件
- SourceProvider.getJniDirectories
