浅谈android网络编程
2016-01-08 22:19
836 查看
写在前面的话:最近有点忙,终于能写个博客了,自己做了几个关于android网络编程的demo,下面跟各位分享下,请各位批评指正,下面言归正传
正文:在一个android应用中,网络部分的编程应该是整个APP里涉及到的最多的内容之一,可能也是最难的之一。说它多,毋庸置疑,当今的APP如果没有网络做支撑,任何内容将是死水一潭,就像我们在憋得不行的时候到处找卫生纸一样,现在的我们同样会因为某个地方没有WIFI而“憋得不行”,是的,我们需要上网!网络就像一道道连接世界的隐形光束,如果哪个地方没有被它照到,这个地方就是荒蛮之地,可见我们对网络的迫切地需求;说网络编程难,也不是我危言耸听:网络是变化的,是动态的,我们访问网络可能需要两拨人维护(android client和server端),需要通过OSI七层协议或TCP/IP四层协议,需要迎合各种各样的网络传输协议(ftp,telnet,http1.1,http/2 等),需要上传和下载各种类型的文件(字符串,图片流,文件流 等),不同格式的数据,打包和解析方式也不同(XML格式(需要PULL,SAX,DOM 等解析方式),JSON格式(需要JSONObject,JSONArray或GSON或JACKSON等解析方式),流文件(Httpmine解析))等。。。说了这么多,你可能很恼火:网络用处这么广,却又这么难,到底还学不学?当然要学,因为正是它比较难,一些公司推出了各种各样的第三方jar包开源框架,这个框架为我们做了很好的代码封装,让我们方便地进行网络编程,下面我结合几个demo跟各位浅谈一下android的网络编程。
用户登录:用户在Android客户端输入用户名密码,上传至服务器,服务器通过查询数据库中的信息,给客户端返回一个正确性的提示。
用户注册:用户将自己输入的姓名和兴趣爱好,上传至服务器,服务器将新增用户添加至数据库中。
下载图片流
本文涉及的知识点:
在tomcat容器中搭建简单的Servlet,在doPost和doGet方法中通过参数HttpServletRequest对象和HttpServletResponse对象获取client端的内容或向client端发送内容。
在client端使用HttpClient对象或HttpURLConnection对象请求server,并使用这两个对象接收返回信息。
使用多线程、Handler、runOnUIThread等线程和异步知识,在主线程(UI线程)中更新UI,在子线程中访问网络,并利用Handler在线程之间传递信息。
利用JSONObject、JSONArray类封装、解析JSON格式的数据
弱引用
定制异常
IO流
- 服务器端使用tomcat容器装载Servlet web应用程序,通过doGet方式接收请求、处理、并返回客户端。
- 客户端通过HttpClient,以get/post方式请求server端
- 通过Handler实现UI更新
- 由于tomcat容器最终运行的classes文件位于 /WebContent/WEB-INF/classes 中,然而创建Dynamic Web Project的时候,代码默认build成class文件的存放地址默认是 /工程名/build ,所以应把该存放地址改为 /WebContent/WEB-INF/classes 。
- 在tomcat中新建Servlet类时,默认的该Servlet的URL地址是 /Servlet类名,如果类名过长,可以在创建Servlet时,在URL mapping中修改一个虚拟映射的URL路径,方便访问。
- 无论客户端用哪种方式请求(get/post),在Server端用doGet和doPost方式都能接收,只需要在其中一个方法中调用另一个方法即可。
- 为了能够处理client端发送的中文信息,应设置字符的编码方式
为了防止client端接收的消息乱码,应设置如下的编码方式
服务器端代码如下:
如上所示,request接收server传来的信息,为方便起见,直接判断用户名是否为tom,密码是否为123,若正确,则返回success!,否则返回failed!。
为使应用获得访问网络权限,应在AndroidManifest.xml中声明相应权限
一定不能在主线程中访问网络,否则会阻塞UI操作。
一定不能在子线程中更新UI,应使用异步请求,如Handler机制。
界面布局
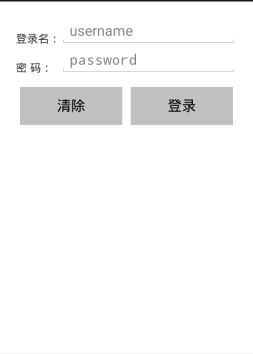
界面布局很简单,就是两个输入框(EditText),一个清除button,一个注册button。不再做过多解释,代码如下:
activity代码
本段代码主要用于初始化布局中的控件,绑定button监听器,开启一个线程用于访问server,在访问的过程中,可能会出现各种异常,可以通过try/catch块按照异常优先级进行捕捉,再强调一点,一定要在Handler中的handlerMessage中更新UI,代码如下:
在上段代码中,继承了一个定制的Handler类,定义了一个弱引用类型的activity,用于处理当内存出现OOM时(Out Of Memory)时,系统及时调用GC机制(Garbage Collection),方便垃圾回收;另外程序会根据优先级对异常进行捕捉,如先捕捉连接服务器超时的异常(在规定的时间内没有连接到服务器,用ConnectTimeoutException类捕捉),在捕捉服务器响应超时异常(在规定的时间内服务器无响应,用SocketTimeoutException类捕捉),接着是业务异常(用户名或密码输入错误,用定制Exception类捕捉),最后是其他异常(用Exception类捕捉)。下面是定制的Exception类定义:
连接server端的client业务代码 (get请求)
定义一个接口,用于声明访问网络的方法并抛出异常,代码如下:
程序使用HttpClient访问网络,用get方式请求,特别说明一点,HttpClient在Android2.3版本后就不推荐使用了,在Android6.0中更是直接被废弃了,若想访问网络可以使用HttpURLConnection,该类会在后面介绍,虽然被废弃了,不过还是有必要介绍一下,毕竟访问方式差不多,步骤如下:
定义HttpClient对象(HttpClient是个接口,只能new它的实现类DefaultHttpClient);
创建HttpGet/HttpPost对象,传入String类型的URL地址参数;
调用HttpClient类的execute方法,传入参数HttpGet/HttpPst对象,返回HttpResponse对象,该对象就是Server端返回给client端的信息;
判断返回的信息中携带的响应码是否为200,若不是200,说明出错,抛出异常;
通过entity实体解析HttpResponse对象,处理返回结果。
具体访问网络代码如下:
注意一点:http协议的get请求方式如下
http://localhost:8080/test/login.do/?参数键=参数值&参数键=参数值 . . . . . .
每个参数的参数键都应与Server端接收到的键一致。
连接server端的client业务代码 (post请求)
与get请求不同,post请求将不会把参数键和参数值直接写在URL之后,而是写在请求的内容中,看得出来,**当传递数据的隐秘性不高、数据量比较小时,适合使用get请求访问server,当数据量比较大(>256bytes),且数据隐秘性比较高时(包含用户的密码等内容),应当考虑使用post请求。**post请求代码如下:
之后的代码与get方式相同。由于参数不能跟在URL后面,post请求使用NameValuePair对象存储需要传递的键值对,接着把这些对象存储在ArrayList中,最后调用GetPost的setEntity方法将list封装成一个实体,这样就可以将post作为execute方法中的参数传递出去了。而无论使用get请求还是post请求,Server端都不用修改代码。
至此第一个demo完成。
commons-beanutils-1.8.0.jar
commons-collections-3.2.1.jar
commons-lang-2.5.jar
commons-logging-1.1.1.jar
ezmorph-1.0.6.jar
json-lib-2.4-jdk15.jar
所见即所得

由于本demo的activity和demo1相仿,故不再给出。
代码如下:
用户在界面上输入用户名,并勾选兴趣爱好,用户名以字符串的形式传入该方法,兴趣爱好以list的形式传入方法,则JSON格式的数据为如下形式:
JSON格式的数据也是以键值对的形式存在,对象中可以包含对象(JSONObject),也可以包含集合(JSONArray),反过来,集合中可以包含单个对象,也可以包含集合,即集合和对象可以相互嵌套。本例中,最外层是一个对象,里面包含了一个对象和一个简单集合,故封装JSON数据如上面代码所示。
client端接收server端的相应结果,首先用工具类UtilEntity对象把JSON数据解析成字符串,然后从Server端可知,封装的JSON数据格式为
特别说明一下,Server端的JSONObject和JSONArray来自第三方框架json-lib.jar,client端来自org.json包。
至此第二个demo结束。
采用HttpURLConnection访问网络步骤如下:
创建HttpURLConnection对象;
创建URL对象,传入URL对象地址参数;
调用URL对象的openConnection方法,打开连接(openConnection);
设置连接参数;
连接(设置本次连接的参数);
接收返回数据 对数据进行操作(connect)。
利用HttpURLConnection访问网络的几点注意事项:
该方式的get请求形式与HttpClient类似,都是在URL后加”?”并拼接键值对,中间用”&”隔开。
post请求的实质也是拼接键值对,只是不能跟在URL后,将键值对拼接后转换成字节数组的形式传递。
HttpURLConnection对象可以在打开连接后对本次连接做一些配置,比如设置连接server时限,server响应的时限,请求方式,读写server端的权限,是否使用缓冲等。
代码首先从服务器磁盘中读取一张图片流到Servlet中,接着传到client端,由于是以流的形式传递,故不能一次传完,否则会比较占用空间,而应使用边存边发的形式。即先从server端读取1kb,再向client传递1kb,由于该图片流可能无法被1kb等分,故应调用outputStream含有三个参数的write方法,该方法的第三个参数将计算读到文件大小的偏移量,所以最后不会出现最后一段流按1kb计算的情况。
至此,demo#3结束。
正文:在一个android应用中,网络部分的编程应该是整个APP里涉及到的最多的内容之一,可能也是最难的之一。说它多,毋庸置疑,当今的APP如果没有网络做支撑,任何内容将是死水一潭,就像我们在憋得不行的时候到处找卫生纸一样,现在的我们同样会因为某个地方没有WIFI而“憋得不行”,是的,我们需要上网!网络就像一道道连接世界的隐形光束,如果哪个地方没有被它照到,这个地方就是荒蛮之地,可见我们对网络的迫切地需求;说网络编程难,也不是我危言耸听:网络是变化的,是动态的,我们访问网络可能需要两拨人维护(android client和server端),需要通过OSI七层协议或TCP/IP四层协议,需要迎合各种各样的网络传输协议(ftp,telnet,http1.1,http/2 等),需要上传和下载各种类型的文件(字符串,图片流,文件流 等),不同格式的数据,打包和解析方式也不同(XML格式(需要PULL,SAX,DOM 等解析方式),JSON格式(需要JSONObject,JSONArray或GSON或JACKSON等解析方式),流文件(Httpmine解析))等。。。说了这么多,你可能很恼火:网络用处这么广,却又这么难,到底还学不学?当然要学,因为正是它比较难,一些公司推出了各种各样的第三方jar包开源框架,这个框架为我们做了很好的代码封装,让我们方便地进行网络编程,下面我结合几个demo跟各位浅谈一下android的网络编程。
网络编程的demo介绍
本文一共包含3个demo,他们分别是:用户登录:用户在Android客户端输入用户名密码,上传至服务器,服务器通过查询数据库中的信息,给客户端返回一个正确性的提示。
用户注册:用户将自己输入的姓名和兴趣爱好,上传至服务器,服务器将新增用户添加至数据库中。
下载图片流
本文涉及的知识点:
在tomcat容器中搭建简单的Servlet,在doPost和doGet方法中通过参数HttpServletRequest对象和HttpServletResponse对象获取client端的内容或向client端发送内容。
在client端使用HttpClient对象或HttpURLConnection对象请求server,并使用这两个对象接收返回信息。
使用多线程、Handler、runOnUIThread等线程和异步知识,在主线程(UI线程)中更新UI,在子线程中访问网络,并利用Handler在线程之间传递信息。
利用JSONObject、JSONArray类封装、解析JSON格式的数据
弱引用
定制异常
IO流
demo#1: 用户登录
本demo将实现从android客户端输入用户名密码,上传至服务器,服务器通过比对,返回客户端正确性信息。- 服务器端使用tomcat容器装载Servlet web应用程序,通过doGet方式接收请求、处理、并返回客户端。
- 客户端通过HttpClient,以get/post方式请求server端
- 通过Handler实现UI更新
server端浅析
Server端需注意的几点:- 由于tomcat容器最终运行的classes文件位于 /WebContent/WEB-INF/classes 中,然而创建Dynamic Web Project的时候,代码默认build成class文件的存放地址默认是 /工程名/build ,所以应把该存放地址改为 /WebContent/WEB-INF/classes 。
- 在tomcat中新建Servlet类时,默认的该Servlet的URL地址是 /Servlet类名,如果类名过长,可以在创建Servlet时,在URL mapping中修改一个虚拟映射的URL路径,方便访问。
- 无论客户端用哪种方式请求(get/post),在Server端用doGet和doPost方式都能接收,只需要在其中一个方法中调用另一个方法即可。
- 为了能够处理client端发送的中文信息,应设置字符的编码方式
// 处理接收到的client的编码方式
request.setCharacterEncoding("UTF-8");
为了防止client端接收的消息乱码,应设置如下的编码方式
// 防止发送到client端乱码
response.setCharacterEncoding("UTF-8");
response.setContentType("text/html;charset=UTF-8");
服务器端代码如下:
@WebServlet("/login.do")
public class SecondVanpersieServletForAndroidLogin extends HttpServlet {
private static final long serialVersionUID = 1L;

/**
* @see HttpServlet#HttpServlet()
*/
public SecondVanpersieServletForAndroidLogin() {
super();
// TODO Auto-generated constructor stub
}

protected void doGet(HttpServletRequest request, HttpServletResponse response)
throws ServletException, IOException {
// TODO Auto-generated method stub

/*      //用于测试服务器无响应异常
try {
Thread.sleep(5000);
} catch (InterruptedException e) {
// TODO Auto-generated catch block
e.printStackTrace();
}
*/
// response.getWriter().append("Served
// at:").append(request.getContextPath());
// 防止发送到client端乱码
response.setCharacterEncoding("UTF-8");
response.setContentType("text/html;charset=UTF-8");
// Server端的输出以打印流的形式回传client
//PrintWriter out = null;
OutputStream out =null;

// 处理接收到的client的编码方式
request.setCharacterEncoding("UTF-8");

// 接收client的LoginName键中的值
String loginName = request.getParameter("LoginName");
// 接收client的LoginPassword键中的值
String loginPassword = request.getParameter("LoginPassword");
System.out.println(loginName + "|" + loginPassword);

try {
//out = response.getWriter();
out= response.getOutputStream();
if (loginName.equals("tom") && loginPassword.equals("123")) {
// 登录正确
out.write("success!".getBytes("UTF-8"));

} else {
//登录失败
out.write("failed!".getBytes("UTF-8"));
}
} finally {
out.flush();
out.close();
}

}

protected void doPost(HttpServletRequest request, HttpServletResponse response)
throws ServletException, IOException {
// TODO Auto-generated method stub
// System.out.println("--doPost--");
doGet(request, response);
}

}
如上所示,request接收server传来的信息,为方便起见,直接判断用户名是否为tom,密码是否为123,若正确,则返回success!,否则返回failed!。
client端浅析
client端需注意的几点:为使应用获得访问网络权限,应在AndroidManifest.xml中声明相应权限
<!-- 应用访问网络权限 -->

<uses-permission android:name="android.permission.INTERNET" />
一定不能在主线程中访问网络,否则会阻塞UI操作。
一定不能在子线程中更新UI,应使用异步请求,如Handler机制。
界面布局
界面布局很简单,就是两个输入框(EditText),一个清除button,一个注册button。不再做过多解释,代码如下:
<LinearLayout xmlns:android="http://schemas.android.com/apk/res/android"
android:layout_width="match_parent"
android:layout_height="match_parent"
android:layout_margin="20dp"
android:orientation="vertical" >

<LinearLayout
android:layout_width="match_parent"
android:layout_height="wrap_content"
android:orientation="horizontal" >

<TextView
android:layout_width="0dp"
android:layout_height="wrap_content"
android:layout_gravity="bottom"
android:layout_weight="1"
android:text="@string/text_login" />

<EditText
android:id="@+id/text_logininput"
android:layout_width="0dp"
android:layout_height="wrap_content"
android:layout_weight="4"
android:hint="@string/text_login_hint"
android:inputType="text"
android:selectAllOnFocus="true" />
</LinearLayout>

<LinearLayout
android:layout_width="match_parent"
android:layout_height="wrap_content"
android:orientation="horizontal" >

<TextView
android:layout_width="0dp"
android:layout_height="wrap_content"
android:layout_gravity="bottom"
android:layout_weight="1"
android:text="@string/text_password" />

<EditText
android:id="@+id/text_passwordinput"
android:layout_width="0dp"
android:layout_height="wrap_content"
android:layout_weight="4"
android:hint="@string/text_password_hint"
android:inputType="textPassword"
android:selectAllOnFocus="true" />
</LinearLayout>

<LinearLayout
android:layout_width="match_parent"
android:layout_height="wrap_content"
android:layout_marginTop="10dp"
android:gravity="center_vertical"
android:orientation="horizontal" >

<Button
android:id="@+id/button_clear"
style="?android:attr/buttonBarButtonStyle"
android:layout_width="0dp"
android:layout_height="wrap_content"
android:layout_margin="5dp"
android:layout_weight="1"
android:background="#69696969"
android:text="@string/button_clear" />

<Button
android:id="@+id/button_login"
style="?android:attr/buttonBarButtonStyle"
android:layout_width="0dp"
android:layout_height="wrap_content"
android:layout_margin="5dp"
android:layout_weight="1"
android:background="#69696969"
android:text="@string/button_login" />
</LinearLayout>
activity代码
本段代码主要用于初始化布局中的控件,绑定button监听器,开启一个线程用于访问server,在访问的过程中,可能会出现各种异常,可以通过try/catch块按照异常优先级进行捕捉,再强调一点,一定要在Handler中的handlerMessage中更新UI,代码如下:
@SuppressWarnings("deprecation")
public class LoginActivity extends Activity {
private EditText mEditLogin;
private EditText mEditPassword;
private Button mButtonClear;
private Button mButtonLogin;
// 接口对象的引用=new 接口对象的实现类
private UserService mUserService = new UserServiceImplement();

// 登陆成功标志
private static final int FLAG_LOGIN_SUCCESS = 1;
// 登录异常显示的信息
private static final String MSG_LOGIN_ERROR = "登录出错!";
// 登陆成功显示的信息
private static final String MSG_LOGIN_SUCCESS = "登录成功!";
// 业务异常
public static final String MSG_LOGIN_FAILED = "登录名|密码出错";

// 接受服务器响应错误
public static final String MSG_SERVER_ERROR = "请求服务器错误";
// 连接服务器超时
public static final String MSG_REQUEST_TIMEOUT = "连接服务器超时";
// 服务器在规定时间未处理完业务
public static final String MSG_RESPONSE_TIMEOUT = "服务器处理超时";
// loading
private static ProgressDialog mDialog;

@Override
protected void onCreate(Bundle savedInstanceState) {
// TODO Auto-generated method stub
super.onCreate(savedInstanceState);
setContentView(R.layout.activity_login);
//初始化控件
init();
//绑定监听器
bindClickListener();
}

private void bindClickListener() {
// TODO Auto-generated method stub
mButtonLogin.setOnClickListener(new OnClickListener() {

@Override
public void onClick(View v) {
// TODO Auto-generated method stub
final String _editLoginName = mEditLogin.getText().toString();
final String _editPassword = mEditPassword.getText().toString();
// Toast.makeText(LoginActivity.this,
// _editLoginName + "|" + _editPassword,
// Toast.LENGTH_SHORT).show();

if (mDialog == null) {
mDialog = new ProgressDialog(LoginActivity.this);
}
mDialog.setTitle("请等待...");
mDialog.setMessage("登陆中...");
mDialog.setCancelable(false);
mDialog.show();
// 新开线程,将输入的用户名和密码提交至服务器
Thread thread = new Thread(new Runnable() {

@Override
public void run() {
// TODO Auto-generated method stub
try {
mUserService.userLogin(_editLoginName,
_editPassword);
// 在子线程中发消息 发给主线程的handler 让handler处理 (登陆成功)
handler.sendEmptyMessage(FLAG_LOGIN_SUCCESS);
}

// 捕获连接超时异常
catch (ConnectTimeoutException e) {
Message msg = new Message();

Bundle bundle = new Bundle();
bundle.putSerializable("ErrorMsg",
MSG_REQUEST_TIMEOUT);
msg.setData(bundle);
handler.sendMessage(msg);
}
// 服务器处理超时
catch (SocketTimeoutException e) {
// TODO: handle exception
Message msg = new Message();

Bundle bundle = new Bundle();
bundle.putSerializable("ErrorMsg",
MSG_RESPONSE_TIMEOUT);
msg.setData(bundle);
handler.sendMessage(msg);
}
// 业务异常
catch (ServiceRulesException e) {
Message msg = new Message();

Bundle bundle = new Bundle();
bundle.putSerializable("ErrorMsg", e.getMessage());
msg.setData(bundle);
handler.sendMessage(msg);
}

// 空指针异常
catch (Exception e) {
// TODO: handle exception
e.printStackTrace();
Message msg = new Message();

Bundle bundle = new Bundle();
bundle.putSerializable("ErrorMsg", MSG_LOGIN_ERROR);
msg.setData(bundle);
handler.sendMessage(msg);
}
}
});
thread.start();
}

});
mButtonClear.setOnClickListener(new OnClickListener() {

@Override
public void onClick(View v) {
// TODO Auto-generated method stub
mEditLogin.setText("");
mEditPassword.setText("");
Toast.makeText(LoginActivity.this, "cleared!",
Toast.LENGTH_SHORT).show();

}
});
}

private void showTip(String str) {
Toast.makeText(this, str, Toast.LENGTH_SHORT).show();
};

// 继承handler,目的是为了持有LoginActivity对象的引用
private static class IHandler extends Handler {
// 创建一个弱引用 可有效避免OOM
private final WeakReference<Activity> mActivity;

public IHandler(LoginActivity activity) {
mActivity = new WeakReference<Activity>(activity);
}

// 该方法可以收到子线程发出的消息,并对其处理(该方法在主线程中运行,可以更新UI)
@Override
public void handleMessage(Message msg) {
// TODO Auto-generated method stub

// 首先关闭ProgressDialog
if (mDialog != null) {
mDialog.dismiss();
}

// 在handler中获得主Activity的对象引用,这样可以调用Activity中的方法
// ((LoginActivity)mActivity.get()).showTip();

int flag = msg.what;
switch (flag) {
// 登录出错
case 0:
String errorMsg = (String) msg.getData().getSerializable(
"ErrorMsg");
((LoginActivity) mActivity.get()).showTip(errorMsg);

break;
// 登陆成功
case FLAG_LOGIN_SUCCESS:
((LoginActivity) mActivity.get()).showTip(MSG_LOGIN_SUCCESS);

break;

default:
break;
}
}

}

private IHandler handler = new IHandler(this);

// 初始化控件
private void init() {
// TODO Auto-generated method stub
mEditLogin = (EditText) findViewById(R.id.text_logininput);
mEditPassword = (EditText) findViewById(R.id.text_passwordinput);
mButtonClear = (Button) findViewById(R.id.button_clear);
mButtonLogin = (Button) findViewById(R.id.button_login);
}

}
在上段代码中,继承了一个定制的Handler类,定义了一个弱引用类型的activity,用于处理当内存出现OOM时(Out Of Memory)时,系统及时调用GC机制(Garbage Collection),方便垃圾回收;另外程序会根据优先级对异常进行捕捉,如先捕捉连接服务器超时的异常(在规定的时间内没有连接到服务器,用ConnectTimeoutException类捕捉),在捕捉服务器响应超时异常(在规定的时间内服务器无响应,用SocketTimeoutException类捕捉),接着是业务异常(用户名或密码输入错误,用定制Exception类捕捉),最后是其他异常(用Exception类捕捉)。下面是定制的Exception类定义:
public class ServiceRulesException extends Exception {

/**
* 定制Exception类,捕捉业务异常
*/
private static final long serialVersionUID = 1L;

public ServiceRulesException(String message) {
super(message);
}

}
连接server端的client业务代码 (get请求)
定义一个接口,用于声明访问网络的方法并抛出异常,代码如下:
public interface UserService {
public void userLogin(String loginName, String loginPassword)
throws Exception;
程序使用HttpClient访问网络,用get方式请求,特别说明一点,HttpClient在Android2.3版本后就不推荐使用了,在Android6.0中更是直接被废弃了,若想访问网络可以使用HttpURLConnection,该类会在后面介绍,虽然被废弃了,不过还是有必要介绍一下,毕竟访问方式差不多,步骤如下:
定义HttpClient对象(HttpClient是个接口,只能new它的实现类DefaultHttpClient);
创建HttpGet/HttpPost对象,传入String类型的URL地址参数;
调用HttpClient类的execute方法,传入参数HttpGet/HttpPst对象,返回HttpResponse对象,该对象就是Server端返回给client端的信息;
判断返回的信息中携带的响应码是否为200,若不是200,说明出错,抛出异常;
通过entity实体解析HttpResponse对象,处理返回结果。
具体访问网络代码如下:
public class UserServiceImplement implements UserService {
@Override
public void userLogin(String loginName, String loginPassword)
throws Exception {
@SuppressWarnings("deprecation")
HttpClient client = new DefaultHttpClient();
String uri = "http://192.168.1.103:8080/test/login.do?LoginName="+ loginName + "&LoginPassword=" + loginPassword;
HttpGet get = new HttpGet(uri);
HttpResponse response = client.execute(get);
int statusCode = response.getStatusLine().getStatusCode();
if (statusCode != HttpStatus.SC_OK)
{
throw new ServiceRulesException(LoginActivity.MSG_SERVER_ERROR);
}
String result = EntityUtils.toString(response.getEntity(), HTTP.UTF_8);
if (result.equals("success!")) {

} else {
throw new ServiceRulesException(LoginActivity.MSG_LOGIN_FAILED);
}

}注意一点:http协议的get请求方式如下
http://localhost:8080/test/login.do/?参数键=参数值&参数键=参数值 . . . . . .
每个参数的参数键都应与Server端接收到的键一致。
连接server端的client业务代码 (post请求)
与get请求不同,post请求将不会把参数键和参数值直接写在URL之后,而是写在请求的内容中,看得出来,**当传递数据的隐秘性不高、数据量比较小时,适合使用get请求访问server,当数据量比较大(>256bytes),且数据隐秘性比较高时(包含用户的密码等内容),应当考虑使用post请求。**post请求代码如下:
// 以post方式请求
HttpParams params = new BasicHttpParams();
// 设置请求的字符集
HttpProtocolParams.setContentCharset(params, HTTP.UTF_8);
// 设置请求的超时时限为3秒,若loading3秒以上则抛异常 ConnectionTimeoutExeption异常
HttpConnectionParams.setConnectionTimeout(params, 3000);
// 设置服务器的响应超时时限,即收到了client的请求但在3秒内没完成操作 SocketTimeoutException
HttpConnectionParams.setSoTimeout(params, 3000);

SchemeRegistry registry = new SchemeRegistry();
// 设置请求协议,以http或HTTPS方式请求(HTTPS对应433端口,http对应80端口)
registry.register(new Scheme("https", PlainSocketFactory
.getSocketFactory(), 433));
registry.register(new Scheme("http", PlainSocketFactory
.getSocketFactory(), 80));
ClientConnectionManager conman = new ThreadSafeClientConnManager(
params, registry);

HttpClient client = new DefaultHttpClient(conman, params);
String url = "http://192.168.1.103:8080/test/login.do";
HttpPost post = new HttpPost(url);
// 用post方式传递参数 通过NameValuePair对象以键值对的方式传递
NameValuePair paramLoginName = new BasicNameValuePair("LoginName",loginName);
NameValuePair paramLoginPassword = new BasicNameValuePair(
"LoginPassword", loginPassword);
// 把参数放在List中
List<NameValuePair> postParams = new ArrayList<NameValuePair>();
postParams.add(paramLoginName);
postParams.add(paramLoginPassword);
// 把封装好的参数放在post中
post.setEntity(new UrlEncodedFormEntity(postParams, HTTP.UTF_8));
// 通过HttpClient的execute方法,将post作为参数 发送到server端
HttpResponse response = client.execute(post);
之后的代码与get方式相同。由于参数不能跟在URL后面,post请求使用NameValuePair对象存储需要传递的键值对,接着把这些对象存储在ArrayList中,最后调用GetPost的setEntity方法将list封装成一个实体,这样就可以将post作为execute方法中的参数传递出去了。而无论使用get请求还是post请求,Server端都不用修改代码。
至此第一个demo完成。
demo#2:用户注册
本demo用于将用户名和兴趣爱好数组上传至Server端,大部分内容与demo1相仿,不同点主要数据采用了JSON格式封装,server端需要用json-lib解析,server端所需json-lib.jar包及其依赖包如下:commons-beanutils-1.8.0.jar
commons-collections-3.2.1.jar
commons-lang-2.5.jar
commons-logging-1.1.1.jar
ezmorph-1.0.6.jar
json-lib-2.4-jdk15.jar
界面布局
一个用户输入(EditText),一个兴趣爱好选择组(RaidioGroup),代码如下:<LinearLayout xmlns:android="http://schemas.android.com/apk/res/android" android:layout_width="match_parent" android:layout_height="match_parent" android:layout_margin="20dp" android:orientation="vertical" > <LinearLayout android:layout_width="match_parent" android:layout_height="wrap_content" android:orientation="horizontal" > <TextView android:layout_width="0dp" android:layout_height="wrap_content" android:layout_gravity="bottom" android:layout_weight="1" android:text="@string/text_register" /> <EditText android:id="@+id/text_register_input" android:layout_width="0dp" android:layout_height="wrap_content" android:layout_weight="4" android:hint="@string/text_register_hint" android:inputType="text" android:selectAllOnFocus="true" /> </LinearLayout> <LinearLayout android:layout_width="match_parent" android:layout_height="wrap_content" android:layout_marginTop="20dp" android:orientation="vertical" > <TextView android:layout_width="wrap_content" android:layout_height="wrap_content" android:layout_gravity="bottom" android:text="@string/text_interesting" /> <CheckBox android:id="@+id/checkbox_music" android:layout_width="wrap_content" android:layout_height="wrap_content" android:checked="false" android:text="@string/checkbox_music" /> <CheckBox android:id="@+id/checkbox_game" android:layout_width="wrap_content" android:layout_height="wrap_content" android:checked="false" android:text="@string/checkbox_game" /> <CheckBox android:id="@+id/checkbox_swim" android:layout_width="wrap_content" android:layout_height="wrap_content" android:checked="false" android:text="@string/checkbox_swim" /> </LinearLayout> <LinearLayout android:layout_width="match_parent" android:layout_height="wrap_content" android:layout_marginTop="10dp" android:gravity="center_vertical" android:orientation="horizontal" > <Button android:id="@+id/button_register_clear" style="?android:attr/buttonBarButtonStyle" android:layout_width="0dp" android:layout_height="wrap_content" android:layout_margin="5dp" android:layout_weight="1" android:background="#69696969" android:text="@string/button_register_clear" /> <Button android:id="@+id/button_register" style="?android:attr/buttonBarButtonStyle" android:layout_width="0dp" android:layout_height="wrap_content" android:layout_margin="5dp" android:layout_weight="1" android:background="#69696969" android:text="@string/button_register" /> </LinearLayout> </LinearLayout>
所见即所得
由于本demo的activity和demo1相仿,故不再给出。
client端发送请求封装JSON数据、接收响应解析JSON数据
client端采用HttpClient访问网络,使用post请求。代码如下:
@Override
public void userRegister(String registerName, List<String> interestingList)
throws Exception {
// TODO Auto-generated method stub

// JSON格式封装数据
HttpClient client = new DefaultHttpClient();
String uri = "http://localhost:8080/test/getstudent.do";
HttpPost post = new HttpPost(uri);

JSONObject obj = new JSONObject();
obj.put("RegisterName", registerName);
JSONArray arr = new JSONArray();
for (String _string : interestingList) {
arr.put(_string);
}
obj.put("Interesting", arr);
NameValuePair pair = new BasicNameValuePair("Data", obj.toString());
List<NameValuePair> data = new ArrayList<NameValuePair>();
data.add(pair);
post.setEntity(new UrlEncodedFormEntity(data, "UTF-8"));

HttpResponse response = client.execute(post);

int status = response.getStatusLine().getStatusCode();

if (status != HttpStatus.SC_OK) {
throw new ServiceRulesException(RegisterActivity.MSG_SERVER_ERROR);

}

String result = EntityUtils.toString(response.getEntity(), HTTP.UTF_8);
// 解析从server返回的Json数据
JSONObject _obj = new JSONObject(result);
String _result = _obj.getString("result");
if (result.equals("success!")) {
// 注册成功
} else {
// 注册失败
String errorMsg = _obj.getString("errorMsg");
throw new ServiceRulesException(errorMsg);
}

}
用户在界面上输入用户名,并勾选兴趣爱好,用户名以字符串的形式传入该方法,兴趣爱好以list的形式传入方法,则JSON格式的数据为如下形式:
var data={"RegisterName":"tom","Interesting":["swim","music","game"]};JSON格式的数据也是以键值对的形式存在,对象中可以包含对象(JSONObject),也可以包含集合(JSONArray),反过来,集合中可以包含单个对象,也可以包含集合,即集合和对象可以相互嵌套。本例中,最外层是一个对象,里面包含了一个对象和一个简单集合,故封装JSON数据如上面代码所示。
client端接收server端的相应结果,首先用工具类UtilEntity对象把JSON数据解析成字符串,然后从Server端可知,封装的JSON数据格式为
var return={"result":"success!","errorMsg":"register success!" } {"result":"failed!","errorMsg":"register failed!"}server端接收请求解析JSON数据、返回响应封装JSON数据
下面是Server端的代码:protected void doPost(HttpServletRequest request, HttpServletResponse response)
throws ServletException, IOException {
// TODO Auto-generated method stub
request.setCharacterEncoding("UTF-8");
// 解析client端传过来的json数据
String data = request.getParameter("Data");
// System.out.println(data);
JSONObject obj = JSONObject.fromObject(data);
String registerName = obj.getString("RegisterName");
System.out.println(registerName);
JSONArray arr = obj.getJSONArray("Interesting");
if (arr != null) {
for (Object object : arr) {
System.out.println(object);
}
}
// 封装json数据 向client端发送
/*
* { "result":"success!","errorMsg":"register success!" } {
* "result":"failed!","errorMsg":"register failed!"}
*/
response.setCharacterEncoding("UTF-8");
response.setContentType("text/html;charset=UTF-8");
PrintWriter out = null;
try {
out = response.getWriter();
ResultJSONBean jsonBean = new ResultJSONBean();
// success
jsonBean.setResult("success!");
jsonBean.setErrorMsg("register success!");
// failed
// jsonBean.setResult("failed!");
// jsonBean.setErrorMsg("register failed!");
JSONObject _obj = JSONObject.fromObject(jsonBean);
System.out.println(_obj);
out.write(_obj.toString());
} finally {
out.flush();
out.close();
}
}特别说明一下,Server端的JSONObject和JSONArray来自第三方框架json-lib.jar,client端来自org.json包。
至此第二个demo结束。
demo#3: 从server下载一个图片流
本demo将以HttpURLConnection请求server上的一个图片流,采用HttpURLConnection访问网络步骤如下:
创建HttpURLConnection对象;
创建URL对象,传入URL对象地址参数;
调用URL对象的openConnection方法,打开连接(openConnection);
设置连接参数;
连接(设置本次连接的参数);
接收返回数据 对数据进行操作(connect)。
client端
@Override
public Bitmap getImage() throws Exception {
// TODO Auto-generated method stub
Bitmap _bitmap = null;
URL url = null;

// 该类是Java SDK里的类 而不是android里的类
// 首先 声明一个HttpsURLConnection对象
HttpURLConnection _httpURLConnection = null;
InputStream _inputStream = null;
// post请求方式
OutputStream out = null;
byte[] data = null;

try {

// 封装向server端发送的数据
Map<String, String> _params = new HashMap<String, String>();
_params.put("id", "1");
data = setPostPassParams(_params).toString().getBytes();

url = new URL("http://127.0.0.1:8080/test/getImage.jpg");
// 打开连接
_httpURLConnection = (HttpURLConnection) url.openConnection();
// 设置参数
// 设置请求服务器超时时间
_httpURLConnection.setConnectTimeout(5000);
// 设置服务器响应超时时间
_httpURLConnection.setReadTimeout(5000);

// 设置允许读取Server端信息权限
_httpURLConnection.setDoInput(true);
// 设置允许向server端发送信息权限
_httpURLConnection.setDoOutput(true);
// 不使用缓冲(希望每次都能从服务器端获取最新数据)
_httpURLConnection.setDefaultUseCaches(false);
// 设置请求方式
_httpURLConnection.setRequestMethod("POST");

// 连接
_httpURLConnection.connect();
// 获取服务器返回的响应状态码
int responceCode = _httpURLConnection.getResponseCode();
if (responceCode != HttpURLConnection.HTTP_OK) {
throw new ServiceRulesException("post请求服务器异常");
}
// 接收server发来的数据流
_inputStream = new BufferedInputStream(
_httpURLConnection.getInputStream());
// _inputStream = _httpURLConnection.getInputStream();
if (_inputStream != null)
// 把Server端传过来的inputstream转化为bitmap格式
_bitmap = BitmapFactory.decodeStream(_inputStream);

// 向Server端发送信息
out = _httpURLConnection.getOutputStream();
out.write(data);
out.flush();

} finally {
if (_inputStream != null) {
_inputStream.close();
}
if (_httpURLConnection != null) {
_httpURLConnection.disconnect();
}
}
return _bitmap;
}
// 通过httpURLConnection访问网络,并用post请求向服务器传递的参数
private static StringBuffer setPostPassParams(Map<String, String> params) {
StringBuffer string = new StringBuffer();
// k1=v1&k2=v2...
for (Map.Entry<String, String> entry : params.entrySet()) {
try {
string.append(entry.getKey()).append("=")
.append(URLEncoder.encode(entry.getValue(), "UTF-8"))
.append("&");

} catch (UnsupportedEncodingException e) {
// TODO Auto-generated catch block
e.printStackTrace();
}
// 去掉最后一个"&"号
string.deleteCharAt(string.length() - 1);
}

return string;
}
利用HttpURLConnection访问网络的几点注意事项:
该方式的get请求形式与HttpClient类似,都是在URL后加”?”并拼接键值对,中间用”&”隔开。
post请求的实质也是拼接键值对,只是不能跟在URL后,将键值对拼接后转换成字节数组的形式传递。
HttpURLConnection对象可以在打开连接后对本次连接做一些配置,比如设置连接server时限,server响应的时限,请求方式,读写server端的权限,是否使用缓冲等。
Server端
protected void doGet(HttpServletRequest request, HttpServletResponse response)
throws ServletException, IOException {
// TODO Auto-generated method stub
// response.getWriter().append("Served at:
// ").append(request.getContextPath());
System.out.println("---get---");
String id = request.getParameter("id");

/*
* 用输入流将磁盘上的图片读到Servlet中
*/
InputStream in = null;
/*
* 将读到的图片流写到response中发送给请求端
*/
OutputStream out = null;
try {
in = new FileInputStream(new File("F://图片素材/" + id + ".jpg"));

// 设置响应头 设置相应内容的长度
response.setContentLength(in.available());
// 设置响应头 设置MIME——标识向client端发送的文件类型 以便client端能够识别该类型文件

response.setContentType("image/jpeg");
out = response.getOutputStream();
// 输入流in和输出流out不能直接交换数据 需要先用in的read把图片以字符数组的形式读进来
// 用byte[]座位中间转换的介质不是一个好方法

/*
* //获得图片的字节大小 分配一个byte数组空间用于存放图片 byte[] b = new
* byte[in.available()]; //用in的read方法把图片的字节数组形式读进来 in.read(b);
* //再用out的write方法把字节数组形式的图片写到客户端 out.write(b);
*/
// 用边读边发的形式
// 先分配1024个字节(1KB)
byte[] b = new byte[1024];
// 只要这1024个字节没读完 就一直读 读一点 写一点
int read=0;
while((read=in.read(b))!=-1)
{
out.write(b, 0, read);
}

} catch (Exception _e) {
// TODO: handle exception
_e.printStackTrace();
} finally {
if (in != null) {
in.close();
}
if (out != null) {
out.flush();
out.close();
}
}
代码首先从服务器磁盘中读取一张图片流到Servlet中,接着传到client端,由于是以流的形式传递,故不能一次传完,否则会比较占用空间,而应使用边存边发的形式。即先从server端读取1kb,再向client传递1kb,由于该图片流可能无法被1kb等分,故应调用outputStream含有三个参数的write方法,该方法的第三个参数将计算读到文件大小的偏移量,所以最后不会出现最后一段流按1kb计算的情况。
至此,demo#3结束。

相关文章推荐
- RPC failed; result=22, HTTP code = 411
- HTTP Header 属性列表
- nginx中http核心模块的配置指令2
- nginx中http核心模块的配置指令3
- nginx中http核心模块的配置指令4
- nginx中http的fastcgi模块的配置指令1
- XML 与 JSON 优劣对比
- 如何在 Linux 中快速地通过 HTTP 提供文件访问服务
- VBA将excel数据表生成JSON文件
- 深入HTTP head的使用详解
- newtonsoft.json解析天气数据出错解决方法
- ASP 中使用 HTTP 协议发送参数详解
- C#基于socket模拟http请求的方法
- http www安全必备知识
- vbs 解析json jsonp的方法
- Extjs4如何处理后台json数据中日期和时间
- C#实现将类的内容写成JSON格式字符串的方法