【LVS】负载均衡集群
2016-01-01 19:25
751 查看
LVS (Linux Virtual Server)是一种集群(Cluster)技术,采用IP负载均衡技术和基于内容请求分发技术。LVS可以实现LINUX平台下的简单负载均衡。
其中LVS/NAT是一种最简单的方式,所有的RealServer只需要将自己的网关指向Director即可。
LVS负载均衡的NAT模式
一、实验准备
在VMware Workstation虚拟机环境下,准备三台服务器,一台作为director, 两台作为real server。
二、网络配置
director需要配置两块网卡,一块(eth0)与real server连接的内网,另外一块(eth1)连接到公网。
配置参考如下:
director:eth0 192.168.20.28/24 (内网)
eth1 192.168.1.33/24 (外网)
real server1:eth0 192.168.20.138
real server2:eth0 192.168.20.250
这三台服务器在192.168.20.0/24能互相通信
实现方法:
1、虚拟机网络模式选择【自定义VMnet1】,在这里的LVS-NAT实验中需要设置director的eth0和两台real server的eth0为自定义VMnet1模式,而director的eth1则设置为桥接模式,可以直接使用外网。

2、客户机Windows机器上VMnet1的IP设置,设置成与LVS的三台服务器eth0的IP在同一个网段,目的是为了能与三台LVS服务器通信,方便做试验

3、具体配置如下,real server1、2的网关均指向192.168.20.28
director:
三、LVS/NAT 配置
1、安装epel扩展源、nginx(测试用)(nginx在real server下安装)
wget http://mirrors.sohu.com/fedora-epel/6/i386/epel-release-6-8.noarch.rpm [root@realserver1 ~]# yum -y install nginx
2、测试页面
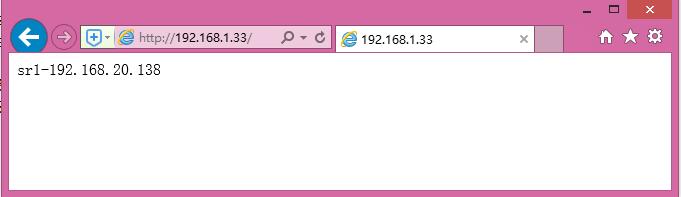
[root@realserver1 ~]# echo "sr1-192.168.20.138" >/usr/share/nginx/html/index.html
[root@realserver2 ~]# echo "sr2-192.168.20.250" >/usr/share/nginx/html/index.html
3、Director 下安装ipvsadm
[root@director ~]# yum -y install ipvsadm
4、配置ipvsadm,创建/usr/local/sbin/lvs_nat.sh脚本
LVS的调度算法:轮叫调度(Round Robin)(简称rr) ,加权轮叫(Weighted Round Robin)(简称wrr),最少链接(least connection)(LC),加权最少链接(Weighted Least Connections)(WLC) 等
5、开启nat服务
[root@director ~]# sh /usr/local/sbin/lvs_nat.sh
6、测试LVS/NAT,由于sr1的权值为2,所以响应的请求为sr1的两倍
LVS负载均衡的DR模式配置
[root@director ~]# ipvsadm -C
[root@director ~]# ipvsadm -ln
IP Virtual Server version 1.2.1 (size=4096)
Prot LocalAddress:Port Scheduler Flags
-> RemoteAddress:Port Forward Weight ActiveConn InActConn
[root@director ~]# iptables -t nat -F
一、网络配置
director:eth0
realserver2:eth0
二、LVS/DR 配置
1、Director配置
[root@director ~]# vim /usr/local/sbin/lvs_dr.sh
执行脚本:
[root@director ~]# sh /usr/local/sbin/lvs_dr.sh
[root@realserver1 ~]# vim /usr/local/sbin/lvs_dr_rs.sh
#! /bin/bash
vip=192.168.1.200
ifconfig lo:0 $vip broadcast $vip netmask 255.255.255.255 up
route add -host $vip lo:0
echo "1" >/proc/sys/net/ipv4/conf/lo/arp_ignore
echo "2" >/proc/sys/net/ipv4/conf/lo/arp_announce
echo "1" >/proc/sys/net/ipv4/conf/all/arp_ignore
echo "2" >/proc/sys/net/ipv4/conf/all/arp_announce
执行脚本:
lo:0 Link encap:Local Loopback
inet addr:192.168.1.200 Mask:255.255.255.255
UP LOOPBACK RUNNING MTU:65536 Metric:1
[root@realserver2 ~]# ifconfig lo:0
lo:0 Link encap:Local Loopback
inet addr:192.168.1.200 Mask:255.255.255.255
UP LOOPBACK RUNNING MTU:16436 Metric:1
3、测试,在第四台机器上访问
4、更改权值
[root@director ~]# vim /usr/local/sbin/lvs_dr.s
[root@director ~]# sh /usr/local/sbin/lvs_dr.sh
测试:
LVS结合Keepalived配置
两台director,两台realserver
[root@director ~]# ipvsadm -C
[root@director ~]# ifconfig eth0:0 down
[root@director network-scripts]# rm -rf ifcfg-eth0:0
一、安装keepalived
[root@director ~]# yum -y install keepalived
二、备用director
1、安装ipvsadm、keepalived
[root@sh ~]# yum -y install ipvsadm
[root@sh ~]# yum -y install keepalived
2、配置keepalived
[root@director ~]# vim /etc/keepalived/keepalived.conf
vrrp_instance VI_1 {
state MASTER #备用服务器上为 BACKUP
interface eth0
virtual_router_id 51
priority 100 #备用服务器上为90
advert_int 1
authentication {
auth_type PASS
auth_pass 1111
}
virtual_ipaddress {
192.168.1.200
}
}
virtual_server 192.168.1.200 80 {
delay_loop 6 #(每隔10秒查询realserver状态)
lb_algo rr #(lvs 算法)
lb_kind DR #(Direct Route)
persistence_timeout 0 #(同一IP的连接60秒内被分配到同一台realserver)
protocol TCP #(用TCP协议检查realserver状态)
real_server 192.168.1.138 80 {
weight 100 #(权重)
TCP_CHECK {
connect_timeout 10 #(10秒无响应超时)
nb_get_retry 3
delay_before_retry 3
connect_port 80
}
}
real_server 192.168.1.250 80 {
weight 100
TCP_CHECK {
connect_timeout 10
nb_get_retry 3
delay_before_retry 3
connect_port 80
}
}
}
3、备用director配置keepalived
scp到备用director
[root@director ~]# yum -y install openssh-clients
[root@director ~]# scp /etc/keepalived/keepalived.conf 192.168.1.218:/etc/keepalived/keepalived.conf
[root@sh ~]# vim /etc/keepalived/keepalived.conf
vrrp_instance VI_1 {
state BACKUP #备用服务器上为 BACKUP
interface eth0
virtual_router_id 51
priority 99 #备用服务器上为90
advert_int 1
authentication {
auth_type PASS
auth_pass 1111
}
virtual_ipaddress {
192.168.1.200
}
}
virtual_server 192.168.1.200 80 {
delay_loop 6 #(每隔10秒查询realserver状态)
lb_algo rr #(lvs 算法)
lb_kind DR #(Direct Route)
persistence_timeout 0 #(同一IP的连接60秒内被分配到同一台realserver)
protocol TCP #(用TCP协议检查realserver状态)
real_server 192.168.1.138 80 {
weight 100 #(权重)
TCP_CHECK {
connect_timeout 10 #(10秒无响应超时)
nb_get_retry 3
delay_before_retry 3
connect_port 80
}
}
real_server 192.168.1.250 80 {
weight 100
TCP_CHECK {
connect_timeout 10
nb_get_retry 3
delay_before_retry 3
connect_port 80
}
}
}
三、director启动keepalived
[root@director ~]# /etc/init.d/keepalived start (主)
Starting keepalived: [ OK ]
[root@sh ~]# /etc/init.d/keepalived start (从)
Starting keepalived: [ OK ]
查看ipvsadm状态
[root@director ~]# ipvsadm -ln
IP Virtual Server version 1.2.1 (size=4096)
Prot LocalAddress:Port Scheduler Flags
-> RemoteAddress:Port Forward Weight ActiveConn InActConn
TCP 192.168.1.200:80 rr
-> 192.168.1.138:80 Route 100 0 7
-> 192.168.1.250:80 Route 100 0 16
[root@director ~]# ip addr
1: lo: <LOOPBACK,UP,LOWER_UP> mtu 65536 qdisc noqueue state UNKNOWN
link/loopback 00:00:00:00:00:00 brd 00:00:00:00:00:00
inet 127.0.0.1/8 scope host lo
inet6 ::1/128 scope host
valid_lft forever preferred_lft forever
2: eth0: <BROADCAST,MULTICAST,UP,LOWER_UP> mtu 1500 qdisc pfifo_fast state UP qlen 1000
link/ether 00:0c:29:92:99:4d brd ff:ff:ff:ff:ff:ff
inet 192.168.1.28/24 brd 192.168.1.255 scope global eth0
inet 192.168.1.200/32 scope global eth0
inet6 fe80::20c:29ff:fe92:994d/64 scope link
valid_lft forever preferred_lft forever
四、两台realserver启动dr脚本/usr/local/sbin/lvs_dr_rs.sh
[root@realserver1 ~]# sh /usr/local/sbin/lvs_dr_rs.sh [root@realserver2 ~]# sh /usr/local/sbin/lvs_dr_rs.sh
五、测试,在第五台机器上访问vip192.168.1.200
清除之前的配置
[root@director ~]# ipvsadm -C
[root@director ~]# iptables -F
[root@director ~]# /etc/init.d/keepalived stop
[root@director ~]# yum -y install nginx
[root@director ~]# vim /etc/nginx/conf.d/lb.conf //配置虚拟主机
upstream test {
server 192.168.1.138:80;
server 192.168.1.250:80;
}
server {
listen 80;
server_name www.huangmingming.cn;
location / {
proxy_pass http://test/; proxy_set_header Host $host;
# proxy_set_header X-Real-IP $remote_addr;
# proxy_set_header X-Forwarded-For $proxy_add_x_forwarded_for;
}
}
[root@director ~]# netstat -ntlp |grep nginx
tcp 0 0 0.0.0.0:80 0.0.0.0:* LISTEN 11205/nginx
测试:
[root@director ~]# curl -xlocalhost:80 www.huangmingming.cn
sr2-192.168.20.250
[root@director ~]# curl -xlocalhost:80 www.huangmingming.cn
sr1-192.168.20.138
[root@director ~]# curl -xlocalhost:80 www.huangmingming.cn
sr2-192.168.20.250
[root@director ~]# curl -xlocalhost:80 www.huangmingming.cn
sr1-192.168.20.138
[root@director ~]# curl -xlocalhost:80 www.huangmingming.cn
sr2-192.168.20.250
[root@director ~]# curl -xlocalhost:80 www.huangmingming.cn
sr1-192.168.20.138
设置权值
upstream test {
server 192.168.1.138:80 weight=2;
server 192.168.1.250:80 weight=1;
}
server {
listen 80;
server_name www.huangmingming.cn;
location / {
proxy_pass http://test/; proxy_set_header Host $host;
# proxy_set_header X-Real-IP $remote_addr;
# proxy_set_header X-Forwarded-For $proxy_add_x_forwarded_for;
}
}
[root@director ~]# curl -xlocalhost:80 www.huangmingming.cn
sr1-192.168.20.138
[root@director ~]# curl -xlocalhost:80 www.huangmingming.cn
sr2-192.168.20.250
[root@director ~]# curl -xlocalhost:80 www.huangmingming.cn
sr1-192.168.20.138
[root@director ~]# curl -xlocalhost:80 www.huangmingming.cn
sr1-192.168.20.138
[root@director ~]# curl -xlocalhost:80 www.huangmingming.cn
sr2-192.168.20.250
[root@realserver2 ~]# nginx -s stop
[root@director ~]# curl -xlocalhost:80 www.huangmingming.cn
sr1-192.168.20.138
[root@director ~]# curl -xlocalhost:80 www.huangmingming.cn
sr1-192.168.20.138
[root@director ~]# curl -xlocalhost:80 www.huangmingming.cn
sr1-192.168.20.138
[root@director ~]# curl -xlocalhost:80 www.huangmingming.cn
sr1-192.168.20.138
[root@director ~]# curl -xlocalhost:80 www.huangmingming.cn
sr1-192.168.20.138
[root@realserver2 ~]# nginx
[root@director ~]# curl -x192.168.1.28:80 www.huangmingming.cn
sr2-192.168.20.250
[root@director ~]# curl -x192.168.1.28:80 www.huangmingming.cn
sr1-192.168.20.138
[root@director ~]# curl -x192.168.1.28:80 www.huangmingming.cn
sr1-192.168.20.138
[root@director ~]# curl -x192.168.1.28:80 www.huangmingming.cn
sr2-192.168.20.250
其中LVS/NAT是一种最简单的方式,所有的RealServer只需要将自己的网关指向Director即可。
LVS负载均衡的NAT模式
一、实验准备
在VMware Workstation虚拟机环境下,准备三台服务器,一台作为director, 两台作为real server。
二、网络配置
director需要配置两块网卡,一块(eth0)与real server连接的内网,另外一块(eth1)连接到公网。
配置参考如下:
director:eth0 192.168.20.28/24 (内网)
eth1 192.168.1.33/24 (外网)
real server1:eth0 192.168.20.138
real server2:eth0 192.168.20.250
这三台服务器在192.168.20.0/24能互相通信
实现方法:
1、虚拟机网络模式选择【自定义VMnet1】,在这里的LVS-NAT实验中需要设置director的eth0和两台real server的eth0为自定义VMnet1模式,而director的eth1则设置为桥接模式,可以直接使用外网。
2、客户机Windows机器上VMnet1的IP设置,设置成与LVS的三台服务器eth0的IP在同一个网段,目的是为了能与三台LVS服务器通信,方便做试验
3、具体配置如下,real server1、2的网关均指向192.168.20.28
director:
DEVICE=eth0(内网)
HWADDR=00:0C:29:92:99:4D
TYPE=Ethernet
UUID=5c49f4f6-154d-43cd-ab8c-d84df2838d01
ONBOOT=yes
NM_CONTROLLED=yes
BOOTPROTO=static
IPADDR=192.168.20.28
NETMASK=255.255.255.0
DEVICE=eth1(外网)
HWADDR=00:0c:29:92:99:57
TYPE=Ethernet
ONBOOT=yes
BOOTPROTO=static
IPADDR=192.168.1.33
NETMASK=255.255.255.0
GATEWAY=192.168.1.1
DNS1=192.168.1.1
real server1:
DEVICE=eth0
HWADDR=00:0C:29:BE:49:72
TYPE=Ethernet
UUID=2e41da17-945e-4ce8-9646-178ce035984e
ONBOOT=yes
NM_CONTROLLED=yes
BOOTPROTO=static
IPADDR=192.168.20.138
NETMASK=255.255.255.0
GATEWAY=192.168.20.28
real server2:
DEVICE=eth0
HWADDR=00:0C:29:8B:40:4A
TYPE=Ethernet
UUID=00ac2932-56ea-434f-b3e2-b6499d552879
ONBOOT=yes
NM_CONTROLLED=yes
BOOTPROTO=static
IPADDR=192.168.20.250
NETMASK=255.255.255.0
GATEWAY=192.168.20.28
三、LVS/NAT 配置
1、安装epel扩展源、nginx(测试用)(nginx在real server下安装)
wget http://mirrors.sohu.com/fedora-epel/6/i386/epel-release-6-8.noarch.rpm [root@realserver1 ~]# yum -y install nginx
2、测试页面
[root@realserver1 ~]# echo "sr1-192.168.20.138" >/usr/share/nginx/html/index.html
[root@realserver2 ~]# echo "sr2-192.168.20.250" >/usr/share/nginx/html/index.html
3、Director 下安装ipvsadm
[root@director ~]# yum -y install ipvsadm
4、配置ipvsadm,创建/usr/local/sbin/lvs_nat.sh脚本
#! /bin/bash
# director 服务器上开启路由转发功能
echo 1 > /proc/sys/net/ipv4/ip_forward
# 关闭icmp的重定向
echo 0 > /proc/sys/net/ipv4/conf/all/send_redirects
echo 0 > /proc/sys/net/ipv4/conf/default/send_redirects
echo 0 > /proc/sys/net/ipv4/conf/eth0/send_redirects
echo 0 > /proc/sys/net/ipv4/conf/eth1/send_redirects
# director 设置nat防火墙
iptables -t nat -F
iptables -t nat -X
iptables -t nat -A POSTROUTING -s 192.168.20.0/24  -j MASQUERADE
# director设置ipvsadm
IPVSADM='/sbin/ipvsadm'
$IPVSADM -C
$IPVSADM -A -t 192.168.1.33:80 -s
wrr   (wrr表示加权轮和以下-w2 -w1对应,表示20.138权值为2,则调度到服务器
20.138
的请求会是服务器20.250的两倍)
$IPVSADM -a -t 192.168.1.33:80 -r 192.168.20.138:80 -m
-w 2
$IPVSADM -a -t 192.168.1.33:80 -r 192.168.20.250:80 -m
-w 1
LVS的调度算法:轮叫调度(Round Robin)(简称rr) ,加权轮叫(Weighted Round Robin)(简称wrr),最少链接(least connection)(LC),加权最少链接(Weighted Least Connections)(WLC) 等
5、开启nat服务
[root@director ~]# sh /usr/local/sbin/lvs_nat.sh
[root@director ~]# ipvsadm -ln
IP Virtual Server version 1.2.1 (size=4096)
Prot LocalAddress:Port Scheduler Flags
-> RemoteAddress:Port           Forward Weight ActiveConn InActConn
TCP  192.168.1.33:80 wrr
-> 192.168.20.138:80            Masq    2      0          0
-> 192.168.20.250:80            Masq    1      0          0
6、测试LVS/NAT,由于sr1的权值为2,所以响应的请求为sr1的两倍
[root@director ~]# curl 192.168.1.33
sr2-192.168.20.250
[root@director ~]# curl 192.168.1.33
sr1-192.168.20.138
[root@director ~]# curl 192.168.1.33
sr1-192.168.20.138
[root@director ~]# curl 192.168.1.33
sr2-192.168.20.250
[root@director ~]# curl 192.168.1.33
sr1-192.168.20.138
[root@director ~]# curl 192.168.1.33
sr1-192.168.20.138
[root@director ~]# curl 192.168.1.33
sr2-192.168.20.250
在windows下访问
LVS负载均衡的DR模式配置
[root@director ~]# ipvsadm -C
[root@director ~]# ipvsadm -ln
IP Virtual Server version 1.2.1 (size=4096)
Prot LocalAddress:Port Scheduler Flags
-> RemoteAddress:Port Forward Weight ActiveConn InActConn
[root@director ~]# iptables -t nat -F
一、网络配置
director:eth0
DEVICE=eth0
HWADDR=00:0C:29:92:99:4D
TYPE=Ethernet
UUID=5c49f4f6-154d-43cd-ab8c-d84df2838d01
ONBOOT=yes
NM_CONTROLLED=yes
BOOTPROTO=static
IPADDR=192.168.1.28
NETMASK=255.255.255.0
GATEWAY=192.168.1.1
DNS1=192.168.1.1
DEVICE=eth0:0
HWADDR=00:0c:29:92:99:57
TYPE=Ethernet
ONBOOT=yes
BOOTPROTO=static
IPADDR=192.168.1.200
NETMASK=255.255.255.0
GATEWAY=192.168.1.1
DNS1=192.168.1.1
realserver1:eth0
DEVICE=eth0
HWADDR=00:0C:29:BE:49:72
TYPE=Ethernet
UUID=2e41da17-945e-4ce8-9646-178ce035984e
ONBOOT=yes
NM_CONTROLLED=yes
BOOTPROTO=static
IPADDR=192.168.1.138
NETMASK=255.255.255.0
GATEWAY=192.168.1.1
DNS1=192.168.1.1
realserver2:eth0
DEVICE=eth0
HWADDR=00:0C:29:8B:40:4A
TYPE=Ethernet
UUID=00ac2932-56ea-434f-b3e2-b6499d552879
ONBOOT=yes
NM_CONTROLLED=yes
BOOTPROTO=static
IPADDR=192.168.1.250
NETMASK=255.255.255.0
GATEWAY=192.168.1.1
DNS1=192.168.1.1
二、LVS/DR 配置
1、Director配置
[root@director ~]# vim /usr/local/sbin/lvs_dr.sh
#! /bin/bash
echo 1 > /proc/sys/net/ipv4/ip_forward
ipv=/sbin/ipvsadm
vip=192.168.1.200
rs1=192.168.1.138
rs2=192.168.1.250
ifconfig eth0:0 $vip broadcast $vip netmask 255.255.255.255 up
route add -host $vip dev eth0:0
$ipv -C
$ipv -A -t $vip:80 -s rr
$ipv -a -t $vip:80 -r $rs1:80 -g -w 1
$ipv -a -t $vip:80 -r $rs2:80 -g -w 1
执行脚本:
[root@director ~]# sh /usr/local/sbin/lvs_dr.sh
[root@director ~]# ipvsadm -ln
IP Virtual Server version 1.2.1 (size=4096)
Prot LocalAddress:Port Scheduler Flags
-> RemoteAddress:Port           Forward Weight ActiveConn InActConn
TCP  192.168.1.200:80 rr
-> 192.168.1.138:80             Route   1      0          0
-> 192.168.1.250:80             Route   1      0          0
[root@director ~]# ifconfig eth0:0
eth0:0    Link encap:Ethernet  HWaddr 00:0C:29:92:99:4D
inet addr:192.168.1.200  Bcast:192.168.1.200  Mask:255.255.255.255
UP BROADCAST RUNNING MULTICAST  MTU:1500  Metric:1
2、在两台realserver配置
[root@realserver1 ~]# vim /usr/local/sbin/lvs_dr_rs.sh
#! /bin/bash
vip=192.168.1.200
ifconfig lo:0 $vip broadcast $vip netmask 255.255.255.255 up
route add -host $vip lo:0
echo "1" >/proc/sys/net/ipv4/conf/lo/arp_ignore
echo "2" >/proc/sys/net/ipv4/conf/lo/arp_announce
echo "1" >/proc/sys/net/ipv4/conf/all/arp_ignore
echo "2" >/proc/sys/net/ipv4/conf/all/arp_announce
执行脚本:
[root@realserver1 ~]# sh /usr/local/sbin/lvs_dr_rs.sh
[root@realserver2 ~]# sh /usr/local/sbin/lvs_dr_rs.sh
[root@realserver1 ~]# ifconfig lo:0
lo:0 Link encap:Local Loopback
inet addr:192.168.1.200 Mask:255.255.255.255
UP LOOPBACK RUNNING MTU:65536 Metric:1
[root@realserver2 ~]# ifconfig lo:0
lo:0 Link encap:Local Loopback
inet addr:192.168.1.200 Mask:255.255.255.255
UP LOOPBACK RUNNING MTU:16436 Metric:1
3、测试,在第四台机器上访问
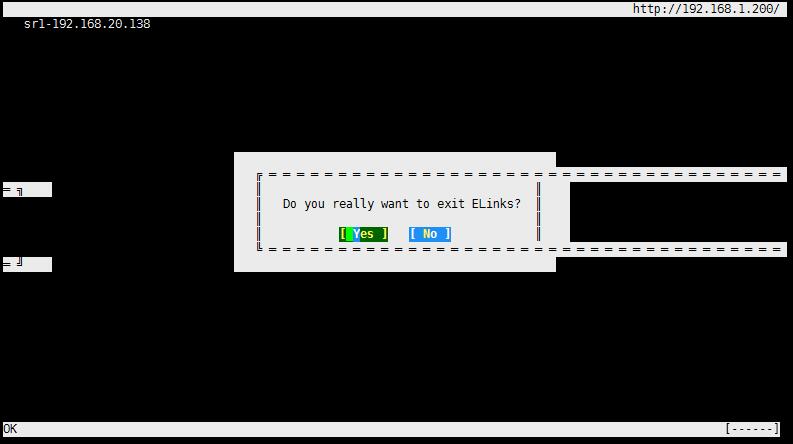
[root@sh ~]# curl 192.168.1.200
sr2-192.168.20.250
[root@sh ~]# curl 192.168.1.200
sr1-192.168.20.138
[root@sh ~]# curl 192.168.1.200
sr2-192.168.20.250
[root@sh ~]# curl 192.168.1.200
sr1-192.168.20.138
[root@sh ~]# curl 192.168.1.200
sr2-192.168.20.250
[root@sh ~]# elinks 192.168.1.200
4、更改权值
[root@director ~]# vim /usr/local/sbin/lvs_dr.s
#! /bin/bash
echo 1 > /proc/sys/net/ipv4/ip_forward
ipv=/sbin/ipvsadm
vip=192.168.1.200
rs1=192.168.1.138
rs2=192.168.1.250
ifconfig eth0:0 down
ifconfig eth0:0 $vip broadcast $vip netmask 255.255.255.255 up
route add -host $vip dev eth0:0
$ipv -C
$ipv -A -t $vip:80 -s wrr
$ipv -a -t $vip:80 -r $rs1:80 -g -w 2
$ipv -a -t $vip:80 -r $rs2:80 -g -w 1
[root@director ~]# sh /usr/local/sbin/lvs_dr.sh
[root@director ~]# ipvsadm -ln
IP Virtual Server version 1.2.1 (size=4096)
Prot LocalAddress:Port Scheduler Flags
-> RemoteAddress:Port           Forward Weight ActiveConn InActConn
TCP  192.168.1.200:80 wrr
-> 192.168.1.138:80             Route   2      0          9
-> 192.168.1.250:80             Route   1      0          5
测试:
[root@sh ~]# curl 192.168.1.200
sr1-192.168.20.138
[root@sh ~]# curl 192.168.1.200
sr1-192.168.20.138
[root@sh ~]# curl 192.168.1.200
sr2-192.168.20.250
[root@sh ~]# curl 192.168.1.200
sr1-192.168.20.138
[root@sh ~]# curl 192.168.1.200
sr1-192.168.20.138
[root@sh ~]# curl 192.168.1.200
sr2-192.168.20.250
LVS结合Keepalived配置
两台director,两台realserver
[root@director ~]# ipvsadm -C
[root@director ~]# ifconfig eth0:0 down
[root@director network-scripts]# rm -rf ifcfg-eth0:0
一、安装keepalived
[root@director ~]# yum -y install keepalived
二、备用director
1、安装ipvsadm、keepalived
[root@sh ~]# yum -y install ipvsadm
[root@sh ~]# yum -y install keepalived
2、配置keepalived
[root@director ~]# vim /etc/keepalived/keepalived.conf
vrrp_instance VI_1 {
state MASTER #备用服务器上为 BACKUP
interface eth0
virtual_router_id 51
priority 100 #备用服务器上为90
advert_int 1
authentication {
auth_type PASS
auth_pass 1111
}
virtual_ipaddress {
192.168.1.200
}
}
virtual_server 192.168.1.200 80 {
delay_loop 6 #(每隔10秒查询realserver状态)
lb_algo rr #(lvs 算法)
lb_kind DR #(Direct Route)
persistence_timeout 0 #(同一IP的连接60秒内被分配到同一台realserver)
protocol TCP #(用TCP协议检查realserver状态)
real_server 192.168.1.138 80 {
weight 100 #(权重)
TCP_CHECK {
connect_timeout 10 #(10秒无响应超时)
nb_get_retry 3
delay_before_retry 3
connect_port 80
}
}
real_server 192.168.1.250 80 {
weight 100
TCP_CHECK {
connect_timeout 10
nb_get_retry 3
delay_before_retry 3
connect_port 80
}
}
}
3、备用director配置keepalived
scp到备用director
[root@director ~]# yum -y install openssh-clients
[root@director ~]# scp /etc/keepalived/keepalived.conf 192.168.1.218:/etc/keepalived/keepalived.conf
[root@sh ~]# vim /etc/keepalived/keepalived.conf
vrrp_instance VI_1 {
state BACKUP #备用服务器上为 BACKUP
interface eth0
virtual_router_id 51
priority 99 #备用服务器上为90
advert_int 1
authentication {
auth_type PASS
auth_pass 1111
}
virtual_ipaddress {
192.168.1.200
}
}
virtual_server 192.168.1.200 80 {
delay_loop 6 #(每隔10秒查询realserver状态)
lb_algo rr #(lvs 算法)
lb_kind DR #(Direct Route)
persistence_timeout 0 #(同一IP的连接60秒内被分配到同一台realserver)
protocol TCP #(用TCP协议检查realserver状态)
real_server 192.168.1.138 80 {
weight 100 #(权重)
TCP_CHECK {
connect_timeout 10 #(10秒无响应超时)
nb_get_retry 3
delay_before_retry 3
connect_port 80
}
}
real_server 192.168.1.250 80 {
weight 100
TCP_CHECK {
connect_timeout 10
nb_get_retry 3
delay_before_retry 3
connect_port 80
}
}
}
三、director启动keepalived
[root@director ~]# /etc/init.d/keepalived start (主)
Starting keepalived: [ OK ]
[root@sh ~]# /etc/init.d/keepalived start (从)
Starting keepalived: [ OK ]
查看ipvsadm状态
[root@director ~]# ipvsadm -ln
IP Virtual Server version 1.2.1 (size=4096)
Prot LocalAddress:Port Scheduler Flags
-> RemoteAddress:Port Forward Weight ActiveConn InActConn
TCP 192.168.1.200:80 rr
-> 192.168.1.138:80 Route 100 0 7
-> 192.168.1.250:80 Route 100 0 16
[root@director ~]# ip addr
1: lo: <LOOPBACK,UP,LOWER_UP> mtu 65536 qdisc noqueue state UNKNOWN
link/loopback 00:00:00:00:00:00 brd 00:00:00:00:00:00
inet 127.0.0.1/8 scope host lo
inet6 ::1/128 scope host
valid_lft forever preferred_lft forever
2: eth0: <BROADCAST,MULTICAST,UP,LOWER_UP> mtu 1500 qdisc pfifo_fast state UP qlen 1000
link/ether 00:0c:29:92:99:4d brd ff:ff:ff:ff:ff:ff
inet 192.168.1.28/24 brd 192.168.1.255 scope global eth0
inet 192.168.1.200/32 scope global eth0
inet6 fe80::20c:29ff:fe92:994d/64 scope link
valid_lft forever preferred_lft forever
四、两台realserver启动dr脚本/usr/local/sbin/lvs_dr_rs.sh
[root@realserver1 ~]# sh /usr/local/sbin/lvs_dr_rs.sh [root@realserver2 ~]# sh /usr/local/sbin/lvs_dr_rs.sh
五、测试,在第五台机器上访问vip192.168.1.200
[root@hh ~]# curl 192.168.1.200
sr2-192.168.20.250
[root@hh ~]# curl 192.168.1.200
sr1-192.168.20.138
[root@hh ~]# curl 192.168.1.200
sr2-192.168.20.250
[root@hh ~]# curl 192.168.1.200
sr1-192.168.20.138
[root@hh ~]# curl 192.168.1.200
sr2-192.168.20.250
[root@hh ~]# curl 192.168.1.200
sr1-192.168.20.138
[root@hh ~]# curl 192.168.1.200
sr2-192.168.20.250
[root@hh ~]# curl 192.168.1.200
sr1-192.168.20.138
nginx的负载均衡集群
清除之前的配置
[root@director ~]# ipvsadm -C
[root@director ~]# iptables -F
[root@director ~]# /etc/init.d/keepalived stop
[root@director ~]# yum -y install nginx
[root@director ~]# vim /etc/nginx/conf.d/lb.conf //配置虚拟主机
upstream test {
server 192.168.1.138:80;
server 192.168.1.250:80;
}
server {
listen 80;
server_name www.huangmingming.cn;
location / {
proxy_pass http://test/; proxy_set_header Host $host;
# proxy_set_header X-Real-IP $remote_addr;
# proxy_set_header X-Forwarded-For $proxy_add_x_forwarded_for;
}
}
[root@director ~]# netstat -ntlp |grep nginx
tcp 0 0 0.0.0.0:80 0.0.0.0:* LISTEN 11205/nginx
测试:
[root@director ~]# curl -xlocalhost:80 www.huangmingming.cn
sr2-192.168.20.250
[root@director ~]# curl -xlocalhost:80 www.huangmingming.cn
sr1-192.168.20.138
[root@director ~]# curl -xlocalhost:80 www.huangmingming.cn
sr2-192.168.20.250
[root@director ~]# curl -xlocalhost:80 www.huangmingming.cn
sr1-192.168.20.138
[root@director ~]# curl -xlocalhost:80 www.huangmingming.cn
sr2-192.168.20.250
[root@director ~]# curl -xlocalhost:80 www.huangmingming.cn
sr1-192.168.20.138
设置权值
upstream test {
server 192.168.1.138:80 weight=2;
server 192.168.1.250:80 weight=1;
}
server {
listen 80;
server_name www.huangmingming.cn;
location / {
proxy_pass http://test/; proxy_set_header Host $host;
# proxy_set_header X-Real-IP $remote_addr;
# proxy_set_header X-Forwarded-For $proxy_add_x_forwarded_for;
}
}
[root@director ~]# curl -xlocalhost:80 www.huangmingming.cn
sr1-192.168.20.138
[root@director ~]# curl -xlocalhost:80 www.huangmingming.cn
sr2-192.168.20.250
[root@director ~]# curl -xlocalhost:80 www.huangmingming.cn
sr1-192.168.20.138
[root@director ~]# curl -xlocalhost:80 www.huangmingming.cn
sr1-192.168.20.138
[root@director ~]# curl -xlocalhost:80 www.huangmingming.cn
sr2-192.168.20.250
[root@realserver2 ~]# nginx -s stop
[root@director ~]# curl -xlocalhost:80 www.huangmingming.cn
sr1-192.168.20.138
[root@director ~]# curl -xlocalhost:80 www.huangmingming.cn
sr1-192.168.20.138
[root@director ~]# curl -xlocalhost:80 www.huangmingming.cn
sr1-192.168.20.138
[root@director ~]# curl -xlocalhost:80 www.huangmingming.cn
sr1-192.168.20.138
[root@director ~]# curl -xlocalhost:80 www.huangmingming.cn
sr1-192.168.20.138
[root@realserver2 ~]# nginx
[root@director ~]# curl -x192.168.1.28:80 www.huangmingming.cn
sr2-192.168.20.250
[root@director ~]# curl -x192.168.1.28:80 www.huangmingming.cn
sr1-192.168.20.138
[root@director ~]# curl -x192.168.1.28:80 www.huangmingming.cn
sr1-192.168.20.138
[root@director ~]# curl -x192.168.1.28:80 www.huangmingming.cn
sr2-192.168.20.250

相关文章推荐
- 一个完整的nginx配置文件范例参考(含负载均衡)
- 关于lvs的activeconn超级大的问题
- linux 系统负载高 如何检查
- 利用LVS+Keepalived 实现高性能高可用负载均衡服务器
- LVS+keepalived负载均衡
- H3C路由器3链路负载,并实现访问内网服务器
- RedHat EL 6.4搭建LVS负载均衡
- Load Generator负载生成器
- Linux下安装LoadRunner LoadGenerator
- Linux下安装LoadRunner LoadGenerator
- LoadRunner添加负载机和安装总结
- linux 负载解惑
- ngnix配置及实战
- zookeeper详解
- Oracle 11g RAC TAF 服务端配置实现failover
- Nginx+Apache均衡负载
- load average如何理解
- 业界知名开源I/O测试工具(Iometer 2015.02.11A1增强IO模型版本)
- 如何探索晶体管驱动负载
- 超大容量负载方案