仿 qq 侧滑菜单
2015-12-29 16:30
543 查看
相信大家见过 qq 左侧隐藏菜单,今天我们就来模仿这样的功能,效果图如下
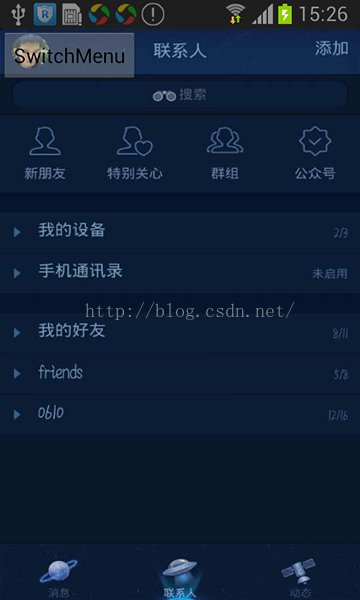
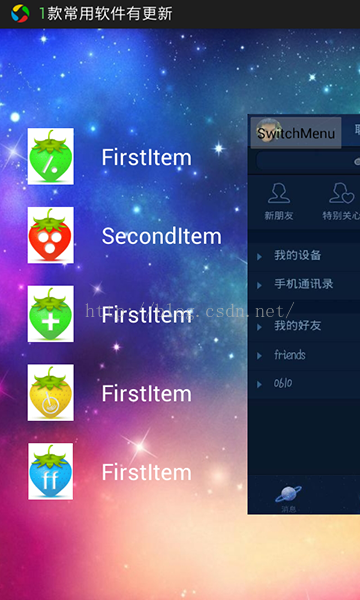
实现这样的功能很简单,所以我就不做太多解释了。我们要先定义主布局文件 activity_main.xml,在 mainlayout 中放入一个自定义的 View( SlidingMenu,继承自 HorizontalScrollView)。然后在 SlidingMenu 里面放入两个子 layout,一个是左侧菜单的 layout,另外一个是右侧内容区域的 layout。
自定义 View SlidingMenu 的代码如下:
因为我们还要用到自定义的属性,所以我们在构造方法中得通过 TypedArray 来读取我们在 attr.xml 中定义的属性。attr.xml 的代码如下
此外,为了兼容3.0以下的版本,我们还得引入 nineoldandroids-2.4.0.jar 外,这个包可在 github 上搜到 ViewHelper 类正是在这个包中定义的。onScrollChanged() 方法是实现模仿 qq 触摸动画的关键,因为在手动的过程中,这个方法会被系统不断的调用,所以相关参数的值也会跟着改变。
接着看一下左侧的布局 left_menu.xml
主布局 activity_main.xml
最后是 MainActivity 的代码
实现这样的功能很简单,所以我就不做太多解释了。我们要先定义主布局文件 activity_main.xml,在 mainlayout 中放入一个自定义的 View( SlidingMenu,继承自 HorizontalScrollView)。然后在 SlidingMenu 里面放入两个子 layout,一个是左侧菜单的 layout,另外一个是右侧内容区域的 layout。
自定义 View SlidingMenu 的代码如下:
/**
* Created by lion on 15-12-29.
*/
public class SlidingMenu extends HorizontalScrollView {

private LinearLayout mRootLayout;
private ViewGroup mLeftMenu;
private ViewGroup mRightContent;
private int mScreenWidth;
private int mMenuRightPadding = 50; // 50dp
private boolean mIsMeasured = false;
private int mMenuWidth;
private boolean isOpen = false;

public SlidingMenu(Context context, AttributeSet attrs) {
this(context, attrs, 0);
}

public SlidingMenu(Context context, AttributeSet attrs, int defStyle) {
super(context, attrs, defStyle);

TypedArray array = context.getTheme().obtainStyledAttributes(attrs,
R.styleable.SlidingMenu, defStyle, 0);

int n = array.getIndexCount();
for(int i = 0; i < n; i++) {
int attr = array.getIndex(i);

switch (attr) {
case R.styleable.SlidingMenu_rightPadding:
mMenuRightPadding = array.getDimensionPixelSize(attr,
(int) TypedValue.applyDimension(TypedValue.COMPLEX_UNIT_DIP, 50,
context.getResources().getDisplayMetrics()));
break;
}
}
array.recycle();

WindowManager wm = (WindowManager) context.getSystemService(Context.WINDOW_SERVICE);
DisplayMetrics outMetrics = new DisplayMetrics();
wm.getDefaultDisplay().getMetrics(outMetrics);
mScreenWidth = outMetrics.widthPixels;

// convert dp to px
//        mMenuRightPadding = (int) TypedValue.applyDimension(TypedValue.COMPLEX_UNIT_DIP,
//                50, context.getResources().getDisplayMetrics()); // default value
}

@Override
protected void onMeasure(int widthMeasureSpec, int heightMeasureSpec) {

if(!mIsMeasured) {
mRootLayout = (LinearLayout) getChildAt(0);
mLeftMenu = (ViewGroup) mRootLayout.getChildAt(0);
mRightContent = (ViewGroup) mRootLayout.getChildAt(1);
mMenuWidth = mLeftMenu.getLayoutParams().width = mScreenWidth - mMenuRightPadding;
mRightContent.getLayoutParams().width = mScreenWidth;
mIsMeasured = true;
}

super.onMeasure(widthMeasureSpec, heightMeasureSpec);
}

@Override
protected void onLayout(boolean changed, int l, int t, int r, int b) {
super.onLayout(changed, l, t, r, b);

if(changed) {
this.scrollTo(mMenuWidth, 0);
}
}

@Override
public boolean onTouchEvent(MotionEvent ev) {
int action = ev.getAction();

switch (action) {
case MotionEvent.ACTION_UP:
int scrollX = getScrollX();
if(scrollX >= mMenuWidth / 2) {
this.smoothScrollTo(mMenuWidth, 0);
isOpen = false;
} else {
this.smoothScrollTo(0, 0);
isOpen = true;
}
return true;
}

return super.onTouchEvent(ev);
}

@Override
protected void onScrollChanged(int l, int t, int oldl, int oldt) {
super.onScrollChanged(l, t, oldl, oldt);
/**
* 右侧内容区域 1.0~0.7 缩放的效果 scale 变化公式 : 0.7 + 0.3 * scale(变化范围 1.0~0.0)
* 菜单的显示有缩放以及透明度变化,缩放公共:1.0 - scale * 0.3(变化范围 0.7 ~1.0 )
* 透明度变化公式 0.6+ 0.4 * (1- scale)(变化范围 0.6 ~ 1.0)
*/
float scale = l * 1.0f / mMenuWidth; // 1~0

float rightScale = 0.7f + 0.3f * scale;
float leftScale = 1.0f - scale * 0.3f;
float leftAlpha = 0.6f + 0.4f * (1 - scale);

// 使用属性动画,设置 TranslationX
ViewHelper.setTranslationX(mLeftMenu, mMenuWidth * scale * 0.8f);

ViewHelper.setScaleX(mLeftMenu, leftScale); // 左侧菜单在 x 轴方向上的缩放比
ViewHelper.setScaleY(mLeftMenu, leftScale); // 右侧菜单在 y 轴方向上的缩放比
ViewHelper.setAlpha(mLeftMenu, leftAlpha); // 左侧菜单的透明度

ViewHelper.setPivotX(mRightContent, 0); // 右侧内容区域的 x 轴旋转中心
ViewHelper.setPivotY(mRightContent, mRightContent.getHeight() / 2); // 右侧内容区域的 y 轴旋转中心
ViewHelper.setScaleX(mRightContent, rightScale);
ViewHelper.setScaleY(mRightContent, rightScale);
}

public void openMenu() {
if(isOpen)return;
this.smoothScrollTo(0, 0);
isOpen = true;
}

public void closeMenu() {
if(!isOpen)return;
this.smoothScrollTo(mMenuWidth, 0);
isOpen = false;
}

// 根据菜单的状态调用打开或关闭方法
public void switchMenu() {
if(isOpen) {
closeMenu();
} else {
openMenu();
}
}
}
因为我们还要用到自定义的属性,所以我们在构造方法中得通过 TypedArray 来读取我们在 attr.xml 中定义的属性。attr.xml 的代码如下
<?xml version="1.0" encoding="utf-8"?>
<resources>
<declare-styleable name="SlidingMenu" >
<attr name="rightPadding" format="dimension"></attr>
</declare-styleable>
</resources>
此外,为了兼容3.0以下的版本,我们还得引入 nineoldandroids-2.4.0.jar 外,这个包可在 github 上搜到 ViewHelper 类正是在这个包中定义的。onScrollChanged() 方法是实现模仿 qq 触摸动画的关键,因为在手动的过程中,这个方法会被系统不断的调用,所以相关参数的值也会跟着改变。
接着看一下左侧的布局 left_menu.xml
<?xml version="1.0" encoding="utf-8"?>
<RelativeLayout xmlns:android="http://schemas.android.com/apk/res/android"
android:layout_width="match_parent"
android:layout_height="match_parent"
android:background="#0000">

<LinearLayout
android:layout_width="match_parent"
android:layout_height="wrap_content"
android:layout_centerInParent="true"
android:orientation="vertical">
<RelativeLayout
android:layout_width="match_parent"
android:layout_height="wrap_content">
<ImageView
android:id="@+id/id_img1"
android:layout_width="50dp"
android:layout_height="50dp"
android:layout_marginTop="20dp"
android:layout_marginLeft="20dp"
android:layout_centerVertical="true"
android:src="@mipmap/img_1"/>
<TextView
android:layout_width="wrap_content"
android:layout_height="wrap_content"
android:textSize="20sp"
android:layout_toRightOf="@id/id_img1"
android:layout_centerVertical="true"
android:textColor="#ffffff"
android:layout_marginLeft="20dp"
android:text="FirstItem"/>
</RelativeLayout>
<RelativeLayout
android:layout_width="match_parent"
android:layout_height="wrap_content">
<ImageView
android:id="@+id/id_img2"
android:layout_width="50dp"
android:layout_height="50dp"
android:layout_marginTop="20dp"
android:layout_marginLeft="20dp"
android:layout_centerVertical="true"
android:src="@mipmap/img_2"/>
<TextView
android:layout_width="wrap_content"
android:layout_height="wrap_content"
android:textSize="20sp"
android:layout_toRightOf="@id/id_img2"
android:layout_centerVertical="true"
android:textColor="#ffffff"
android:layout_marginLeft="20dp"
android:text="SecondItem"/>
</RelativeLayout>
<RelativeLayout
android:layout_width="match_parent"
android:layout_height="wrap_content">
<ImageView
android:id="@+id/id_img3"
android:layout_width="50dp"
android:layout_height="50dp"
android:layout_marginTop="20dp"
android:layout_marginLeft="20dp"
android:layout_centerVertical="true"
android:src="@mipmap/img_3"/>
<TextView
android:layout_width="wrap_content"
android:layout_height="wrap_content"
android:textSize="20sp"
android:layout_toRightOf="@id/id_img3"
android:layout_centerVertical="true"
android:textColor="#ffffff"
android:layout_marginLeft="20dp"
android:text="FirstItem"/>
</RelativeLayout>
<RelativeLayout
android:layout_width="match_parent"
android:layout_height="wrap_content">
<ImageView
android:id="@+id/id_img4"
android:layout_width="50dp"
android:layout_height="50dp"
android:layout_marginTop="20dp"
android:layout_marginLeft="20dp"
android:layout_centerVertical="true"
android:src="@mipmap/img_4"/>
<TextView
android:layout_width="wrap_content"
android:layout_height="wrap_content"
android:textSize="20sp"
android:layout_toRightOf="@id/id_img4"
android:layout_centerVertical="true"
android:textColor="#ffffff"
android:layout_marginLeft="20dp"
android:text="FirstItem"/>
</RelativeLayout>
<RelativeLayout
android:layout_width="match_parent"
android:layout_height="wrap_content">
<ImageView
android:id="@+id/id_img5"
android:layout_width="50dp"
android:layout_height="50dp"
android:layout_marginTop="20dp"
android:layout_marginLeft="20dp"
android:layout_centerVertical="true"
android:src="@mipmap/img_5"/>
<TextView
android:layout_width="wrap_content"
android:layout_height="wrap_content"
android:textSize="20sp"
android:layout_toRightOf="@id/id_img5"
android:layout_centerVertical="true"
android:textColor="#ffffff"
android:layout_marginLeft="20dp"
android:text="FirstItem"/>
</RelativeLayout>
</LinearLayout>

</RelativeLayout>
主布局 activity_main.xml
<RelativeLayout xmlns:android="http://schemas.android.com/apk/res/android"
xmlns:tools="http://schemas.android.com/tools"
xmlns:lion="http://schemas.android.com/apk/res-auto"
android:layout_width="match_parent"
android:layout_height="match_parent"
tools:context=".MainActivity">

<cn.lion.view.SlidingMenu
android:id="@+id/leftmenu"
android:layout_width="match_parent"
android:layout_height="match_parent"
lion:rightPadding="100dp"
android:background="@mipmap/img_base_bg">
<LinearLayout
android:layout_width="wrap_content"
android:layout_height="match_parent"
android:orientation="horizontal">

<include layout="@layout/left_menu" />

<LinearLayout
android:layout_width="match_parent"
android:layout_height="match_parent"
android:background="@mipmap/right_bg.jpg">
<Button
android:id="@+id/button"
android:layout_width="wrap_content"
android:layout_height="wrap_content"
android:text="SwitchMenu"/>
</LinearLayout>

</LinearLayout>
</cn.lion.view.SlidingMenu>

</RelativeLayout>
最后是 MainActivity 的代码
public class MainActivity extends Activity {

private SlidingMenu mSlidingMenu;

@Override
protected void onCreate(Bundle savedInstanceState) {
super.onCreate(savedInstanceState);
requestWindowFeature(Window.FEATURE_NO_TITLE);
setContentView(R.layout.activity_main);

mSlidingMenu = (SlidingMenu) findViewById(R.id.leftmenu);
Button button = (Button) findViewById(R.id.button);
button.setOnClickListener(new View.OnClickListener() {
@Override
public void onClick(View v) {
mSlidingMenu.switchMenu();
}
});
}

@Override
public boolean onCreateOptionsMenu(Menu menu) {
// Inflate the menu; this adds items to the action bar if it is present.
getMenuInflater().inflate(R.menu.menu_main, menu);
return true;
}
}

相关文章推荐
- 使用C++实现JNI接口需要注意的事项
- Android IPC进程间通讯机制
- Android Manifest 用法
- [转载]Activity中ConfigChanges属性的用法
- Android之获取手机上的图片和视频缩略图thumbnails
- Android之使用Http协议实现文件上传功能
- Android学习笔记(二九):嵌入浏览器
- android string.xml文件中的整型和string型代替
- i-jetty环境搭配与编译
- android之定时器AlarmManager
- android wifi 无线调试
- Android Native 绘图方法
- Android java 与 javascript互访(相互调用)的方法例子
- android 代码实现控件之间的间距
- android FragmentPagerAdapter的“标准”配置
- Android"解决"onTouch和onClick的冲突问题
- android:installLocation简析
- android searchView的关闭事件
- SourceProvider.getJniDirectories