HTML5之canvas剪切图片
2015-12-17 13:58
661 查看
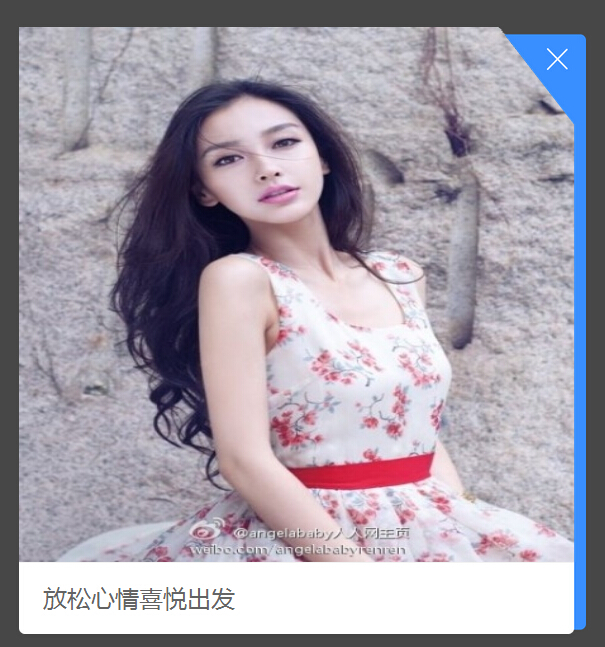
有时UI设计效果图,设定图片某个角不可见,但上传的图片又不全是PNG透明图,那么Canvas就能帮忙解决困扰啦,自己根据需求做的一个实例,实现这样的效果,以下贴代码
<!doctype html>
<html>
<head>
<meta http-equiv="Content-Type" content="text/html; charset=utf-8">
<meta name="viewport" content="width=device-width, initial-scale=1.0, minimum-scale=1.0, maximum-scale=1.0,user-scalable=no" />
<meta http-equiv="Cache-Control" content="max-age=0" />
<meta name="apple-touch-fullscreen" content="yes" />
<meta name="apple-mobile-web-app-capable" content="yes" />
<meta name="apple-mobile-web-app-status-bar-style" content="black" />
<meta name="format-detection" content="telephone=no" />
<title>canvas剪切图片</title>
<style>
@media screen and (min-width:320px) and (max-width:359px){html{font-size:12px;}body{ font-size:1.2rem;}}
@media screen and (min-width:360px) and (max-width:374px){html{font-size:13.5px;}}
@media screen and (min-width:375px) and (max-width:383px){html{font-size:14.07px;}}
@media screen and (min-width:384px) and (max-width:392px){html{font-size:14.38px;}}
@media screen and (min-width:393px) and (max-width:410px){html{font-size:14.75px;}}
@media screen and (min-width:411px) and (max-width:413px){html{font-size:15.41px;}}
@media screen and (min-width:414px) and (max-width:479px){html{font-size:15.52px;}}
@media screen and (min-width:480px) and (max-width:511px){html{font-size:18px;}}
@media screen and (min-width:512px) and (max-width:639px){html{font-size:19.19px;}}
@media screen and (min-width:640px){html{font-size:24px;}}
*{ margin:0px; padding:0px; -webkit-tap-highlight-color:rgba(0,0,0,0);}
html{ min-width:320px; max-width:640px; margin:0 auto;}
body{ background-color:#f0f0f0; font-family:"STHeitiSC-Light","微软雅黑","Microsoft YaHei"; color:#666; line-height:1rem;}
a:link , a:visited , a:hover ,a:active{ text-decoration:none; color:#666;}
.hide{ display:none;}
.mask.show{ -webkit-animation:fadein .3s; animation:fadein .3s;}
@-webkit-keyframes fadein
{
0% {opacity:0;}
100% {opacity:.75;}
}
@keyframes fadein
{
0% {opacity:0;}
100% {opacity:.75;}
}
.mask.hide , .link_picture.hide{ -webkit-animation:fadeout .3s; animation:fadeout .3s;}
@-webkit-keyframes fadeout
{
0% {opacity:.75;}
100% {opacity:0;}
}
@keyframes fadeout
{
0% {opacity:.75;}
100% {opacity:0;}
}
.link_picture.show{-webkit-animation:popout .5s;}
@-webkit-keyframes popout{
0%{ -webkit-transform:scale(0.9,0.9); opacity:0;}
30%{-webkit-transform:scale(1.05,1.05);opacity:1;}
60%{-webkit-transform:scale(0.95,0.95);opacity:1;}
100%{-webkit-transform:scale(1,1);opacity:1;}
}
@keyframes popout{
0%{ transform:scale(0.9,0.9); opacity:0;}
30%{transform:scale(1.05,1.05);opacity:1;}
60%{transform:scale(0.95,0.95);opacity:1;}
100%{transform:scale(1,1);opacity:1;}
}
.mask{ width:100%; height:100%; background:rgba(0,0,0,0.7); position:fixed; left:0; top:0; z-index:4;}
/*盒子*/
.link_picture{ width:23.65rem; height:25rem; position:fixed; top:10%; left:50%; margin-left:-11.8rem; z-index:5;}
/*显示的图片*/
.link_picture_img{ display:block; width:23.2rem; height:22.3rem; position:absolute; top:-0.3rem; left:0;}
/*盖在上面的图*/
.link_picture_top{ width:23.65rem; height:25rem; position:absolute; left:0; top:0;}
/*文字*/
.link_text{ width:100%; height:3rem; line-height:3rem; box-sizing:border-box; padding:0 1rem; white-space:nowrap; overflow:hidden; position:absolute; left:0; bottom:0;}
/*关闭*/
.link_picture_colse{ display:block; width:2rem; height:2rem; cursor:pointer; position:absolute; right:0; top:0; z-index:6;}
</style>
</head>
<body>
<div class="mask"></div>
<div class="link_picture show">
<canvas id="picture" class="link_picture_img"></canvas>
<img class="link_picture_top" src="link_picture_top.png" />
<div class="link_text">放松心情喜悦出发</div>
<div class="link_picture_colse"></div>
</div>
<script type="text/javascript">
window.onload = function(){
//
var picture_c = document.getElementById("picture");
var ctx_picture = picture_c.getContext("2d");
//页面背景图片
img = new Image();
img.src = "demo.jpg";//随便给一张图片测试就行
img.onload = function() {
var iw = img.width;
var ih = img.height;
//设置canvas的宽等于图片宽,这样移动端(比例显示)的图片就能全部显示
picture_c.width = iw;
picture_c.height = ih;
//载入图片
//ctx_picture.rect(0,0,iw-50,ih);
//ctx_picture.stroke();
//开始一个新的绘制路径
ctx_picture.beginPath();
//设置线条颜色为蓝色
//ctx_picture.strokeStyle = "rgba(0,0,0,0)";
//设置路径起点坐标
ctx_picture.moveTo(0, 0);
//绘制直线线段到坐标点(60, 50)
ctx_picture.lineTo(0, ih);
ctx_picture.lineTo(iw, ih);
//ctx_picture.lineTo(iw, 30);
ctx_picture.lineTo(iw, ih*0.1831775700934579);
//ctx_picture.lineTo(iw - 37, 0);
ctx_picture.lineTo(iw*0.8617594254937163, 0);
//先关闭绘制路径。注意,此时将会使用直线连接当前端点和起始端点。
ctx_picture.closePath();
//最后,按照绘制路径画出直线
//ctx_picture.stroke();
//剪切
ctx_picture.clip();
ctx_picture.drawImage(img,0,0,iw,ih,0,0,iw,ih);
//ctx_picture.setAntiAlias(true);
}
};
</script>
</body>
</html>
用到的边框图片

相关文章推荐
- HTML5新元素section和article的区别详解
- html5 audio
- 让一些较早的浏览器(不支持HTML5)支持 HTML5。
- html5开发之viewport使用
- html5 Audio音乐播放器(canvas圆形音乐播放进度条)(一)
- 使用h5 canvas绘制圆形进度条
- html5 搜索框
- H5中form属性
- 8款超酷的HTML5 3D图片动画源码
- HTML5跨域请求--POST方式
- HTML5新元素section和article的区别详解
- HTML5 常用表单属性
- 【1】网页的构造块(《HTML5与CSS3基础教程 (第8版)》)
- 在CDH5.5.0上安装Phoenix1.2
- 在CDH5.5.0上安装Kudu6.0
- html5语义化标签
- 为什么HTML5移动应用程序名声不好?
- 兄弟连HTML5视频教程
- Html5中的Canvas宽度为100%
- H5交互开发培训后效果