memcached安装
2015-11-24 16:47
543 查看
1、安装扩展源
yum install -y epel-release
[root@localhost ~]# wget www.lishiming.net/data/attachment/forum/epel-release-5-4_32.noarch.rpm
[root@localhost ~]# rpm -ivh epel-release-5-4_32.noarch.rpm
[root@localhost ~]# rpm -qa epel-release
epel-release-5-4.noarch
表明已经安装成功。
2、安装
[root@localhost ~]# yum install -y libevent memcached libmemcached
3、启动memcached
[root@localhost ~]# /etc/init.d/memcached start
Starting memcached: [ OK ]
[root@localhost ~]#
4、查看memcached的监听端口 (默认是11121)
[root@localhost ~]# netstat -lnp|grep memcached
tcp 0 0 0.0.0.0:11211 0.0.0.0:* LISTEN 3322/memcached
tcp 0 0 :::11211 :::* LISTEN 3322/memcached
udp 0 0 0.0.0.0:11211 0.0.0.0:* 3322/memcached
udp 0 0 :::11211 :::* 3322/memcached
5、查看其进程
[root@localhost ~]# ps aux|grep memcached
496 3322 0.0 0.0 58188 888 ? Ssl 00:21 0:00 memcached -d -p 11211 -u memcached -m 64 -c 1024 -P /var/run/memcached/memcached.pid
root 3347 0.0 0.0 4420 760 pts/2 S+ 00:24 0:00 grep memcached
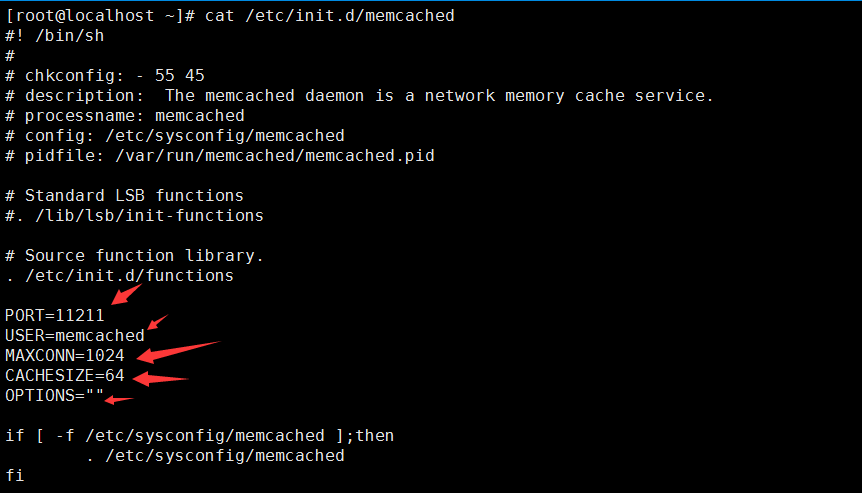
6、查看其启动脚本
[root@localhost ~]# cat /etc/init.d/memcached
7、配置文件
[root@localhost ~]# cat /etc/sysconfig/memcached
PORT="11211" #端口号
USER="memcached" #用户名
MAXCONN="1024" #最大连接数 单位是M
CACHESIZE="64" #内存大小
OPTIONS=""
8、查看memcached运行状态
a、memcached-tool 127.0.0.0.1:11211 stats
b、或者echo stats |nc 127.0.0.1 11211 需要安装nc工具(yum install -y nc)
c、若是安装libmemcached 后,可以使用命令 memstat --servers=127.0.0.1:11211查看memcached的服务状态
--------------------------------------------------------------------------------------------------
[root@localhost ~]# memcached-tool 127.0.0.1:11211 stats
#127.0.0.1:11211 Field Value
accepting_conns 1
auth_cmds 0
auth_errors 0
bytes 0
bytes_read 7
bytes_written 0
cas_badval 0
cas_hits 0
cas_misses 0
cmd_flush 0
cmd_get 0
cmd_set 0
conn_yields 0
connection_structures 6
curr_connections 5
curr_items 0
decr_hits 0
decr_misses 0
delete_hits 0
delete_misses 0
evictions 0
get_hits 0
get_misses 0
incr_hits 0
incr_misses 0
limit_maxbytes 134217728
listen_disabled_num 0
pid 3460
pointer_size 32
reclaimed 0
rusage_system 0.008998
rusage_user 0.000000
threads 4
time 1448354429
total_connections 6
total_items 0
uptime 194
version 1.4.5
--------------------------------------------------------------------------------------------------
[root@localhost ~]# echo stats |nc 127.0.0.1 11211
STAT pid 3460
STAT uptime 297
STAT time 1448354532
STAT version 1.4.5
STAT pointer_size 32
STAT rusage_user 0.000000
STAT rusage_system 0.013997
STAT curr_connections 5
STAT total_connections 7
STAT connection_structures 6
STAT cmd_get 0
STAT cmd_set 0
STAT cmd_flush 0
STAT get_hits 0
STAT get_misses 0
STAT delete_misses 0
STAT delete_hits 0
STAT incr_misses 0
STAT incr_hits 0
STAT decr_misses 0
STAT decr_hits 0
STAT cas_misses 0
STAT cas_hits 0
STAT cas_badval 0
STAT auth_cmds 0
STAT auth_errors 0
STAT bytes_read 13
STAT bytes_written 784
STAT limit_maxbytes 134217728
STAT accepting_conns 1
STAT listen_disabled_num 0
STAT threads 4
STAT conn_yields 0
STAT bytes 0
STAT curr_items 0
STAT total_items 0
STAT evictions 0
STAT reclaimed 0
END
--------------------------------------------------------------------------------------------------
[root@localhost ~]# memstat --servers=127.0.0.1:11211
Listing 1 Server
Server: 127.0.0.1 (11211)
pid: 3460
uptime: 394
time: 1448354629
version: 1.4.5
pointer_size: 32
rusage_user: 0.0
rusage_system: 0.17997
curr_items: 0
total_items: 0
bytes: 0
curr_connections: 5
total_connections: 8
connection_structures: 6
cmd_get: 0
cmd_set: 0
get_hits: 0
get_misses: 0
evictions: 0
bytes_read: 0
bytes_written: 0
limit_maxbytes: 134217728
threads: 4
知识点
1、相关的参数 在/etc/init.d/memcached 和/etc/sysconfig/memcached中定义
2、Memcached 启动参数
-d 选项是启动一个守护进程
-m 是分配给memcache使用内存数量,单位是MB,这里的是128MB
-u 是运行Memcache的用户,如果当前为root的话,需要使用此参数指定用户。
-l 是监听的服务器的IP地址
-p 是设置memcache监听的端口号,默认是11211
-c 选项是最大运行的并发连接数,默认是1024
-P 是设置保存Memcache的pid文件,
3、设置监听的端口号
[root@localhost ~]# vim /etc/sysconfig/memcached
PORT="11211"
USER="memcached"
MAXCONN="1024"
CACHESIZE="128"
OPTIONS="-l 127.0.0.1" #设置本地为监听
重启memcached,然后查看,
[root@localhost ~]# vim /etc/sysconfig/memcached
[root@localhost ~]# service memcached restart
Stopping memcached: [ OK ]
Starting memcached: [ OK ]
[root@localhost ~]# ps aux|grep memcached
496 3460 0.0 0.0 58188 820 ? Ssl 00:37 0:00 memcached -d -p 11211 -u memcached -m 128 -c 1024 -P /var/run/memcached/memcached.pid -l 127.0.0.1
root 3472 0.0 0.0 4420 756 pts/2 R+ 00:37 0:00 grep memcached
[root@localhost ~]# netstat -lnp|grep memcached
tcp 0 0 127.0.0.1:11211 0.0.0.0:* LISTEN 3460/memcached #监听的端口号
udp 0 0 127.0.0.1:11211 0.0.0.0:* 3460/memcached
yum install -y epel-release
[root@localhost ~]# wget www.lishiming.net/data/attachment/forum/epel-release-5-4_32.noarch.rpm
[root@localhost ~]# rpm -ivh epel-release-5-4_32.noarch.rpm
[root@localhost ~]# rpm -qa epel-release
epel-release-5-4.noarch
表明已经安装成功。
2、安装
[root@localhost ~]# yum install -y libevent memcached libmemcached
3、启动memcached
[root@localhost ~]# /etc/init.d/memcached start
Starting memcached: [ OK ]
[root@localhost ~]#
4、查看memcached的监听端口 (默认是11121)
[root@localhost ~]# netstat -lnp|grep memcached
tcp 0 0 0.0.0.0:11211 0.0.0.0:* LISTEN 3322/memcached
tcp 0 0 :::11211 :::* LISTEN 3322/memcached
udp 0 0 0.0.0.0:11211 0.0.0.0:* 3322/memcached
udp 0 0 :::11211 :::* 3322/memcached
5、查看其进程
[root@localhost ~]# ps aux|grep memcached
496 3322 0.0 0.0 58188 888 ? Ssl 00:21 0:00 memcached -d -p 11211 -u memcached -m 64 -c 1024 -P /var/run/memcached/memcached.pid
root 3347 0.0 0.0 4420 760 pts/2 S+ 00:24 0:00 grep memcached
6、查看其启动脚本
[root@localhost ~]# cat /etc/init.d/memcached
7、配置文件
[root@localhost ~]# cat /etc/sysconfig/memcached
PORT="11211" #端口号
USER="memcached" #用户名
MAXCONN="1024" #最大连接数 单位是M
CACHESIZE="64" #内存大小
OPTIONS=""
8、查看memcached运行状态
a、memcached-tool 127.0.0.0.1:11211 stats
b、或者echo stats |nc 127.0.0.1 11211 需要安装nc工具(yum install -y nc)
c、若是安装libmemcached 后,可以使用命令 memstat --servers=127.0.0.1:11211查看memcached的服务状态
--------------------------------------------------------------------------------------------------
[root@localhost ~]# memcached-tool 127.0.0.1:11211 stats
#127.0.0.1:11211 Field Value
accepting_conns 1
auth_cmds 0
auth_errors 0
bytes 0
bytes_read 7
bytes_written 0
cas_badval 0
cas_hits 0
cas_misses 0
cmd_flush 0
cmd_get 0
cmd_set 0
conn_yields 0
connection_structures 6
curr_connections 5
curr_items 0
decr_hits 0
decr_misses 0
delete_hits 0
delete_misses 0
evictions 0
get_hits 0
get_misses 0
incr_hits 0
incr_misses 0
limit_maxbytes 134217728
listen_disabled_num 0
pid 3460
pointer_size 32
reclaimed 0
rusage_system 0.008998
rusage_user 0.000000
threads 4
time 1448354429
total_connections 6
total_items 0
uptime 194
version 1.4.5
--------------------------------------------------------------------------------------------------
[root@localhost ~]# echo stats |nc 127.0.0.1 11211
STAT pid 3460
STAT uptime 297
STAT time 1448354532
STAT version 1.4.5
STAT pointer_size 32
STAT rusage_user 0.000000
STAT rusage_system 0.013997
STAT curr_connections 5
STAT total_connections 7
STAT connection_structures 6
STAT cmd_get 0
STAT cmd_set 0
STAT cmd_flush 0
STAT get_hits 0
STAT get_misses 0
STAT delete_misses 0
STAT delete_hits 0
STAT incr_misses 0
STAT incr_hits 0
STAT decr_misses 0
STAT decr_hits 0
STAT cas_misses 0
STAT cas_hits 0
STAT cas_badval 0
STAT auth_cmds 0
STAT auth_errors 0
STAT bytes_read 13
STAT bytes_written 784
STAT limit_maxbytes 134217728
STAT accepting_conns 1
STAT listen_disabled_num 0
STAT threads 4
STAT conn_yields 0
STAT bytes 0
STAT curr_items 0
STAT total_items 0
STAT evictions 0
STAT reclaimed 0
END
--------------------------------------------------------------------------------------------------
[root@localhost ~]# memstat --servers=127.0.0.1:11211
Listing 1 Server
Server: 127.0.0.1 (11211)
pid: 3460
uptime: 394
time: 1448354629
version: 1.4.5
pointer_size: 32
rusage_user: 0.0
rusage_system: 0.17997
curr_items: 0
total_items: 0
bytes: 0
curr_connections: 5
total_connections: 8
connection_structures: 6
cmd_get: 0
cmd_set: 0
get_hits: 0
get_misses: 0
evictions: 0
bytes_read: 0
bytes_written: 0
limit_maxbytes: 134217728
threads: 4
知识点
1、相关的参数 在/etc/init.d/memcached 和/etc/sysconfig/memcached中定义
2、Memcached 启动参数
-d 选项是启动一个守护进程
-m 是分配给memcache使用内存数量,单位是MB,这里的是128MB
-u 是运行Memcache的用户,如果当前为root的话,需要使用此参数指定用户。
-l 是监听的服务器的IP地址
-p 是设置memcache监听的端口号,默认是11211
-c 选项是最大运行的并发连接数,默认是1024
-P 是设置保存Memcache的pid文件,
3、设置监听的端口号
[root@localhost ~]# vim /etc/sysconfig/memcached
PORT="11211"
USER="memcached"
MAXCONN="1024"
CACHESIZE="128"
OPTIONS="-l 127.0.0.1" #设置本地为监听
重启memcached,然后查看,
[root@localhost ~]# vim /etc/sysconfig/memcached
[root@localhost ~]# service memcached restart
Stopping memcached: [ OK ]
Starting memcached: [ OK ]
[root@localhost ~]# ps aux|grep memcached
496 3460 0.0 0.0 58188 820 ? Ssl 00:37 0:00 memcached -d -p 11211 -u memcached -m 128 -c 1024 -P /var/run/memcached/memcached.pid -l 127.0.0.1
root 3472 0.0 0.0 4420 756 pts/2 R+ 00:37 0:00 grep memcached
[root@localhost ~]# netstat -lnp|grep memcached
tcp 0 0 127.0.0.1:11211 0.0.0.0:* LISTEN 3460/memcached #监听的端口号
udp 0 0 127.0.0.1:11211 0.0.0.0:* 3460/memcached

相关文章推荐
- Redis和Memcached的区别(4)redis内存k/v管理
- 配置spring-mvc + simple-spring-memcached
- 使用Simple-Spring-Memcached注解做缓存操作
- memcached全面剖析--5
- memcached全面剖析--4
- memcached全面剖析--3
- memcached全面剖析--2
- memcached完全剖析--1
- memcached的基础知识
- php与memcache结合做部分重页面做缓存处理
- nginx+memcached+tomcat创建集群
- memcache的原理和命中率的总结
- Windows下Memcached的安装配置方法
- 分布式缓存集群方案特性使用场景(Memcache/Redis(Twemproxy/Codis/Redis-cluster))优缺点对比及选型
- redis memcached比较
- Memcached 及 Redis 架构分析和比较(一)
- Redis与Memcached的比较
- REDIS与MEMCACHED的区别
- 缓存Redis与Memcached的比较
- Memcached 及 Redis 架构分析和比较