(六)zookeeper 可视化界面zkui
2015-10-10 10:59
731 查看
zookeeper节点的可视化界面有很多种,我使用的是zkui,比较直观,而且可以导入文件,他的git地址:
https://github.com/DeemOpen/zkui。
使用
1、 从github上可以下载下来,maven clean install成jar,运行zkui-2.0-SNAPSHOT.jar 或者直接在编译器中运行main函数,启动jetty插件。
2、配置文件config.cfg zookeeper相关配置如下
serverPort访问zk ui的端口号,默认是9090,zkServer zookeeper集群节点,userSet:用户名角色及其密码设置,在这里设置的admin密码为123456。
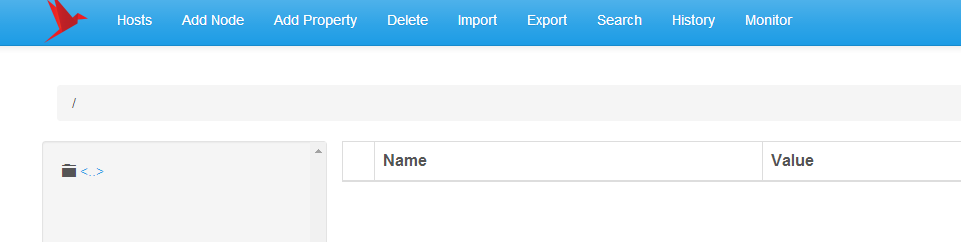
3、在linxu中启动jar,或者是在自己本地的编译器中启动main函数,输入localhost:9090,zookeeer中相关配置的节点就可以在可视化界面中看到。界面如下
下一篇,java操作zookeeper,添加删除节点
欢迎指教~
https://github.com/DeemOpen/zkui。
使用
1、 从github上可以下载下来,maven clean install成jar,运行zkui-2.0-SNAPSHOT.jar 或者直接在编译器中运行main函数,启动jetty插件。
2、配置文件config.cfg zookeeper相关配置如下
#Server Port
serverPort=9090
#Comma seperated list of all the zookeeper servers
zkServer=127.0.0.1:2181,127.0.0.1:2182,127.0.0.1:2183
#Http path of the repository. Ignore if you dont intent to upload files from repository.
scmRepo=http://myserver.com/@rev1=
#Path appended to the repo url. Ignore if you dont intent to upload files from repository.
scmRepoPath=//appconfig.txt
#if set to true then userSet is used for authentication, else ldap authentication is used.
ldapAuth=false
ldapDomain=mycompany,mydomain
#ldap authentication url. Ignore if using file based authentication.
ldapUrl=ldap://<ldap_host>:<ldap_port>/dc=mycom,dc=com
#Specific roles for ldap authenticated users. Ignore if using file based authentication.
ldapRoleSet={"users": [{ "username":"domain\\user1" , "role": "ADMIN" }]}
userSet = {"users": [{ "username":"admin" , "password":"123456","role": "ADMIN" },{ "username":"appconfig" , "password":"appconfig","role": "USER" }]}
#Set to prod in production and dev in local. Setting to dev will clear history each time.
env=prod
jdbcClass=org.h2.Driver
jdbcUrl=jdbc:h2:zkui
jdbcUser=root
jdbcPwd=manager
#If you want to use mysql db to store history then comment the h2 db section.
#jdbcClass=com.mysql.jdbc.Driver
#jdbcUrl=jdbc:mysql://localhost:3306/zkui
#jdbcUser=root
#jdbcPwd=manager
loginMessage=Please login using admin/manager or appconfig/appconfig.
#session timeout 5 mins/300 secs.
sessionTimeout=300
#Default 5 seconds to keep short lived zk sessions. If you have large data then the read will take more than 30 seconds so increase this accordingly.
#A bigger zkSessionTimeout means the connection will be held longer and resource consumption will be high.
zkSessionTimeout=5
#Block PWD exposure over rest call.
blockPwdOverRest=false
#ignore rest of the props below if https=false.
https=false
keystoreFile=/home/user/keystore.jks
keystorePwd=password
keystoreManagerPwd=password
# The default ACL to use for all creation of nodes. If left blank, then all nodes will be universally accessible
# Permissions are based on single character flags: c (Create), r (read), w (write), d (delete), a (admin), * (all)
# For example defaultAcl={"acls": [{"scheme":"ip", "id":"192.168.1.192", "perms":"*"}, {"scheme":"ip", id":"192.168.1.0/24", "perms":"r"}]
defaultAcl=
serverPort访问zk ui的端口号,默认是9090,zkServer zookeeper集群节点,userSet:用户名角色及其密码设置,在这里设置的admin密码为123456。
3、在linxu中启动jar,或者是在自己本地的编译器中启动main函数,输入localhost:9090,zookeeer中相关配置的节点就可以在可视化界面中看到。界面如下
下一篇,java操作zookeeper,添加删除节点
欢迎指教~

相关文章推荐
- Kendo UI Professional Q3 2015正式发布[附下载]
- js客户端UI框架
- this kernel requires an x86-64 CPU, but only detected an i686 CPU
- POJ 1458 Common Subsequence (DP 动态规划)
- 关于 ZigBee WiFi Bluetooth 的分析
- POJ 1458 Common Subsequence (暴力枚举)
- iOS中 UIProgressView 技术分享
- iOS中 UIProgressView 技术分享
- ueditor1.4.3.1版本二次开发记录
- UISlider大总结
- flash builder 4.7 破解
- UITabelView移动,编辑大总结
- UIImageView animation大总结
- UIScrollView大总结
- request属性 request.getAttribute()
- IOS 实现UI状态保持和恢复
- UIScreenEdgePanGestureRecognizer无法响应/失效
- UITableBarController大总结
- Android Can only use lower 16 bits for requestCode问题
- IOS开发UI基础之综合应用