Fragment+RadioButton实现点击切换页面效果
2015-09-04 08:29
721 查看
首先我们需要在主布局文件中 放一个 容器,方便让fragment加入进去,我们创建了四个Fragment,并用RedioButton实现了导航栏
MainActivity.java
主布局文件,在这里我分开写的,底部的导航栏有新建了一个xml文件,并在主布局文件中用include将他包含进来。
activity_main.xml
底部导航栏的布局文件
四个fragment都一样,我就放一个代码,布局也很简单,就放了一个TextView
Fragment.java
该fragment的布局文件为:
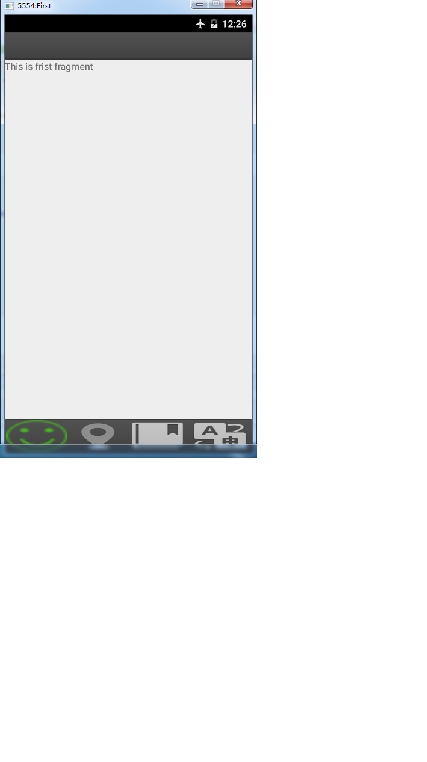
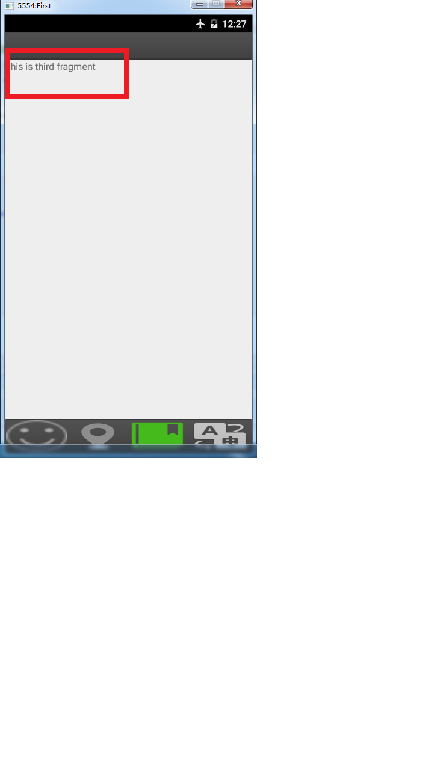
效果图:
MainActivity.java
package com.example.administrator.fragmentdemo;

import android.app.Activity;
import android.app.FragmentManager;
import android.app.FragmentTransaction;
import android.os.Bundle;
import android.view.View;
import android.widget.RadioButton;

public class MainActivity extends Activity implements View.OnClickListener {

private RadioButton image1;
private RadioButton image2;
private RadioButton image3;
private RadioButton image4;

private FirstFragment firstFragment;
private SecondFragment secondFragment;
private ThirdFragment thirdFragment;
private FourFragment fourFragment;

@Override
protected void onCreate(Bundle savedInstanceState) {
super.onCreate(savedInstanceState);
setContentView(R.layout.activity_main);

initViews();
initEvents();
//首先 我们先选定一个
select(0);
}
//初始化  各种个 View
private void initViews(){
image1 = (RadioButton) findViewById(R.id.tab_image1);
image2 = (RadioButton) findViewById(R.id.tab_image2);
image3 = (RadioButton) findViewById(R.id.tab_image3);
image4 = (RadioButton) findViewById(R.id.tab_image4);
}
//初始化 监听事件
private void initEvents(){
image1.setOnClickListener(this);
image2.setOnClickListener(this);
image3.setOnClickListener(this);
image4.setOnClickListener(this);
}
// 初始化 各种图片
private void initImageBack(){
image1.setBackgroundResource(R.drawable.chatting_biaoqing_btn_normal);
image2.setBackgroundResource(R.drawable.lbs_icon_disable);
image3.setBackgroundResource(R.drawable.scan_book);
image4.setBackgroundResource(R.drawable.scan_word);
}
//
private void select(int i){
FragmentManager fm = getFragmentManager();  //获得Fragment管理器
FragmentTransaction ft = fm.beginTransaction(); //开启一个事务

hidtFragment(ft);   //先隐藏 Fragment

switch (i){
case 0:
image1.setBackgroundResource(R.drawable.chatting_biaoqing_btn_enable);
if (firstFragment == null){
firstFragment = new FirstFragment();
ft.add(R.id.fragment_container,firstFragment);
}else{
ft.show(firstFragment);
}
break;
case 1:
image2.setBackgroundResource(R.drawable.lbs_icon_enable);
if (secondFragment == null){
secondFragment = new SecondFragment();
ft.add(R.id.fragment_container,secondFragment);
}else {
ft.show(secondFragment);
}
break;
case 2:
image3.setBackgroundResource(R.drawable.scan_book_hl);
if (thirdFragment == null){
thirdFragment = new ThirdFragment();
ft.add(R.id.fragment_container,thirdFragment);
}else {
ft.show(thirdFragment);
}
break;
case 3:
image4.setBackgroundResource(R.drawable.scan_word_hl);
if(fourFragment == null){
fourFragment = new FourFragment();
ft.add(R.id.fragment_container,fourFragment);
}else {
ft.show(fourFragment);
}
break;
}
ft.commit();   //提交事务
}
//隐藏所有Fragment
private void hidtFragment(FragmentTransaction fragmentTransaction){
if (firstFragment != null){
fragmentTransaction.hide(firstFragment);
}
if (secondFragment != null){
fragmentTransaction.hide(secondFragment);
}
if (thirdFragment != null){
fragmentTransaction.hide(thirdFragment);
}
if (fourFragment != null){
fragmentTransaction.hide(fourFragment);
}
}
//重写监听
@Override
public void onClick(View v) {

initImageBack(); //初始化 图片背景

switch (v.getId()){
case R.id.tab_image1:
select(0);
break;
case R.id.tab_image2:
select(1);
break;
case R.id.tab_image3:
select(2);
break;
case R.id.tab_image4:
select(3);
break;
}
}
}
主布局文件,在这里我分开写的,底部的导航栏有新建了一个xml文件,并在主布局文件中用include将他包含进来。
activity_main.xml
<LinearLayout
xmlns:android="http://schemas.android.com/apk/res/android"
xmlns:tools="http://schemas.android.com/tools"
android:layout_width="match_parent"
android:layout_height="match_parent"
android:orientation="vertical"
tools:context=".MainActivity">

<ImageView
android:layout_width="match_parent"
android:layout_height="40dp"
android:background="@drawable/friendactivity_comment_frame_pressed"/>

<FrameLayout
android:id="@+id/fragment_container"
android:layout_width="match_parent"
android:layout_height="0dp"
android:layout_weight="1">
</FrameLayout>

<include layout="@layout/activity_main_tab_view"/>

</LinearLayout>
底部导航栏的布局文件
<?xml version="1.0" encoding="utf-8"?>
<LinearLayout
xmlns:android="http://schemas.android.com/apk/res/android"
android:orientation="horizontal"
android:layout_width="match_parent"
android:layout_height="50dp"
android:layout_gravity="bottom"
android:background="@drawable/friendactivity_comment_frame_pressed">

<RadioGroup
android:layout_width="match_parent"
android:layout_height="match_parent"
android:orientation="horizontal">

<RadioButton
android:id="@+id/tab_image1"
android:layout_width="0dp"
android:layout_height="match_parent"
android:layout_weight="1"
android:button="@null"
android:background="@drawable/chatting_biaoqing_btn_normal"/>

<RadioButton
android:id="@+id/tab_image2"
android:layout_width="0dp"
android:layout_height="match_parent"
android:layout_weight="1"
android:button="@null"
android:background="@drawable/lbs_icon_disable"/>
<RadioButton
android:id="@+id/tab_image3"
android:layout_width="0dp"
android:layout_height="match_parent"
android:layout_weight="1"
android:button="@null"
android:background="@drawable/scan_book"/>
<RadioButton
android:id="@+id/tab_image4"
android:layout_width="0dp"
android:layout_height="match_parent"
android:layout_weight="1"
android:button="@null"
android:background="@drawable/scan_word"/>
</RadioGroup>

</LinearLayout>
四个fragment都一样,我就放一个代码,布局也很简单,就放了一个TextView
Fragment.java
package com.example.administrator.fragmentdemo;

import android.app.Fragment;
import android.os.Bundle;
import android.view.LayoutInflater;
import android.view.View;
import android.view.ViewGroup;

/**
* Created by Administrator on 2015/9/3.
*/
public class FirstFragment extends Fragment {
@Override
public View onCreateView(LayoutInflater inflater, ViewGroup container, Bundle savedInstanceState) {

return inflater.inflate(R.layout.first_fragment_view,container,false);
}
}
该fragment的布局文件为:
<?xml version="1.0" encoding="utf-8"?>
<LinearLayout
xmlns:android="http://schemas.android.com/apk/res/android"
android:layout_width="match_parent"
android:layout_height="match_parent"
android:orientation="vertical">
<TextView
android:layout_width="wrap_content"
android:layout_height="wrap_content"
android:text="This is frist fragment"/>
</LinearLayout>
效果图:

相关文章推荐
- PHP基础----常用库函数----16生成图片
- C++之随笔(二)
- 关于存储过程可空条件查询
- PHP基础----常用库函数----15文件操作
- PHP基础----常用库函数----14JSON格式数据的操作
- PHP基础----常用库函数----13时间和日期
- TQ2440 学习笔记—— 18、存储控制器
- Bash在cd进入目录时自动启动脚本
- html5中的一些小知识点(CSS)
- Win10预览版10532新版《邮件》,请回Win8初期功能
- 根据文本内容计算cell的高度
- PHP基础----面向对象相关特性----12类的继承与方法重写
- codebook-based precoding and non-codebook-based precoding
- NLP--自然语言处理与机器学习会议
- PHP基础----面向对象相关特性----11成员方法和类方法
- 自然语言处理课程作业 中文文本情感分类
- Fragment和Activity的关系
- Tomcat的session集群和session服务器
- 通过Python判断主机是否存在
- PHP基础----面向对象相关特性----10类和命名空间介绍