WPF入门(五):简单绑定 - 用户输入合法性验证
2015-08-14 10:20
369 查看
在我们绑定完数据后,在用户输入数据后,还需要进行用户输入合法性验证,比如需要判断 必填项,email地址输入格式,日期格式是否正确等。
wpf为我们提供了一种验证用户合法行的方式。依赖于绑定。在将实体数据绑定到视图后,如果用户输入的视图改变,则同时通知实体的属性值改变。先看代码:
1. 构建一个要绑定到界面的实体。该实体实现了IDataErrorInfo接口,在接口里写了验证规则。


代码
//实体 实现 IDataErrorInfo接口,并在 this[]索引器里定制自己的验证规则
class Person : IDataErrorInfo
{
public string Name { get; set; }
public int Age { get; set; }
#region IDataErrorInfo 成员
string _err;
public string Error
{
get { return _err; }
}
//定制验证规则
public string this[string columnName]
{
get
{
string err = "";
switch (columnName)
{
case "Name":
if (string.IsNullOrEmpty(this.Name))
{
err = "名称不能为空";
}
else
{
if (this.Name.Length > 8)
{
err = "名称太长了,不能大于8个字符";
}
}
break;
case "Age":
if (this.Age < 0 || this.Age > 200)
{
err = "年龄不合法";
}
break;
}
_err = err;
return _err;
}
}
#endregion
}
2.页面:
代码
1 <Window x:Class="WpfApplication3.Window1"
2 xmlns="http://schemas.microsoft.com/winfx/2006/xaml/presentation"
3 xmlns:x="http://schemas.microsoft.com/winfx/2006/xaml"
4 xmlns:local ="clr-namespace:WpfApplication3"
5 Title="Window1" Height="298" Width="681" Loaded="Window_Loaded">
6
7 <Grid Name="grid1">
8 <TextBlock Margin="25,29,0,0" Name="textBlock1" Height="21" VerticalAlignment="Top" HorizontalAlignment="Left" Width="38">
9 Name:
10 </TextBlock>
11 <TextBox HorizontalAlignment="Left" Margin="83,29,0,0" Name="textBlock2" VerticalAlignment="Top" Width="120" >
12 <TextBox.Text>
13 <!-- 启动Binding的绑定方式1 -->
14 <Binding Path="Name" UpdateSourceTrigger="PropertyChanged"
15 ValidatesOnDataErrors="True" />
16 </TextBox.Text>
17 </TextBox>
18 <TextBlock Text="Age:" Height="21" HorizontalAlignment="Left" Margin="25,68,0,0" Name="textBlock3" VerticalAlignment="Top" Width="38" />
19 <TextBox Height="23" HorizontalAlignment="Left" Margin="83,66,0,0" Name="textBox1" VerticalAlignment="Top" Width="120" >
20 <TextBox.Text>
21 <!-- 启动Binding的绑定方式2 -->
22 <Binding Path="Age" UpdateSourceTrigger="PropertyChanged">
23 <Binding.ValidationRules>
24 <DataErrorValidationRule />
25 <ExceptionValidationRule></ExceptionValidationRule>
26 </Binding.ValidationRules>
27 </Binding>
28 </TextBox.Text>
29 </TextBox>
30 </Grid>
31 </Window>
32
页面的后置代码:
代码
1 /// <summary>
2 /// Window1.xaml 的交互逻辑
3 /// </summary>
4 public partial class Window1 : Window
5 {
6 public Window1()
7 {
8 InitializeComponent();
9 }
10
11 private void Window_Loaded(object sender, RoutedEventArgs e)
12 {
13 grid1.DataContext = GetPersonFromDatabase();
14 }
15
16 private Person GetPersonFromDatabase()
17 {
18 //从数据库获得数据对象 <演示>
19 return new Person() { Name = "join", Age = 30 };
20 }
21 }
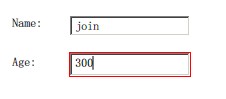
按F5运行后,尝试输入写不合法数据。可以看到Textbox的边框变成红色。这是一种默认的提示错误的风格方式,我们还可以对这个提示风格进行自定义。
注意Binding的下面两个属性:
也就是说当我们设置了 Binding的ValidatesOnDataErrors="True" 时。WPF框架在构造Binding对象时,会自动的添加一个默认的DataErrorValidationRule到ValidationRules 属性值(验证规则列表)内。或者我们直接在ValidationRules 里添加我们需要的规则,比如下面是添加了两个规则:
<Binding.ValidationRules>
<DataErrorValidationRule />
<ExceptionValidationRule></ExceptionValidationRule>
</Binding.ValidationRules>
这样的写法很有意思,貌似IOC的方式配置文件,比如spring.Net的配置文件,这样的声明ValidationRules的包含的规则。当WPF框架创建对象时自动的完成规则操作,并判断ValidationRules内的规则数量,如果多于0个,就遍历所有的规则集合,如果集合中包含了DataErrorValidationRule 并且实体类显示了IDataErrorInfo
接口,就调用 实体内包含的 验证规则。
ExceptionValidationRule 类是一个内置的规则,它检查在绑定源属性更新过程中引发的异常。这里验证了Age的用户输入不可为空,当为空时,转型成int(Age是int类型)时就会出错。
通过创建一个从 ValidationRule 派生的类,可以创建自定义规则。下面我尝试自定义验证规则。
MSDN里对ValidateionRule的描述如下:
在使用 WPF 数据绑定模型时,可将 ValidationRules 与绑定对象关联。若要创建自定义规则,请创建此类的子类并实现 Validate 方法。也可选择使用内置的 ExceptionValidationRule(该类捕获在源更新期间引发的异常)或 DataErrorValidationRule(该类检查源对象的 IDataErrorInfo 实现所引发的错误)。
绑定引擎在每次将输入值(即绑定目标属性值)传给绑定源属性时将检查与绑定关联的每一个 ValidationRule。
我们写一个类继承自ValidationRule,代码如下:
代码
1 class AgeValidationRule : ValidationRule
2 {
3 //验证规则
4 public override ValidationResult Validate(object value, System.Globalization.CultureInfo cultureInfo)
5 {
6 if (value == null)
7 {
8 return new ValidationResult(false, "年龄不能为空");
9 }
10 int valNew = 0;
11 if (!int.TryParse(value.ToString(), out valNew))
12 {
13 return new ValidationResult(false, value + "不是一个数字类型");
14 }
15 else
16 {
17 if (valNew < 0 || valNew > 200)
18 {
19 return new ValidationResult(false, "年龄必须在0和200之间");
20 }
21 }
22 return ValidationResult.ValidResult;
23 }
实体的代码:
1 //实体
class Person
3 {
4 public string Name { get; set; }
5 public int Age { get; set; }
6
7 }
页面xaml代码如下,而后置代码不变。
代码
1 <Window x:Class="WpfApplication3.Window1"
2 xmlns="http://schemas.microsoft.com/winfx/2006/xaml/presentation"
3 xmlns:x="http://schemas.microsoft.com/winfx/2006/xaml"
4 xmlns:local ="clr-namespace:WpfApplication3"
5 Title="Window1" Height="298" Width="681" Loaded="Window_Loaded">
6
7 <Grid Name="grid1">
8 <TextBlock Margin="25,29,0,0" Name="textBlock1" Height="21" VerticalAlignment="Top" HorizontalAlignment="Left" Width="38">
9 Name:
10 </TextBlock>
11 <TextBox HorizontalAlignment="Left" Margin="83,29,0,0" Name="textBlock2" VerticalAlignment="Top" Width="120" >
12 <TextBox.Text>
13 <!-- 启动Binding的绑定方式1 -->
14 <Binding Path="Name" UpdateSourceTrigger="PropertyChanged"
15 ValidatesOnDataErrors="True" />
16 </TextBox.Text>
17 </TextBox>
18 <TextBlock Text="Age:" Height="21" HorizontalAlignment="Left" Margin="25,68,0,0" Name="textBlock3" VerticalAlignment="Top" Width="38" />
19 <TextBox Height="23" HorizontalAlignment="Left" Margin="83,66,0,0" Name="textBox1" VerticalAlignment="Top" Width="120" >
20 <TextBox.Text>
21 <!-- 启动Binding的绑定方式2 -->
22 <Binding Path="Age" UpdateSourceTrigger="PropertyChanged">
23 <Binding.ValidationRules>
24 <!-- 我们自定义的验证规则 -->
25 <local:AgeValidationRule />
26 <ExceptionValidationRule></ExceptionValidationRule>
27 </Binding.ValidationRules>
28 </Binding>
29 </TextBox.Text>
30 </TextBox>
31 </Grid>
32 </Window>
33
F5运行。是不是一样呢。我个人不推荐第一种方法。当实体实现了IDataErrorInfo,并在实体的代码里写验证规则时,会把代码搞的非常混杂。网上有推荐利用Attribute的进行验证的,但是好像还要让实体继承一个基类。我更喜欢让实体model干干净净。
下面我们看看如何更改在验证失败时的提示风格。
代码
<Window x:Class="WpfApplication3.Window1"
xmlns="http://schemas.microsoft.com/winfx/2006/xaml/presentation"
xmlns:x="http://schemas.microsoft.com/winfx/2006/xaml"
xmlns:local ="clr-namespace:WpfApplication3"
Title="Window1" Height="298" Width="681" Loaded="Window_Loaded">
<Grid Name="grid1">
<TextBlock Margin="25,29,0,0" Name="textBlock1" Height="21" VerticalAlignment="Top" HorizontalAlignment="Left" Width="38">
Name:
</TextBlock>
<TextBox HorizontalAlignment="Left" Margin="83,29,0,0" Name="textBlock2" VerticalAlignment="Top" Width="120" >
<TextBox.Text>
<!-- 启动Binding的绑定方式1 -->
<Binding Path="Name" UpdateSourceTrigger="PropertyChanged"
ValidatesOnDataErrors="True" />
</TextBox.Text>
</TextBox>
<TextBlock Text="Age:" Height="21" HorizontalAlignment="Left" Margin="25,68,0,0" Name="textBlock3" VerticalAlignment="Top" Width="38" />
<TextBox Height="23" HorizontalAlignment="Left" Margin="83,66,0,0" Name="textBox1" VerticalAlignment="Top" Width="120" >
<TextBox.Text>
<!-- 启动Binding的绑定方式2 -->
<Binding Path="Age" UpdateSourceTrigger="PropertyChanged">
<Binding.ValidationRules>
<!-- 我们自定义的验证规则 -->
<local:AgeValidationRule />
<ExceptionValidationRule></ExceptionValidationRule>
</Binding.ValidationRules>
</Binding>
</TextBox.Text>
<Validation.ErrorTemplate>
<ControlTemplate>
<!-- ControlTemplate要求只能有一个子级,所以加个容器控件DockPanel -->
<DockPanel>
<!-- AdornedElementPlaceholder就是要验证的控件本身,本例里是个TextBox -->
<AdornedElementPlaceholder />
<TextBlock Foreground="Red" FontSize="20" Text="*" />
</DockPanel>
</ControlTemplate>
</Validation.ErrorTemplate>
</TextBox>
</Grid>
</Window>
我们注意到Textbox.Validation属性的ErrorTemplate是发生错误时使用的模板,我们重新new了一个ControlTemplate来代替这个模板。在这个模板里我们定义了一个DockPanel作为容器控件,使用 占位标记AdornedElementPlaceholder 标记了TextBox的位置,并在它后面添加两个 字符"*"号。这可能有点难以理解。换个说法是,每个TextBox都有个Validation属性,Validation包含了一些和验证相关的像,包含有个当验证失败时的显示模板。而我们重新定义了个显示模板。这个模板里有个占位符,占位符表示TextBox本身,我们在这个模板的占位符后面添加一些字符 红色的"*" 号。那么当TextBox在执行时,如果失败,就会把 错误模板 显示出来,并在 占位符位置 显示自己。
我们换个另外的方式来改变视图效果,使用style 方式。
在窗体资源里添加一个style,style这个东西呢,类似web开发中的css。他有个属性TargetType 指示了这个样式的作用域。本例中指示了 所有的TextBox,style的强大之处还有个Triggers就是触发器。本例中触发器指向一个属性Validation.HasError属性,当这属性的值为"True"时,触发Trigger包含的样式。当不等于"True"时,自动改回原来的样式。很强大吧。Setter元素提供了设置目标对象属性的方法,我们直接更改了Textbox.ToolTop属性,那么当鼠标移动到控件上时,就会显示发生错误的原因。
代码
1 <Window.Resources>
2 <Style TargetType="TextBox">
3 <Style.Triggers>
4 <Trigger Property="Validation.HasError" Value="True">
5 <Setter Property="Background" Value="#DDD" />
6 <Setter Property="Foreground" Value="Red" />
7 <Setter Property="ToolTip"
8 Value="{Binding RelativeSource={RelativeSource Self},Path=(Validation.Errors)[0].ErrorContent}"/>
9 </Trigger>
10 </Style.Triggers>
11 </Style>
12 </Window.Resources>
这句<Setter Property="ToolTip"
Value="{Binding RelativeSource={RelativeSource Self},Path=(Validation.Errors)[0].ErrorContent}"/>
完成了获得关联数据源,并绑定错误提示的操作。
下载代码
本节完。
待续ing...
wpf为我们提供了一种验证用户合法行的方式。依赖于绑定。在将实体数据绑定到视图后,如果用户输入的视图改变,则同时通知实体的属性值改变。先看代码:
1. 构建一个要绑定到界面的实体。该实体实现了IDataErrorInfo接口,在接口里写了验证规则。
代码
//实体 实现 IDataErrorInfo接口,并在 this[]索引器里定制自己的验证规则
class Person : IDataErrorInfo
{
public string Name { get; set; }
public int Age { get; set; }
#region IDataErrorInfo 成员
string _err;
public string Error
{
get { return _err; }
}
//定制验证规则
public string this[string columnName]
{
get
{
string err = "";
switch (columnName)
{
case "Name":
if (string.IsNullOrEmpty(this.Name))
{
err = "名称不能为空";
}
else
{
if (this.Name.Length > 8)
{
err = "名称太长了,不能大于8个字符";
}
}
break;
case "Age":
if (this.Age < 0 || this.Age > 200)
{
err = "年龄不合法";
}
break;
}
_err = err;
return _err;
}
}
#endregion
}
2.页面:
代码
1 <Window x:Class="WpfApplication3.Window1"
2 xmlns="http://schemas.microsoft.com/winfx/2006/xaml/presentation"
3 xmlns:x="http://schemas.microsoft.com/winfx/2006/xaml"
4 xmlns:local ="clr-namespace:WpfApplication3"
5 Title="Window1" Height="298" Width="681" Loaded="Window_Loaded">
6
7 <Grid Name="grid1">
8 <TextBlock Margin="25,29,0,0" Name="textBlock1" Height="21" VerticalAlignment="Top" HorizontalAlignment="Left" Width="38">
9 Name:
10 </TextBlock>
11 <TextBox HorizontalAlignment="Left" Margin="83,29,0,0" Name="textBlock2" VerticalAlignment="Top" Width="120" >
12 <TextBox.Text>
13 <!-- 启动Binding的绑定方式1 -->
14 <Binding Path="Name" UpdateSourceTrigger="PropertyChanged"
15 ValidatesOnDataErrors="True" />
16 </TextBox.Text>
17 </TextBox>
18 <TextBlock Text="Age:" Height="21" HorizontalAlignment="Left" Margin="25,68,0,0" Name="textBlock3" VerticalAlignment="Top" Width="38" />
19 <TextBox Height="23" HorizontalAlignment="Left" Margin="83,66,0,0" Name="textBox1" VerticalAlignment="Top" Width="120" >
20 <TextBox.Text>
21 <!-- 启动Binding的绑定方式2 -->
22 <Binding Path="Age" UpdateSourceTrigger="PropertyChanged">
23 <Binding.ValidationRules>
24 <DataErrorValidationRule />
25 <ExceptionValidationRule></ExceptionValidationRule>
26 </Binding.ValidationRules>
27 </Binding>
28 </TextBox.Text>
29 </TextBox>
30 </Grid>
31 </Window>
32
页面的后置代码:
代码
1 /// <summary>
2 /// Window1.xaml 的交互逻辑
3 /// </summary>
4 public partial class Window1 : Window
5 {
6 public Window1()
7 {
8 InitializeComponent();
9 }
10
11 private void Window_Loaded(object sender, RoutedEventArgs e)
12 {
13 grid1.DataContext = GetPersonFromDatabase();
14 }
15
16 private Person GetPersonFromDatabase()
17 {
18 //从数据库获得数据对象 <演示>
19 return new Person() { Name = "join", Age = 30 };
20 }
21 }
按F5运行后,尝试输入写不合法数据。可以看到Textbox的边框变成红色。这是一种默认的提示错误的风格方式,我们还可以对这个提示风格进行自定义。
注意Binding的下面两个属性:
| ValidatesOnDataErrors | 获取或设置一个值,该值指示是否包含 DataErrorValidationRule。 |
| ValidationRules | 获取用于检查用户输入有效性的规则集合。 |
<Binding.ValidationRules>
<DataErrorValidationRule />
<ExceptionValidationRule></ExceptionValidationRule>
</Binding.ValidationRules>
这样的写法很有意思,貌似IOC的方式配置文件,比如spring.Net的配置文件,这样的声明ValidationRules的包含的规则。当WPF框架创建对象时自动的完成规则操作,并判断ValidationRules内的规则数量,如果多于0个,就遍历所有的规则集合,如果集合中包含了DataErrorValidationRule 并且实体类显示了IDataErrorInfo
接口,就调用 实体内包含的 验证规则。
ExceptionValidationRule 类是一个内置的规则,它检查在绑定源属性更新过程中引发的异常。这里验证了Age的用户输入不可为空,当为空时,转型成int(Age是int类型)时就会出错。
通过创建一个从 ValidationRule 派生的类,可以创建自定义规则。下面我尝试自定义验证规则。
MSDN里对ValidateionRule的描述如下:
在使用 WPF 数据绑定模型时,可将 ValidationRules 与绑定对象关联。若要创建自定义规则,请创建此类的子类并实现 Validate 方法。也可选择使用内置的 ExceptionValidationRule(该类捕获在源更新期间引发的异常)或 DataErrorValidationRule(该类检查源对象的 IDataErrorInfo 实现所引发的错误)。
绑定引擎在每次将输入值(即绑定目标属性值)传给绑定源属性时将检查与绑定关联的每一个 ValidationRule。
我们写一个类继承自ValidationRule,代码如下:
代码
1 class AgeValidationRule : ValidationRule
2 {
3 //验证规则
4 public override ValidationResult Validate(object value, System.Globalization.CultureInfo cultureInfo)
5 {
6 if (value == null)
7 {
8 return new ValidationResult(false, "年龄不能为空");
9 }
10 int valNew = 0;
11 if (!int.TryParse(value.ToString(), out valNew))
12 {
13 return new ValidationResult(false, value + "不是一个数字类型");
14 }
15 else
16 {
17 if (valNew < 0 || valNew > 200)
18 {
19 return new ValidationResult(false, "年龄必须在0和200之间");
20 }
21 }
22 return ValidationResult.ValidResult;
23 }
实体的代码:
1 //实体
class Person
3 {
4 public string Name { get; set; }
5 public int Age { get; set; }
6
7 }
页面xaml代码如下,而后置代码不变。
代码
1 <Window x:Class="WpfApplication3.Window1"
2 xmlns="http://schemas.microsoft.com/winfx/2006/xaml/presentation"
3 xmlns:x="http://schemas.microsoft.com/winfx/2006/xaml"
4 xmlns:local ="clr-namespace:WpfApplication3"
5 Title="Window1" Height="298" Width="681" Loaded="Window_Loaded">
6
7 <Grid Name="grid1">
8 <TextBlock Margin="25,29,0,0" Name="textBlock1" Height="21" VerticalAlignment="Top" HorizontalAlignment="Left" Width="38">
9 Name:
10 </TextBlock>
11 <TextBox HorizontalAlignment="Left" Margin="83,29,0,0" Name="textBlock2" VerticalAlignment="Top" Width="120" >
12 <TextBox.Text>
13 <!-- 启动Binding的绑定方式1 -->
14 <Binding Path="Name" UpdateSourceTrigger="PropertyChanged"
15 ValidatesOnDataErrors="True" />
16 </TextBox.Text>
17 </TextBox>
18 <TextBlock Text="Age:" Height="21" HorizontalAlignment="Left" Margin="25,68,0,0" Name="textBlock3" VerticalAlignment="Top" Width="38" />
19 <TextBox Height="23" HorizontalAlignment="Left" Margin="83,66,0,0" Name="textBox1" VerticalAlignment="Top" Width="120" >
20 <TextBox.Text>
21 <!-- 启动Binding的绑定方式2 -->
22 <Binding Path="Age" UpdateSourceTrigger="PropertyChanged">
23 <Binding.ValidationRules>
24 <!-- 我们自定义的验证规则 -->
25 <local:AgeValidationRule />
26 <ExceptionValidationRule></ExceptionValidationRule>
27 </Binding.ValidationRules>
28 </Binding>
29 </TextBox.Text>
30 </TextBox>
31 </Grid>
32 </Window>
33
F5运行。是不是一样呢。我个人不推荐第一种方法。当实体实现了IDataErrorInfo,并在实体的代码里写验证规则时,会把代码搞的非常混杂。网上有推荐利用Attribute的进行验证的,但是好像还要让实体继承一个基类。我更喜欢让实体model干干净净。
下面我们看看如何更改在验证失败时的提示风格。
代码
<Window x:Class="WpfApplication3.Window1"
xmlns="http://schemas.microsoft.com/winfx/2006/xaml/presentation"
xmlns:x="http://schemas.microsoft.com/winfx/2006/xaml"
xmlns:local ="clr-namespace:WpfApplication3"
Title="Window1" Height="298" Width="681" Loaded="Window_Loaded">
<Grid Name="grid1">
<TextBlock Margin="25,29,0,0" Name="textBlock1" Height="21" VerticalAlignment="Top" HorizontalAlignment="Left" Width="38">
Name:
</TextBlock>
<TextBox HorizontalAlignment="Left" Margin="83,29,0,0" Name="textBlock2" VerticalAlignment="Top" Width="120" >
<TextBox.Text>
<!-- 启动Binding的绑定方式1 -->
<Binding Path="Name" UpdateSourceTrigger="PropertyChanged"
ValidatesOnDataErrors="True" />
</TextBox.Text>
</TextBox>
<TextBlock Text="Age:" Height="21" HorizontalAlignment="Left" Margin="25,68,0,0" Name="textBlock3" VerticalAlignment="Top" Width="38" />
<TextBox Height="23" HorizontalAlignment="Left" Margin="83,66,0,0" Name="textBox1" VerticalAlignment="Top" Width="120" >
<TextBox.Text>
<!-- 启动Binding的绑定方式2 -->
<Binding Path="Age" UpdateSourceTrigger="PropertyChanged">
<Binding.ValidationRules>
<!-- 我们自定义的验证规则 -->
<local:AgeValidationRule />
<ExceptionValidationRule></ExceptionValidationRule>
</Binding.ValidationRules>
</Binding>
</TextBox.Text>
<Validation.ErrorTemplate>
<ControlTemplate>
<!-- ControlTemplate要求只能有一个子级,所以加个容器控件DockPanel -->
<DockPanel>
<!-- AdornedElementPlaceholder就是要验证的控件本身,本例里是个TextBox -->
<AdornedElementPlaceholder />
<TextBlock Foreground="Red" FontSize="20" Text="*" />
</DockPanel>
</ControlTemplate>
</Validation.ErrorTemplate>
</TextBox>
</Grid>
</Window>
我们注意到Textbox.Validation属性的ErrorTemplate是发生错误时使用的模板,我们重新new了一个ControlTemplate来代替这个模板。在这个模板里我们定义了一个DockPanel作为容器控件,使用 占位标记AdornedElementPlaceholder 标记了TextBox的位置,并在它后面添加两个 字符"*"号。这可能有点难以理解。换个说法是,每个TextBox都有个Validation属性,Validation包含了一些和验证相关的像,包含有个当验证失败时的显示模板。而我们重新定义了个显示模板。这个模板里有个占位符,占位符表示TextBox本身,我们在这个模板的占位符后面添加一些字符 红色的"*" 号。那么当TextBox在执行时,如果失败,就会把 错误模板 显示出来,并在 占位符位置 显示自己。
我们换个另外的方式来改变视图效果,使用style 方式。
在窗体资源里添加一个style,style这个东西呢,类似web开发中的css。他有个属性TargetType 指示了这个样式的作用域。本例中指示了 所有的TextBox,style的强大之处还有个Triggers就是触发器。本例中触发器指向一个属性Validation.HasError属性,当这属性的值为"True"时,触发Trigger包含的样式。当不等于"True"时,自动改回原来的样式。很强大吧。Setter元素提供了设置目标对象属性的方法,我们直接更改了Textbox.ToolTop属性,那么当鼠标移动到控件上时,就会显示发生错误的原因。
代码
1 <Window.Resources>
2 <Style TargetType="TextBox">
3 <Style.Triggers>
4 <Trigger Property="Validation.HasError" Value="True">
5 <Setter Property="Background" Value="#DDD" />
6 <Setter Property="Foreground" Value="Red" />
7 <Setter Property="ToolTip"
8 Value="{Binding RelativeSource={RelativeSource Self},Path=(Validation.Errors)[0].ErrorContent}"/>
9 </Trigger>
10 </Style.Triggers>
11 </Style>
12 </Window.Resources>
这句<Setter Property="ToolTip"
Value="{Binding RelativeSource={RelativeSource Self},Path=(Validation.Errors)[0].ErrorContent}"/>
完成了获得关联数据源,并绑定错误提示的操作。
下载代码
本节完。
待续ing...

相关文章推荐
- WPF入门(六)样式Style
- WPF入门(七)绑定一个集合
- WPF入门(八)布局(layout)
- WPF入门(八)布局(layout) port 2
- android开发(1) - 登录界面的布局演示
- android开发(1) - 登录界面的布局演示
- android开发(2) - 九宫格的实现
- android开发(3) 可滚动的录入表单演示
- 一直以来伴随我的一些学习习惯
- 质数因子(java)
- HDU 5387 Clock (MUT#8 模拟)
- javascript事件委托,事件代理,元素绑定多个事件之练习篇
- 第七章 查找
- POJ 2075:Tangled in Cables 【Prim】
- Gson解析数组和list容器
- noip1997 街道 (动态规划,方格左下角到右上角路径数)
- CodeForces 570B Simple Game 概率
- NY 题目58 最少步数 【BFS】
- Python3 ctypes简单使用
- 排序问题思考