IOS开发之——绘图(CGContext)
2015-05-15 15:38
471 查看
0 CGContextRef context = UIGraphicsGetCurrentContext(); 设置上下文
1 CGContextMoveToPoint 开始画线
2 CGContextAddLineToPoint 画直线
4 CGContextAddEllipseInRect 画一椭圆
4 CGContextSetLineCap 设置线条终点形状
4 CGContextSetLineDash 画虚线
4 CGContextAddRect 画一方框
4 CGContextStrokeRect 指定矩形
4 CGContextStrokeRectWithWidth 指定矩形线宽度
4 CGContextStrokeLineSegments 一些直线
5 CGContextAddArc 画已曲线 前俩店为中心 中间俩店为起始弧度 最后一数据为0则顺时针画 1则逆时针
5 CGContextAddArcToPoint(context,0,0, 2, 9, 40);//先画俩条线从point 到 弟1点 , 从弟1点到弟2点的线 切割里面的圆
6 CGContextSetShadowWithColor 设置阴影
7 CGContextSetRGBFillColor 这只填充颜色
7 CGContextSetRGBStrokeColor 画笔颜色设置
7 CGContextSetFillColorSpace 颜色空间填充
7 CGConextSetStrokeColorSpace 颜色空间画笔设置
8 CGContextFillRect 补充当前填充颜色的rect
8 CGContextSetAlaha 透明度
9 CGContextTranslateCTM 改变画布位置
10 CGContextSetLineWidth 设置线的宽度
11 CGContextAddRects 画多个线
12 CGContextAddQuadCurveToPoint 画曲线
13 CGContextStrokePath 开始绘制图片
13 CGContextDrawPath 设置绘制模式
14 CGContextClosePath 封闭当前线路
15 CGContextTranslateCTM(context, 0, rect.size.height); CGContextScaleCTM(context, 1.0, -1.0);反转画布
16 CGContextSetInterpolationQuality 背景内置颜色质量等级
16 CGImageCreateWithImageInRect 从原图片中取小图
17 字符串的 写入可用 nsstring本身的画图方法 - (CGSize)drawInRect:(CGRect)rect withFont:(UIFont *)font lineBreakMode:(UILineBreakMode)lineBreakMode
alignment:(UITextAlignment)alignment;来写进去即可
18对图片放大缩小的功能就是慢了点
UIGraphicsBeginImageContext(newSize);
UIImage* newImage = UIGraphicsGetImageFromCurrentImageContext();
UIGraphicsEndImageContext();
19 CGColorGetComponents() 返回颜色的各个直 以及透明度 可用只读const float 来接收 是个数组
20 画图片 CGImageRef image=CGImageRetain(img.CGImage);
CGContextDrawImage(context, CGRectMake(10.0, height -
100.0, 90.0, 90.0), image);
21 实现逐变颜色填充方法 CGContextClip(context);
CGColorSpaceRef rgb = CGColorSpaceCreateDeviceRGB();
CGFloat colors[] =
{
204.0 / 255.0, 224.0 / 255.0, 244.0 / 255.0, 1.00,
29.0 / 255.0, 156.0 / 255.0, 215.0 / 255.0, 1.00,
0.0 / 255.0, 50.0 / 255.0, 126.0 / 255.0, 1.00,
};
CGGradientRef gradient = CGGradientCreateWithColorComponents
(rgb, colors, NULL, sizeof(colors)/(sizeof(colors[0])*4));
CGColorSpaceRelease(rgb);
CGContextDrawLinearGradient(context, gradient,CGPointMake
(0.0,0.0) ,CGPointMake(0.0,self.frame.size.height),
kCGGradientDrawsBeforeStartLocation);
22 注: 画完图后,必须
先用CGContextStrokePath来描线,即形状
后用CGContextFillPath来填充形状内的颜色.
填充一个路径的时候,路径里面的子路径都是独立填充的。
假如是重叠的路径,决定一个点是否被填充,有两种规则
1,nonzero winding number rule:非零绕数规则,假如一个点被从左到右跨过,计数器+1,从右到左跨过,计数器-1,最后,如果结果是0,那么不填充,如果是非零,那么填充。
2,even-odd rule: 奇偶规则,假如一个点被跨过,那么+1,最后是奇数,那么要被填充,偶数则不填充,和方向没有关系。
Function
Description
CGContextEOFillPath
使用奇偶规则填充当前路径
CGContextFillPath
使用非零绕数规则填充当前路径
CGContextFillRect
填充指定的矩形
CGContextFillRects
填充指定的一些矩形
CGContextFillEllipseInRect
填充指定矩形中的椭圆
CGContextDrawPath
两个参数决定填充规则,kCGPathFill表示用非零绕数规则,kCGPathEOFill表示用奇偶规则,kCGPathFillStroke表示填充,kCGPathEOFillStroke表示描线,不是填充
设置当一个颜色覆盖上另外一个颜色,两个颜色怎么混合
默认方式是
result = (alpha * foreground) + (1 - alpha) * background
CGContextSetBlendMode :设置blend mode.
CGContextSaveGState :保存blend mode.
CGContextRestoreGState:在没有保存之前,用这个函数还原blend mode.
CGContextSetBlendMode 混合俩种颜色
http://www.cocoachina.com/bbs/read.php?tid=75122&page=1
================================================================

IOS直线样式
================================================================
虚线
画虚线需要用到函数:
CGContextSetLineDash
此函数需要四个参数:
context – 这个不用多说
phase - 稍后再说
lengths – 指明虚线是如何交替绘制,具体看例子
count – lengths数组的长度
CGContextRef context =UIGraphicsGetCurrentContext();
CGContextBeginPath(context);
CGContextSetLineWidth(context, 2.0);
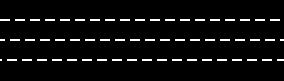
CGContextSetStrokeColorWithColor(context, [UIColorwhiteColor].CGColor);
float lengths[] = {10,10};
CGContextSetLineDash(context, 0, lengths,2);
CGContextMoveToPoint(context, 10.0, 20.0);
CGContextAddLineToPoint(context, 310.0,20.0);
CGContextStrokePath(context);
CGContextClosePath(context);
lengths的值{10,10}表示先绘制10个点,再跳过10个点,如此反复,如图:

如果把lengths值改为{10, 20, 10},则表示先绘制10个点,跳过20个点,绘制10个点,跳过10个点,再绘制20个点,如此反复,如图:

注意count的值等于lengths数组的长度
phase参数表示在第一个虚线绘制的时候跳过多少个点,举例说明:
float lengths[] = {10,5};
CGContextSetLineDash(context, 0, lengths, 2);
CGContextMoveToPoint(context, 0.0, 20.0);
CGContextAddLineToPoint(context, 310.0, 20.0);
CGContextStrokePath(context);
CGContextSetLineDash(context, 5, lengths, 2);
CGContextMoveToPoint(context, 0.0, 40.0);
CGContextAddLineToPoint(context, 310.0, 40.0);
CGContextStrokePath(context);
CGContextSetLineDash(context, 8, lengths, 2);
CGContextMoveToPoint(context, 0.0, 60.0);
CGContextAddLineToPoint(context, 310.0, 60.);
CGContextStrokePath(context);
如图显示:
由于lengths值为{10,5},第一条线就是绘制10,跳过5,反复绘制。
第二条线的phase值为5,则首先绘制【10减去5】,再跳过5,绘制10,反复绘制。
第三条给也如此,先绘制2,再跳过5,如此反复。
CGContextSetStrokeColorWithColor(myContext, [UIColor blackColor].CGColor);
CGContextSetLineDash (myContext,phase,lengths,2);
CGContextClosePath(myContext);
CGContextStrokePath(myContext);
================================================================
切线
- (void)drawRect:(CGRect)rect {
CGContextRef context = UIGraphicsGetCurrentContext();
CGContextSetLineWidth(context, 2.0);
CGContextSetStrokeColorWithColor(context, [UIColor blueColor].CGColor);
CGContextMoveToPoint(context, 100, 100);
CGContextAddArcToPoint(context, 100,200, 300,200, 100);
CGContextStrokePath(context);
}

================================================================
- (void)drawRect:(CGRect)rect {
CGContextRef context = UIGraphicsGetCurrentContext();
CGContextSetLineWidth(context, 2.0);
CGContextSetStrokeColorWithColor(context, [UIColor blueColor].CGColor);
CGRect rectangle = CGRectMake(60,170,200,80);
CGContextAddEllipseInRect(context, rectangle);
CGContextStrokePath(context);
}

================================================================
- (void)drawRect:(CGRect)rect {
CGContextRef context = UIGraphicsGetCurrentContext();
CGContextSetLineWidth(context, 2.0);
CGContextSetStrokeColorWithColor(context, [UIColor blueColor].CGColor);
CGContextMoveToPoint(context, 10, 10);
CGContextAddCurveToPoint(context, 0, 50, 300, 250, 300, 400);
CGContextStrokePath(context);
}

================================================================
- (void)drawRect:(CGRect)rect {
CGContextRef context = UIGraphicsGetCurrentContext();
CGContextSetLineWidth(context, 2.0);
CGContextSetStrokeColorWithColor(context, [UIColor blueColor].CGColor);
CGContextMoveToPoint(context, 10, 200);
CGContextAddQuadCurveToPoint(context, 150, 10, 300, 200);
CGContextStrokePath(context);
}

================================================================
- (void)drawRect:(CGRect)rect {
CGContextRef context = UIGraphicsGetCurrentContext();
CGContextSetLineWidth(context, 5.0);
CGContextSetStrokeColorWithColor(context, [UIColor blueColor].CGColor);
CGFloat dashArray[] = {2,6,4,2};
CGContextSetLineDash(context, 3, dashArray, 4);
CGContextMoveToPoint(context, 10, 200);
CGContextAddQuadCurveToPoint(context, 150, 10, 300, 200);
CGContextStrokePath(context);
}

转载自http://blog.csdn.net/zhenyu5211314/article/details/24230581?utm_source=tuicool
1 CGContextMoveToPoint 开始画线
2 CGContextAddLineToPoint 画直线
4 CGContextAddEllipseInRect 画一椭圆
4 CGContextSetLineCap 设置线条终点形状
4 CGContextSetLineDash 画虚线
4 CGContextAddRect 画一方框
4 CGContextStrokeRect 指定矩形
4 CGContextStrokeRectWithWidth 指定矩形线宽度
4 CGContextStrokeLineSegments 一些直线
5 CGContextAddArc 画已曲线 前俩店为中心 中间俩店为起始弧度 最后一数据为0则顺时针画 1则逆时针
5 CGContextAddArcToPoint(context,0,0, 2, 9, 40);//先画俩条线从point 到 弟1点 , 从弟1点到弟2点的线 切割里面的圆
6 CGContextSetShadowWithColor 设置阴影
7 CGContextSetRGBFillColor 这只填充颜色
7 CGContextSetRGBStrokeColor 画笔颜色设置
7 CGContextSetFillColorSpace 颜色空间填充
7 CGConextSetStrokeColorSpace 颜色空间画笔设置
8 CGContextFillRect 补充当前填充颜色的rect
8 CGContextSetAlaha 透明度
9 CGContextTranslateCTM 改变画布位置
10 CGContextSetLineWidth 设置线的宽度
11 CGContextAddRects 画多个线
12 CGContextAddQuadCurveToPoint 画曲线
13 CGContextStrokePath 开始绘制图片
13 CGContextDrawPath 设置绘制模式
14 CGContextClosePath 封闭当前线路
15 CGContextTranslateCTM(context, 0, rect.size.height); CGContextScaleCTM(context, 1.0, -1.0);反转画布
16 CGContextSetInterpolationQuality 背景内置颜色质量等级
16 CGImageCreateWithImageInRect 从原图片中取小图
17 字符串的 写入可用 nsstring本身的画图方法 - (CGSize)drawInRect:(CGRect)rect withFont:(UIFont *)font lineBreakMode:(UILineBreakMode)lineBreakMode
alignment:(UITextAlignment)alignment;来写进去即可
18对图片放大缩小的功能就是慢了点
UIGraphicsBeginImageContext(newSize);
UIImage* newImage = UIGraphicsGetImageFromCurrentImageContext();
UIGraphicsEndImageContext();
19 CGColorGetComponents() 返回颜色的各个直 以及透明度 可用只读const float 来接收 是个数组
20 画图片 CGImageRef image=CGImageRetain(img.CGImage);
CGContextDrawImage(context, CGRectMake(10.0, height -
100.0, 90.0, 90.0), image);
21 实现逐变颜色填充方法 CGContextClip(context);
CGColorSpaceRef rgb = CGColorSpaceCreateDeviceRGB();
CGFloat colors[] =
{
204.0 / 255.0, 224.0 / 255.0, 244.0 / 255.0, 1.00,
29.0 / 255.0, 156.0 / 255.0, 215.0 / 255.0, 1.00,
0.0 / 255.0, 50.0 / 255.0, 126.0 / 255.0, 1.00,
};
CGGradientRef gradient = CGGradientCreateWithColorComponents
(rgb, colors, NULL, sizeof(colors)/(sizeof(colors[0])*4));
CGColorSpaceRelease(rgb);
CGContextDrawLinearGradient(context, gradient,CGPointMake
(0.0,0.0) ,CGPointMake(0.0,self.frame.size.height),
kCGGradientDrawsBeforeStartLocation);
22 注: 画完图后,必须
先用CGContextStrokePath来描线,即形状
后用CGContextFillPath来填充形状内的颜色.
填充一个路径的时候,路径里面的子路径都是独立填充的。
假如是重叠的路径,决定一个点是否被填充,有两种规则
1,nonzero winding number rule:非零绕数规则,假如一个点被从左到右跨过,计数器+1,从右到左跨过,计数器-1,最后,如果结果是0,那么不填充,如果是非零,那么填充。
2,even-odd rule: 奇偶规则,假如一个点被跨过,那么+1,最后是奇数,那么要被填充,偶数则不填充,和方向没有关系。
Function
Description
CGContextEOFillPath
使用奇偶规则填充当前路径
CGContextFillPath
使用非零绕数规则填充当前路径
CGContextFillRect
填充指定的矩形
CGContextFillRects
填充指定的一些矩形
CGContextFillEllipseInRect
填充指定矩形中的椭圆
CGContextDrawPath
两个参数决定填充规则,kCGPathFill表示用非零绕数规则,kCGPathEOFill表示用奇偶规则,kCGPathFillStroke表示填充,kCGPathEOFillStroke表示描线,不是填充
设置当一个颜色覆盖上另外一个颜色,两个颜色怎么混合
默认方式是
result = (alpha * foreground) + (1 - alpha) * background
CGContextSetBlendMode :设置blend mode.
CGContextSaveGState :保存blend mode.
CGContextRestoreGState:在没有保存之前,用这个函数还原blend mode.
CGContextSetBlendMode 混合俩种颜色
http://www.cocoachina.com/bbs/read.php?tid=75122&page=1
================================================================
IOS直线样式
================================================================
虚线
画虚线需要用到函数:
CGContextSetLineDash
此函数需要四个参数:
context – 这个不用多说
phase - 稍后再说
lengths – 指明虚线是如何交替绘制,具体看例子
count – lengths数组的长度
CGContextRef context =UIGraphicsGetCurrentContext();
CGContextBeginPath(context);
CGContextSetLineWidth(context, 2.0);
CGContextSetStrokeColorWithColor(context, [UIColorwhiteColor].CGColor);
float lengths[] = {10,10};
CGContextSetLineDash(context, 0, lengths,2);
CGContextMoveToPoint(context, 10.0, 20.0);
CGContextAddLineToPoint(context, 310.0,20.0);
CGContextStrokePath(context);
CGContextClosePath(context);
lengths的值{10,10}表示先绘制10个点,再跳过10个点,如此反复,如图:
如果把lengths值改为{10, 20, 10},则表示先绘制10个点,跳过20个点,绘制10个点,跳过10个点,再绘制20个点,如此反复,如图:
注意count的值等于lengths数组的长度
phase参数表示在第一个虚线绘制的时候跳过多少个点,举例说明:
float lengths[] = {10,5};
CGContextSetLineDash(context, 0, lengths, 2);
CGContextMoveToPoint(context, 0.0, 20.0);
CGContextAddLineToPoint(context, 310.0, 20.0);
CGContextStrokePath(context);
CGContextSetLineDash(context, 5, lengths, 2);
CGContextMoveToPoint(context, 0.0, 40.0);
CGContextAddLineToPoint(context, 310.0, 40.0);
CGContextStrokePath(context);
CGContextSetLineDash(context, 8, lengths, 2);
CGContextMoveToPoint(context, 0.0, 60.0);
CGContextAddLineToPoint(context, 310.0, 60.);
CGContextStrokePath(context);
如图显示:
由于lengths值为{10,5},第一条线就是绘制10,跳过5,反复绘制。
第二条线的phase值为5,则首先绘制【10减去5】,再跳过5,绘制10,反复绘制。
第三条给也如此,先绘制2,再跳过5,如此反复。
CGContextSetStrokeColorWithColor(myContext, [UIColor blackColor].CGColor);
CGContextSetLineDash (myContext,phase,lengths,2);
CGContextClosePath(myContext);
CGContextStrokePath(myContext);
================================================================
切线
- (void)drawRect:(CGRect)rect {
CGContextRef context = UIGraphicsGetCurrentContext();
CGContextSetLineWidth(context, 2.0);
CGContextSetStrokeColorWithColor(context, [UIColor blueColor].CGColor);
CGContextMoveToPoint(context, 100, 100);
CGContextAddArcToPoint(context, 100,200, 300,200, 100);
CGContextStrokePath(context);
}
================================================================
- (void)drawRect:(CGRect)rect {
CGContextRef context = UIGraphicsGetCurrentContext();
CGContextSetLineWidth(context, 2.0);
CGContextSetStrokeColorWithColor(context, [UIColor blueColor].CGColor);
CGRect rectangle = CGRectMake(60,170,200,80);
CGContextAddEllipseInRect(context, rectangle);
CGContextStrokePath(context);
}
================================================================
- (void)drawRect:(CGRect)rect {
CGContextRef context = UIGraphicsGetCurrentContext();
CGContextSetLineWidth(context, 2.0);
CGContextSetStrokeColorWithColor(context, [UIColor blueColor].CGColor);
CGContextMoveToPoint(context, 10, 10);
CGContextAddCurveToPoint(context, 0, 50, 300, 250, 300, 400);
CGContextStrokePath(context);
}
================================================================
- (void)drawRect:(CGRect)rect {
CGContextRef context = UIGraphicsGetCurrentContext();
CGContextSetLineWidth(context, 2.0);
CGContextSetStrokeColorWithColor(context, [UIColor blueColor].CGColor);
CGContextMoveToPoint(context, 10, 200);
CGContextAddQuadCurveToPoint(context, 150, 10, 300, 200);
CGContextStrokePath(context);
}
================================================================
- (void)drawRect:(CGRect)rect {
CGContextRef context = UIGraphicsGetCurrentContext();
CGContextSetLineWidth(context, 5.0);
CGContextSetStrokeColorWithColor(context, [UIColor blueColor].CGColor);
CGFloat dashArray[] = {2,6,4,2};
CGContextSetLineDash(context, 3, dashArray, 4);
CGContextMoveToPoint(context, 10, 200);
CGContextAddQuadCurveToPoint(context, 150, 10, 300, 200);
CGContextStrokePath(context);
}
转载自http://blog.csdn.net/zhenyu5211314/article/details/24230581?utm_source=tuicool

相关文章推荐
- (转)IOS开发之——绘图(CGContext)
- IOS开发之——绘图(CGContext)
- IOS开发之——绘图(CGContext)
- IOS开发之——绘图(CGContext)
- iOS 开发 Quartz 2D+ UIBezierPath绘图大全详解
- iOS开发UI篇—Quartz2D使用(绘图路径)
- ios开发学习--绘图(Drawing)效果源码分享
- iOS开发学习之Quartz2D绘图
- IOS开发笔记之绘图(CGContext小记)
- IOS 图形开发绘图小结
- IOS开发(107)之Quartz 2D绘图
- 【iOS开发-80】Quartz2D绘图简介:直线/圆形/椭圆/方形以及上下文栈管理CGContextSaveGState/CGContextRestoreGState
- iOS开发之Quartz2D 五:UIKIT 绘图演练,画文字,画图片
- iOS开发系列-动画绘图CALayer
- iOS开发UI篇—Quartz2D使用(绘图路径)
- ios开发中关于绘图的问题
- ios 开发中跟绘图相关的CGFloat,CGPoint,CGSize,CGRect,CGRectZero
- iOS绘图系列二:画直线 CGContextMoveToPoint,CGContextAddLineToPoint,CGContextAddLines,
- IOS开发之—绘图 CGContext
- IOS开发之绘图函数