The Swift Code之UILabel的创建,以及不同的状态和外观
2015-04-02 10:07
477 查看
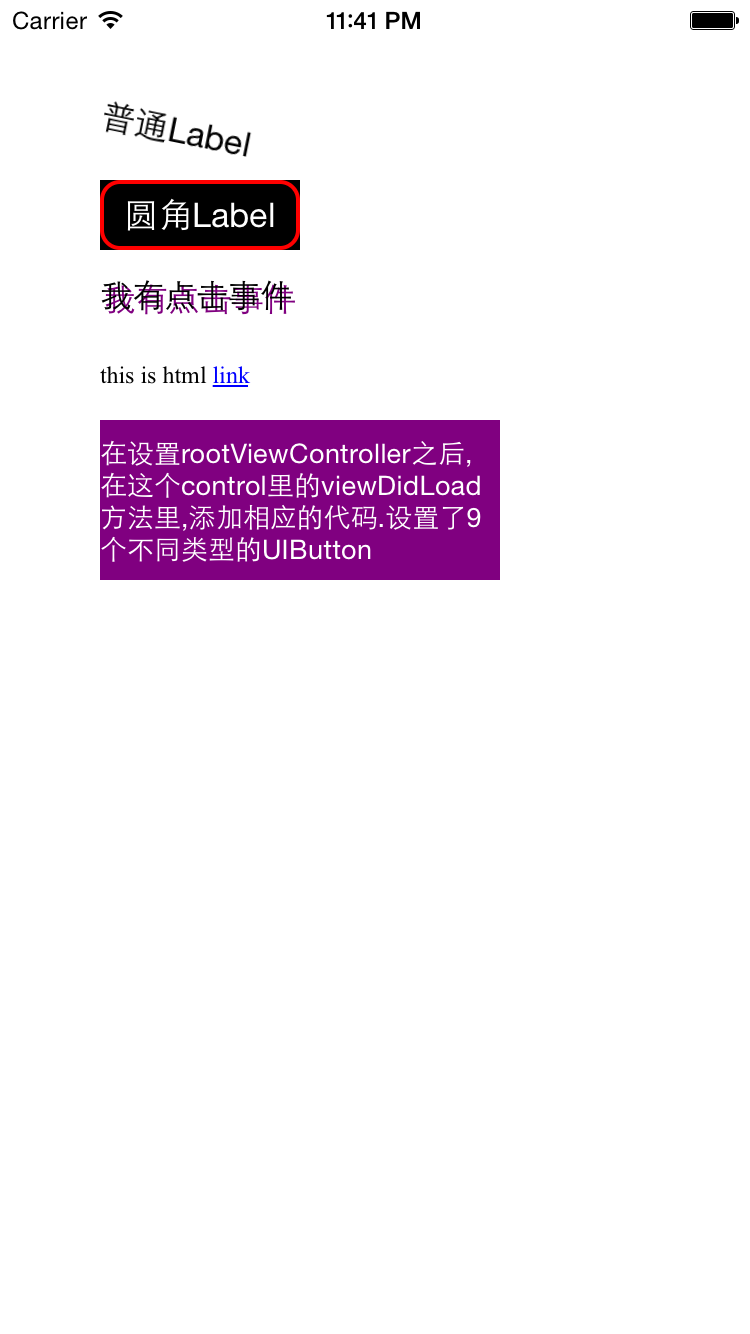
UILabel主要是一些标签文本的使用控件,教程里主要涉及到的是UILabel的普通创建及转变效果,带背景边框的label,还有圆角的设置,给UILabel增加点击时间,阴影效果,文本的排版效果(根据Label的宽度调整字体),多行文本的使用,显示HTML标签代码等等.下面是代码,可以复制到Xcode里执行.其他的相关属性,详细查看苹果开发文档
效果如下:
转载自吴统威的博客:http://www.wutongwei.com/front/infor_showone.tweb?id=89
import UIKit

class ViewController: UIViewController {

override func viewDidLoad() {
super.viewDidLoad()

//普通label
var label:UILabel = UILabel(frame: CGRect(x: 50, y: 50, width: 100, height: 35))
label.text = "普通Label"
label.transform = CGAffineTransformMakeRotation(0.2)
self.view.addSubview(label)

//带背景和边框的label
//Label的圆角对其背景不起作用,只对其边框起作用
var label2:UILabel = UILabel(frame: CGRect(x: 50, y: 90, width: 100, height: 35))
label2.text = "圆角Label"
label2.textColor = UIColor.whiteColor()
label2.backgroundColor = UIColor.blackColor()
label2.textAlignment = NSTextAlignment.Center
label2.layer.cornerRadius = 10
label2.layer.borderWidth = 2
label2.layer.borderColor = UIColor.redColor().CGColor

self.view.addSubview(label2)

//UILabel拥有点击事件
var label3:UILabel = UILabel(frame: CGRect(x: 50, y: 130, width: 100, height: 35))
label3.text = "我有点击事件"
label3.adjustsFontSizeToFitWidth = true //根据label的宽度,改变字体的大小

var tap:UITapGestureRecognizer = UITapGestureRecognizer(target: self, action: "click:")
label3.userInteractionEnabled = true
label3.addGestureRecognizer(tap)

label3.shadowColor = UIColor.purpleColor() //设置shadow
label3.shadowOffset = CGSize(width: 2, height: 2)

self.view.addSubview(label3)

//让Label显示html标签
var label4:UILabel = UILabel(frame: CGRect(x: 50, y: 170, width: 300, height: 35))
let html = "this is html <a href=\"http://www.baidu.com\">link</a>"
let data = html.dataUsingEncoding(NSUTF32StringEncoding, allowLossyConversion: false)

var atext = NSAttributedString(data: data!, options: [NSDocumentTypeDocumentAttribute : NSHTMLTextDocumentType], documentAttributes: nil, error: nil)

label4.multipleTouchEnabled = true
label4.attributedText = atext

self.view.addSubview(label4)

//设置多行文本
var label5:UILabel = UILabel(frame: CGRect(x: 50, y: 210, width: 200, height: 80))
label5.backgroundColor = UIColor.purpleColor()
label5.textColor = UIColor.whiteColor()
label5.text = "在设置rootViewController之后,在这个control里的viewDidLoad方法里,添加相应的代码.设置了9个不同类型的UIButton";
label5.lineBreakMode = NSLineBreakMode.ByTruncatingTail
label5.numberOfLines = 10
label5.adjustsFontSizeToFitWidth = true
self.view.addSubview(label5)

}

override func didReceiveMemoryWarning() {
super.didReceiveMemoryWarning()
// Dispose of any resources that can be recreated.
}

func click(sender:AnyObject){
var tap:UITapGestureRecognizer = sender as! UITapGestureRecognizer

NSLog("this is click")
}

}
效果如下:
转载自吴统威的博客:http://www.wutongwei.com/front/infor_showone.tweb?id=89

相关文章推荐
- The Swift Code之UILabel的创建,以及不同的状态和外观
- The Swift Code之UITextView的创建,以及不同的状态和外观
- THE SWIFT CODE之设置UIBUTTON的不同方式创建,以及不同的状态和外观
- The Swift Code之设置UIButton的不同方式创建,以及不同的状态和外观
- The Swift Code之UITextView的创建,以及不同的状态和外观
- The Swift Code之设置UIButton的不同方式创建,以及不同的状态和外观
- The Swift Code之设置UIButton的不同方式创建,以及不同的状态和外观
- The Swift Code之UITextView的创建,以及不同的状态和外观
- The Swift Code之UILabel的创建,以及不同的状态和外观
- Swift3.0-UILabel、UIButton、UIImageView创建以及使用
- swift安装以及创建项目
- LinearLayout详解二:LinearLayout的创建过程以及状态全程解析
- D3D游戏降帧的动态创建D3D设备以及ShellCode HOOK玩法
- Swift游戏实战-跑酷熊猫 06 创建平台类以及平台工厂类
- Code Fragment-对于一些状态性接口,应该有不同的阶段
- Android中View(视图)绘制不同状态背景图片原理深入分析以及StateListDrawable使用详解
- JS中不同的函数创建方式以及相应的使用方法
- Android中View(视图)绘制不同状态背景图片原理深入分析以及StateListDrawable使用详解
- Android中View(视图)绘制不同状态背景图片原理深入分析以及StateListDrawable使用详解
- audioqueue的各种状态总结,以及不同状态下参数问题