struts2上传文件
2015-02-14 15:56
281 查看
1. 开发环境
Myeclipse

Version: 10.0
Build id: 10.0-20111028

Struts2.3及commons-fileupload1.3.1、commons-io-2.2
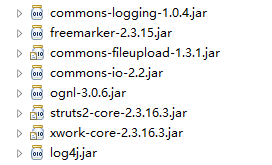
简单了解一下这些常用的jar包:

commons-logging:日志处理的接口。只是一个简单的log接口,通常的使用会结合相关的实现工具来开发。例如:log4j、logKit等。当加入到项目中后,会根据项目中有哪些日志的配置来自动去扫描并配置制定的日志工具。通常项目配置为commons-logging和log4j。
freemarker:一种类似于EL、jstl表达式的界面显示模板语言。
Commons-fileupload、commons-io:用于支持文件上传和文件读写操作的第三方包。
ognl:在struts2特有的界面标签显示语言。一般情况很少用,因为jstl已经将这些定义更加规范和统一。
Struts2-core:struts2的核心包。
xwork:也是一款非常优秀的mvc框架,而struts2就是基于xwork来开发的。
一般的思路:对于此类问题,一般的思路就是从界面拿到对应文件路径,在代码中读取文件输出流,在代码中写入到指定路径。很不幸的是struts2做了非常好的封装,以至于更多的细节问题都屏蔽了。
Struts.xml
<?xml version="1.0" encoding="UTF-8" ?>
<!DOCTYPE struts PUBLIC
"-//Apache Software Foundation//DTD Struts Configuration 2.0//EN"
"http://struts.apache.org/dtds/struts-2.0.dtd">

<struts>
<!--开发者模式 -->
<constant name="struts.devMode" value="true" />
<constant name="struts.i18n.encoding" value="utf-8" />

<package name="upload" namespace="/" extends="struts-default">

<action name="showUpload">
<result>/upload.jsp</result>
</action>

<action name="doUpload" class="com.cfl.StrutsFileUpload">
<result name="input">/upload.jsp</result>
<result>/upload_success.jsp</result>
</action>

</package>

</struts>
简单介绍一下这个文件的配置,文件默认配置名为struts,是struts2的主要配置文件。主要的配置就是
<action name="actionname">
<result>jsp路径</result>
</action>
1.开发者模式配置:
该配置中有 <constant name="struts.devMode" value="true" />,这个主要是将项目配置为开发者模式。既然有开发者模式,对应会有一个产品模式
proMode。配置为开发者模式之后,每次会重新加载配置的资源文件,不仅仅是jsp热部署等。而是项目的配置文件如struts.xml、web.xml的每次变动都会重新加载。这样对于开发者来讲,就不用每次在开发时都去重新启动tomcat或者jboss了。但是随着带来也是性能的损耗。往往都是这样效率的提高,伴随着性能的下降。
2.extends=”struts-default”
在struts2-core的jar下面有这样的一个文件struts-default.xml,一个struts2的样板配置。而这个配置中就有这样一个struts-default,是用来配置struts2的18个核心filter的,算是struts2的一个约定吧。
Web.xml
<?xml version="1.0" encoding="UTF-8"?>
<web-app id="WebApp_ID" version="2.4"
xmlns="http://java.sun.com/xml/ns/j2ee"
xmlns:xsi="http://www.w3.org/2001/XMLSchema-instance"
xsi:schemaLocation="http://java.sun.com/xml/ns/j2ee http://java.sun.com/xml/ns/j2ee/web-app_2_4.xsd">
<display-name>customization</display-name>
<!--清楚缓存 -->
<filter>
<filter-name>struts-cleanup</filter-name>
<filter-class>
org.apache.struts2.dispatcher.ActionContextCleanUp
</filter-class>
</filter>

<filter>
<filter-name>struts2</filter-name>
<filter-class>
org.apache.struts2.dispatcher.FilterDispatcher
</filter-class>
</filter>

<filter-mapping>
<filter-name>struts-cleanup</filter-name>
<url-pattern>/*</url-pattern>
</filter-mapping>

<filter-mapping>
<filter-name>struts2</filter-name>
<url-pattern>/*</url-pattern>
</filter-mapping>

</web-app>
这个是最常见的配置文件了,作为整个项目的入口。该demo中配置了两个分发器,分别是清理缓存与分发控制的filter。在网上查阅资料中讲,第一个分发器主要是用来清理缓存的,如果没有配置该过滤器可能在上传文件时无法获取文件。
Action
package com.cfl;

import java.io.File;

import javax.servlet.ServletContext;

import org.apache.commons.io.FileUtils;
import org.apache.struts2.util.ServletContextAware;

import com.opensymphony.xwork2.ActionSupport;

public class StrutsFileUpload extends ActionSupport implements
ServletContextAware {

//文件名
private File upload;
//文件类型
private String uploadContentType;
//文件名
private String uploadFileName;

private ServletContext context;

public String execute() throws Exception {

try {

//获取服务器文件路径
String serverFolder = context.getRealPath("/uploadFolder");
//获取文件名
String fileName = uploadFileName;
//新建文件
File file = new File(serverFolder, fileName);
//将源文件复制到目的文件
FileUtils.copyFile(upload, file);

setUploadFileName(file.getPath());

} catch (Exception e) {

addActionError(e.getMessage());

return INPUT;
}

return SUCCESS;

}

/**
* 得到上传文件
* @return
*/
public File getUpload() {
return upload;
}
/**
* 设置上传文件
* @param upload
*/
public void setUpload(File upload) {
this.upload = upload;
}
/**
* 得到上传文件类型
* @return
*/
public String getUploadContentType() {
return uploadContentType;
}
/**
* 设置上传文件类型
* @param uploadContentType
*/
public void setUploadContentType(String uploadContentType) {
this.uploadContentType = uploadContentType;
}
/**
* 得到上传文件名
* @return
*/
public String getUploadFileName() {
return uploadFileName;
}
/**
* 设置上传文件类型
* @param uploadFileName
*/
public void setUploadFileName(String uploadFileName) {
this.uploadFileName = uploadFileName;
}
/**
* 设置配置文件上下文
*/
public void setServletContext(ServletContext context) {
this.context = context;
}

}
//文件名 private File upload; //文件类型 private String uploadContentType; //文件名 private String uploadFileName; 这三个属性都是struts2在文件上传时封装好了的,所以只要前台jsp页面与之对应好File的属性名,相应匹配为**ContentType、**FileName。这样省去了很多工作。对于整个action来讲,这三个变量都是共享的。

相关文章推荐
- Struts2文件上传在配置fileUpload拦截器中设置文件大小无效的问题
- 在Struts2中实现文件上传(一)
- struts2-上传文件(1)
- Struts2学习笔记14:Struts2的文件上传和下载【续】
- 在Struts2中实现文件上传
- 使用struts2中的文件上传
- Ext2.1 + Struts2 实现简单的文件上传
- 手工处理 Struts2 框架上传的文件
- Struts2中文件过大上传失败问题解决方案org.apache.commons.fileupload.FileUploadBase$SizeLimitExceededException
- 在Struts2中实现文件上传(二)
- struts2文件上传
- struts2文件上传
- Struts2 上传文件时取得文件扩展名的最好方法
- struts2文件上传的过滤
- Struts2文件的上传和下载
- 一篇关于struts2文件上传的好文章
- Struts2教程7:上传任意多个文件
- Struts2教程7:上传任意多个文件
- Struts2学习笔记13:Struts2的文件上传和下载
- struts2 common-fileupload上传文件大小限制