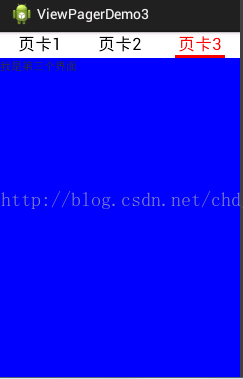
使用ViewPager+Fragment实现选项卡切换效果
2015-01-28 18:39
519 查看
原博客:http://blog.csdn.net/chdjj/article/details/21564503
后面我添加了页卡的点击事件,大家一起学习下。
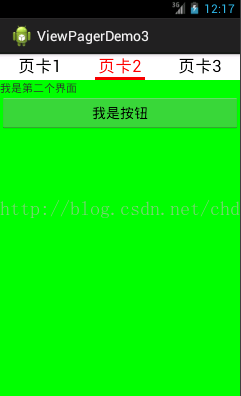
显示效果:
实现过程:
1.创建3个选项卡中的内容,即三个Fragment。
这里仅贴出其中一个:
Tab2:
[java] view
plaincopy


package com.example.viewpagerdemo3;
import android.os.Bundle;
import android.support.v4.app.Fragment;
import android.view.LayoutInflater;
import android.view.View;
import android.view.View.OnClickListener;
import android.view.ViewGroup;
import android.widget.Button;
import android.widget.Toast;
public class Tab2 extends Fragment
{
private Button but = null;
@Override
public View onCreateView(LayoutInflater inflater, ViewGroup container,
Bundle savedInstanceState)
{
View view = inflater.inflate(R.layout.tab2,null);//注意不要指定父视图
but = (Button) view.findViewById(R.id.but);
return view;
}
@Override
public void onActivityCreated(Bundle savedInstanceState)
{
super.onActivityCreated(savedInstanceState);
but.setOnClickListener(new OnClickListener()
{
@Override
public void onClick(View v)
{
Toast.makeText(Tab2.this.getActivity(),"hahah", 0).show();
}
});
}
}
布局:
[html] view
plaincopy
<?xml version="1.0" encoding="utf-8"?>
<LinearLayout xmlns:android="http://schemas.android.com/apk/res/android"
android:layout_width="match_parent"
android:layout_height="match_parent"
android:background="#00ff00"
android:orientation="vertical" >
<TextView
android:id="@+id/tab1"
android:layout_width="match_parent"
android:layout_height="wrap_content"
android:text="我是第二个界面"
/>
<Button
android:id="@+id/but"
android:layout_width="match_parent"
android:layout_height="wrap_content"
android:text="我是按钮"
/>
</LinearLayout>
剩下两个Fragment类似。
2.主界面布局
[html] view
plaincopy
<LinearLayout xmlns:android="http://schemas.android.com/apk/res/android"
xmlns:tools="http://schemas.android.com/tools"
android:layout_width="match_parent"
android:layout_height="match_parent"
android:orientation="vertical"
tools:context=".MainActivity" >
<LinearLayout
android:id="@+id/linearLayout1"
android:layout_width="fill_parent"
android:layout_height="wrap_content"
android:background="#FFFFFF"
android:orientation="horizontal" >
<TextView
android:id="@+id/text1"
android:layout_width="fill_parent"
android:layout_height="fill_parent"
android:layout_weight="1.0"
android:gravity="center"
android:text="页卡1"
android:textColor="#000000"
android:textSize="22.0dip" />
<TextView
android:id="@+id/text2"
android:layout_width="fill_parent"
android:layout_height="fill_parent"
android:layout_weight="1.0"
android:gravity="center"
android:text="页卡2"
android:textColor="#000000"
android:textSize="22.0dip" />
<TextView
android:id="@+id/text3"
android:layout_width="fill_parent"
android:layout_height="fill_parent"
android:layout_weight="1.0"
android:gravity="center"
android:text="页卡3"
android:textColor="#000000"
android:textSize="22.0dip" />
</LinearLayout>
<ImageView
android:id="@+id/cursor"
android:layout_width="fill_parent"
android:layout_height="wrap_content"
android:scaleType="matrix"
android:src="@drawable/line" />
<android.support.v4.view.ViewPager
android:id="@+id/vPager"
android:layout_width="wrap_content"
android:layout_height="wrap_content"
android:layout_gravity="center"
android:background="#000000"
android:flipInterval="30"
android:persistentDrawingCache="animation"
/>
</LinearLayout>
三个TextView代表选项卡标题,ImageView代表选项卡下的下划线。
3.实现activity。
[python] view
plaincopy
package com.example.viewpagerdemo3;
import android.graphics.BitmapFactory;
import android.graphics.Color;
import android.graphics.Matrix;
import android.os.Bundle;
import android.support.v4.app.Fragment;
import android.support.v4.app.FragmentActivity;
import android.support.v4.app.FragmentPagerAdapter;
import android.support.v4.view.ViewPager;
import android.support.v4.view.ViewPager.OnPageChangeListener;
import android.util.DisplayMetrics;
import android.view.animation.Animation;
import android.view.animation.TranslateAnimation;
import android.widget.ImageView;
import android.widget.TextView;
public class MainActivity extends FragmentActivity
{
private ViewPager vPager = null;
/**
* 代表选项卡下的下划线的imageview
*/
private ImageView cursor = null;
/**
* 选项卡下划线长度
*/
private static int lineWidth = 0;
/**
* 偏移量
* (手机屏幕宽度/3-选项卡长度)/2
*/
private static int offset = 0;
/**
* 选项卡总数
*/
private static final int TAB_COUNT = 3;
/**
* 当前显示的选项卡位置
*/
private int current_index = 0;
/**
* 选项卡标题
*/
private TextView text1,text2,text3;
@Override
protected void onCreate(Bundle savedInstanceState)
{
super.onCreate(savedInstanceState);
setContentView(R.layout.activity_main);
vPager = (ViewPager) findViewById(R.id.vPager);
initImageView();
text1 = (TextView) findViewById(R.id.text1);
text2 = (TextView) findViewById(R.id.text2);
text3 = (TextView) findViewById(R.id.text3);
final TextView[] titles = {text1,text2,text3};
vPager.setAdapter(new FragmentPagerAdapter(getSupportFragmentManager())
{
@Override
public int getCount()
{
return TAB_COUNT;
}
@Override
public Fragment getItem(int index)//直接创建fragment对象并返回
{
switch (index)
{
case 0:
return new Tab1();
case 1:
return new Tab2();
case 2:
return new Tab3();
}
return null;
}
});
vPager.setOnPageChangeListener(new OnPageChangeListener()
{
int one = offset * 2 + lineWidth;// 页卡1 -> 页卡2 偏移量
@Override
public void onPageSelected(int index)//设置标题的颜色以及下划线的移动效果
{
Animation animation = new TranslateAnimation(one*current_index,one*index, 0,0);
animation.setFillAfter(true);
animation.se
19ebd
tDuration(300);
cursor.startAnimation(animation);
titles[current_index].setTextColor(Color.BLACK);
titles[index].setTextColor(Color.RED);
current_index = index;
}
@Override
public void onPageScrolled(int arg0, float arg1, int arg2)
{
}
@Override
public void onPageScrollStateChanged(int index)
{
}
});
}
private void initImageView()
{
cursor = (ImageView) findViewById(R.id.cursor);
//获取图片宽度
lineWidth = BitmapFactory.decodeResource(getResources(),R.drawable.line).getWidth();
DisplayMetrics dm = new DisplayMetrics();
getWindowManager().getDefaultDisplay().getMetrics(dm);
//获取屏幕宽度
int screenWidth = dm.widthPixels;
Matrix matrix = new Matrix();
offset = (int) ((screenWidth/(float)TAB_COUNT - lineWidth)/2);
matrix.postTranslate(offset, 0);
//设置初始位置
cursor.setImageMatrix(matrix);
}
}
下面是选项卡的点击事件:
//首先先findviewbyid 然后设监听事件
后面我添加了页卡的点击事件,大家一起学习下。
显示效果:
实现过程:
1.创建3个选项卡中的内容,即三个Fragment。
这里仅贴出其中一个:
Tab2:
[java] view
plaincopy
package com.example.viewpagerdemo3;
import android.os.Bundle;
import android.support.v4.app.Fragment;
import android.view.LayoutInflater;
import android.view.View;
import android.view.View.OnClickListener;
import android.view.ViewGroup;
import android.widget.Button;
import android.widget.Toast;
public class Tab2 extends Fragment
{
private Button but = null;
@Override
public View onCreateView(LayoutInflater inflater, ViewGroup container,
Bundle savedInstanceState)
{
View view = inflater.inflate(R.layout.tab2,null);//注意不要指定父视图
but = (Button) view.findViewById(R.id.but);
return view;
}
@Override
public void onActivityCreated(Bundle savedInstanceState)
{
super.onActivityCreated(savedInstanceState);
but.setOnClickListener(new OnClickListener()
{
@Override
public void onClick(View v)
{
Toast.makeText(Tab2.this.getActivity(),"hahah", 0).show();
}
});
}
}
布局:
[html] view
plaincopy
<?xml version="1.0" encoding="utf-8"?>
<LinearLayout xmlns:android="http://schemas.android.com/apk/res/android"
android:layout_width="match_parent"
android:layout_height="match_parent"
android:background="#00ff00"
android:orientation="vertical" >
<TextView
android:id="@+id/tab1"
android:layout_width="match_parent"
android:layout_height="wrap_content"
android:text="我是第二个界面"
/>
<Button
android:id="@+id/but"
android:layout_width="match_parent"
android:layout_height="wrap_content"
android:text="我是按钮"
/>
</LinearLayout>
剩下两个Fragment类似。
2.主界面布局
[html] view
plaincopy
<LinearLayout xmlns:android="http://schemas.android.com/apk/res/android"
xmlns:tools="http://schemas.android.com/tools"
android:layout_width="match_parent"
android:layout_height="match_parent"
android:orientation="vertical"
tools:context=".MainActivity" >
<LinearLayout
android:id="@+id/linearLayout1"
android:layout_width="fill_parent"
android:layout_height="wrap_content"
android:background="#FFFFFF"
android:orientation="horizontal" >
<TextView
android:id="@+id/text1"
android:layout_width="fill_parent"
android:layout_height="fill_parent"
android:layout_weight="1.0"
android:gravity="center"
android:text="页卡1"
android:textColor="#000000"
android:textSize="22.0dip" />
<TextView
android:id="@+id/text2"
android:layout_width="fill_parent"
android:layout_height="fill_parent"
android:layout_weight="1.0"
android:gravity="center"
android:text="页卡2"
android:textColor="#000000"
android:textSize="22.0dip" />
<TextView
android:id="@+id/text3"
android:layout_width="fill_parent"
android:layout_height="fill_parent"
android:layout_weight="1.0"
android:gravity="center"
android:text="页卡3"
android:textColor="#000000"
android:textSize="22.0dip" />
</LinearLayout>
<ImageView
android:id="@+id/cursor"
android:layout_width="fill_parent"
android:layout_height="wrap_content"
android:scaleType="matrix"
android:src="@drawable/line" />
<android.support.v4.view.ViewPager
android:id="@+id/vPager"
android:layout_width="wrap_content"
android:layout_height="wrap_content"
android:layout_gravity="center"
android:background="#000000"
android:flipInterval="30"
android:persistentDrawingCache="animation"
/>
</LinearLayout>
三个TextView代表选项卡标题,ImageView代表选项卡下的下划线。
3.实现activity。
[python] view
plaincopy
package com.example.viewpagerdemo3;
import android.graphics.BitmapFactory;
import android.graphics.Color;
import android.graphics.Matrix;
import android.os.Bundle;
import android.support.v4.app.Fragment;
import android.support.v4.app.FragmentActivity;
import android.support.v4.app.FragmentPagerAdapter;
import android.support.v4.view.ViewPager;
import android.support.v4.view.ViewPager.OnPageChangeListener;
import android.util.DisplayMetrics;
import android.view.animation.Animation;
import android.view.animation.TranslateAnimation;
import android.widget.ImageView;
import android.widget.TextView;
public class MainActivity extends FragmentActivity
{
private ViewPager vPager = null;
/**
* 代表选项卡下的下划线的imageview
*/
private ImageView cursor = null;
/**
* 选项卡下划线长度
*/
private static int lineWidth = 0;
/**
* 偏移量
* (手机屏幕宽度/3-选项卡长度)/2
*/
private static int offset = 0;
/**
* 选项卡总数
*/
private static final int TAB_COUNT = 3;
/**
* 当前显示的选项卡位置
*/
private int current_index = 0;
/**
* 选项卡标题
*/
private TextView text1,text2,text3;
@Override
protected void onCreate(Bundle savedInstanceState)
{
super.onCreate(savedInstanceState);
setContentView(R.layout.activity_main);
vPager = (ViewPager) findViewById(R.id.vPager);
initImageView();
text1 = (TextView) findViewById(R.id.text1);
text2 = (TextView) findViewById(R.id.text2);
text3 = (TextView) findViewById(R.id.text3);
final TextView[] titles = {text1,text2,text3};
vPager.setAdapter(new FragmentPagerAdapter(getSupportFragmentManager())
{
@Override
public int getCount()
{
return TAB_COUNT;
}
@Override
public Fragment getItem(int index)//直接创建fragment对象并返回
{
switch (index)
{
case 0:
return new Tab1();
case 1:
return new Tab2();
case 2:
return new Tab3();
}
return null;
}
});
vPager.setOnPageChangeListener(new OnPageChangeListener()
{
int one = offset * 2 + lineWidth;// 页卡1 -> 页卡2 偏移量
@Override
public void onPageSelected(int index)//设置标题的颜色以及下划线的移动效果
{
Animation animation = new TranslateAnimation(one*current_index,one*index, 0,0);
animation.setFillAfter(true);
animation.se
19ebd
tDuration(300);
cursor.startAnimation(animation);
titles[current_index].setTextColor(Color.BLACK);
titles[index].setTextColor(Color.RED);
current_index = index;
}
@Override
public void onPageScrolled(int arg0, float arg1, int arg2)
{
}
@Override
public void onPageScrollStateChanged(int index)
{
}
});
}
private void initImageView()
{
cursor = (ImageView) findViewById(R.id.cursor);
//获取图片宽度
lineWidth = BitmapFactory.decodeResource(getResources(),R.drawable.line).getWidth();
DisplayMetrics dm = new DisplayMetrics();
getWindowManager().getDefaultDisplay().getMetrics(dm);
//获取屏幕宽度
int screenWidth = dm.widthPixels;
Matrix matrix = new Matrix();
offset = (int) ((screenWidth/(float)TAB_COUNT - lineWidth)/2);
matrix.postTranslate(offset, 0);
//设置初始位置
cursor.setImageMatrix(matrix);
}
}
下面是选项卡的点击事件:
//首先先findviewbyid 然后设监听事件

相关文章推荐
- 【安卓笔记】使用ViewPager+Fragment实现选项卡切换效果
- 使用ViewPager+Fragment实现选项卡切换效果
- 使用ViewPager+Fragment实现选项卡切换效果
- 使用ViewPager+Fragment实现选项卡切换效果
- 使用ViewPager+Fragment实现选项卡切换效果
- Android使用TabLayou+fragment+viewpager实现滑动切换页面效果
- Android编程心得-使用ActionBar+Fragment+ViewPager实现动态切换Menu效果
- Android使用ViewPager+Fragment实现定制TabHost选项卡效果
- Android App中使用ViewPager+Fragment实现滑动切换效果
- 使用viewpager实现QQ界面切换效果
- ViewPager、Fragment、Matrix综合使用实现Tab滑页效果
- 如何在Fragment中使用ViewPager,并实现导航随手势滑动效果
- viewpager+Fragment实现简单滑动切换效果
- Android使用Fragment来实现ViewPager的功能(解决切换Fragment状态不保存)以及各个Fragment之间的通信
- android使用viewPager和Fragment实现滑动切换activity!
- 使用RadioGroup+ViewPager+Fragment实现带滑动的页卡效果TabHost时遇到的问题
- 兔子--Fragment与ViewPager实现切换与侧滑效果
- 【转】Android使用Fragment来实现ViewPager的功能(解决切换Fragment状态不保存)以及各个Fragment之间的通信
- Fragment,ActionBar,ViewPager实现选项卡实现点击切换Fragment
- Android 利用ViewPager实现底部圆点导航左右滑动效果以及Fragment页面切换