wcf 双工通讯
2015-01-14 15:53
183 查看
介绍 wcf 单工通讯
但在双向操作模式中,不但客户端可以向服务器发送请求,服务器也可以主动向客户端广播消息(也就是回调客户端中的方法)。在WCF中,不是所有的绑定都可 以实现双向操作模式的,比如http协议,它本身就是基于请求-回复的传输模式,所以本质上是实现不了双向操作的。但WCF提供了 WSDualHttpBinding协议让我们在http上实现了双向操作。其实WSDualHttpBinding并没有违反http单向传输的本质, 它实际上是创建两个了通道,一个用于客户端向服务器请求,一个用于服务器向客户端广播,间接实现了双向操作。但《WCF服务编程》书上有 说,WSDualHttpBinding无法穿越客户端与服务器的重重障碍,所以不赞成使用WSDualHttpBinding来实现双向操作。
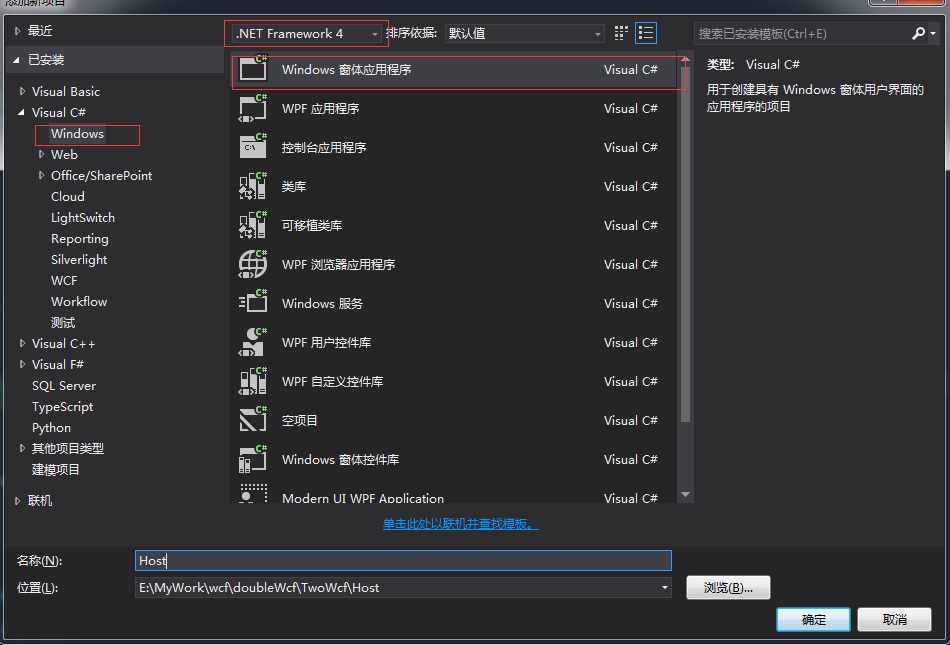
第一步
新建一个windows应用程序,取名Host
第2步:建立接口,IMessageService
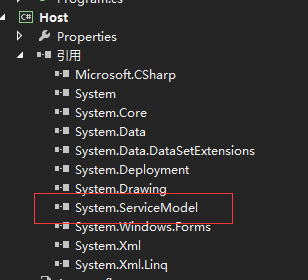
这时候引用 wcf组件
第 3步 建立 实现 MessageService
第4步 配置 Appconfig
右键Appconfig 点击编辑wcf配置 进入元素浏览器(我把这个理解成 可视化配置),这样免去程序员手敲代码的麻烦。
上几张图
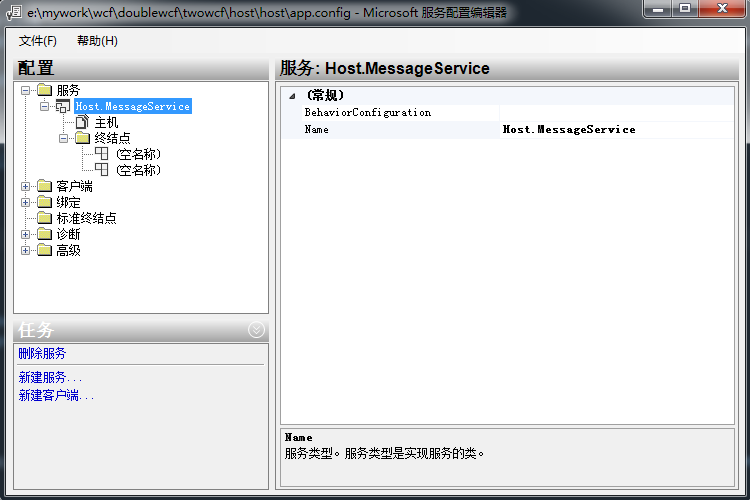
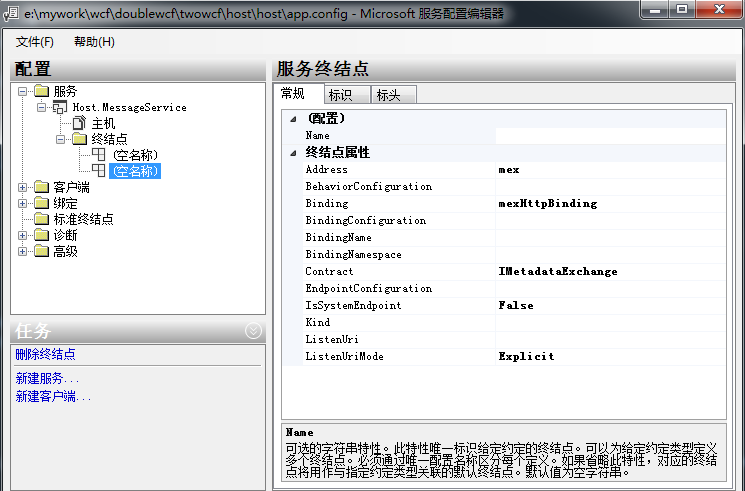
看到3张图没,新建了一个服务,添加了2个终结点
app.config生产代码
这个说下wcf 之 abc
Address: 每一个WCF的Service都有一个唯一的地址。这个地址给出了Service的地址和传输协议(Transport Protocol)
Binding:通信(Communication)的方式很多,同步的request/reply模式,非同步的fire-and- forget模式。消息可以单向或者双向的发送接收,可以立即发送或者把它放入到某一个队列中再处理。所供选择的传输协议也有Http, Tcp,P2P,IPC等。当要考虑Client/Server如何进行通讯的时候,除了考虑以上提到的几点之外,还有其它很多需要考虑的因素,如安全, 性能等。因此,简单来说,Binding只不过是微软提供的一组考虑比较周全、常用的封装好的通信方式。
Contract:Contract描述了Service能提供的各种服务。Contract有四种,包括Service Contract, Data Contract, Fault Contract和Message Contract
第5步 建立客户端 取名 Client 添加 System.ServiceModel引用,添加wcf引用
这里强调一下wcf引用 怎么加入项目里,打开wcf服务端生成的bin文件,运行Host.exe文件
这时候 http://192.168.2.23:9998/Host 就可以访问了,取名叫WcfSvc

引用wcf服务 的时候 你发现 客户端 app.config配置文件已经生成了
在Client工程里新建 MyCallBack 类回调 服务端方法
这时候双工通讯搭建完毕,再来设计UI页面
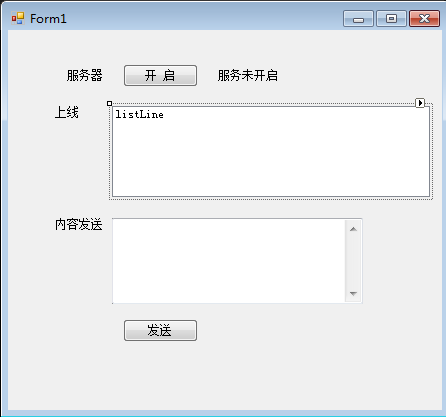
这里设置ui控件有个技巧:默认控件是 私有属性,我把上线 这边文本框 改成 public,让他接受外面访问。

画客户端页面
上几张双工效果图,服务实现 “有图有真相”。
服务端 向客户端发送请求。
客户端向客户端发送请求

分享一下我的源码,有什么建议的朋友可以留言给我,相互讨论,相互学习。
大家可以把 双工通讯 理解成 “礼上往来”的通讯。
源码下载
但在双向操作模式中,不但客户端可以向服务器发送请求,服务器也可以主动向客户端广播消息(也就是回调客户端中的方法)。在WCF中,不是所有的绑定都可 以实现双向操作模式的,比如http协议,它本身就是基于请求-回复的传输模式,所以本质上是实现不了双向操作的。但WCF提供了 WSDualHttpBinding协议让我们在http上实现了双向操作。其实WSDualHttpBinding并没有违反http单向传输的本质, 它实际上是创建两个了通道,一个用于客户端向服务器请求,一个用于服务器向客户端广播,间接实现了双向操作。但《WCF服务编程》书上有 说,WSDualHttpBinding无法穿越客户端与服务器的重重障碍,所以不赞成使用WSDualHttpBinding来实现双向操作。
第一步
新建一个windows应用程序,取名Host
第2步:建立接口,IMessageService
using System;
using System.Collections.Generic;
using System.Linq;
using System.ServiceModel;
using System.Text;

namespace Host
{
//和单向操作相比,我们会发现服务契约上多了一行代码:[ServiceContract(CallbackContract = typeof(ICallBack))]
[ServiceContract(CallbackContract = typeof(ICallBack))]
public interface IMessageService
{
[OperationContract]
void RegisterMes();

[OperationContract]
int SendToAll(string name, string msg);
/// <summary>
/// 文件上传
/// </summary>
/// <param name="data">字节数组</param>
/// <param name="suffix">文件后缀名</param>
/// <returns></returns>
[OperationContract]
int SentFile(byte[] data, string suffix);
}

public interface ICallBack
{
[OperationContract(IsOneWay = true)]
void SendMessage(string name, string msg);

[OperationContract(IsOneWay = true)]
void Show();
}
}
这时候引用 wcf组件
第 3步 建立 实现 MessageService
using System;
using System.Collections.Generic;
using System.IO;
using System.Linq;
using System.ServiceModel;
using System.Text;
using System.Threading.Tasks;

namespace Host
{
[ServiceBehavior(InstanceContextMode = InstanceContextMode.Single)]
public class MessageService : IMessageService, IDisposable
{
public static List<ICallBack> CallBackList
{
get;
set;
}

public MessageService()
{
CallBackList = new List<ICallBack>();
}

public void RegisterMes()
{
var callback = OperationContext.Current.GetCallbackChannel<ICallBack>();
string sessionid = OperationContext.Current.SessionId;

Form1.fm1.listLine.Items.Add(sessionid);//服务端显示客户端的SessionId

//OperationContext.Current.Channel.Closing +=
//    delegate
//    {
//        lock (CallBackList)
//        {
//            CallBackList.Remove(callback);
//        }
//    };

OperationContext.Current.Channel.Closing += new EventHandler(Channel_Closing);
CallBackList.Add(callback);
}

void Channel_Closing(object sender, EventArgs e)
{
lock (CallBackList)
{
CallBackList.Remove((ICallBack)sender);
}
}

public void Dispose()
{
CallBackList.Clear();
}

public int SendToAll(string name, string msg)
{
var list = Host.MessageService.CallBackList;
if (list == null || list.Count == 0)
return 0;
lock (list)
{
Task.Factory.StartNew(new Action(() =>
{
foreach (var client in list)
{
client.SendMessage(name, msg);

}
}));
}
return 1;
}

/// <summary>
/// 文件上传
/// </summary>
/// <param name="data">字节数组</param>
/// <param name="suffix">文件后缀名</param>
/// <returns></returns>
public int SentFile(byte[] data, string suffix)
{
DateTime dt = DateTime.Now;
string filename = string.Format("{0:yyyyMMddHHmmssffff}", dt);
File.WriteAllBytes(filename+suffix, data);
return 0;
}
}
}
第4步 配置 Appconfig
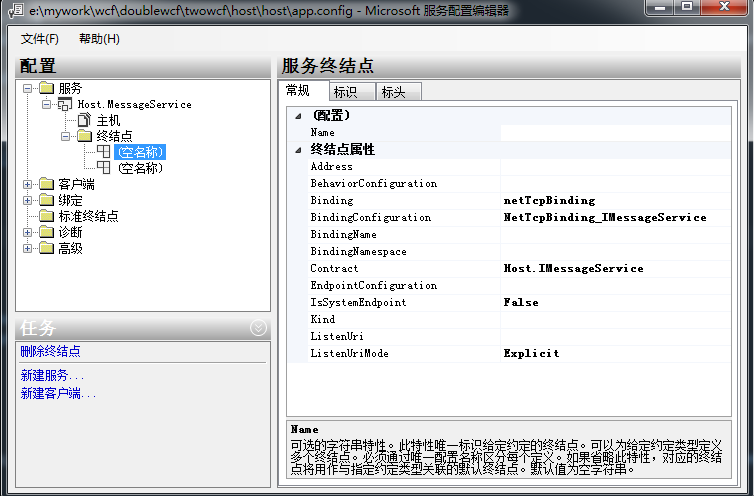
右键Appconfig 点击编辑wcf配置 进入元素浏览器(我把这个理解成 可视化配置),这样免去程序员手敲代码的麻烦。
上几张图
看到3张图没,新建了一个服务,添加了2个终结点
app.config生产代码
<?xml version="1.0" encoding="utf-8" ?>
<configuration>
<system.web>
<compilation debug="true"/>
</system.web>
<system.serviceModel>
<services>
<service name="Host.MessageService">
<endpoint address="" binding="netTcpBinding" bindingConfiguration="NetTcpBinding_IMessageService" contract="Host.IMessageService">
</endpoint>
<endpoint address="mex" binding="mexHttpBinding" contract="IMetadataExchange"/>
<host>
<baseAddresses>
<add baseAddress="net.tcp://192.168.2.23:9999/Host/"/>
<add baseAddress="http://192.168.2.23:9998/Host"/>
</baseAddresses>
</host>
</service>
</services>
<behaviors>
<serviceBehaviors>
<behavior>
<serviceMetadata httpGetEnabled="True"/>
<serviceDebug includeExceptionDetailInFaults="False"/>
</behavior>
</serviceBehaviors>
</behaviors>
<bindings>
<netTcpBinding>
<binding name="NetTcpBinding_IMessageService" maxBufferSize="1024000000" maxReceivedMessageSize="1024000000" sendTimeout="00:00:30" transferMode="Buffered">

<security mode="None">

<transport clientCredentialType="Windows" />

<message clientCredentialType="Windows" />

</security>
</binding>
</netTcpBinding>
</bindings>
</system.serviceModel>
<startup>
<supportedRuntime version="v4.0" sku=".NETFramework,Version=v4.0"/>
</startup>
</configuration>
这个说下wcf 之 abc
Address: 每一个WCF的Service都有一个唯一的地址。这个地址给出了Service的地址和传输协议(Transport Protocol)
Binding:通信(Communication)的方式很多,同步的request/reply模式,非同步的fire-and- forget模式。消息可以单向或者双向的发送接收,可以立即发送或者把它放入到某一个队列中再处理。所供选择的传输协议也有Http, Tcp,P2P,IPC等。当要考虑Client/Server如何进行通讯的时候,除了考虑以上提到的几点之外,还有其它很多需要考虑的因素,如安全, 性能等。因此,简单来说,Binding只不过是微软提供的一组考虑比较周全、常用的封装好的通信方式。
Contract:Contract描述了Service能提供的各种服务。Contract有四种,包括Service Contract, Data Contract, Fault Contract和Message Contract
第5步 建立客户端 取名 Client 添加 System.ServiceModel引用,添加wcf引用
这里强调一下wcf引用 怎么加入项目里,打开wcf服务端生成的bin文件,运行Host.exe文件
这时候 http://192.168.2.23:9998/Host 就可以访问了,取名叫WcfSvc
引用wcf服务 的时候 你发现 客户端 app.config配置文件已经生成了
<?xml version="1.0" encoding="utf-8" ?>
<configuration>
<system.serviceModel>
<bindings>
<netTcpBinding>
<binding name="NetTcpBinding_IMessageService">
<security mode="None" />
</binding>
</netTcpBinding>
</bindings>
<client>
<endpoint address="net.tcp://192.168.2.23:9999/Host/" binding="netTcpBinding"
bindingConfiguration="NetTcpBinding_IMessageService" contract="WcfSvc.IMessageService"
name="NetTcpBinding_IMessageService" />
</client>
</system.serviceModel>
</configuration>
在Client工程里新建 MyCallBack 类回调 服务端方法
using System;
using System.Collections.Generic;
using System.Linq;
using System.Text;
using System.Threading;

namespace Client
{
public class MyCallBack : WcfSvc.IMessageServiceCallback
{

public long count = 0;
public void SendMessage(string name, string msg)
{
System.Threading.Interlocked.Increment(ref count);

Form1.f.listMessage.Items.Add(string.Format("{0}:{1}:{2}", name, msg, count));
Form1.f.txtreceiving.Invoke(new Action(() =>
{
Form1.f.txtreceiving.Text = count.ToString();
}));

}

public void Show()
{
Form1.f.listMessage.Invoke(new Action(() =>
{
Form1.f.listMessage.Items.Add("show方法调用了");
}));
}

}
}
这时候双工通讯搭建完毕,再来设计UI页面
这里设置ui控件有个技巧:默认控件是 私有属性,我把上线 这边文本框 改成 public,让他接受外面访问。
using System;
using System.Collections.Generic;
using System.ComponentModel;
using System.Data;
using System.Drawing;
using System.Linq;
using System.ServiceModel;
using System.Text;
using System.Windows.Forms;

namespace Host
{
public partial class Form1 : Form
{
public static Form1 fm1;
private ServiceHost _host = null;

public Form1()
{
InitializeComponent();

//构造函数初始化加载
fm1 =this;
CheckForIllegalCrossThreadCalls = false;
BindHost();
}

private void btnStart_Click(object sender, EventArgs e)
{
BindHost();
}

void BindHost()
{
try
{
_host = new ServiceHost(typeof(Host.MessageService));
_host.Open();
lbService.Text = string.Format("服务开启:{0}", DateTime.Now.ToString());
}
catch (Exception ex)
{
ShowMessage(ex.Message);
}
}

private void btnsend_Click(object sender, EventArgs e)
{//发送内容
#region 备用
if (fm1 != null)
{
lock (MessageService.CallBackList)
{
foreach (ICallBack callback in MessageService.CallBackList)
{
callback.SendMessage("服务器发送: ", txtMsg.Text);
}

}
}
#endregion

}

/// <summary>
/// (公用的)信息显示
/// </summary>
/// <param name="msg">消息内容</param>
private void ShowMessage(string msg)
{
this.lbMessage.Text = msg;
this.lbMessage.Visible = true;
}
}
}
画客户端页面
using System;
using System.Collections.Generic;
using System.ComponentModel;
using System.Data;
using System.Drawing;
using System.Linq;
using System.Text;
using System.Windows.Forms;
using System.ServiceModel;
using System.Threading.Tasks;
using System.IO;
namespace Client
{
public partial class Form1 : Form
{
public static Form1 f;
public Form1()
{
InitializeComponent();
f = this;
CheckForIllegalCrossThreadCalls = false;
}
WcfSvc.MessageServiceClient svc;
private void Form1_Load(object sender, EventArgs e)
{//页面初始化
//Online();
var client = new MyCallBack();
var ctx = new InstanceContext(client);
svc = new WcfSvc.MessageServiceClient(ctx);
svc.RegisterMes();
}
private void button1_Click(object sender, EventArgs e)
{//停止
isRun = false;
}
void ShowMessage(string msg)
{
this.lbError.Text = msg;
this.lbError.Visible = true;
}
Task t;
int sleeptime = 100;
bool isRun = true;
private void btnSend_Click(object sender, EventArgs e)
{//发送
isRun = true;
sleeptime = int.Parse(txtNum.Text);
t = Task.Factory.StartNew(delegate
{
while (true)
{
if (isRun)
{
svc.SendToAll(txtUserName.Text, txtSendMessage.Text);
System.Threading.Thread.Sleep(sleeptime);
}
else
{
break;
}
}
});
}
private void btnclear_Click(object sender, EventArgs e)
{//清屏
this.listMessage.Items.Clear();
}
private void btnUpload_Click(object sender, EventArgs e)
{//文件上传
using (OpenFileDialog ofd = new OpenFileDialog())
{
if (ofd.ShowDialog() == DialogResult.OK)
{
//FileStream fs = new FileStream(ofd.FileName, FileMode.Open, FileAccess.Read);
byte[] data = File.ReadAllBytes(ofd.FileName);
int r = svc.SentFile(data, Path.GetExtension(ofd.FileName));
if (r == 0)
{
MessageBox.Show("发送完毕");
}
}
}
}
}
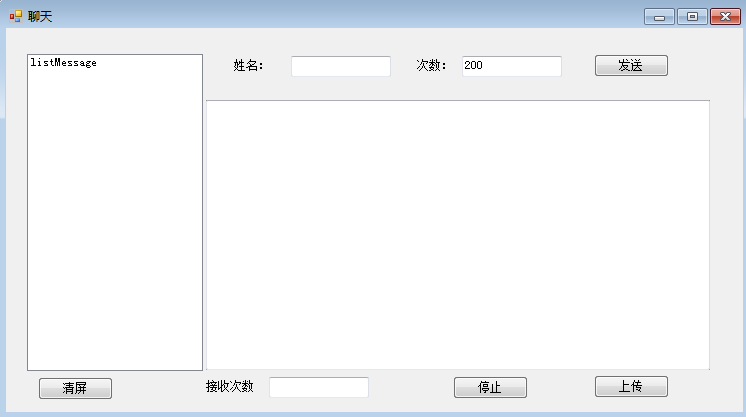
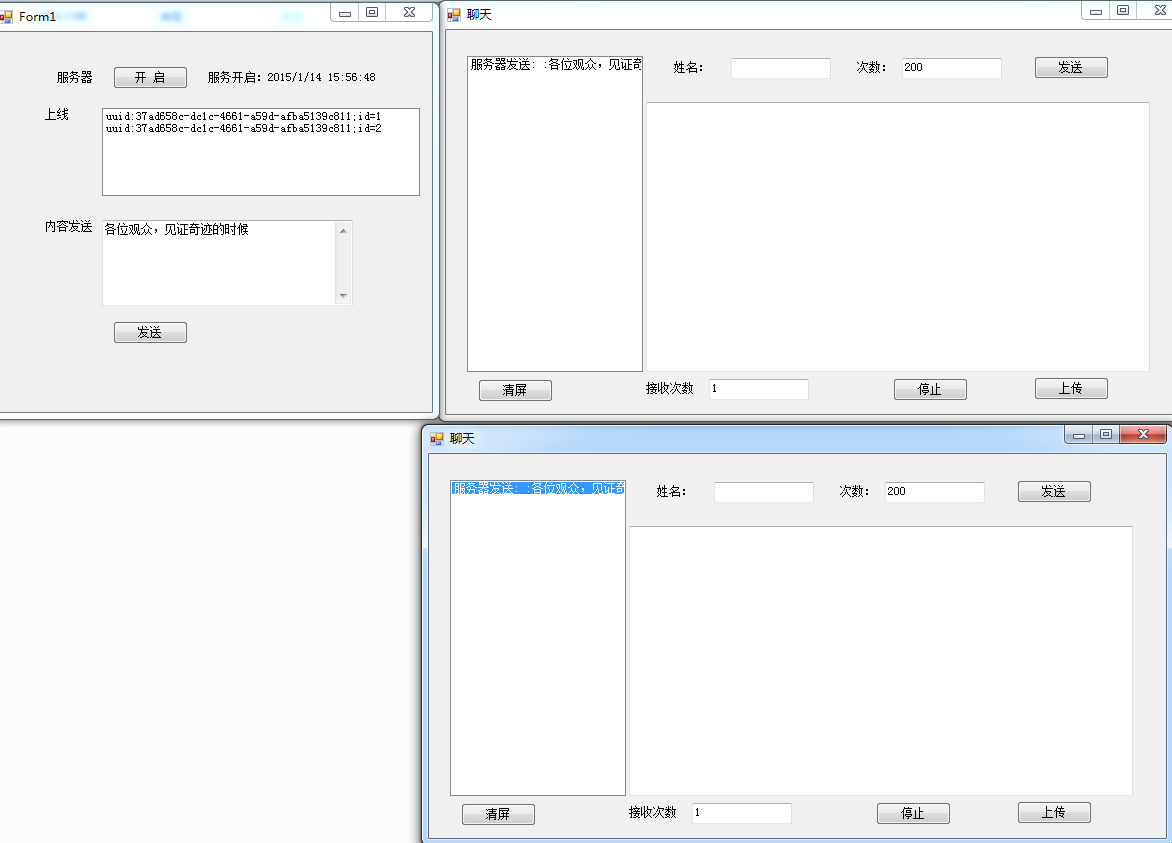
}上几张双工效果图,服务实现 “有图有真相”。
服务端 向客户端发送请求。
客户端向客户端发送请求
分享一下我的源码,有什么建议的朋友可以留言给我,相互讨论,相互学习。
大家可以把 双工通讯 理解成 “礼上往来”的通讯。
源码下载

相关文章推荐
- 浅谈WCF的三种通信模式:请求响应模式、数据报模式和双工通讯模式
- SilverLight与WCF服务双工通讯第一篇:PollingDuplexHttpBinding
- Winfrom 使用WCF 实现双工通讯
- WCF初探-5:WCF消息交换模式之双工通讯(Duplex)
- SilverLight与WCF服务双工通讯第二篇:Net.Tcp binding
- silverlight:wcf双工通讯学习笔记
- WCF消息交换模式之双工通讯(Duplex)
- WCF系列教程之消息交换模式之双工通讯(Duplex)
- WCF双工通讯以及客户端间的间接通讯
- 利用WCF的双工通讯实现一个简单的心跳监控系统
- WCF实现双工通讯及客户端调用
- 利用WCF的双工通讯实现一个简单的心跳监控系统 z
- 利用WCF双工模式实现即时通讯
- wcf双工通讯遇到的问题
- 解决WCF双工通讯模式中向ChannelFactory提供的InstanceContext包含未实现CallbackContractType的问题
- WCF双工通讯以及客户端间的间接通讯
- WCF双工通讯以及客户端间的间接通讯
- WCF双工通讯+身份认证
- Winfrom 使用WCF 实现双工通讯
- silverlight之wcf双工通讯学习笔记