手把手教你nginx基础安装配置
2014-12-29 19:25
381 查看
手把手教你nginx基础安装配置!一、Nginx安装及简单配置;
安装环境和依赖的包:
#yum groupinstall “developmenttools” “server platform development”
# yum -yinstall pcre-devel
#yum install openssl-devel
下载相关nginx源码包:#wgethttp://nginx.org/download/nginx-1.6.2.tar.gz

解压缩源码包

编译安装:
创建nginx用户和组:
#groupadd nginx
#useradd –g nginx nginx
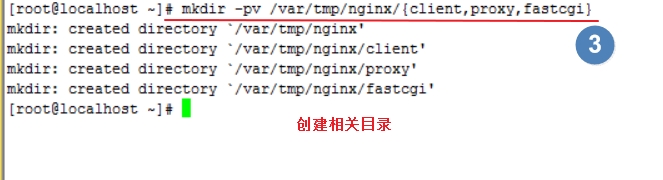
创建相关目录: # mkdir -pv /var/tmp/nginx/{client,proxy,fastcgi}
#cd nginx-1.62
# ./configure--prefix=/usr/local/nginx --conf-path=/etc/nginx/nginx.conf --user=nginx--group=nginx --error-log-path=/var/log/nginx/error.log--http-log-path=/var/log/nginx/access.log --pid-path=/var/run/nginx/nginx.pid--lock-path=/var/lock/nginx.lock --with-http_ssl_module--with-http_stub_status_module --with-http_gzip_static_module--with-http_flv_module --with-http_mp4_module--http-client-body-temp-path=/var/tmp/nginx/client--http-proxy-temp-path=/var/tmp/nginx/proxy --http-fastcgi-temp-path=/var/tmp/nginx/fastcgi
# make && make install
安装完成后使用
#./usr/local/nginx/sbin/nginx 启动服务
注释:关闭服务可以使用:# killall nginx命令;
使用# ps aux查看进程

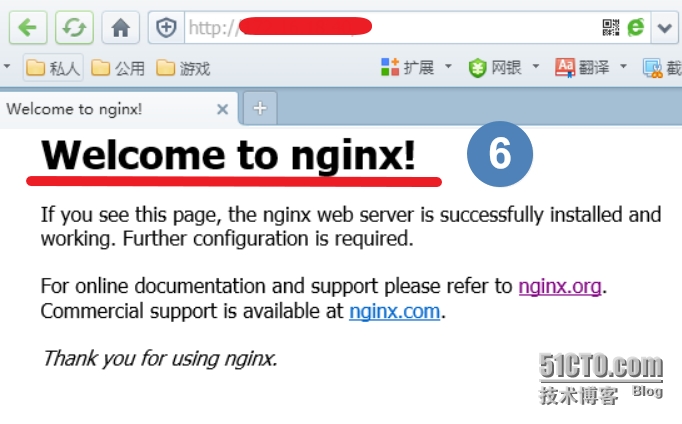
通过网页访问本地ip地址
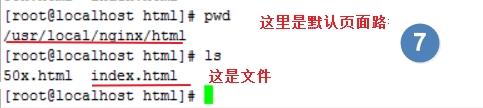
默认页面存放路径 /usr/local/nginx/html/*
新建文件(服务脚本)#vim /etc/rc.d/init.d/nginx,内容如下
#!/bin/sh
#
# nginx - this script startsand stops the nginx daemon
#
# chkconfig: - 85 15
# description: Nginx is an HTTP(S) server, HTTP(S) reverse \
# proxy and IMAP/POP3 proxy server
# processname: nginx
# config: /etc/nginx/nginx.conf
# config: /etc/sysconfig/nginx
# pidfile: /var/run/nginx.pid
# Source function library.
. /etc/rc.d/init.d/functions
# Source networkingconfiguration.
. /etc/sysconfig/network
# Check that networking is up.
[ "$NETWORKING" ="no" ] && exit 0
nginx="/usr/local/nginx/sbin/nginx"
prog=$(basename $nginx)
NGINX_CONF_FILE="/etc/nginx/nginx.conf"
[ -f /etc/sysconfig/nginx ]&& . /etc/sysconfig/nginx
lockfile=/var/lock/subsys/nginx
make_dirs() {
# make required directories
user=`nginx -V 2>&1 | grep"configure arguments:" | sed 's/[^*]*--user=\([^ ]*\).*/\1/g' -`
options=`$nginx -V 2>&1 | grep'configure arguments:'`
for opt in $options; do
if [ `echo $opt | grep '.*-temp-path'`]; then
value=`echo $opt | cut -d"=" -f 2`
if [ ! -d "$value" ]; then
# echo "creating"$value
mkdir -p $value && chown-R $user $value
fi
fi
done
}
start() {
[ -x $nginx ] || exit 5
[ -f $NGINX_CONF_FILE ] || exit 6
make_dirs
echo -n $"Starting $prog: "
daemon $nginx -c $NGINX_CONF_FILE
retval=$?
echo
[ $retval -eq 0 ] && touch$lockfile
return $retval
}
stop() {
echo -n $"Stopping $prog: "
killproc $prog -QUIT
retval=$?
echo
[ $retval -eq 0 ] && rm -f$lockfile
return $retval
}
restart() {
configtest || return $?
stop
sleep 1
start
}
reload() {
configtest || return $?
echo -n $"Reloading $prog: "
killproc $nginx -HUP
RETVAL=$?
echo
}
force_reload() {
restart
}
configtest() {
$nginx -t -c $NGINX_CONF_FILE
}
rh_status() {
status $prog
}
rh_status_q() {
rh_status >/dev/null 2>&1
}
case "$1" in
start)
rh_status_q && exit 0
$1
;;
stop)
rh_status_q || exit 0
$1
;;
restart|configtest)
$1
;;
reload)
rh_status_q || exit 7
$1
;;
force-reload)
force_reload
;;
status)
rh_status
;;
condrestart|try-restart)
rh_status_q || exit 0
;;
*)
echo $"Usage: $0{start|stop|status|restart|condrestart|try-restart|reload|force-reload|configtest}"
exit 2
esac
为此脚本赋予执行权限:
# chmod +x/etc/rc.d/init.d/nginx
添加至服务管理列表,并让其开机自动启动:
# chkconfig --add nginx
# chkconfig nginx on

使用seervice nginx restart 命令尝试是否可用:
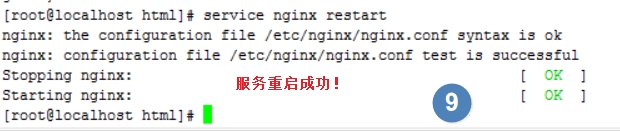
如果配置文件有改动,可以使用#service nginx reload命令重新装载配置文件!
配置文件路径:/etc/nginx/nginx.conf (这里默认的配置文件没有语法变色,我们在后面可以设置)
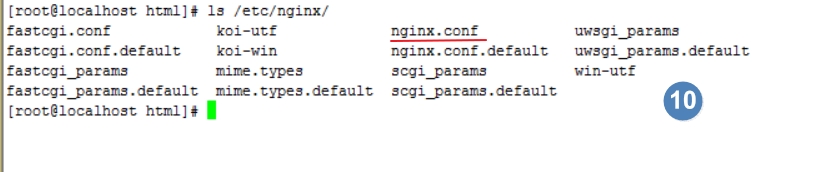
使用vim /etc/nginx/nginx.conf编辑器查看
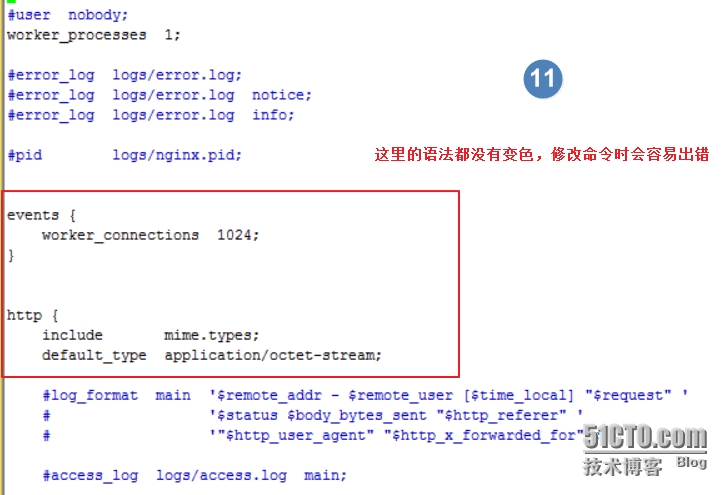
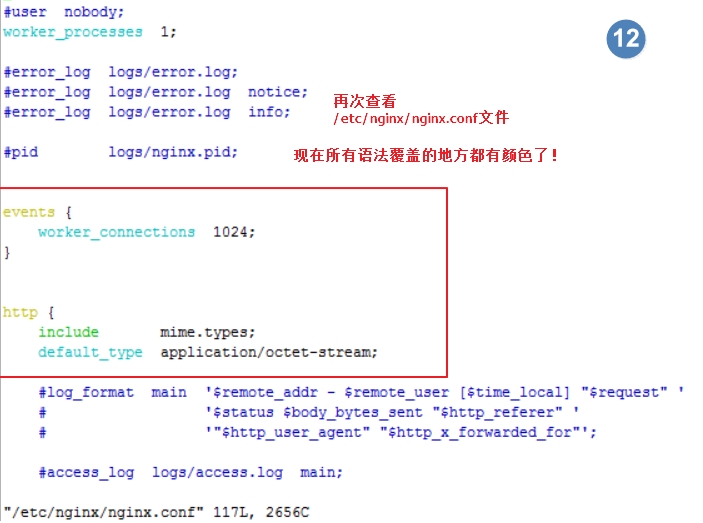
设置/etc/nginx/nginx.conf配置文件语法变色:
1、下载nginx.vim
下载页面:http://www.vim.org/scripts/script.php?script_id=1886
2、安装nginx.vim
创建mkdir -pv ~/.vim/syntax
将nginx.vim放置于~/.vim/syntax/目录,
3、配置 nginx.vim
而后在~/.vim/filetype.vim中添加如下行:(注意:filetype.vim文件不存在,这里可以直接使用vim ~/.vim/filetype.vim命令)au BufRead,BufNewFile/etc/nginx/*,/usr/local/nginx/conf/* if &ft == '' | setfiletype nginx |endif其中“/etc/nginx”为nginx配置文件的目录。
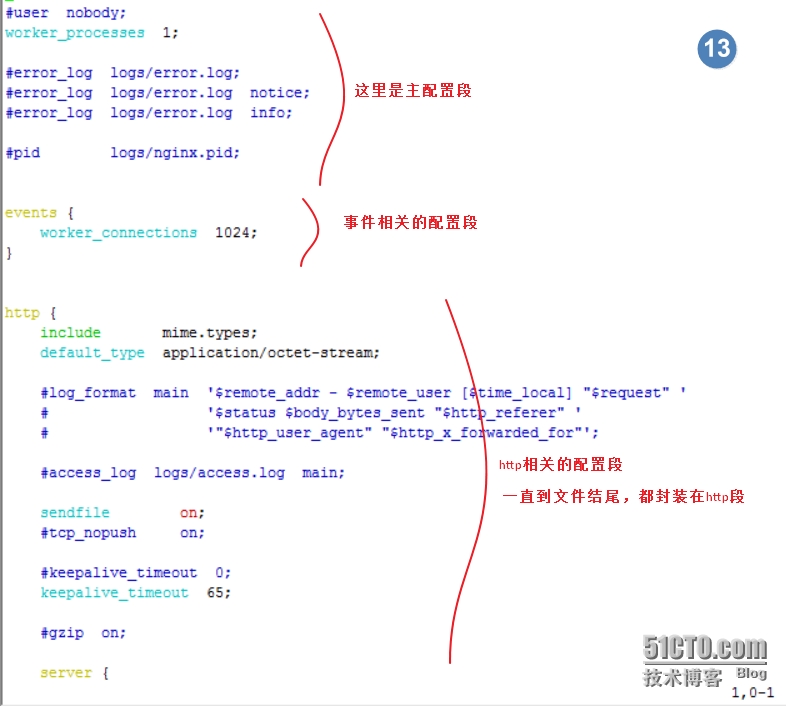
在 /etc/nginx/nginx.conf配置文件中:
main配置段(对http和mail都有效的配置,属于核心配置段)
http{
}
二、nginx虚拟主机相关的配置:
为了以防万一,我在设置之前先把配置文件复制一份;
使用命令:# cp -r /etc/nginx/ /root/编辑配置文件# vim /etc/nginx/nginx.conf

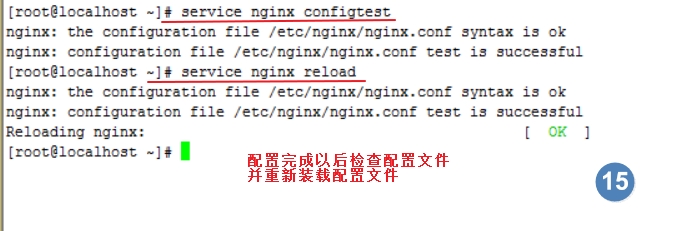
重启nginx服务:# service nginx restart
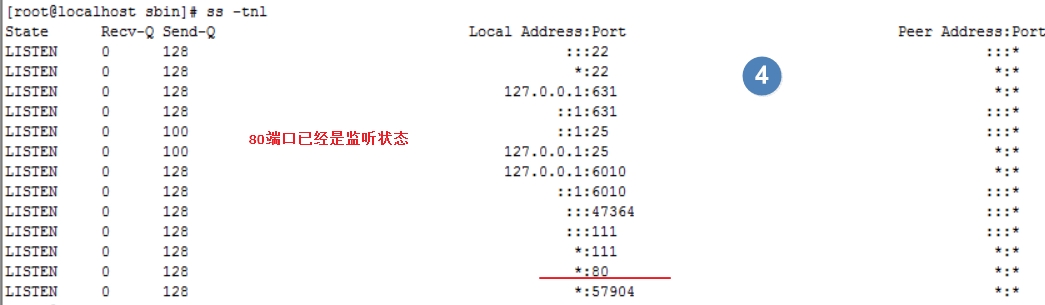
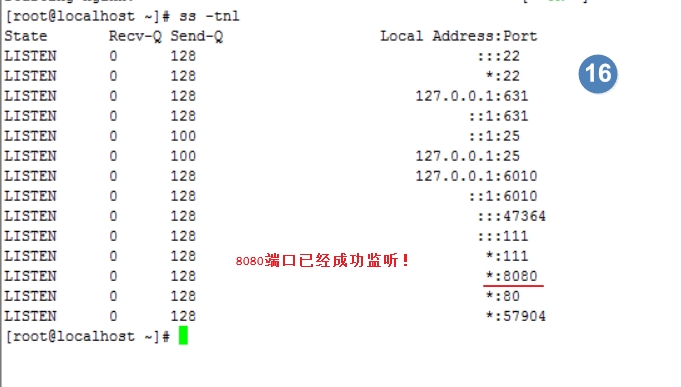
使用 #ss –tnl命令查看监听端口是否有前面写的8080端口:

使用浏览器测试:

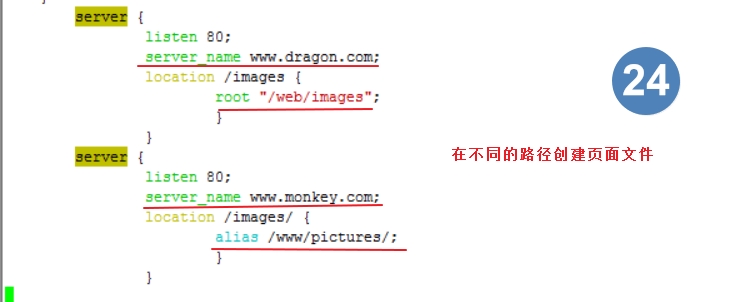
设置web资源路径映射;
用于指明请求的URL所对应的文档的目录路径;
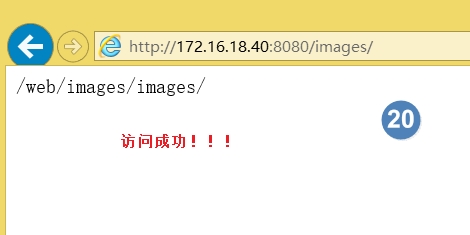
location /images/ {
root "/web/images";
}
当请求 www.dragon.com/images时,实际请求路径为/web/images/images/
注意: root表示指明路径为对应location的"/" URL;举个例子:

创建相关目录及文件: # mkdir -pv /web/images/images# vim /web/images/images/index.html 编辑# vim /etc/nginx/nginx.conf文件

刷新nginx.conf文件;使用:#service nginx reload
设置完成以后访问浏览器
设置aliaspath资源路径映射;(设置别名路径)
用于location配置段,定义路径别名
location /images/ {
alias /www/pictures/;
}
当请求www.magedu.com/images时,实际请求路径为 /www/pictures/
注意: alias表示路径映射,即location中的URL是相对于alias所指明的路径而言;
举个例子:

创建相关目录及文件: # mkdir -pv /www/pictures# vim /www/pictures /index.html 编辑# vim /etc/nginx/nginx.conf文件

刷新nginx.conf文件;使用:#service nginx reload
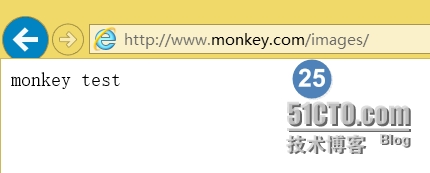
设置完成以后访问浏览器
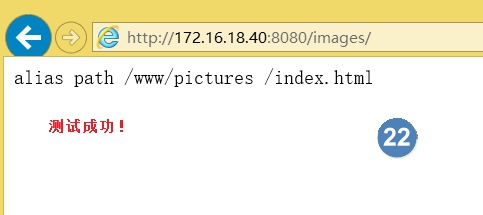
两种方式都已经测试成功!
注意:我这里使用的都是8080端口(基于端口的虚拟机),如果要设置基于域名的虚拟机可以把端口改成80,仅需要修改本地主机的hosts文件,添加两条记录即可;
一般windows系统的hosts文件放在:C:\Windows\System32\drivers\etc这个路径下面
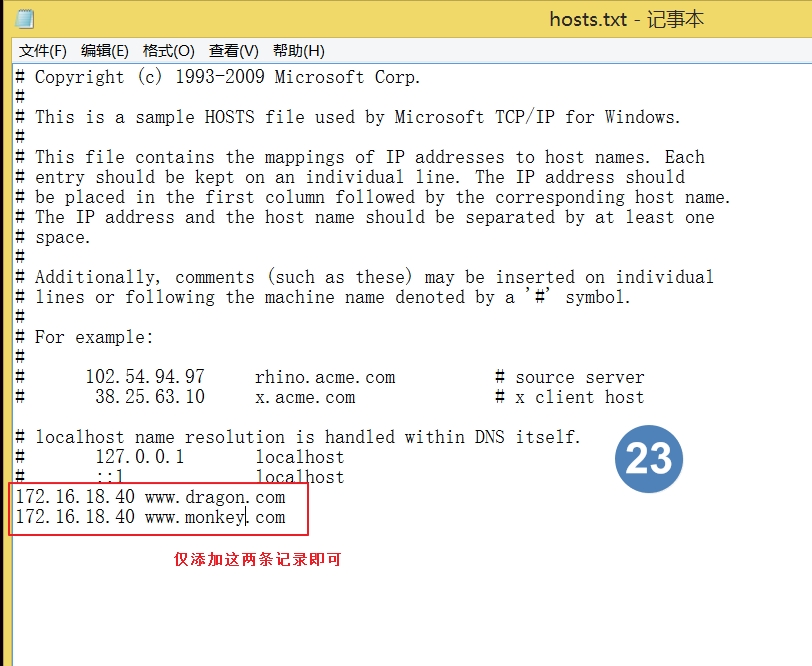
分别对monkey和dragon页面进行测试!!!

三、网络连接相关的配置;
四、对客户端请求进行限制:1、 limit_exceptMETHOD {...}
指定范围之外的其他方法的访问控制;
limit_except GET { allow172.16.0.0/16;
deny all;
}
2、 client_body_max_sizeSIZE;
限制请求报文中body部分的上限;通过检测请求报文首部中的“Content_length”来判定;
3、 limit_ratespeed;
限制客户端每秒传输的字节数,默认为0,表示无限制
五、对内存或磁盘资源进行分配:1、client_body_in_file_onlyon|clean|off;
请求报文的body部分若大,是否可暂存于磁盘;on表示允许
2、client_body_in_single_bufferon|off
请求报文的body部分是否可暂存在内存的buffer中,默认off;允许会提高性能
3、client_body_buffer_sizesize;
暂存大小
4、client_body_temp_pathDIR[level1 [level2 [level3 [level4]]]]
暂存文件存储路径,[level1 [level2 [level3 [level4]]]]为多级目录,会自动创建例如:client_body_temp_path /var/tmp/nginx/client 1 2 5、client_header_buffer_sizesize
正常接收用户请求报文的首部部分指定的内存空间的大小
六、MIME类型相关的配置:
1、types {}
定义MIME types至文件的扩展名; type{
text/html.html
image/jpeg.jpg
}2、 default_typeMIME-TYPE;
指明默认的MIME类型
七、文件操作优化相关的配置:1、 sendfile on|off 系统调用不经过用户态直接由内核封装后响应给请求方,启用能提搞性能
2、 aioon|off 异步I/O,启用性能更好
3、 directiosize|off 直接I/O
是否使用O_DIRECT选项去请求读取文件;与sendfile功能互斥;
4、 open_file_cachemax=N[inactive=time]|off 是否打开缓存大小
nginx可以缓存以下三种信息:
(1)文件句柄、文件大小和最近一次修改时间
(2)打开目录的目录结构
(3)没有找到的或者没有权限操作的文件的相关信息
max=N表示可以缓存的最大条目上限;一旦达到上限,则会使用LRU从缓存中删除最近最少使用的条目
inactive=time在inactive指定的时长内没有被访问过的缓存条目将会被淘汰
5、open_file_cache_errorson|off;
是否缓存在文件中缓存打开文件时出现找不到路径,没有权限等的错误信息
6、open_file_cache_min_usestime
每隔多久检查一次缓存中缓存条目的有效性,默认60s 八、基于IP的访问控制:在http、server、location
使用allow 、deny来定义允许和限制
例如:在server中加一段location /admin{ root /nginx/htdocs;
allow 192.168.0.0/24
deny all;
}九、基于用户的basic认证配置: auth_basic auth_basic_user_filehtpassword命令创建用户账号文件举例:
十、基于gzip实现响应报文压缩:ngx_http_gzip_modulegzip on|off 是否启用gzip功能gzip_buffers number size 使用多大的空间来缓存压缩的结果gzip_comp_level level 压缩级别gzip_disable regex...; 对哪种内容不压缩,可以用正则匹配gzip_min_length length; 文件最小是多少起始才启用压缩gizp_http_version 1.0|1.1; gzip使用哪种版本协议gzip_types mime-type ...;对哪种类型的文件进行压缩gzip_vary on|off 启用或禁用在响应报文中插入一个首部“Vary:Accept-Encoding” 十一、定制响应首部:ngx_http_headers_module add_headername value[always]; expirs24h; 指定有效期限
十二、定制访问日志:ngx_http_log_moduleaccess_log 定义访问日志log_fomat 定义日志格式open_log_file_cache 开启日志文件缓存 十三、定义合法引用:(可以防盗链)ngx_http_referer_modulevalid_referers none | blocked |server_names | string ...;if ($invalid_referer){ return403;} 十四、URL rewrite(URL重写):ngx_http_rewrite_modulerewrite regex replacement [flag]四种flag: last 服务器端匹配完规则从头再检测一遍,然后再响应给客户端 break 服务器端匹配完规则不再从头检测,直接响应给客户端 redirect 响应报文返回临时重定向状态码302 permanent 响应报文返回永久重定向状态码301if (condition) { ...} 比较表达式:=、!=、~、~*、!~、-f、!-f、-d、!-d、-e、!-e return: returncode URL; set $variable value
十五、状态页面ngx_http_stub_status_module
十六、ssl功能ngx_http_ssl_module
安装环境和依赖的包:
#yum groupinstall “developmenttools” “server platform development”
# yum -yinstall pcre-devel
#yum install openssl-devel
下载相关nginx源码包:#wgethttp://nginx.org/download/nginx-1.6.2.tar.gz
解压缩源码包
编译安装:
创建nginx用户和组:
#groupadd nginx
#useradd –g nginx nginx
创建相关目录: # mkdir -pv /var/tmp/nginx/{client,proxy,fastcgi}
#cd nginx-1.62
# ./configure--prefix=/usr/local/nginx --conf-path=/etc/nginx/nginx.conf --user=nginx--group=nginx --error-log-path=/var/log/nginx/error.log--http-log-path=/var/log/nginx/access.log --pid-path=/var/run/nginx/nginx.pid--lock-path=/var/lock/nginx.lock --with-http_ssl_module--with-http_stub_status_module --with-http_gzip_static_module--with-http_flv_module --with-http_mp4_module--http-client-body-temp-path=/var/tmp/nginx/client--http-proxy-temp-path=/var/tmp/nginx/proxy --http-fastcgi-temp-path=/var/tmp/nginx/fastcgi
| 编译安装相关参数解释 | |
| --prefix= | Nginx安装路径 |
| --conf-path= | Conf配置文件安装路径 |
| --user= | Nginx管理用户 |
| --group= | Nginx管理组 |
| --error-log-path= | 错误日志存放位置 |
| --http-log-path= | 访问日志存放位置 |
| --pid-path= | Pid(进程ID)路径 |
| --lock-path= | 锁文件路径 |
| --with-http_ssl_module | 使用ssl模块 |
| --with-http_stub_status_module | 使用状态模块 |
| --with-http_gzip_static_module | 支持gzip |
| --with-http_flv_module | 支持flv(流媒体) |
| --with-http_mp4_module | 支持mp4 |
| --http-client-body-temp-path= | 临时文件访问路径(body部分存放路径) |
| --http-proxy-temp-path= | Proxy(代理)临时文件存放路径 |
| --http-fastcgi-temp-path= | 使用cgi(通用网关接口)模块 |
安装完成后使用
#./usr/local/nginx/sbin/nginx 启动服务
注释:关闭服务可以使用:# killall nginx命令;
使用# ps aux查看进程
通过网页访问本地ip地址
默认页面存放路径 /usr/local/nginx/html/*
新建文件(服务脚本)#vim /etc/rc.d/init.d/nginx,内容如下
#!/bin/sh
#
# nginx - this script startsand stops the nginx daemon
#
# chkconfig: - 85 15
# description: Nginx is an HTTP(S) server, HTTP(S) reverse \
# proxy and IMAP/POP3 proxy server
# processname: nginx
# config: /etc/nginx/nginx.conf
# config: /etc/sysconfig/nginx
# pidfile: /var/run/nginx.pid
# Source function library.
. /etc/rc.d/init.d/functions
# Source networkingconfiguration.
. /etc/sysconfig/network
# Check that networking is up.
[ "$NETWORKING" ="no" ] && exit 0
nginx="/usr/local/nginx/sbin/nginx"
prog=$(basename $nginx)
NGINX_CONF_FILE="/etc/nginx/nginx.conf"
[ -f /etc/sysconfig/nginx ]&& . /etc/sysconfig/nginx
lockfile=/var/lock/subsys/nginx
make_dirs() {
# make required directories
user=`nginx -V 2>&1 | grep"configure arguments:" | sed 's/[^*]*--user=\([^ ]*\).*/\1/g' -`
options=`$nginx -V 2>&1 | grep'configure arguments:'`
for opt in $options; do
if [ `echo $opt | grep '.*-temp-path'`]; then
value=`echo $opt | cut -d"=" -f 2`
if [ ! -d "$value" ]; then
# echo "creating"$value
mkdir -p $value && chown-R $user $value
fi
fi
done
}
start() {
[ -x $nginx ] || exit 5
[ -f $NGINX_CONF_FILE ] || exit 6
make_dirs
echo -n $"Starting $prog: "
daemon $nginx -c $NGINX_CONF_FILE
retval=$?
echo
[ $retval -eq 0 ] && touch$lockfile
return $retval
}
stop() {
echo -n $"Stopping $prog: "
killproc $prog -QUIT
retval=$?
echo
[ $retval -eq 0 ] && rm -f$lockfile
return $retval
}
restart() {
configtest || return $?
stop
sleep 1
start
}
reload() {
configtest || return $?
echo -n $"Reloading $prog: "
killproc $nginx -HUP
RETVAL=$?
echo
}
force_reload() {
restart
}
configtest() {
$nginx -t -c $NGINX_CONF_FILE
}
rh_status() {
status $prog
}
rh_status_q() {
rh_status >/dev/null 2>&1
}
case "$1" in
start)
rh_status_q && exit 0
$1
;;
stop)
rh_status_q || exit 0
$1
;;
restart|configtest)
$1
;;
reload)
rh_status_q || exit 7
$1
;;
force-reload)
force_reload
;;
status)
rh_status
;;
condrestart|try-restart)
rh_status_q || exit 0
;;
*)
echo $"Usage: $0{start|stop|status|restart|condrestart|try-restart|reload|force-reload|configtest}"
exit 2
esac
为此脚本赋予执行权限:
# chmod +x/etc/rc.d/init.d/nginx
添加至服务管理列表,并让其开机自动启动:
# chkconfig --add nginx
# chkconfig nginx on
使用seervice nginx restart 命令尝试是否可用:
如果配置文件有改动,可以使用#service nginx reload命令重新装载配置文件!
配置文件路径:/etc/nginx/nginx.conf (这里默认的配置文件没有语法变色,我们在后面可以设置)
使用vim /etc/nginx/nginx.conf编辑器查看
设置/etc/nginx/nginx.conf配置文件语法变色:
1、下载nginx.vim
下载页面:http://www.vim.org/scripts/script.php?script_id=1886
2、安装nginx.vim
创建mkdir -pv ~/.vim/syntax
将nginx.vim放置于~/.vim/syntax/目录,
3、配置 nginx.vim
而后在~/.vim/filetype.vim中添加如下行:(注意:filetype.vim文件不存在,这里可以直接使用vim ~/.vim/filetype.vim命令)au BufRead,BufNewFile/etc/nginx/*,/usr/local/nginx/conf/* if &ft == '' | setfiletype nginx |endif其中“/etc/nginx”为nginx配置文件的目录。
在 /etc/nginx/nginx.conf配置文件中:
main配置段(对http和mail都有效的配置,属于核心配置段)
http{
}
| 主配置段的的类别分为四类: | |
| 1 | 用于调试,定位问题 |
| 2 | 正常运行必备的 配置 |
| 3 | 优化性能相关的 配置 |
| 4 | 事件相关的配置 |
| 用于正常运行的 必备配置: | |
| 1 | user USERNAME[GROUPNAME]; 指定运行worker进程的用户和组 例如: user nginx nginx; 用户和组都是nginx |
| 2 | pid/path/to/pid_file; 指定nginx的pid文件 |
| 3 | worker_rlimit_nofile#: (资源限定用) 指定一个worker进程能够打开的最大文件句柄(数); |
| 3 | worker_rlimit_sigpending# (资源限定用) 指定每个用户能够发往worker的信号的数量; |
| 优化性能相关的配置: | |
| 1 | worker_processes #; 启动worker线程的个数;通常应该为物理CPU核心个数减1; |
| 2 | worker_cpu_affinity cpumask...; 绑定worker进程指定的CPU上; |
| 3 | timer_resolution t; (时间解析度;) |
| 4 | worker_priority nice; (优先级范围是:-20,19) |
| 事件相关的 配置; | |
| 1 | accept_mutex[on|off] :互斥锁 是否打开nginx负载均衡锁(内部调度用户请求至各worker时用的负载均衡锁;打开时表示能够让多个worker轮流地,序列化地与响应新请求;) |
| 2 | lock_file /path/to/lock_file; (锁文件,nginx自己的锁(互斥锁)文件) |
| 3 | accept_mutex_delay #ms; (内部的负载均衡锁在接收请求时的请求延迟,单位毫秒;在打开的内部负载均衡锁的模式中,一个worker进程为取得accept锁(锁是唯一的 ,相当于令牌,谁拿到锁谁可以接收新请求),请求失败时等待的时间) |
| 4 | use [epoll|rgsig|select|poll]; 定义使用的事件模型;建议nginx自动选择;默认epoll |
| 5 | worker_connecttions #;(每个worker进程所能够响应的最大并发请求数;) |
| 用于调试,定位问题; | |
| 1 | daemon [off|on] 是否以守护进程方式启动nginx;(正常环境中应该为on,默认为on) |
| 2 | master_process on|off; (如果使用off,表示只启动master不启动worker) 是否以master/worker模型来运行nginx; |
| 3 | error_log /path/to/error_log level; 错误日志及其级别;(出于调试目的可以使用debug级别,但此级别只有在编译nginx时使用了 --with-debug选项才有效;) |
为了以防万一,我在设置之前先把配置文件复制一份;
使用命令:# cp -r /etc/nginx/ /root/编辑配置文件# vim /etc/nginx/nginx.conf
重启nginx服务:# service nginx restart
使用 #ss –tnl命令查看监听端口是否有前面写的8080端口:
使用浏览器测试:
设置web资源路径映射;
用于指明请求的URL所对应的文档的目录路径;
location /images/ {
root "/web/images";
}
当请求 www.dragon.com/images时,实际请求路径为/web/images/images/
注意: root表示指明路径为对应location的"/" URL;举个例子:
创建相关目录及文件: # mkdir -pv /web/images/images# vim /web/images/images/index.html 编辑# vim /etc/nginx/nginx.conf文件
刷新nginx.conf文件;使用:#service nginx reload
设置完成以后访问浏览器
设置aliaspath资源路径映射;(设置别名路径)
用于location配置段,定义路径别名
location /images/ {
alias /www/pictures/;
}
当请求www.magedu.com/images时,实际请求路径为 /www/pictures/
注意: alias表示路径映射,即location中的URL是相对于alias所指明的路径而言;
举个例子:
创建相关目录及文件: # mkdir -pv /www/pictures# vim /www/pictures /index.html 编辑# vim /etc/nginx/nginx.conf文件
刷新nginx.conf文件;使用:#service nginx reload
设置完成以后访问浏览器
两种方式都已经测试成功!
注意:我这里使用的都是8080端口(基于端口的虚拟机),如果要设置基于域名的虚拟机可以把端口改成80,仅需要修改本地主机的hosts文件,添加两条记录即可;
一般windows系统的hosts文件放在:C:\Windows\System32\drivers\etc这个路径下面
分别对monkey和dragon页面进行测试!!!
三、网络连接相关的配置;
| 在 /etc/nginx/nginx.conf 文件中设置 | |
| 1 | keepalive_timeout time; 保持连接的超时时长,默认为75秒; |
| 2 | keepalive_requests #: 在一次保持连接上允许承载最大资源请求数; |
| 3 | keepalive_disble [msie6|safari|none] 为指定类型的浏览器禁用长连接; |
| 4 | cp_nodelay on|off 对长连接是否使用tcp_nodelay选项 |
| 5 | client_header_timeout time; 读取http请求报文首部的超时时长; |
| 6 | client_body_timeout time; 读取http请求报文的body部分的超时时长; |
| 7 | send_timeout time; 发送响应的超时时长; |
指定范围之外的其他方法的访问控制;
limit_except GET { allow172.16.0.0/16;
deny all;
}
2、 client_body_max_sizeSIZE;
限制请求报文中body部分的上限;通过检测请求报文首部中的“Content_length”来判定;
3、 limit_ratespeed;
限制客户端每秒传输的字节数,默认为0,表示无限制
五、对内存或磁盘资源进行分配:1、client_body_in_file_onlyon|clean|off;
请求报文的body部分若大,是否可暂存于磁盘;on表示允许
2、client_body_in_single_bufferon|off
请求报文的body部分是否可暂存在内存的buffer中,默认off;允许会提高性能
3、client_body_buffer_sizesize;
暂存大小
4、client_body_temp_pathDIR[level1 [level2 [level3 [level4]]]]
暂存文件存储路径,[level1 [level2 [level3 [level4]]]]为多级目录,会自动创建例如:client_body_temp_path /var/tmp/nginx/client 1 2 5、client_header_buffer_sizesize
正常接收用户请求报文的首部部分指定的内存空间的大小
六、MIME类型相关的配置:
1、types {}
定义MIME types至文件的扩展名; type{
text/html.html
image/jpeg.jpg
}2、 default_typeMIME-TYPE;
指明默认的MIME类型
七、文件操作优化相关的配置:1、 sendfile on|off 系统调用不经过用户态直接由内核封装后响应给请求方,启用能提搞性能
2、 aioon|off 异步I/O,启用性能更好
3、 directiosize|off 直接I/O
是否使用O_DIRECT选项去请求读取文件;与sendfile功能互斥;
4、 open_file_cachemax=N[inactive=time]|off 是否打开缓存大小
nginx可以缓存以下三种信息:
(1)文件句柄、文件大小和最近一次修改时间
(2)打开目录的目录结构
(3)没有找到的或者没有权限操作的文件的相关信息
max=N表示可以缓存的最大条目上限;一旦达到上限,则会使用LRU从缓存中删除最近最少使用的条目
inactive=time在inactive指定的时长内没有被访问过的缓存条目将会被淘汰
5、open_file_cache_errorson|off;
是否缓存在文件中缓存打开文件时出现找不到路径,没有权限等的错误信息
6、open_file_cache_min_usestime
每隔多久检查一次缓存中缓存条目的有效性,默认60s 八、基于IP的访问控制:在http、server、location
使用allow 、deny来定义允许和限制
例如:在server中加一段location /admin{ root /nginx/htdocs;
allow 192.168.0.0/24
deny all;
}九、基于用户的basic认证配置: auth_basic auth_basic_user_filehtpassword命令创建用户账号文件举例:
| 创建保存用户账户密码的文件 cd /usr/loca/nginx/ htpasswd –c –m .htpasswd tom location /admin{ root /nginx/htdocs; auth_basic “admin area”; auth_basic_user_file/usr/local/nginx/.htpasswd;} |
| 例如: location / { root /nginx/htdocs;index index.html;add_header x-header testheader;} 查看首部时就会多一项 x-header:testheader |
| 例如: location / { root /nginx/htdocs;index index.html;add_header x-header testheader;rewrite ^/bbs/(.*) /forum/$1;} 比如用户访问www.test.com/bbs/1.jpg会变成www.test.com/forum/1.jpg |
| location /status { stub_status on;} Active connections:当前活动的连接数 accepts:已经接收的请求数 handled:已经处理的请求数 requests:总共处理的请求数 |
| server { listen 443 ssl;server_name localhost; ssl_certificate /etc/nginx/ssl/nginx.crt;服务器证书ssl_certificate_key /etc/nginx/ssl/nginx.key; 服务器私钥 ssl_session_cache shared:SSL:1m;ssl_session_timeout 5m; ssl_ciphers HIGH: !aNULL: !MD5;ssl_prefer_server_ciphers on; location / {root /nginx/htdocs;index index.html;}} |

相关文章推荐
- Nginx基础安装配置
- Nginx基础及安装配置
- nginx(一)基础安装配置
- nginx服务器的安装和配置---基础
- Nginx入门(下载安装|基础配置)
- nginx的安装与基础配置
- nginx服务器的安装和配置---基础
- Nginx基础安装配置
- nginx配置解析php,nginx不能访问php的解决文案——0基础linux安装web服务器8
- AD活动目录的安装与基础配置
- Nginx 0.7.x + PHP 5.2.10(FastCGI)搭建胜过Apache十倍的Web服务器 安装与配置(4)
- Nginx安装及配置简介
- nginx详细文档 – 安装配置,深入源码,模块编写,编译器参数,系统函数
- nginx安装与配置
- nginx+PHP+PHP-FPM(FastCGI)在Ubuntu上的安装和配置
- AD活动目录的安装与基础配置
- nginx安装与配置
- IT基础结构-4.BDNS-安装与配置
- Nginx 0.7.x + PHP 5.2.10(FastCGI)搭建胜过Apache十倍的Web服务器 安装与配置(1)
- nginx+php+memcache+xcache+mysql安装与配置