NGUI的背包制作
2014-11-26 15:10
246 查看
NGUI制作背包很是方便,听紫龙慢慢道来:
这次比较简单,但是需要理解代码。首先建立bg-——背景,然后是Grid,然后Grid下面是cell,cell是背包的格子,然后里面放物品——wuping。wuping下面放个Label,Label里面写数字,暂时表示物品数量。一切都如图所示;

之后給wuping加一个脚本,脚本命名也为wuping ,下面是详细代码:
话说这段代码要理解一下,wuping继承的是UIDragDropItemz这是NGUI本来就有的,从if开始是自己写的。
说明一下在写代码之前要给cell和wuping都加tag,我给cell加的tag名字是cell,wuping加的tag名字为wuping。从下面代码就可以看到了。
这是把物品放到格子里的代码:
using UnityEngine;
using System.Collections;
public class wuping : UIDragDropItem {
protected override void OnDragDropRelease(GameObject surface)
{
base.OnDragDropRelease(surface);
print(surface);
if (surface.tag == "cell")//若拖到的是空格子里
{
this.transform.parent = surface.transform;//拖动wuping放到cell时,让格子(现在的是surface也就是cell)成为所选物体的parent。
this.transform.localPosition = Vector3.zero;//所选物体的local坐标,实现的是放到格子里是放到格子位置的中心。
}
//else if (surface.tag == "wuping")
//{
// Transform parent = surface.transform.parent;
// surface.transform.parent = this.transform.parent;
// surface.transform.localPosition = Vector3.zero;
// this.transform.parent = parent;
// this.transform.localPosition = Vector3.zero;
// }
}
}
下面是若cell里已经有了wuping的情况就把两个物品交换的代码:
using UnityEngine;
using System.Collections;
public class wuping : UIDragDropItem {
protected override void OnDragDropRelease(GameObject surface)
{
base.OnDragDropRelease(surface);
print(surface);
if (surface.tag == "cell")//若拖到的是空格子里
{
this.transform.parent = surface.transform;//拖动wuping放到cell时,让格子(现在的是surface也就是cell)成为所选物体的parent。
this.transform.localPosition = Vector3.zero;//所选物体的local坐标,实现的是放到格子里是放到格子位置的中心。
}
else if (surface.tag == "wuping")//若拖到的是已经放了物体的格子里,也就是格子里已有wuping了。
{
Transform parent = surface.transform.parent;
surface.transform.parent = this.transform.parent;//保留还没有移动wuping前wuping目前所在的cell
surface.transform.localPosition = Vector3.zero;//保留还没有移动wuping前wuping目前所在的cell的位置
this.transform.parent = parent;//新的cell成为移动后的wuping的cell(也就是交换wuping)
this.transform.localPosition = Vector3.zero;
}
}
}
然后把脚本添加给wuping即可运行:
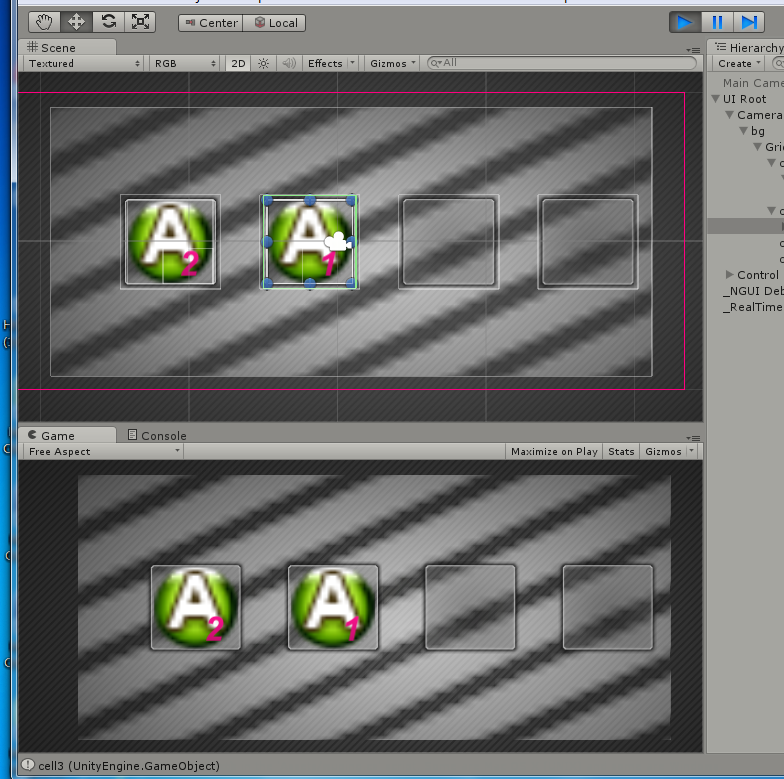
这次比较简单,但是需要理解代码。首先建立bg-——背景,然后是Grid,然后Grid下面是cell,cell是背包的格子,然后里面放物品——wuping。wuping下面放个Label,Label里面写数字,暂时表示物品数量。一切都如图所示;
之后給wuping加一个脚本,脚本命名也为wuping ,下面是详细代码:
话说这段代码要理解一下,wuping继承的是UIDragDropItemz这是NGUI本来就有的,从if开始是自己写的。
说明一下在写代码之前要给cell和wuping都加tag,我给cell加的tag名字是cell,wuping加的tag名字为wuping。从下面代码就可以看到了。
这是把物品放到格子里的代码:
using UnityEngine;
using System.Collections;
public class wuping : UIDragDropItem {
protected override void OnDragDropRelease(GameObject surface)
{
base.OnDragDropRelease(surface);
print(surface);
if (surface.tag == "cell")//若拖到的是空格子里
{
this.transform.parent = surface.transform;//拖动wuping放到cell时,让格子(现在的是surface也就是cell)成为所选物体的parent。
this.transform.localPosition = Vector3.zero;//所选物体的local坐标,实现的是放到格子里是放到格子位置的中心。
}
//else if (surface.tag == "wuping")
//{
// Transform parent = surface.transform.parent;
// surface.transform.parent = this.transform.parent;
// surface.transform.localPosition = Vector3.zero;
// this.transform.parent = parent;
// this.transform.localPosition = Vector3.zero;
// }
}
}
下面是若cell里已经有了wuping的情况就把两个物品交换的代码:
using UnityEngine;
using System.Collections;
public class wuping : UIDragDropItem {
protected override void OnDragDropRelease(GameObject surface)
{
base.OnDragDropRelease(surface);
print(surface);
if (surface.tag == "cell")//若拖到的是空格子里
{
this.transform.parent = surface.transform;//拖动wuping放到cell时,让格子(现在的是surface也就是cell)成为所选物体的parent。
this.transform.localPosition = Vector3.zero;//所选物体的local坐标,实现的是放到格子里是放到格子位置的中心。
}
else if (surface.tag == "wuping")//若拖到的是已经放了物体的格子里,也就是格子里已有wuping了。
{
Transform parent = surface.transform.parent;
surface.transform.parent = this.transform.parent;//保留还没有移动wuping前wuping目前所在的cell
surface.transform.localPosition = Vector3.zero;//保留还没有移动wuping前wuping目前所在的cell的位置
this.transform.parent = parent;//新的cell成为移动后的wuping的cell(也就是交换wuping)
this.transform.localPosition = Vector3.zero;
}
}
}
然后把脚本添加给wuping即可运行:

相关文章推荐
- NGUI 3.5教程(九)Scroll view - 制作【商店】和【背包】(待续)
- NGUI制作背包系统
- 用NGUI制作背包系统
- NGUI 制作简易背包UI
- NGUI 制作简易背包UI
- NGUI 3.5教程(九)Scroll view - 制作【商店】和【背包】
- NGUI 3.5教程(九)Scroll view - 制作【商店】和【背包】
- unity3d ngui 字体制作 工具与示例
- 【Unity&NGUI】背包单格中最大数量怎么设置
- RPG黑暗之光(5)NGUI实现背包系统初步
- NGUI 圆形血条、进度条制作
- NGUI 学习笔记实战——制作商城UI界面
- NGUI制作ScrollView详解
- NGUI结合Shader制作的小地图
- Unity3D使用NGUI实现简单背包功能
- NGUI制作显示tooltip需要注意的地方
- 【NGUI】背包
- 【Unity】NGUI背包系统——背包整理按钮的改进
- NGUI制作显示tooltip需要注意的地方
- NGUI 背包滑动整合