android junit test
2014-11-22 21:03
274 查看
最近偶然接触到juit test 自动测试方式,觉得挺酷的。就写个demo试了一下.
一.新建一个android项目:com.vigor.junittest
主Activity为TestDemo;
在TestDemo 类中,写一个有问题的方法 displayTest()。
package com.vigor.junittest;
import android.os.Bundle;
import android.app.Activity;
import android.view.Menu;
public class TestDemo extends Activity {
@Override
protected void onCreate(Bundle savedInstanceState) {
super.onCreate(savedInstanceState);
setContentView(R.layout.activity_test_demo);
}
@Override
public boolean onCreateOptionsMenu(Menu menu) {
// Inflate the menu; this adds items to the action bar if it is present.
getMenuInflater().inflate(R.menu.test_demo, menu);
return true;
}
//有问题的待测试方法
public void displayTest(){
int a = 10;
int b = 0;
int c = 0;
c = a/b;
}
}
二.配置单元测试环境。
<?xml version="1.0" encoding="utf-8"?>
<manifest xmlns:android="http://schemas.android.com/apk/res/android"
package="com.vigor.junittest"
android:versionCode="1"
android:versionName="1.0" >
<uses-sdk
android:minSdkVersion="8"
android:targetSdkVersion="18" />
<application
android:allowBackup="true"
android:icon="@drawable/ic_launcher"
android:label="@string/app_name"
android:theme="@style/AppTheme" >
<!-- 在application标签里使用单元测试库 -->
<uses-library android:name="android.test.runner"/>
<activity
android:name="com.vigor.junittest.TestDemo"
android:label="@string/app_name" >
<intent-filter>
<action android:name="android.intent.action.MAIN" />
<category android:name="android.intent.category.LAUNCHER" />
</intent-filter>
</activity>
</application>
<!-- 声明android框架和目标测试包 -->
<instrumentation
android:name="android.test.InstrumentationTestRunner"
android:targetPackage="com.vigor.junittest"
android:label="Hello Android Test"
></instrumentation>
</manifest>
(1)"<uses-library android:name="android.test.runner"/>"需要放在Application 内部,同时在四大组件之前。
(2)android:targetPackage 这个属性一般为应用程序的包名
三.建立单元测试类
在com.vigor.junit包下,新建一个单元测试类TestService。
/**
*
*/
package com.vigor.junit;
import com.vigor.junittest.TestDemo;
import android.test.AndroidTestCase;
/**
* @author vigor
*
*/
//这里要继承AndroidTestCase
public class TestService extends AndroidTestCase{
/*
* 要测试的方法放到这里
*/
/*
* 1.单元测试方法返回值为void
* 2.单元测试方法需要声明为public
* 3.按照jUnit规范,单元测试方法命名需要以test开头
* 4.单元测试方法需要向单元测试框架排除异常
*/
public void testSave() throws Throwable{
TestDemo testdemo = new TestDemo();
testdemo.displayTest();
}
}
四.进行测试。
打开大纲视图,单击 Window-> Show View -> Outline 打开如下界面:
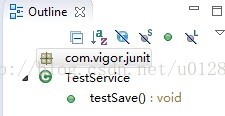
然后 右键单击测试方法名,选择 Run as -> Android JunitTest 即可。
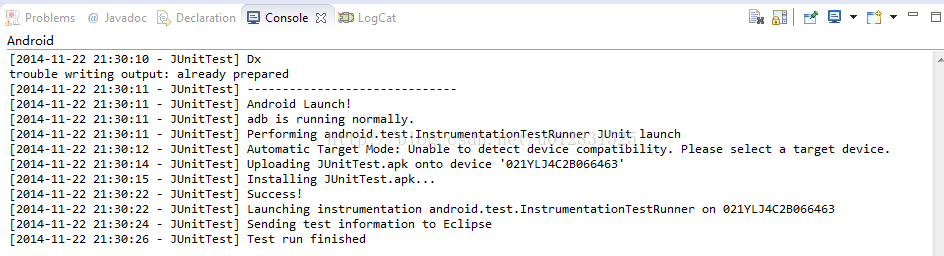
运行结果如下(我是在真机上测试的,没有用虚拟机)
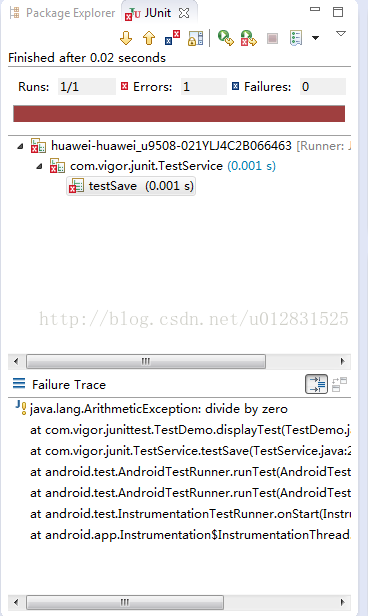
左边的面板上 可以直观的看到出现的错误,无错误是显示一个绿色的条。
一.新建一个android项目:com.vigor.junittest
主Activity为TestDemo;
在TestDemo 类中,写一个有问题的方法 displayTest()。
package com.vigor.junittest;
import android.os.Bundle;
import android.app.Activity;
import android.view.Menu;
public class TestDemo extends Activity {
@Override
protected void onCreate(Bundle savedInstanceState) {
super.onCreate(savedInstanceState);
setContentView(R.layout.activity_test_demo);
}
@Override
public boolean onCreateOptionsMenu(Menu menu) {
// Inflate the menu; this adds items to the action bar if it is present.
getMenuInflater().inflate(R.menu.test_demo, menu);
return true;
}
//有问题的待测试方法
public void displayTest(){
int a = 10;
int b = 0;
int c = 0;
c = a/b;
}
}
二.配置单元测试环境。
<?xml version="1.0" encoding="utf-8"?>
<manifest xmlns:android="http://schemas.android.com/apk/res/android"
package="com.vigor.junittest"
android:versionCode="1"
android:versionName="1.0" >
<uses-sdk
android:minSdkVersion="8"
android:targetSdkVersion="18" />
<application
android:allowBackup="true"
android:icon="@drawable/ic_launcher"
android:label="@string/app_name"
android:theme="@style/AppTheme" >
<!-- 在application标签里使用单元测试库 -->
<uses-library android:name="android.test.runner"/>
<activity
android:name="com.vigor.junittest.TestDemo"
android:label="@string/app_name" >
<intent-filter>
<action android:name="android.intent.action.MAIN" />
<category android:name="android.intent.category.LAUNCHER" />
</intent-filter>
</activity>
</application>
<!-- 声明android框架和目标测试包 -->
<instrumentation
android:name="android.test.InstrumentationTestRunner"
android:targetPackage="com.vigor.junittest"
android:label="Hello Android Test"
></instrumentation>
</manifest>
(1)"<uses-library android:name="android.test.runner"/>"需要放在Application 内部,同时在四大组件之前。
(2)android:targetPackage 这个属性一般为应用程序的包名
三.建立单元测试类
在com.vigor.junit包下,新建一个单元测试类TestService。
/**
*
*/
package com.vigor.junit;
import com.vigor.junittest.TestDemo;
import android.test.AndroidTestCase;
/**
* @author vigor
*
*/
//这里要继承AndroidTestCase
public class TestService extends AndroidTestCase{
/*
* 要测试的方法放到这里
*/
/*
* 1.单元测试方法返回值为void
* 2.单元测试方法需要声明为public
* 3.按照jUnit规范,单元测试方法命名需要以test开头
* 4.单元测试方法需要向单元测试框架排除异常
*/
public void testSave() throws Throwable{
TestDemo testdemo = new TestDemo();
testdemo.displayTest();
}
}
四.进行测试。
打开大纲视图,单击 Window-> Show View -> Outline 打开如下界面:
然后 右键单击测试方法名,选择 Run as -> Android JunitTest 即可。
运行结果如下(我是在真机上测试的,没有用虚拟机)
左边的面板上 可以直观的看到出现的错误,无错误是显示一个绿色的条。

相关文章推荐
- Eclipse Android Junit Test 测试实例
- 对应用进行单元测试(AndroidJunitTest)
- Android JUnit Test
- Android - JUnit Test(单元测试)
- Android JUnit Test——批量运行测试代码
- Android、JUnit深入浅出(五)——AndroidTest例子分析
- Android项目集成Jenkins(JUnit test & Coverage)
- Junit and android test
- Android JUnit Test的使用
- Android Junit Test Process
- Android JUnit深入浅出(五)——AndroidTest例子分析
- Android JUnit Test Unable to execute dex: Multiple dex files define 解决方法
- android junit test问题
- Android - JUnit Test(单元测试)
- Emma+Junit+Ant test android coverage
- android jUnit test 进行自动化测试
- Android JUnIt Test 解析Excel文件 pio or jxl
- android jUnit test 进行自动化测试
- Android Junit Test(semc-build编译并且生成emma coverage)
- Android JUnit Test for Eclipse使用入门