拼图游戏之 IOS 版(用swift语言开发的)
2014-11-04 11:45
134 查看
因为公司项目需要,最近在学习IOS开发,为了巩固我的学习,我想着能不能把以前用C# 开发的拼图游戏移植到 Iphone 上呢,然后我就开始了这一移植的历程,因为这是第二次做这个游戏了,所以想的也就比较深入,对以前的算法进行了优化,借助系统提供的API又节省了不少代码。个人感觉这个游戏还是挺成功的。
界面设计:
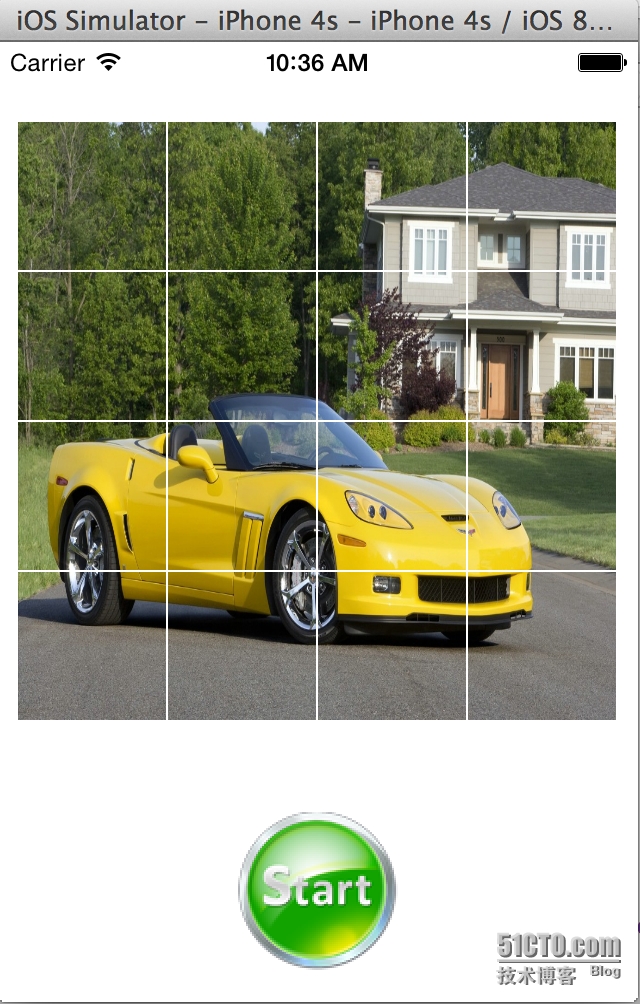
开始之后:

算法:
自定义一个控件,有两个属性 ImageTag 和ImageIndex,ImageTag用来存储控件的位置,ImageIndex 用来存储图片的序号,tag 的取值范围是0 - 15
一张图片分割成4 *4 =16 张小图,从 0 开始标号,初始的时候,tag 和index相等的,
当向下滑动时,它与它的ImageTag +4的图片互换,
当向上的时间 ,取imageTag-4,
当向左的时候,取ImageTag-1,
当向右的时候,取imageTag+1,
改变图片后index也跟着改变,tag不变,用 tag==index来判断图片是否复位,当所有的图片都复位了,拼图也就完成了
我的想法是能不能利用系统提供的手势来移动UIImageView 控件呢,然后我就写了一个测试程序,发现手势操作只能控制View的移动,不能移动UIImageView,
所以要改变一下思路,把一个UIImageView控件加到一个View中,做成一个自定义控件,问题解决:
调用它的checkTagAndIndexValueIsSame() 方法来检测图片是否复位.
我们再看看主界面代码:
代码请看附件
本文出自 “糖炒栗子” 博客,请务必保留此出处http://tangchaolizi.blog.51cto.com/3126463/1571616
界面设计:
开始之后:
算法:
自定义一个控件,有两个属性 ImageTag 和ImageIndex,ImageTag用来存储控件的位置,ImageIndex 用来存储图片的序号,tag 的取值范围是0 - 15
一张图片分割成4 *4 =16 张小图,从 0 开始标号,初始的时候,tag 和index相等的,
当向下滑动时,它与它的ImageTag +4的图片互换,
当向上的时间 ,取imageTag-4,
当向左的时候,取ImageTag-1,
当向右的时候,取imageTag+1,
改变图片后index也跟着改变,tag不变,用 tag==index来判断图片是否复位,当所有的图片都复位了,拼图也就完成了
我的想法是能不能利用系统提供的手势来移动UIImageView 控件呢,然后我就写了一个测试程序,发现手势操作只能控制View的移动,不能移动UIImageView,
所以要改变一下思路,把一个UIImageView控件加到一个View中,做成一个自定义控件,问题解决:
import Foundation
import UIKit
class PImageView:UIView
{

//    init(image: UIImage!)
//    {
//       // super.init(image:image)
//    }
var parentView:ViewController!
var imageView:UIImageView!
init(frame: CGRect)
{
super.init(frame: frame)
var temp=frame
temp.origin=CGPointMake(0, 0)
imageView=UIImageView(frame:temp)
self.addSubview(imageView)

var recognizer1=UISwipeGestureRecognizer()

recognizer1.addTarget(self, action:"handleSwipeView:")
recognizer1.direction=UISwipeGestureRecognizerDirection.Right

var recognizer2=UISwipeGestureRecognizer()

recognizer2.addTarget(self, action:"handleSwipeView:")
recognizer2.direction=UISwipeGestureRecognizerDirection.Left

var recognizer3=UISwipeGestureRecognizer()
recognizer3.addTarget(self, action:"handleSwipeView:")
recognizer3.direction=UISwipeGestureRecognizerDirection.Up

var recognizer4=UISwipeGestureRecognizer()
recognizer4.addTarget(self, action:"handleSwipeView:")
recognizer4.direction=UISwipeGestureRecognizerDirection.Down

self.addGestureRecognizer(recognizer1)
self.addGestureRecognizer(recognizer2)
self.addGestureRecognizer(recognizer3)
self.addGestureRecognizer(recognizer4)
}
func handleSwipeView(recognizer:UISwipeGestureRecognizer!)
{
var dir:String!
if recognizer.direction.value==UISwipeGestureRecognizerDirection.Down.value
{
dir="Down"
NSLog("move Down")
}
if recognizer.direction.value==UISwipeGestureRecognizerDirection.Up.value
{
dir="Up"
NSLog("move Up")
}
if recognizer.direction.value==UISwipeGestureRecognizerDirection.Left.value
{
dir="Left"
NSLog("move Left")
}
if recognizer.direction.value==UISwipeGestureRecognizerDirection.Right.value
{
dir="Right"
NSLog("move Right")
}
//NSLog("tag:%d", self.imageTag)

parentView.moveImages(self, directionStr: dir)
}

func initWithTagAndIndex(myTag:Int! ,myIndex:Int!)
{
self.imageIndex=myIndex
self.imageTag=myTag
}

func checkTagAndIndexValueIsSame()->Bool
{
return self.imageIndex==self.imageTag
}
var imageTag:Int!
var imageIndex:Int!

}
这个是自定义View的代码,初始化的时候设置View的iamgeIndex和 imageTag,设置图片,注册系统手势操作调用它的checkTagAndIndexValueIsSame() 方法来检测图片是否复位.
我们再看看主界面代码:
import UIKit

class ViewController: UIViewController {

@IBOutlet var v_allImageViews : UIView
var screenWidth:CGFloat!
var screenHeight:CGFloat!
var dicImages:NSMutableDictionary!
var dicIndexValues:NSMutableDictionary!
var LocationX:Int = 0
var locationY:Int=0
override func viewDidLoad() {
super.viewDidLoad()
// Do any additional setup after loading the view, typically from a nib.
//var imageView:UIImageView
//var image:UIImage
var myImage:UIImage
self.screenWidth=self.view.frame.size.width
self.screenHeight=self.view.frame.size.height
var colWidth=(self.screenWidth-24)/4

var rowHeight=(self.screenHeight-184)/4
myImage=UIImage(named:"7.jpg")
dicImages=NSMutableDictionary()
var imageW=myImage.size.width/4
var imageH=myImage.size.height/4
var num=0

while(num<16)
{

var row = Float( num/4)
var col = Float(num%4)

NSLog("row:%.2f col:%.2f\r\n", row,col)

var rect = CGRectMake(imageW * col, imageH *  row, imageW, imageH)
var tem=CGRectMake(10+colWidth * col+col, 40+rowHeight * row+row, colWidth, rowHeight)
var sv=PImageView(frame: tem)
//            sv.frame.origin=CGPointMake(10+colWidth * col+col, 40+rowHeight * row+row)
//            sv.frame.size=CGSizeMake(colWidth, rowHeight)
sv.backgroundColor=UIColor.lightGrayColor()
//            var frm=CGRect()
//            var imageView=PImageView(frame:frm)
//            imageView.frame.origin=CGPointMake(0, 0)
//            imageView.frame.size=CGSizeMake(colWidth, rowHeight)
//            imageView.backgroundColor=UIColor.redColor()

sv.initWithTagAndIndex(num,myIndex: num)

var image=getImage(myImage,rect: rect)

if(num==0){
sv.imageView.image=image
}
else
{
//var data = UIImagePNGRepresentation(image)
dicImages.setObject(image, forKey:String( num))
sv.imageView.image=image
}
sv.parentView=self
self.v_allImageViews.addSubview(sv)
//self.view.addSubview(imageView)
num++
}

NSLog("dic count: %d ", dicImages.count)
}

override func didReceiveMemoryWarning() {
super.didReceiveMemoryWarning()
// Dispose of any resources that can be recreated.
}

func getImage(img:UIImage, rect:CGRect)->UIImage
{
var  im:UIImage
var imagePartRef:CGImageRef
var imageRef:CGImageRef

imageRef=img.CGImage

imagePartRef=CGImageCreateWithImageInRect(imageRef, rect)

im=UIImage(CGImage: imagePartRef)

//CGImageRelease(imagePartRef)

return im
}

@IBOutlet var btnStart : UIButton

//开始游戏
@IBAction func start(sender : AnyObject) {
var vFrist =  self.v_allImageViews.subviews[0] as PImageView
vFrist.imageView.image=nil
dicIndexValues=NSMutableDictionary()
var num=1
dicIndexValues.setObject(0, forKey: 0)
var  arr:NSArray = ["0"]

while(num<self.v_allImageViews.subviews.count)
{
var myindex=arc4random()%15+1;
//if(!dicIndexValues.allValues.(String(myindex)))
//var obj = arr.indexOfObject(String(myindex))
if (!arr.containsObject(String(myindex)))
{
arr = arr.arrayByAddingObject(String(myindex))
dicIndexValues.setObject(String( myindex), forKey: num)
NSLog("key :%d value: %@\r\n",num, String( myindex))
//var data = dicImages.objectForKey(String( myindex))

var   v_img  = self.v_allImageViews.subviews[num]  as PImageView

v_img.imageView.image = dicImages.objectForKey(String(myindex)) as UIImage
v_img.imageIndex=Int( myindex)
num++

// NSLog("tag:%d index:%d", v_img.imageTag,v_img.imageIndex)
}

}
}
//动画切换图片(没有加入动画,只是简单的移动)
func moveImages(myImageView:PImageView,directionStr:String! )
{
var myTag=myImageView.imageTag
let anotherCharacter:String=directionStr
var num=0
switch  anotherCharacter
{

case "Up":
num = -4
NSLog("up")
case "Down":
num = 4
NSLog("Down")

case "Left":
num = -1
case "Right":
num = 1
default:
NSLog("default")
}
//边界检查
if (myTag + num)>=0 && (myTag + num) <= 15
{
var   v_img  = self.v_allImageViews.subviews[myTag + num]  as PImageView
//判断目标位置是否为空
if v_img.imageIndex != 0
{
return
}
var tempImage=myImageView.imageView.image
//dicImages.objectForKey(String(myImageView.imageIndex)) as UIImage
v_img.imageView.image=tempImage
v_img.imageIndex=myImageView.imageIndex
myImageView.imageIndex=0
myImageView.imageView.image=nil
}

//up -4 >=0
//down +4 <=15
//left -1>=0
//right +1<=15

//检测是否完成
var indexValue=0
var isComplate:Bool = false

while (indexValue < self.v_allImageViews.subviews.count)
{
var tempView = self.v_allImageViews.subviews[myTag + num]  as PImageView
if !tempView.checkTagAndIndexValueIsSame()
{
return
}
indexValue++
}
//弹出消息,完成拼图

NSLog("image Tag:%d ,direction:%@", myImageView.imageTag,directionStr)

}
}
每移动一步就检测一次.当遇到第一个没复位的就反回,如果所有都 复位了则游戏完成了.代码请看附件
本文出自 “糖炒栗子” 博客,请务必保留此出处http://tangchaolizi.blog.51cto.com/3126463/1571616

相关文章推荐
- 使用swift语言进行IOS应用开发
- Swift语言iOS开发:CALayer十则示例
- IOS Swift语言开发 tableView的重用以及自cell的自适应高度
- swift语言ios开发 第一个程序hello world!
- IOS Swift语言开发 tableView的重用以及自cell的自适应高度
- 【IOS沉思录】开发软硬件SDK支持以及Swift语言
- IOS开发Swift语言键盘遮挡输入框(UITextField)
- 记在学习swift语言进行iOS开发前
- <Swift>IOS开发Swift语言中应用CoreData之数据存取
- 初试swift语言ios开发
- iOS开发系列--Swift语言
- Swift语言iOS开发:CALayer十则示例
- iOS开发系列--Swift语言
- iOS开发:一个无限滚动自动播放图片的Demo(Swift语言编码)
- iOS开发系列--Swift语言
- [共享]iOS开发系列--Swift语言
- iOS开发系列--Swift语言
- 16、使用swift语言开发iOS app
- 使用swift语言进行IOS应用开发
- IOS开发Swift语言UITextField设置靠左的间距