Complete Setup Guide for Android SDK / ADT Bundle on Ubuntu
2014-10-30 12:15
459 查看
http://tecadmin.net/complete-setup-guide-for-android-sdk-adt-bundle-on-ubuntu/
Complete Setup Guide for Android SDK / ADT Bundle on Ubuntu
Rahul June15, 2014 IDE, SDK No
comments
The Android SDK is a software development kit which provides
API libraries and necessary developer tools necessary for building Android application’s. Android SDK is officially provided by android developers.
This article will help you for quickly configuring ADT (Android Developer Tools) Bundle for developing apps on your Linux system. ADT has all the essential SDK components with Eclipse IDE for your Android app development.

ADT Bundle includes all the things we required to start application development. It including followings –
Eclipse + ADT plugin
Android SDK Tools
Android Platform-tools
The latest Android platform
The latest Android system image for the emulator
Step 1: Install Java
Java is the primary requirement for installing Android SDK (ADT). If you don’t have java install use below commands else you may skip it.$ sudo add-apt-repository ppa:webupd8team/java $ sudo apt-get update $ sudo apt-get install oracle-java8-installer $ sudo apt-get install oracle-java8-set-default
Step 2: Download ADT (Android Developer Tools)
We can download latest ADT version from official android developer website. Also we can use the following commands to download ADT 22.6.2 version
For 32bit-
$ cd ~/Downloads/
$ wget http://dl.google.com/android/adt/22.6.2/adt-bundle-linux-x86-20140321.zip
For 64bit-
$ cd ~/Downloads/
$ wget http://dl.google.com/android/adt/22.6.2/adt-bundle-linux-x86_64-20140321.zip
After downloading ADT tools, extract it to your desired place in system. Keep remember to not to move any files to other location from extracted source.
$ unzip adt-bundle-linux*.zip
Step 3: Start ADT (Android Developer Tools)
In the extracted files, you will get two directories (eclipse and sdk). Navigate to eclipse directory and double-click on eclipse file to start Eclipse IDE as pr below screenshot.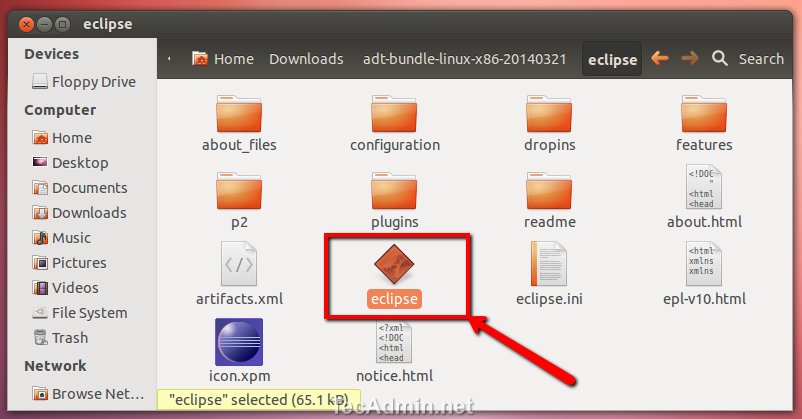
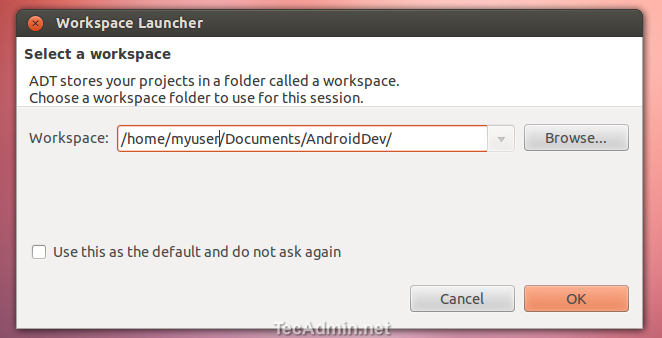
Now select the workspace where you want to save you projects files in system. You may also check the check box for automatically loading this workspace on next time load without prompting.
At this stage Eclipse is ready to use, you can start developing your application’s using Eclipse with Android SDK.
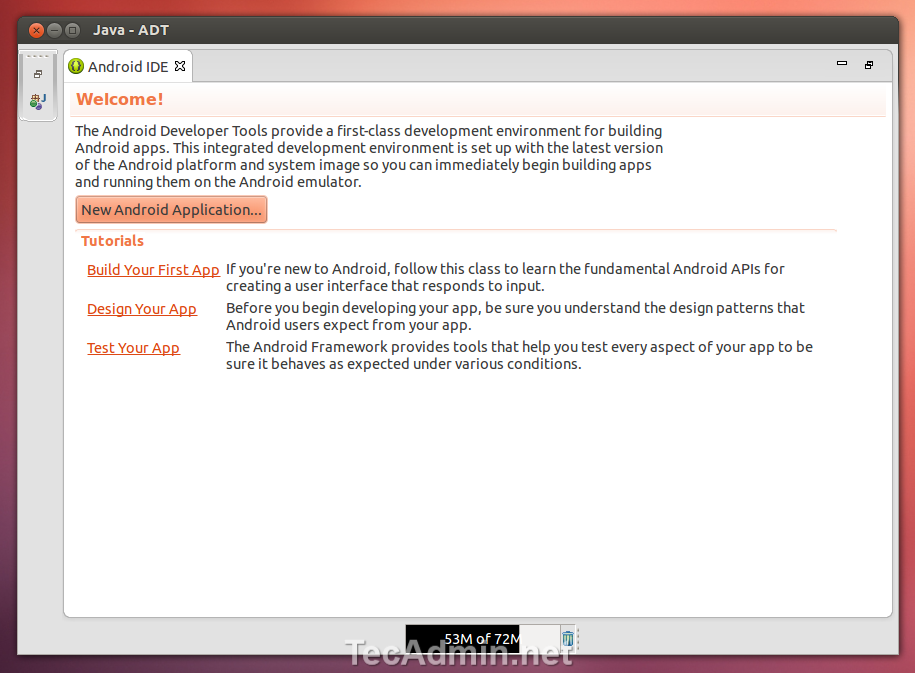
Now you can start building the awesome android apps, If you are new in Android development, you can start from here.
Step 4: Install or Update Required Packages
While working with Android SDK, You may need to install more additional packages or libraries required for your application. ADT provides Android SDK Manager utility to do this. To start SDK Manager – Click AndroidSDK Manager under Windows menu. It will open
a window like below, here you can select the required packages and install or upgrade them as per your need.


相关文章推荐
- [GUIDE] How to Setup Ubuntu 16.04 LTS Xenial Xerus for Compiling Android ROMs
- Trixbox v1.2 Complete setup guide for a small business
- Downloading Android SDK and ADT Plugin Setup
- ubuntu下android开发环境搭建(eclipse+ADT+android sdk)
- Setting up PhoneGap on Ubuntu for Android app development
- Downloading Android SDK and ADT Plugin Setup
- ubuntu12下安装配置sdk,adt的android开发环境
- ADT Bundle – Just a single step to setup android development environment
- Setup Building Environment for Android ICS/FireFox OS from and clean Ubuntu10.04 LTS
- 日积月累:配置SDK路径错误(An error occurred while automatically activating bundle com.android.ide.eclipse.adt)
- Linux(Ubuntu)环境下安装Eclipse+Android SDK(ADT)教程
- Android--入门---2---(Android 的环境搭建&配置 JDK 1.6+ Eclipse + ADT +SDK(windows / ubuntu))
- ubuntu13下安装android 开发工具 ADT Bundle
- Android NDK for Windows setup guide
- Ubuntu_Ubuntu环境下安装Eclipse+Android SDK(ADT)教程
- ubuntu 安装android+eclipse+adt 开发环境 sdk
- 64位ubuntu 11.10下android开发环境的搭建(jdk+Eclipse+adt+android sdk详细)
- 基于adt bundle for windows-的AndroidOpenCV安装文档说明
- How to Install Eclipse Android ADT Bundle Ubuntu 13.10 Saucy
- Android开发环境,Eclipse+SDK ,For Ubuntu 12.04, 新手指南